

合并Excel工作薄中成绩表的VBA代码,非常适合教育一线的朋友

这时候还需要把各个工作表合并到一起来形成一个汇总表。这时候比较麻烦也比较容易出错,因为各个表的学号不一定都是一致的、对齐的。因为可能会有人缺考,有人会考号涂错等等。特奉献以下代码,用于合并学生成绩表或者其它类似的表都可以。本代码特点在于不需要使用SQL或者Access等大头软件,只需要Excel就可以执行,非常方便,速度也不慢。转载请勿清除广告。
没有合适的局域网管理软件吗?你的网管工具够灵活够高效吗?看看这个network management software。
' =============================================
' 合并总表时,不参加计算的表格数目
' 因为一般合并的总表放在最后一个工作表,要排除掉这个表。
Const ExcludeSheetCount = 1
' 主函数,因为用到了ADO,必须作如下引用才能运行本代码。
' 工具>引用, 引用ADO(Microsoft ActiveX Data Objects 2.X Library)
' 链接所有sheet到一个总表
' 要合并的表的第一行必须是字段名称,不能是合并单元格
Sub SQL_ADO_EXCEL_JOIN_ALL()
Dim cnn As New ADODB.Connection
Dim rs As New ADODB.Recordset
Dim i, k, shCount As Integer
Dim SQL, SQL2 As String, cnnStr As String
Dim s1, s2, s3, tmp As String
Dim ws As Worksheet
Const IDIdx = 1
Const ScoreIdx = 3
shCount = ActiveWorkbook.Sheets.Count
' 获取所有考号
' EXCEL 会自动去除重复数据
' SQL = "(select ID from [语文$]) union (select ID from [英语$]) union (select ID from [物理$]) order by ID"
SQL = ""
For i = 1 To shCount - ExcludeSheetCount
s1 = "(SELECT ID FROM [" & Sheets(i).Name & "$])"
If i = 1 Then
SQL = s1
Else
SQL = SQL & " UNION " & s1
End If
Next
'MsgBox SQL
Set ws = ActiveWorkbook.Sheets(shCount)
cnnStr = "provider = microsoft.jet.oledb.4.0;Extended Properties='Excel 8.0;HDR=yes;IMEX=1';data source=" & ThisWorkbook.FullName
cnn.CursorLocation = adUseClient
cnn.ConnectionString = cnnStr
cnn.Open
rs.Open SQL, cnn, adOpenKeyset, adLockOptimistic
ws.Activate
ws.Cells.Clear
For i = 1 To rs.Fields.Count
ws.Cells(1, i) = rs.Fields(i - 1).Name
Next
ws.Range("A2").CopyFromRecordset rs
For i = 1 To shCount - ExcludeSheetCount
Sheets(shCount).Cells(1, i + 1) = Sheets(i).Name
Next
'EXCEL 不支持 UPDATE
'SQL = "update [合并$] set 语文 = '1'"
' 相当于内联接
'SQL = "select tt.ID,ta.score as 语文,tb.score as 英语 from [合并$] AS tt, [语文$] as ta, [英语$] as tb "
'SQL = SQL & "where (tt.ID = ta.ID) and (tt.ID = tb.ID)"
' 左联接所有表格
' 通过测试的语句
'SQL = "select tt.ID,ta.score AS 语文,tb.score as 英语 from ([合并$] AS tt left join [语文$] as ta on tt.ID = ta.ID) "
'SQL = SQL & "left join [英语$] as tb on tt.ID = tb.ID"
SQL2 = "([" & Sheets(shCount).Name & "$] AS tt LEFT JOIN [" & Sheets(1).Name & "$] AS t1 ON tt.id=t1.id) "
SQL = "SELECT tt.ID,"
For i = 1 To shCount - ExcludeSheetCount
tmp = "t" & i
SQL = SQL & tmp & ".score AS " & Sheets(i).Name
If i If i > 1 Then
SQL2 = "(" & SQL2 & " LEFT JOIN [" & Sheets(i).Name & "$] AS " & tmp & " ON tt.id=" & tmp & ".id)"
End If
Next
s1 = SQL & " FROM " & SQL2 & " ORDER BY tt.ID"
MsgBox s1
rs.Close
rs.Open s1, cnn, adOpenKeyset, adLockOptimistic
' 清除表格
ws.Activate
Cells.Select
Selection.Delete Shift:=xlUp
For i = 1 To rs.Fields.Count
ws.Cells(1, i) = rs.Fields(i - 1).Name
Next
ws.Range("A2").CopyFromRecordset rs
rs.Close
cnn.Close
Set rs = Nothing
Set cnn = Nothing
Call AddHeader
Call FindBlankCells
Call TableBorderSet
ws.Columns(1).AutoFit
ws.Cells(2, 1).Select
MsgBox "Finished."
End Sub
' 在表格第一行插入行,然后合并单元格,加上说明文字
Sub AddHeader()
Dim ws As Worksheet
Dim s1, s2 As String
shCount = ActiveWorkbook.Sheets.Count
Set ws = Sheets(shCount)
Column = ws.UsedRange.Columns.Count
ws.Rows(1).Insert
s1 = Chr(Asc("A") + Column - 1)
s2 = "A1:" & s1 & "1"
ws.Range(s2).Merge
ws.Rows(1).RowHeight = 100
s1 = "说明" & Chr(13) & Chr(10) & _
"本总表为计算生成,把几个单科的客观题成绩合并在一起,避免手工处理时因考号不对齐而导致错位。" & Chr(13) & Chr(10) & _
"注意:如果某单科成绩表中存在相同考号,则总表中该考号的该科成绩是不准确的。" & Chr(13) & Chr(10) & _
"填涂错误的考号,一般出现在表里顶端或底端"
ws.Cells(1, 1) = s1
ActiveSheet.Rows(1).RowHeight = 80
' 冻结窗格
ActiveSheet.Rows(3).Select
ActiveWindow.FreezePanes = True
ActiveWindow.SmallScroll Down:=0
End Sub
' 设置表格边框
Sub TableBorderSet()
ActiveSheet.UsedRange.Select
Selection.Borders(xlDiagonalDown).LineStyle = xlNone
Selection.Borders(xlDiagonalUp).LineStyle = xlNone
With Selection.Borders(xlEdgeLeft)
.LineStyle = xlContinuous
.Weight = xlThin
.ColorIndex = xlAutomatic
End With
With Selection.Borders(xlEdgeTop)
.LineStyle = xlContinuous
.Weight = xlThin
.ColorIndex = xlAutomatic
End With
With Selection.Borders(xlEdgeBottom)
.LineStyle = xlContinuous
.Weight = xlThin
.ColorIndex = xlAutomatic
End With
With Selection.Borders(xlEdgeRight)
.LineStyle = xlContinuous
.Weight = xlThin
.ColorIndex = xlAutomatic
End With
With Selection.Borders(xlInsideVertical)
.LineStyle = xlContinuous
.Weight = xlThin
.ColorIndex = xlAutomatic
End With
With Selection.Borders(xlInsideHorizontal)
.LineStyle = xlContinuous
.Weight = xlThin
.ColorIndex = xlAutomatic
End With
End Sub
' 标记无分数的单元格,方便找出答题卡没有分数的学生
Sub FindBlankCells()
Dim i, j, row, col As Integer
'ActiveSheet.Cells(2, 1).Interior.ColorIndex = 15
row = ActiveSheet.UsedRange.Rows.Count
col = ActiveSheet.UsedRange.Columns.Count
For i = 2 To row
For j = 2 To col
If IsEmpty(ActiveSheet.Cells(i, j).Value) Then
ActiveSheet.Cells(i, j).Interior.ColorIndex = 15
End If
Next
Next
End Sub

Hot AI Tools

Undresser.AI Undress
AI-powered app for creating realistic nude photos

AI Clothes Remover
Online AI tool for removing clothes from photos.

Undress AI Tool
Undress images for free

Clothoff.io
AI clothes remover

Video Face Swap
Swap faces in any video effortlessly with our completely free AI face swap tool!

Hot Article
Hot Tools

Notepad++7.3.1
Easy-to-use and free code editor

SublimeText3 Chinese version
Chinese version, very easy to use

Zend Studio 13.0.1
Powerful PHP integrated development environment

Dreamweaver CS6
Visual web development tools

SublimeText3 Mac version
God-level code editing software (SublimeText3)
Hot Topics
 1392
1392
 52
52

 What should I do if the frame line disappears when printing in Excel?
Mar 21, 2024 am 09:50 AM
What should I do if the frame line disappears when printing in Excel?
Mar 21, 2024 am 09:50 AM
If when opening a file that needs to be printed, we will find that the table frame line has disappeared for some reason in the print preview. When encountering such a situation, we must deal with it in time. If this also appears in your print file If you have questions like this, then join the editor to learn the following course: What should I do if the frame line disappears when printing a table in Excel? 1. Open a file that needs to be printed, as shown in the figure below. 2. Select all required content areas, as shown in the figure below. 3. Right-click the mouse and select the "Format Cells" option, as shown in the figure below. 4. Click the “Border” option at the top of the window, as shown in the figure below. 5. Select the thin solid line pattern in the line style on the left, as shown in the figure below. 6. Select "Outer Border"
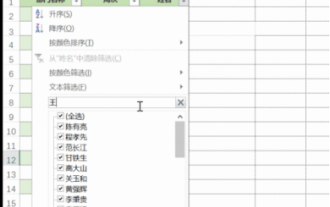 How to filter more than 3 keywords at the same time in excel
Mar 21, 2024 pm 03:16 PM
How to filter more than 3 keywords at the same time in excel
Mar 21, 2024 pm 03:16 PM
Excel is often used to process data in daily office work, and it is often necessary to use the "filter" function. When we choose to perform "filtering" in Excel, we can only filter up to two conditions for the same column. So, do you know how to filter more than 3 keywords at the same time in Excel? Next, let me demonstrate it to you. The first method is to gradually add the conditions to the filter. If you want to filter out three qualifying details at the same time, you first need to filter out one of them step by step. At the beginning, you can first filter out employees with the surname "Wang" based on the conditions. Then click [OK], and then check [Add current selection to filter] in the filter results. The steps are as follows. Similarly, perform filtering separately again
 How to change excel table compatibility mode to normal mode
Mar 20, 2024 pm 08:01 PM
How to change excel table compatibility mode to normal mode
Mar 20, 2024 pm 08:01 PM
In our daily work and study, we copy Excel files from others, open them to add content or re-edit them, and then save them. Sometimes a compatibility check dialog box will appear, which is very troublesome. I don’t know Excel software. , can it be changed to normal mode? So below, the editor will bring you detailed steps to solve this problem, let us learn together. Finally, be sure to remember to save it. 1. Open a worksheet and display an additional compatibility mode in the name of the worksheet, as shown in the figure. 2. In this worksheet, after modifying the content and saving it, the dialog box of the compatibility checker always pops up. It is very troublesome to see this page, as shown in the figure. 3. Click the Office button, click Save As, and then
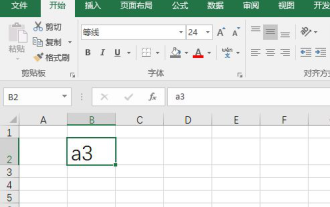 How to type subscript in excel
Mar 20, 2024 am 11:31 AM
How to type subscript in excel
Mar 20, 2024 am 11:31 AM
eWe often use Excel to make some data tables and the like. Sometimes when entering parameter values, we need to superscript or subscript a certain number. For example, mathematical formulas are often used. So how do you type the subscript in Excel? ?Let’s take a look at the detailed steps: 1. Superscript method: 1. First, enter a3 (3 is superscript) in Excel. 2. Select the number "3", right-click and select "Format Cells". 3. Click "Superscript" and then "OK". 4. Look, the effect is like this. 2. Subscript method: 1. Similar to the superscript setting method, enter "ln310" (3 is the subscript) in the cell, select the number "3", right-click and select "Format Cells". 2. Check "Subscript" and click "OK"
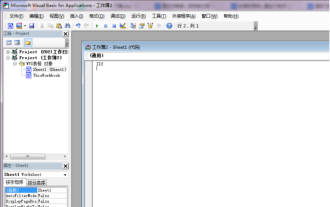 How to use the iif function in excel
Mar 20, 2024 pm 06:10 PM
How to use the iif function in excel
Mar 20, 2024 pm 06:10 PM
Most users use Excel to process table data. In fact, Excel also has a VBA program. Apart from experts, not many users have used this function. The iif function is often used when writing in VBA. It is actually the same as if The functions of the functions are similar. Let me introduce to you the usage of the iif function. There are iif functions in SQL statements and VBA code in Excel. The iif function is similar to the IF function in the excel worksheet. It performs true and false value judgment and returns different results based on the logically calculated true and false values. IF function usage is (condition, yes, no). IF statement and IIF function in VBA. The former IF statement is a control statement that can execute different statements according to conditions. The latter
 How to set superscript in excel
Mar 20, 2024 pm 04:30 PM
How to set superscript in excel
Mar 20, 2024 pm 04:30 PM
When processing data, sometimes we encounter data that contains various symbols such as multiples, temperatures, etc. Do you know how to set superscripts in Excel? When we use Excel to process data, if we do not set superscripts, it will make it more troublesome to enter a lot of our data. Today, the editor will bring you the specific setting method of excel superscript. 1. First, let us open the Microsoft Office Excel document on the desktop and select the text that needs to be modified into superscript, as shown in the figure. 2. Then, right-click and select the "Format Cells" option in the menu that appears after clicking, as shown in the figure. 3. Next, in the “Format Cells” dialog box that pops up automatically
 Where to set excel reading mode
Mar 21, 2024 am 08:40 AM
Where to set excel reading mode
Mar 21, 2024 am 08:40 AM
In the study of software, we are accustomed to using excel, not only because it is convenient, but also because it can meet a variety of formats needed in actual work, and excel is very flexible to use, and there is a mode that is convenient for reading. Today I brought For everyone: where to set the excel reading mode. 1. Turn on the computer, then open the Excel application and find the target data. 2. There are two ways to set the reading mode in Excel. The first one: In Excel, there are a large number of convenient processing methods distributed in the Excel layout. In the lower right corner of Excel, there is a shortcut to set the reading mode. Find the pattern of the cross mark and click it to enter the reading mode. There is a small three-dimensional mark on the right side of the cross mark.
 How to insert excel icons into PPT slides
Mar 26, 2024 pm 05:40 PM
How to insert excel icons into PPT slides
Mar 26, 2024 pm 05:40 PM
1. Open the PPT and turn the page to the page where you need to insert the excel icon. Click the Insert tab. 2. Click [Object]. 3. The following dialog box will pop up. 4. Click [Create from file] and click [Browse]. 5. Select the excel table to be inserted. 6. Click OK and the following page will pop up. 7. Check [Show as icon]. 8. Click OK.
