

转帖:PHP4(windows版本)中的COM函数

window|函数
这几天一直在写excel转化成mysql,发现一篇文章,搜一下phpx论坛,没有这个帖子,把它转帖如下:
PHP4(windows版本)中的COM函数
介绍
内置于PHP4里的COM函数对于我们在win32环境下开发程序是相当有吸引力的,但是至今仍没有多少相关的技术文档。本文将以三个例子分
别处理 MS office 2000 Word 、 Excel 、 Adobe Distiller 来说明如何在PHP中使用COM函数。
COM技术是由Microsoft在几年前提出并开发的,本文中提到的相关名词有OLE, OLE Automation, ActiveX, COM ,这些词的意思都基本一
样,都表示用一段封装的代码(对象)来完成一个windows 应用程序的一些功能。 PHP4 COM 函数可以连接一个对象实例,并使用它的方法与
属性。
如果你想使用下面的例子源码,请参考一下我的配置。
Windows 98 - MS Office 2000
Apache 1.3.9 Windows
PHP4.02 Dev (08-20-00) Running as CGI
PHP4中的COM标记
现在让我们开始吧,用PHP4的COM来实例化一个组件,需要 new 操作符和对象的 "OLE 程序标识":
$instance = new COM("$identifier");
?>
因为COM是一个PHP4的保留字,它传送这个对象的标识给一个构造函数,现在得到了这个组件的一个实例,根据OOP类的性质,我们可以很容易
地访问它的方法与属性。
例如:
$instance->[Object]->[method1]->[method2]->..->[property];
?>
就是这么简单!
OOP的结构在PHP下不能工作,(由于PHP语法的问题,属性的名字.值是非法字符,如点和圆括号等),所以PHP4提供了两个相应的函数:
bool com_set(class com_object, string property name, string property_value);
mixed com_get(class com_object, string property_name);
?>
最后,PHP4也支持DCOM技术,可以在远程计算机创建一个对象实例。
$Instance = new COM(string "Component name", string "remote_server_address");
?>
注意:这是用DCOM指令来设置PHP。在将来,PHP开发者提供Unix下对DCOM的支持。
标识、方法和属性
标识是一个如下的字串:
MS Word: "Word.Application" or "Word.Application.9"
MS Excel: "Excel.Application" or "Excel.Sheet"
ADOBE Acrobat: "Exch.application" or "PdfDistiller.PdfDistiller"
对于最后一个标识,我要指明的是,获得正确的对象标识名不是一件容易的事。如果你不能访问VBA文档,你可以查找一下windows的注册
表,在 HKEY_CLASSES_ROOT 中寻找一下,你就可以得到一些应用程序的名字。在你的机器上有效的对象标识放在 CLSID 子文件夹下。
应用程序一般会提供文档说明它的COM方法和属性。在office2000中,你可以运行程序,打开VBA编辑器 ,选择对象编辑器。输入应用程序
库中的一个方法名或属性名,然后,在下面的窗口中用鼠标右键选择一个类或成员名称,点帮助,你就会得到关于这个类或成员的描述。你也
可以参考 MSDN。一个 Excel 的例子如下: http://msdn.microsoft.com/library/officedev/off2000/xltocobjectmodelapplication.htm
用COM函数操作 MS Word
现在,我们开始第一个例子吧:
#*********************************************************
# 本例来自Zend站点,略有改动
# 打开一个word实例,并新建一个文档Useless test.doc
# 输入一行文字 "This is a test2..."
#*********************************************************
#实例化一个对象
$word = new COM("word.application") or die("Unable to instantiate Word");
#取得并显示版本
print "Loaded Word, version {$word->Version}
";
#另一种方法去取得版本
$testversion = com_get($word->application,version);
print "Version using Com_get(): $testversion
";
#使其可见
$word->Visible = 1;
#创建新文件
$word->Documents->Add();
#写字符
$word->Selection->TypeText("This is a test...");
#保存
$word->Documents[1]->SaveAs("Useless test.doc");
#关闭
$word->Quit();
?>
你只要花几分钟来读这个程序,并参考Word的OLE 技术文档,你将学到几乎是你在自己程序中所需的全部的操作。
MS Excel在使用PHP的COM函数
如同上面的Word的例子一样,你应学习这个例子的同时参考Excel的Visual Basic 编辑器中的对象浏览器的帮助文档。
#打开workbook和它的sheet,
#本例使用一个电子表格是Excel安装时自带的SOLVSAMP.XLS
$workbook = "C:Program FilesMicrosoft officeOfficeSamplesSOLVSAMP.XLS";
$sheet = "Quick Tour";
#实例化一个组件的对象
$ex = new COM("Excel.sheet") or Die ("Did not connect");
#取程序名称和版本
print "Application name:{$ex->Application->value}
" ;
print "Loaded version: {$ex->Application->version}
";
#打开工作本使我们可使用它
$wkb = $ex->application->Workbooks->Open($workbook) or Die ("Did not open");
#预保存原来的工作本,创建一个工作本的复本
$ex->Application->ActiveWorkbook->SaveAs("Ourtest");
#$ex->Application->Visible = 1; #本句去注释让Excel可见
# 读写一个单元格在一个新的工作表中
# 我们可以读到这个单元格 E11 (Advertising in the 4th. Quarter)
$sheets = $wkb->Worksheets($sheet); #Select the sheet
$sheets->activate; #Activate it
$cell = $sheets->Cells(11,5) ; #Select the cell (Row Column number)
$cell->activate; #Activate the cell
print "Old Value = {$cell->value}
"; #Print the value of the cell:10000
$cell->value = 15000; #Change it to 15000
print "New value = {$cell->value}
";#Print the new value=15000
#最后,用新值重新计算这个单元格
$sheets->Calculate;
#必须的如果要计算,手动则是可选的
#可看到效果总价值(E13单元格)
$cell = $sheets->Cells(13,5) ; #Select the cell (Row Column number)
$number = Number_format($cell->value);
print "New Total cost =$$number - was $47,732 before.
";
#根据计算公式,广告影响了公司的开销,这里将显示 $57,809
#使用Excel内建的函数
# PMT(percent/12 months,Number of payments,Loan amount)
$pay = $ex->application->pmt(0.08/12,10,10000);
$pay = sprintf("%.2f",$pay);
print "Monthly payment for $10,000 loan @8% interest /10 months: $ $pay
";
#Should print monthly payment = $ -1,037.03
#可选,保存
$ex->Application->ActiveWorkbook->SaveAs("Ourtest");
#关闭,不提问
$ex->application->ActiveWorkbook->Close("False");
unset ($ex);
?>
这个例子让你的PHP与Excel一同工作了,当然,也有更多的对象可以使用,访问一个自已写的OOP封装类也与访问excel一样容易。
用PHP的COM访问 Adobe Distiller
这最后一个例子不是MS程序了,如果你的程序有一个PostScript文件,你会对这个有兴趣的,改写(蒸馏)它成为一个PDF文档. Adobe 有一
个程序叫 Distiller ,它可以生成一个实例。代码如下:
$pdf = new COM("pdfdistiller.pdfdistiller.1");
?>
有一点要注意的,是在Distiller 的文档中给出的这个OLE标识名 "pdfdistiller" 是无效的。
蒸馏一个文件的最基本的方法是:
$pdf->FileToPdf ($psfile, strOutputPDF '', strJobOptions "");
?>
这 $psfile 是这个PostScript的文件名, strOutputPDF 是输出文件PDF的文件名。 StrJobOptions 是Distiller的参数文件名,最后两个参数
是可选的,默认是同一名字。 这PS文件名与PDF文件名,使用这个默认的Job options 文件。例如:
$pdf->FileToPdf ($psfile, "", "");
#这儿$psfile 可以是 Myfile.ps 将返回 Myfile.pdf 文件。
?>
在Distiller中有更多的方法和属性能被用。如果你感兴趣,请参考一下Adobe的技术文档。
中止/可能的问题
如果你的代码中发生了什么错误,你可能会创建了一个实例,但没有正常地关闭它。最糟的是,这个应用程序可能被这个实例所保持,结
果,在你的程序列表中就存在多份这个程序的副本,即使你更正了这个错误也会干扰你的结果。解决方法是:修正一个bug以来要及时清除它们
在你重新开始运行之前,用 并结束任务。同样的原因,在你的代码最后,也要及时关闭这个程序并删除这个实例。
你有一些技巧在处理 com_get 和 com_set的异常时。例如:
$Version = Com_get($instance->Application,"Version");
将会在Word中工作但在Excel中会产生一个错误。
有一些对象在PHP4中是不能实例化的,这是因为这个程序要一个自定义的接口,但PHP4不支持。
为什么我们要用它?
我希望这三个例子可以给你一些思考的线索,PHP的COM允许你在PHP的脚本中访问windows4的程序。这个代码比ASP简单并且能集成其它的
PHP对数据库强大的支持功能。Microsoft 在各个方面都大力销售这个COM 技术,在不同的名称和结构下,如 COM+(Combine COM with
Microsoft Transaction Server MTS), ADO, OLE DB, OWC, Windows DNA, 等等。 PHP 和 Apache的结合,提供了一个开放源码的解决方案。

Hot AI Tools

Undresser.AI Undress
AI-powered app for creating realistic nude photos

AI Clothes Remover
Online AI tool for removing clothes from photos.

Undress AI Tool
Undress images for free

Clothoff.io
AI clothes remover

AI Hentai Generator
Generate AI Hentai for free.
Hot Article
Hot Tools

Notepad++7.3.1
Easy-to-use and free code editor

SublimeText3 Chinese version
Chinese version, very easy to use

Zend Studio 13.0.1
Powerful PHP integrated development environment

Dreamweaver CS6
Visual web development tools

SublimeText3 Mac version
God-level code editing software (SublimeText3)
Hot Topics
 1376
1376
 52
52

 How to cancel automatic word wrapping in word
Mar 19, 2024 pm 10:16 PM
How to cancel automatic word wrapping in word
Mar 19, 2024 pm 10:16 PM
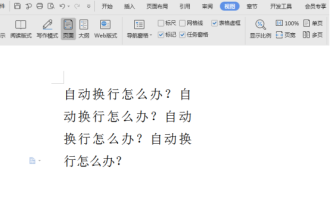
When editing content in a word document, lines may automatically wrap. If no adjustment is made at this time, it will have a great impact on our editing and make people very headache. What is going on? In fact, it is a problem with the ruler. Below, I will introduce the solution to how to cancel automatic word wrapping in word. I hope it can help everyone! After opening a Word document and entering text, when you try to copy and paste, the text may jump to a new line. In this case, you need to adjust the settings to solve this problem. 2. To solve this problem, we must first know the cause of this problem. At this time we click View under the toolbar. 3. Then click the "Ruler" option below. 4. At this time we will find that a ruler appears above the document with several conical markers on it.
 Detailed explanation of how to display the ruler in Word and how to operate the ruler!
Mar 20, 2024 am 10:46 AM
Detailed explanation of how to display the ruler in Word and how to operate the ruler!
Mar 20, 2024 am 10:46 AM
When we use Word, in order to edit the content more beautifully, we often use rulers. You should know that the rulers in Word include horizontal rulers and vertical rulers, which are used to display and adjust the document's page margins, paragraph indents, tabs, etc. So, how do you display the ruler in Word? Next, I will teach you how to set the ruler display. Students in need should quickly collect it! The steps are as follows: 1. First, we need to bring up the word ruler. The default word document does not display the word ruler. We only need to click the [View] button in word. 2. Then, we find the option of [Ruler] and check it. In this way, we can adjust the word ruler! Yes or no
 How to add handwritten signature to word document
Mar 20, 2024 pm 08:56 PM
How to add handwritten signature to word document
Mar 20, 2024 pm 08:56 PM
Word documents are widely used due to their powerful functions. Not only can various formats be inserted into Word, such as pictures and tables, etc., but now for the integrity and authenticity of the files, many files require a manual signature at the end of the document. It sounds like this How to solve complex problems? Today I will teach you how to add a handwritten signature to a word document. Use a scanner, camera or mobile phone to scan or photograph the handwritten signature, and then use PS or other image editing software to perform necessary cropping on the image. 2. Select "Insert - Picture - From File" in the Word document where you want to insert the handwritten signature, and select the cropped handwritten signature. 3. Double-click the handwritten signature picture (or right-click the picture and select "Set Picture Format"), and the "Set Picture Format" pops up.
 How to set page margins for Word
Mar 19, 2024 pm 10:00 PM
How to set page margins for Word
Mar 19, 2024 pm 10:00 PM
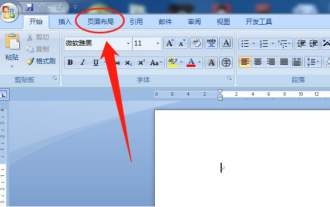
Among office software, Word is one of our most commonly used software. The text documents we produce are generally operated with Word. Some documents need to be submitted in paper version as required. Before printing, the layout must be set before it can be presented. produce better results. So the question is, how do you set page margins in Word? We have specific course explanations to help you solve your doubts. 1. Open or create a new word document and click the "Page Layout" menu on the menu bar. 2. Click the "Margins" button of the "Page Setup" option. 3. Select a commonly used page margin in the list. 4. If there are no suitable margins in the list, click "Custom Margins". 5. The "Page Setup" dialog box pops up, enter the "Margins" option respectively.
 Where is the shading setting in word?
Mar 20, 2024 am 08:16 AM
Where is the shading setting in word?
Mar 20, 2024 am 08:16 AM
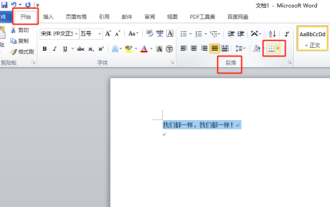
We often use word for office work, but do you know where the shading settings are in word? Today I will share with you the specific operation steps. Come and take a look, friends! 1. First, open the word document, select a paragraph of text paragraph information that needs to be added with shading, then click the [Start] button on the toolbar, find the paragraph area, and click the drop-down button on the right (as shown in the red circle in the figure below) ). 2. After clicking the drop-down box button, in the pop-up menu options, click the [Border and Shading] option (as shown in the red circle in the figure below). 3. In the pop-up [Border and Shading] dialog box, click the [Shading] option (as shown in the red circle in the figure below). 4. In the filled column, select a color
 How to draw a dotted line in word
Mar 19, 2024 pm 10:25 PM
How to draw a dotted line in word
Mar 19, 2024 pm 10:25 PM
Word is a software that we often use in our office. It has many functions that can facilitate our operations. For example, for a large article, we can use the search function inside to find out that a word in the full text is wrong, so we can directly replace it. Make changes one by one; when submitting the document to your superiors, you can beautify the document to make it look better, etc. Below, the editor will share with you the steps on how to draw a dotted line in Word. Let's learn together! 1. First, we open the word document on the computer, as shown in the figure below: 2. Then, enter a string of text in the document, as shown in the red circle in the figure below: 3. Next, press and hold [ctrl+A] Select all the text, as shown in the red circle in the figure below: 4. Click [Start] on the top of the menu bar
 Specific steps to delete down arrow in Word!
Mar 19, 2024 pm 08:50 PM
Specific steps to delete down arrow in Word!
Mar 19, 2024 pm 08:50 PM
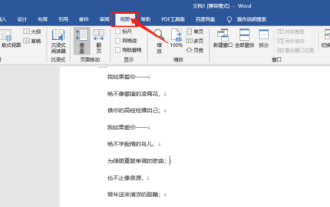
In daily office work, if you copy a piece of text from a website and paste it directly into Word, you will often see a [down arrow]. This [down arrow] can be deleted by selecting it, but if there are too many such symbols, So is there a quick way to delete all arrows? So today I will share with you the specific steps to delete the downward arrow in Word! First of all, the [Down Arrow] in Word actually represents [Manual Line Break]. We can replace all [Down Arrows] with [Paragraph Mark] symbols, as shown in the figure below. 2. Then, we select the [Find and Replace] option on the menu bar (as shown in the red circle in the figure below). 3. Then, click the [Replace] command, a pop-up box will pop up, click [Special Symbols]
 Do you know how to sum a Word table?
Mar 21, 2024 pm 01:10 PM
Do you know how to sum a Word table?
Mar 21, 2024 pm 01:10 PM
Sometimes, we often encounter counting problems in Word tables. Generally, when encountering such problems, most students will copy the Word table to Excel for calculation; some students will silently pick up the calculator. Calculate. Is there a quick way to calculate it? Of course there is, in fact the sum can also be calculated in Word. So, do you know how to do it? Today, let’s take a look together! Without further ado, friends in need should quickly collect it! Step details: 1. First, we open the Word software on the computer and open the document that needs to be processed. (As shown in the picture) 2. Next, we position the cursor on the cell where the summed value is located (as shown in the picture); then, we click [Menu Bar
