

Preparation
Preface, why and what to do
My surname is Bai, and I am truly a novice in programming. However, ever since I came into contact with the wonderful thing of programming during my freshman year, I have been completely immersed in the world of programming.
No, I have started to mess with APPs recently. It is really easy to develop an APP now. It can be completed with only JavaScript and a little HTML css technology. But the backend of the APP is different. After developing an APP and want to read some data into it, we have to develop a backend.
The laravel framework is my favorite PHP framework, bar none. Last year I used laravel to write my personal website, but the roughness made me blush. Okay, let’s not go into details, let’s go directly to the topic - install laravel first!
Basic environment configuration
For specific steps, please refer to the documentation directly. Laravel5.2 installation
My own environment is that wampsrver2.5 is installed on win10, but it is worth paying attention to. If you use wampsrver2.5, you need to change these places. Regarding this, please read my notes and click to preview
Tools: sublime
Browser: chrome (postman plug-in to be used)
About API
API (Application Programming Interface, Application Programming Interface) are predefined functions that provide applications and developers with the ability to access a set of routines based on certain software or hardware without accessing the source code, or Understand the details of the inner workings.
It should be noted that the API has its specific purpose, and we should know what it does. What should be entered when accessing the API. What should you get after accessing the API.
When starting to design an API, we should pay attention to these 8 points
The content here is excerpted from the master’s blog
Subsequent development plans will revolve around this. (Really great summary)
1.Restful design principles
2. API naming
3.API security
4.API returns data
5. Image processing
6. Returned prompt information
7. Online API testing documentation
8. When the app starts, call an initialization API to obtain the necessary information
Develop API with laravel
Just when I was worried about whether to start learning from scratch, I found this plug-in dingo/api, so let’s install it now!
First of all, you must download it correctly
Add the following content to the newly installed laravel composer.json
Then open cmd and execute
1 |
|
Add
to providers in config/app.php1 2 3 4 |
|
Add
in aliases1 |
|
Modify the content in the app/Http/Kernel.php file
1 2 3 4 5 6 7 8 9 |
|
Then execute
1 2 |
|
Add these configurations in the .env file
API_STANDARDS_TREE=x
API_SUBTYPE=rest
API_NAME=REST
API_PREFIX=api
API_VERSION=v1
API_CONDITIONAL_REQUEST=true
API_STRICT=false
API_DEBUG=true
API_DEFAULT_FORMAT=json
Modify the appconfigoauth2.php file
1 2 3 4 5 6 7 |
|
Create a new service provider and create a new OAuthServiceProvider.php file under app/Providers with the following content
1 2 3 4 5 6 7 8 9 10 11 12 13 14 15 16 17 18 19 20 21 22 23 24 25 26 27 28 29 30 |
|
Then open routes.php and add relevant routes
1 2 3 4 5 6 7 8 9 10 11 12 13 14 15 16 17 18 19 20 21 22 23 24 25 26 27 |
|
Create BaseController.php and UsersController.php respectively with the following content
1 2 3 4 5 6 7 8 9 10 11 12 13 14 15 16 17 18 19 20 21 22 23 24 25 26 27 28 29 30 31 32 |
|
Then create PasswordGrantVerifier.php under app/Http/Controllers/Auth/ with the following content
1 2 3 4 5 6 7 8 9 10 11 12 13 14 15 16 17 18 19 |
|
Open the oauth_client table of the database and add a new client data
1 |
|
Then it’s time to go to Happy Testing. The APIs to be tested here are
Add a new user
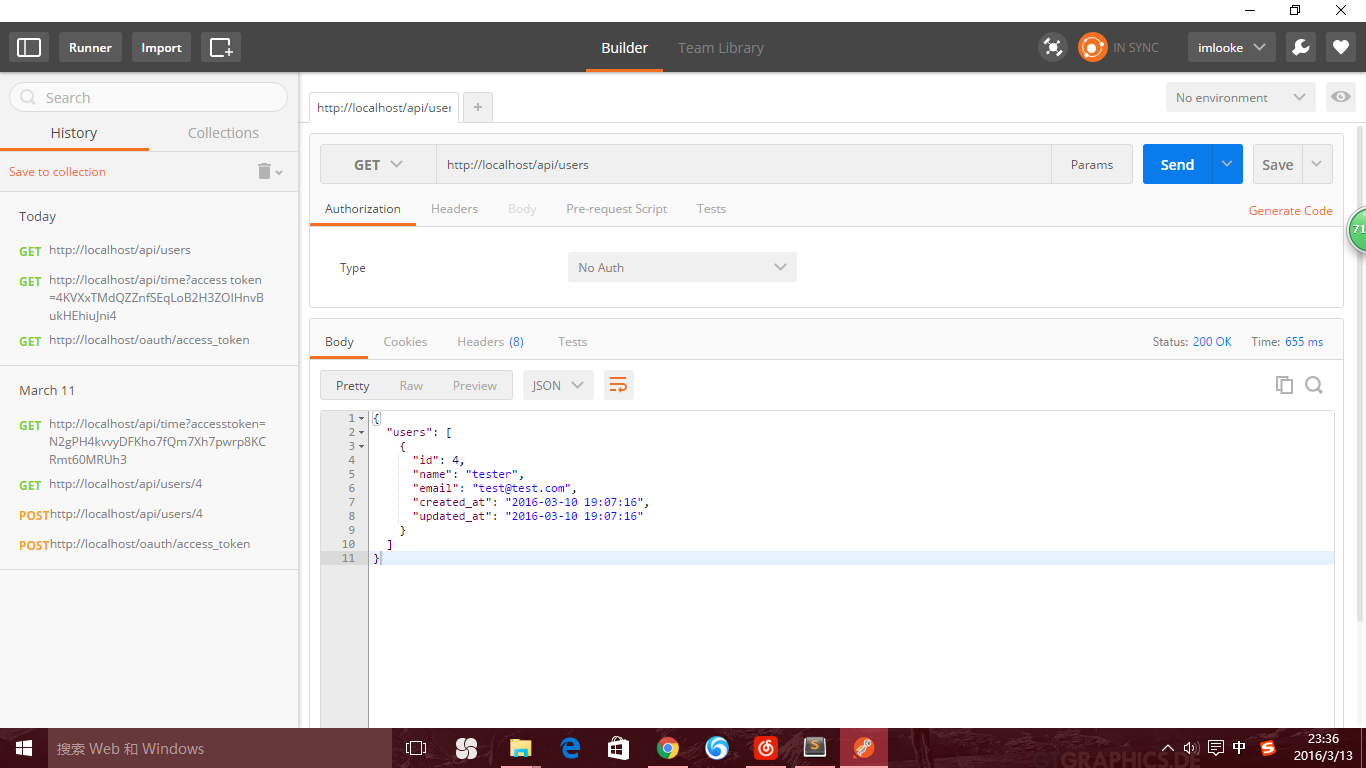
Read all user information
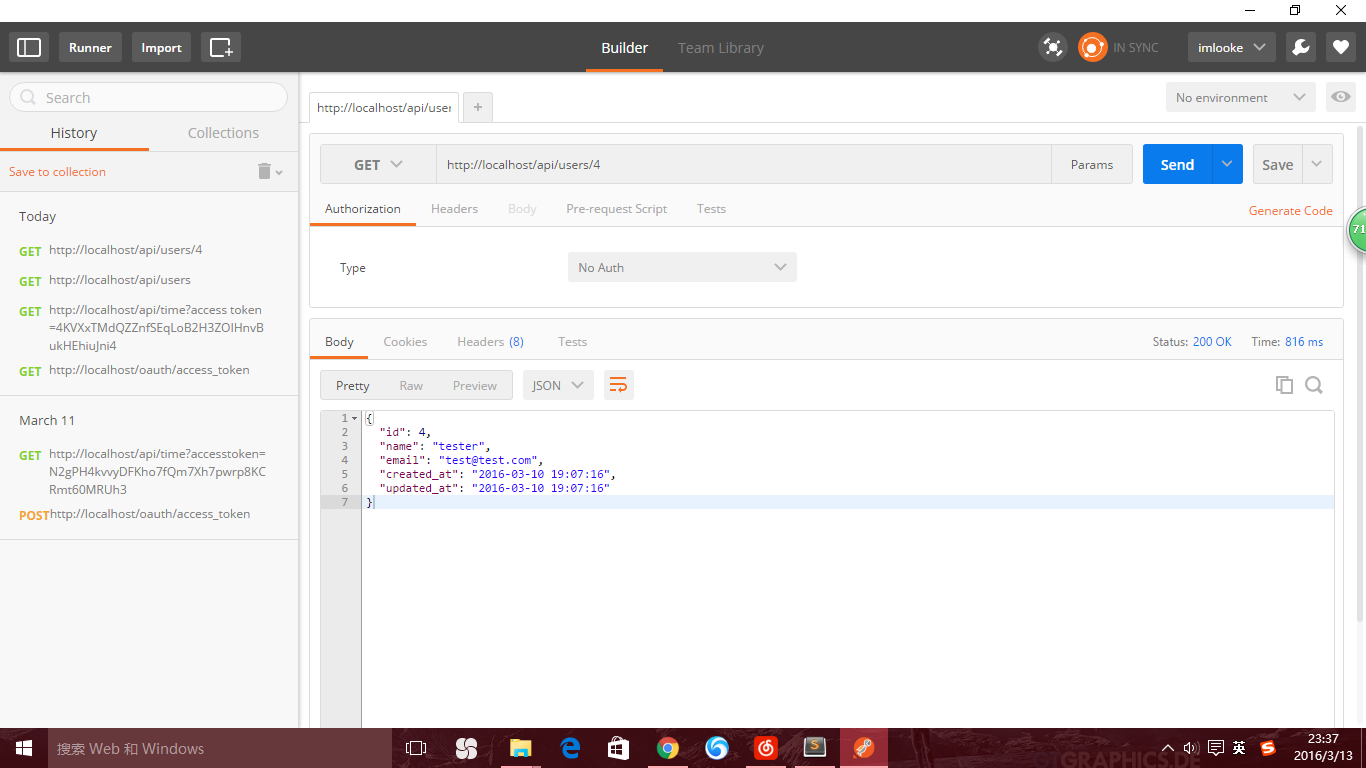
Only return information with user ID 4
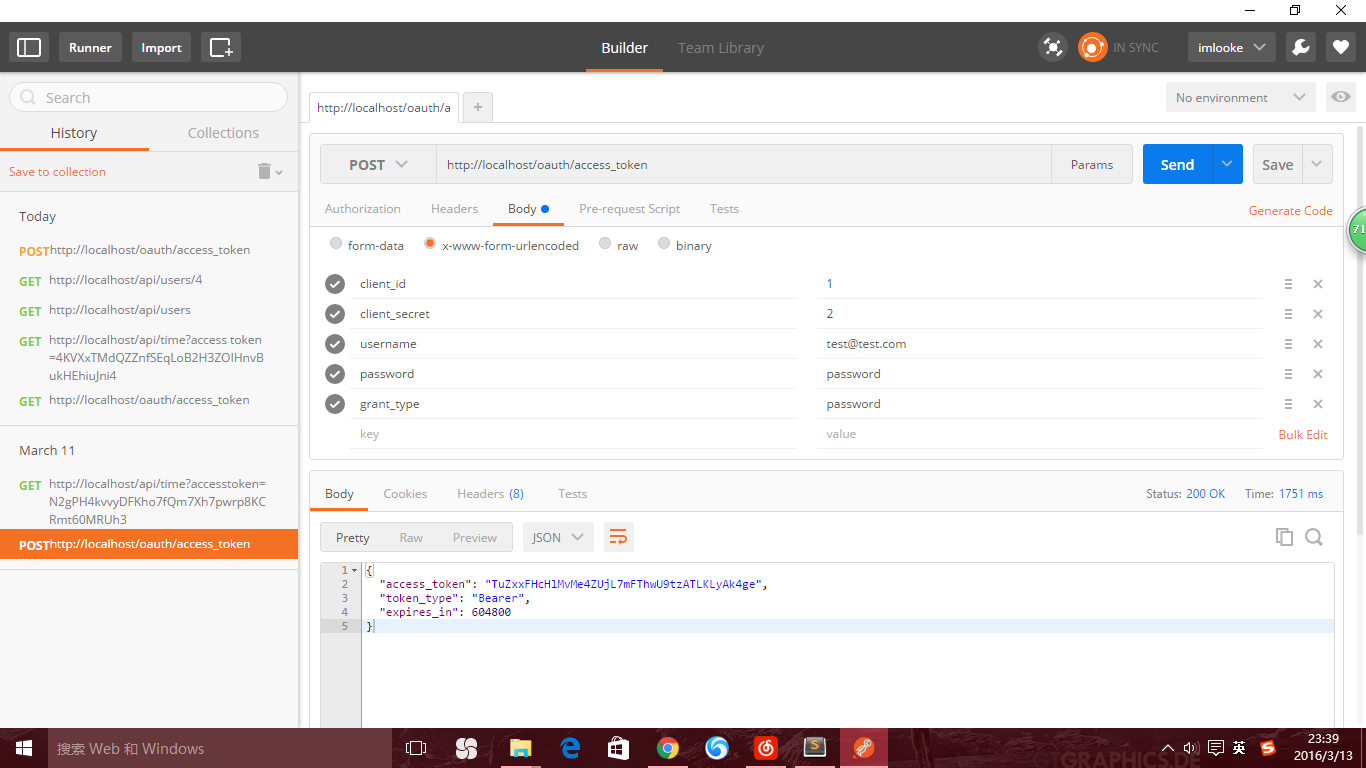
Get access_token
http://localhost/oauth/access_token
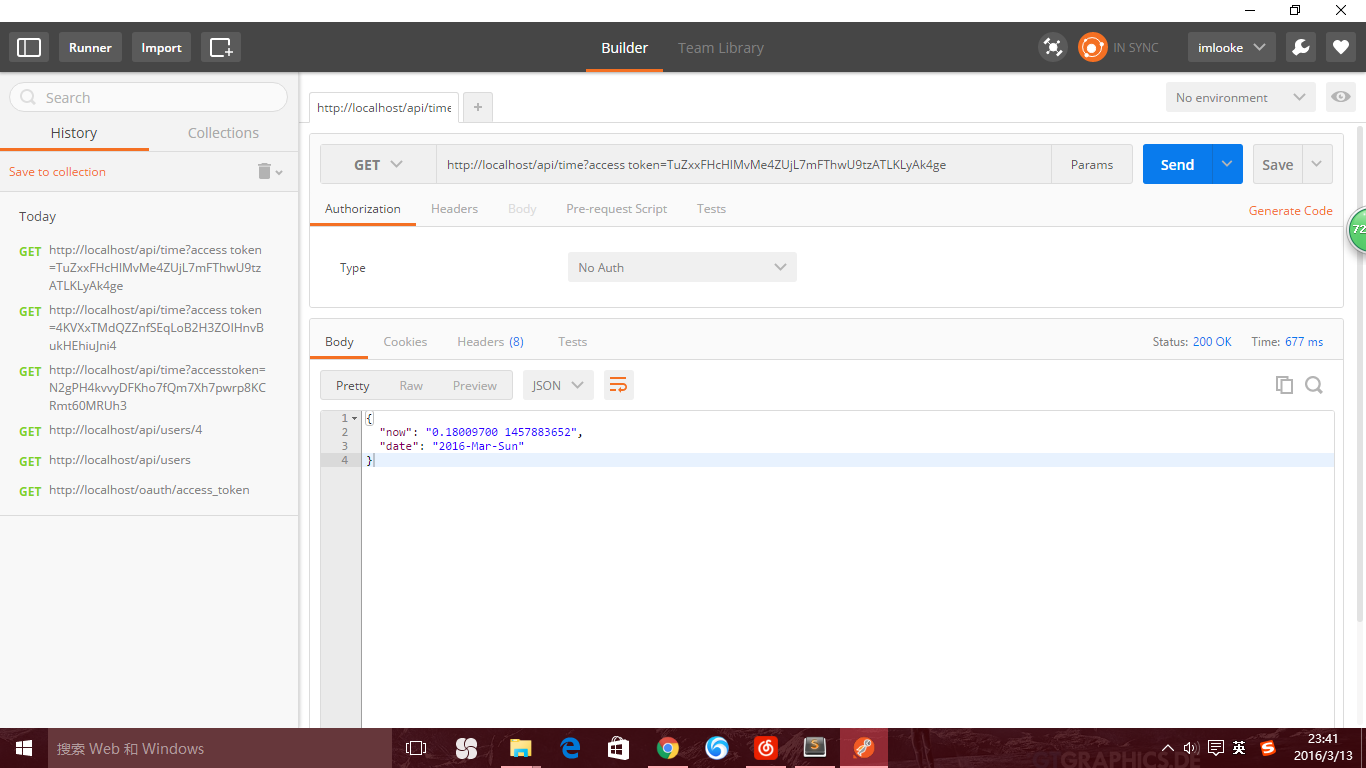
Use the token value to obtain the time. Only when the token value is correct can the correct value be returned
Open PostMan
 Introduction to laravel components
 Introduction to laravel middleware
 What are the design patterns used by laravel?
 Which one is easier, thinkphp or laravel?
 Laravel Tutorial
 How much is Dimensity 6020 equivalent to Snapdragon?
 Common HTML tags
 Detailed explanation of quartz configuration file
 What are the calling methods of java reflection


![[Web front-end] Node.js quick start](https://img.php.cn/upload/course/000/000/067/662b5d34ba7c0227.png)


