Introduction to Python
The founder of python is Guido van Rossum. During the Christmas period of 1989, in order to kill time in Amsterdam, Guido van Rossum decided to develop a new script interpreter as a successor to the ABC language.
Comparison between Python and other languages:
C and Python, Java, C#, etc.
C language: The code is compiled to obtain machine code. The machine code is directly executed on the processor. Each instruction controls the CPU work
Other languages: The code is compiled to obtain bytecode. The virtual machine executes the bytecode and converts it into machine code and then executes it on the processor
Python and C Python is a language developed from C
For use: Python’s class library is complete and simple to use. If you want to achieve the same function, Python can solve it with 10 lines of code, while C may require 100 lines or more.
Regarding speed: Compared with C, Python’s running speed is definitely slower
Python and Java, C#, etc.
For use: Linux original Python, not available in other languages; the above languages have very rich class library support
For speed: Python may be slightly inferior in speed
So, there is no essential difference between Python and other languages. The other differences are: being good at a certain field, having rich talents, and being preconceived.
Types of Python
•Cpython
The official version of Python is implemented in C language and is the most widely used. The CPython implementation converts the source file (py file) into a bytecode file (pyc file) and then runs it on the Python virtual machine.
•Jyhton
Java implementation of Python, Jython will dynamically compile Python code into Java bytecode, and then run on the JVM.
•IronPython
A C# implementation of Python, IronPython compiles Python code into C# bytecode and then runs it on the CLR. (Similar to Jython)
•PyPy (Special)
Python implemented by Python recompiles Python's bytecode bytecode into machine code.
•RubyPython, Brython...
Install Python
windows:
1. Download the installation package
https://www.python.org/downloads/
2. Installation
Default installation path: C:python27
3. Configure environment variables
[Right-click Computer]--"[Properties]--"[Advanced System Settings]--"[Advanced]--"[Environment Variables]--"[Find the variable named Path in the second content box A line of , double-click] --> [The Python installation directory is appended to the variable value, separated by;]
For example: original value; C: python27, remember to have a semicolon in front of it
linux:
No installation required, original Python environment
ps: If you come with 2.6, please update to 2.7
Update Python
windows:
Just uninstall and reinstall
linux:
View default Python version
python -V
1. Install gcc for compiling Python source code
yum install gcc
2. Download the source code package, https://www.python.org/ftp/python/
3. Unzip and enter the source code file
4. Compile and install
./configure
make all
make install
5. View version
/usr/local/bin/python2.7 -V
6. Modify the default Python version
mv /usr/bin/python /usr/bin/python2.6
ln -s /usr/local/bin/python2.7 /usr/bin/python
7. Prevent yum execution exceptions and modify the Python version used by yum
vi /usr/bin/yum
Modify the header #!/usr/bin/python to #!/usr/bin/python2.6
Introduction to Python
1. Interpreter
If you want to execute a python script similar to a shell script, for example: ./hello.py, then you need to specify the interpreter at the head of the hello.py file, as follows:
#!/usr/bin/env python

print "hello,world"
ps: Hello.py needs to be given execution permission before execution, chmod 755 hello.py
2. Content encoding
When the python interpreter loads the code in the .py file, it will encode the content (default ascill)
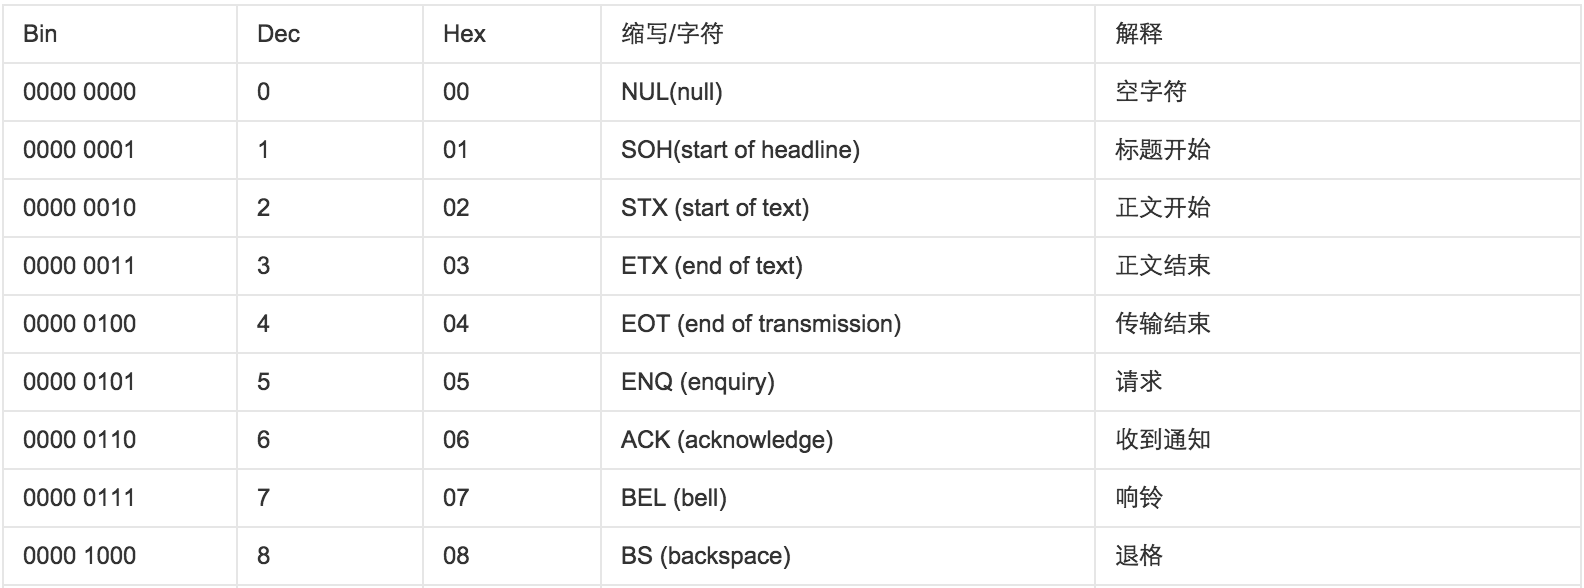
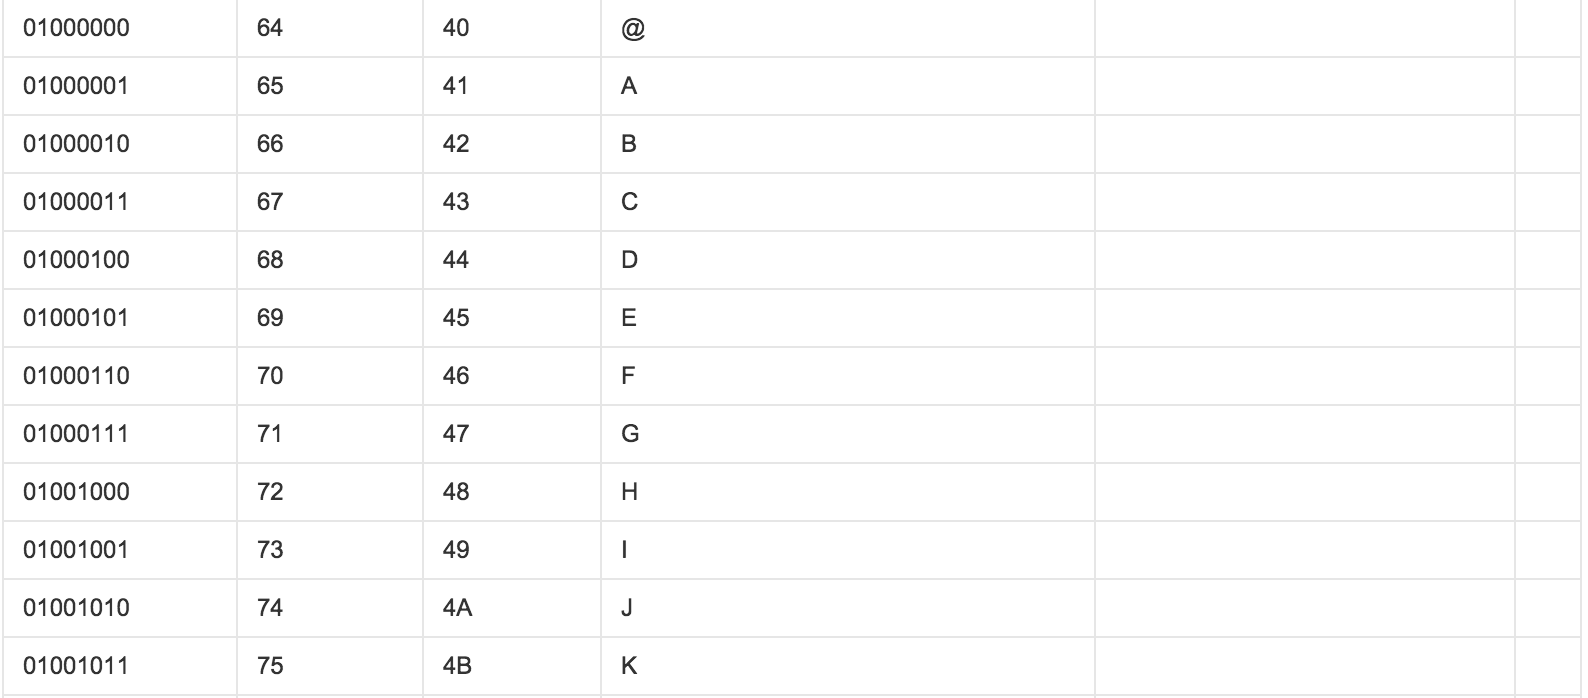
ASCII (American Standard Code for Information Interchange, American Standard Code for Information Interchange) is a computer coding system based on the Latin alphabet. It is mainly used to display modern English and other Western European languages. It can only be represented by up to 8 bits ( One byte), that is: 2**8 = 256, so the ASCII code can only represent up to 256 symbols.


显然ASCII码无法将世界上的各种文字和符号全部表示,所以,就需要新出一种可以代表所有字符和符号的编码,即:Unicode
Unicode(统一码、万国码、单一码)是一种在计算机上使用的字符编码。Unicode 是为了解决传统的字符编码方案的局限而产生的,它为每种语言中的每个字符设定了统一并且唯一的二进制编码,规定虽有的字符和符号最少由 16 位来表示(2个字节),即:2 **16 = 65536,
注:此处说的的是最少2个字节,可能更多
UTF-8,是对Unicode编码的压缩和优化,他不再使用最少使用2个字节,而是将所有的字符和符号进行分类:ascii码中的内容用1个字节保存、欧洲的字符用2个字节保存,东亚的字符用3个字节保存...
所以,python解释器在加载 .py 文件中的代码时,会对内容进行编码(默认ascill),如果是如下代码的话:
报错:ascii码无法表示中文
#!/usr/bin/env python


print "你好,世界"
改正:应该显示的告诉python解释器,用什么编码来执行源代码,即:
#!/usr/bin/env python

# -*- coding: utf-8 -*-


print "你好,世界"
三、注释
当行注视:# 被注释内容
多行注释:""" 被注释内容 """
四、执行脚本传入参数
Python有大量的模块,从而使得开发Python程序非常简洁。类库有包括三中:
•Python内部提供的模块
•业内开源的模块
•程序员自己开发的模块
Python内部提供一个 sys 的模块,其中的 sys.argv 用来捕获执行执行python脚本时传入的参数
#!/usr/bin/env python

# -*- coding: utf-8 -*-


import sys


print sys.argv
五、 pyc 文件
执行Python代码时,如果导入了其他的 .py 文件,那么,执行过程中会自动生成一个与其同名的 .pyc 文件,该文件就是Python解释器编译之后产生的字节码。
ps:代码经过编译可以产生字节码;字节码通过反编译也可以得到代码。
六、变量
1、声明变量
#!/usr/bin/env python

# -*- coding: utf-8 -*-


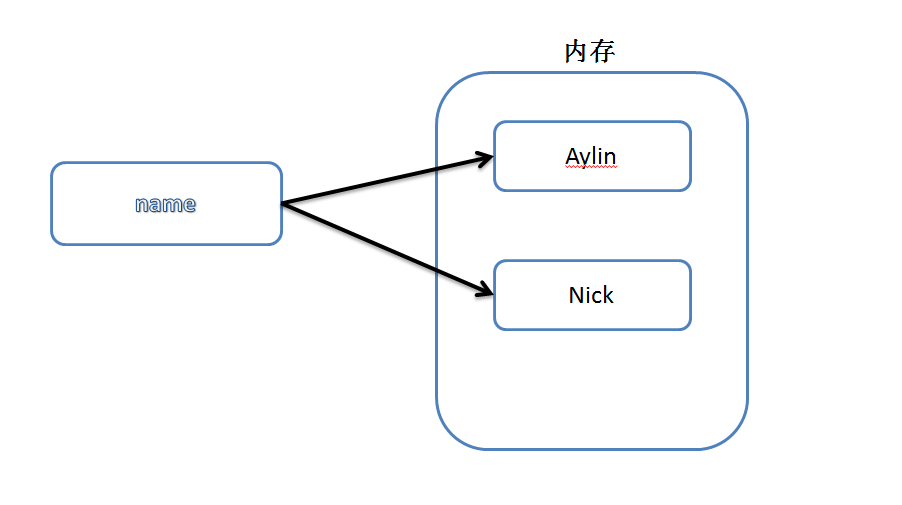
name = "zhangyanlin"
上述代码声明了一个变量,变量名为: name,变量name的值为:"zhangyanlin"
变量定义的规则:
变量名只能是 字母、数字或下划线的任意组合变量名的第一个字符不能是数字以下关键字不能声明为变量名
['and', 'as', 'assert', 'break', 'class', 'continue', 'def', 'del', 'elif', 'else', 'except', 'exec', 'finally', 'for', 'from', 'global', 'if', 'import', 'in', 'is', 'lambda', 'not', 'or', 'pass', 'print', 'raise', 'return', 'try', 'while', 'with', 'yield']
七、输入
#!/usr/bin/env python

# -*- coding: utf-8 -*-


# 将用户输入的内容赋值给 name 变量

name = raw_input("请输入用户名:")


# 打印输入的内容

print name输入密码时,如果想要不可见,需要利用getpass 模块中的 getpass方法,即:
#!/usr/bin/env python

# -*- coding: utf-8 -*-


import getpass


# 将用户输入的内容赋值给 name 变量

pwd = getpass.getpass("请输入密码:")


# 打印输入的内容

print pwd八、流程控制和缩进
需求一、用户登陆验证
#!/usr/bin/env python

# -*- coding: encoding -*-


# 提示输入用户名和密码


# 验证用户名和密码

#   如果错误,则输出用户名或密码错误

#   如果成功,则输出 欢迎,XXX!


import getpass


name = raw_input('请输入用户名:')

pwd = getpass.getpass('请输入密码:')


if name == "zhangyanlin" and pwd == "123456":

  print "欢迎,zhangyanlin!"

else:

print "用户名和密码错误"九、while循环
1、基本循环
while 条件:


  # 循环体


  # 如果条件为真,那么循环体则执行

  # 如果条件为假,那么循环体不执行
2、break
break用于退出所有循环
while True:

  print 123


  break
3、continue
continue用于退出当前循环,继续下一次循环
while True:

  print 123


  continue
4.#列出100之内所有的奇数
odd = 1

while odd <= 100:


    print(odd)

odd += 25.#列出100之内所有的偶数
even = 0

while even <= 100:


print (even)

even += 2
6.算出1-2+3-4....+99的和
#排除99剩余49组1减2

u1 =49

print(u1*(1-2)+99)
or
#列出1-99所有数的和

start=1

sum = 0

while start < 100:

  temp = start %2

  if temp == 1:

     sum = sum+start

  else

     sum=sum-start

  start+=1

print(sum)以上就是小编为大家带来的Python基础篇之初识Python必看攻略全部内容了,希望大家多多支持脚本之家~
 How to learn python programming from scratch
 What are the css3 gradient properties?
 File name contains illegal content
 How to format hard drive in linux
 What is the difference between eclipse and idea?
 What is the difference between original screen and assembled screen?
 How to open an account with u currency
 Computer application areas


