

C#图片加水印实例与代码

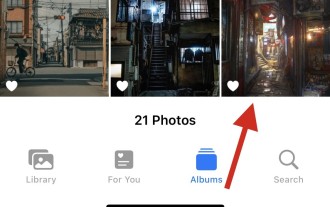
本文要提供的类可以为图片加文字水印,以及判断是否是图片文件。经过测试可运行,例子请下载:http://hovertree.com/h/bjaf/5qc5eh6y.htm 例子效果图: 以下是HovercWarter类的代码: 1 using System.Drawing; 2 using System.Drawing.Imaging; 3 using Syst
本文要提供的类可以为图片加文字水印,以及判断是否是图片文件。经过测试可运行,例子请下载:http://hovertree.com/h/bjaf/5qc5eh6y.htm
例子效果图:

以下是HovercWarter类的代码:
<span style="color: #008080;"> 1</span> <span style="color: #0000ff;">using</span><span style="color: #000000;"> System.Drawing;
</span><span style="color: #008080;"> 2</span> <span style="color: #0000ff;">using</span><span style="color: #000000;"> System.Drawing.Imaging;
</span><span style="color: #008080;"> 3</span> <span style="color: #0000ff;">using</span><span style="color: #000000;"> System.IO;
</span><span style="color: #008080;"> 4</span>
<span style="color: #008080;"> 5</span> <span style="color: #0000ff;">namespace</span><span style="color: #000000;"> HoverTreeBatch.HovercFrame
</span><span style="color: #008080;"> 6</span> <span style="color: #000000;">{
</span><span style="color: #008080;"> 7</span> <span style="color: #0000ff;">public</span> <span style="color: #0000ff;">class</span><span style="color: #000000;"> HovercWarter
</span><span style="color: #008080;"> 8</span> <span style="color: #000000;">{
</span><span style="color: #008080;"> 9</span> <span style="color: #0000ff;">public</span> <span style="color: #0000ff;">static</span> Image AddTextToImg(Image image, <span style="color: #0000ff;">string</span><span style="color: #000000;"> text)
</span><span style="color: #008080;">10</span> <span style="color: #000000;">{
</span><span style="color: #008080;">11</span> Bitmap bitmap = <span style="color: #0000ff;">new</span><span style="color: #000000;"> Bitmap(image, image.Width, image.Height);
</span><span style="color: #008080;">12</span> Graphics g =<span style="color: #000000;"> Graphics.FromImage(bitmap);
</span><span style="color: #008080;">13</span>
<span style="color: #008080;">14</span> <span style="color: #0000ff;">float</span> fontSize = <span style="color: #800080;">12.0f</span>; <span style="color: #008000;">//</span><span style="color: #008000;">字体大小</span>
<span style="color: #008080;">15</span> <span style="color: #0000ff;">float</span> textWidth = text.Length * fontSize; <span style="color: #008000;">//</span><span style="color: #008000;">文本的长度
</span><span style="color: #008080;">16</span> <span style="color: #008000;">//</span><span style="color: #008000;">下面定义一个矩形区域,以后在这个矩形里画上白底黑字</span>
<span style="color: #008080;">17</span> <span style="color: #0000ff;">float</span> rectX = <span style="color: #800080;">0</span><span style="color: #000000;">;
</span><span style="color: #008080;">18</span> <span style="color: #0000ff;">float</span> rectY = <span style="color: #800080;">0</span><span style="color: #000000;">;
</span><span style="color: #008080;">19</span> <span style="color: #0000ff;">float</span> rectWidth = text.Length * (fontSize + <span style="color: #800080;">8</span><span style="color: #000000;">);
</span><span style="color: #008080;">20</span> <span style="color: #0000ff;">float</span> rectHeight = fontSize + <span style="color: #800080;">8</span><span style="color: #000000;">;
</span><span style="color: #008080;">21</span> <span style="color: #008000;">//</span><span style="color: #008000;">声明矩形域</span>
<span style="color: #008080;">22</span> RectangleF textArea = <span style="color: #0000ff;">new</span><span style="color: #000000;"> RectangleF(rectX, rectY, rectWidth, rectHeight);
</span><span style="color: #008080;">23</span>
<span style="color: #008080;">24</span> Font font = <span style="color: #0000ff;">new</span> Font(<span style="color: #800000;">"</span><span style="color: #800000;">宋体</span><span style="color: #800000;">"</span>, fontSize); <span style="color: #008000;">//</span><span style="color: #008000;">定义字体</span>
<span style="color: #008080;">25</span> Brush whiteBrush = <span style="color: #0000ff;">new</span> SolidBrush(Color.White); <span style="color: #008000;">//</span><span style="color: #008000;">白笔刷,画文字用</span>
<span style="color: #008080;">26</span> Brush blackBrush = <span style="color: #0000ff;">new</span> SolidBrush(Color.Black); <span style="color: #008000;">//</span><span style="color: #008000;">黑笔刷,画背景用</span>
<span style="color: #008080;">27</span>
<span style="color: #008080;">28</span> <span style="color: #000000;">g.FillRectangle(blackBrush, rectX, rectY, rectWidth, rectHeight);
</span><span style="color: #008080;">29</span>
<span style="color: #008080;">30</span> <span style="color: #000000;">g.DrawString(text, font, whiteBrush, textArea);
</span><span style="color: #008080;">31</span> MemoryStream ms = <span style="color: #0000ff;">new</span><span style="color: #000000;"> MemoryStream();
</span><span style="color: #008080;">32</span> <span style="color: #008000;">//</span><span style="color: #008000;">保存为Jpg类型</span>
<span style="color: #008080;">33</span> <span style="color: #000000;">bitmap.Save(ms, ImageFormat.Jpeg);
</span><span style="color: #008080;">34</span>
<span style="color: #008080;">35</span> Image h_hovercImg =<span style="color: #000000;"> Image.FromStream(ms);
</span><span style="color: #008080;">36</span>
<span style="color: #008080;">37</span> <span style="color: #000000;">g.Dispose();
</span><span style="color: #008080;">38</span> <span style="color: #000000;">bitmap.Dispose();
</span><span style="color: #008080;">39</span>
<span style="color: #008080;">40</span>
<span style="color: #008080;">41</span> <span style="color: #0000ff;">return</span><span style="color: #000000;"> h_hovercImg;
</span><span style="color: #008080;">42</span> <span style="color: #000000;">}
</span><span style="color: #008080;">43</span>
<span style="color: #008080;">44</span>
<span style="color: #008080;">45</span> <span style="color: #808080;">///</span> <span style="color: #808080;"><summary></summary></span>
<span style="color: #008080;">46</span> <span style="color: #808080;">///</span><span style="color: #008000;"> 根据文件头判断上传的文件类型
</span><span style="color: #008080;">47</span> <span style="color: #808080;">///</span> <span style="color: #808080;"></span>
<span style="color: #008080;">48</span> <span style="color: #808080;">///</span> <span style="color: #808080;"><param name="filePath"></span><span style="color: #008000;">filePath是文件的完整路径 </span><span style="color: #808080;"></span>
<span style="color: #008080;">49</span> <span style="color: #808080;">///</span> <span style="color: #808080;"><returns></returns></span><span style="color: #008000;">返回true或false</span><span style="color: #808080;"></span>
<span style="color: #008080;">50</span> <span style="color: #0000ff;">public</span> <span style="color: #0000ff;">static</span> <span style="color: #0000ff;">bool</span> IsPicture(<span style="color: #0000ff;">string</span><span style="color: #000000;"> filePath)
</span><span style="color: #008080;">51</span> <span style="color: #000000;">{
</span><span style="color: #008080;">52</span> <span style="color: #0000ff;">try</span>
<span style="color: #008080;">53</span> <span style="color: #000000;">{
</span><span style="color: #008080;">54</span> FileStream fs = <span style="color: #0000ff;">new</span><span style="color: #000000;"> FileStream(filePath, FileMode.Open, Fileaccess.Read);
</span><span style="color: #008080;">55</span> BinaryReader reader = <span style="color: #0000ff;">new</span><span style="color: #000000;"> BinaryReader(fs);
</span><span style="color: #008080;">56</span> <span style="color: #0000ff;">string</span><span style="color: #000000;"> fileClass;
</span><span style="color: #008080;">57</span> <span style="color: #0000ff;">byte</span><span style="color: #000000;"> buffer;
</span><span style="color: #008080;">58</span> buffer =<span style="color: #000000;"> reader.ReadByte();
</span><span style="color: #008080;">59</span> fileClass =<span style="color: #000000;"> buffer.ToString();
</span><span style="color: #008080;">60</span> buffer =<span style="color: #000000;"> reader.ReadByte();
</span><span style="color: #008080;">61</span> fileClass +=<span style="color: #000000;"> buffer.ToString();
</span><span style="color: #008080;">62</span> <span style="color: #000000;">reader.Close();
</span><span style="color: #008080;">63</span> <span style="color: #000000;">fs.Close();
</span><span style="color: #008080;">64</span> <span style="color: #0000ff;">if</span> (fileClass == <span style="color: #800000;">"</span><span style="color: #800000;">255216</span><span style="color: #800000;">"</span> || fileClass == <span style="color: #800000;">"</span><span style="color: #800000;">7173</span><span style="color: #800000;">"</span> || fileClass == <span style="color: #800000;">"</span><span style="color: #800000;">13780</span><span style="color: #800000;">"</span> || fileClass == <span style="color: #800000;">"</span><span style="color: #800000;">6677</span><span style="color: #800000;">"</span><span style="color: #000000;">)
</span><span style="color: #008080;">65</span> <span style="color: #008000;">//</span><span style="color: #008000;">何问起 hovertree.com
</span><span style="color: #008080;">66</span> <span style="color: #008000;">//</span><span style="color: #008000;">255216是jpg;7173是gif;6677是BMP,13780是PNG;7790是exe,8297是rar </span>
<span style="color: #008080;">67</span> <span style="color: #000000;">{
</span><span style="color: #008080;">68</span> <span style="color: #0000ff;">return</span> <span style="color: #0000ff;">true</span><span style="color: #000000;">;
</span><span style="color: #008080;">69</span> <span style="color: #000000;">}
</span><span style="color: #008080;">70</span> <span style="color: #0000ff;">else</span>
<span style="color: #008080;">71</span> <span style="color: #000000;">{
</span><span style="color: #008080;">72</span> <span style="color: #0000ff;">return</span> <span style="color: #0000ff;">false</span><span style="color: #000000;">;
</span><span style="color: #008080;">73</span> <span style="color: #000000;">}
</span><span style="color: #008080;">74</span> <span style="color: #000000;">}
</span><span style="color: #008080;">75</span> <span style="color: #0000ff;">catch</span>
<span style="color: #008080;">76</span> <span style="color: #000000;">{
</span><span style="color: #008080;">77</span> <span style="color: #0000ff;">return</span> <span style="color: #0000ff;">false</span><span style="color: #000000;">;
</span><span style="color: #008080;">78</span> <span style="color: #000000;">}
</span><span style="color: #008080;">79</span> <span style="color: #000000;">}
</span><span style="color: #008080;">80</span> <span style="color: #000000;">}
</span><span style="color: #008080;">81</span> }另外出一道.NET的题目:http://hovertree.com/shortanswer/bjaf/9vqxwuda.htm
开发技术文章收集: http://www.cnblogs.com/sosoft/p/kaifajishu.html

Hot AI Tools

Undresser.AI Undress
AI-powered app for creating realistic nude photos

AI Clothes Remover
Online AI tool for removing clothes from photos.

Undress AI Tool
Undress images for free

Clothoff.io
AI clothes remover

AI Hentai Generator
Generate AI Hentai for free.

Hot Article
Hot Tools

Notepad++7.3.1
Easy-to-use and free code editor

SublimeText3 Chinese version
Chinese version, very easy to use

Zend Studio 13.0.1
Powerful PHP integrated development environment

Dreamweaver CS6
Visual web development tools

SublimeText3 Mac version
God-level code editing software (SublimeText3)
Hot Topics
 1386
1386
 52
52

 How to make round pictures and text in ppt
Mar 26, 2024 am 10:23 AM
How to make round pictures and text in ppt
Mar 26, 2024 am 10:23 AM
First, draw a circle in PPT, then insert a text box and enter text content. Finally, set the fill and outline of the text box to None to complete the production of circular pictures and text.
 How to add watermark to Meitu Xiuxiu? Share how to add watermark to beautiful photos!
Mar 16, 2024 pm 09:55 PM
How to add watermark to Meitu Xiuxiu? Share how to add watermark to beautiful photos!
Mar 16, 2024 pm 09:55 PM
Want to know how to add watermark to MeituXiuXiu? Meitu Xiuxiu is a very easy-to-use photo editing software. It provides functions such as cutting out pictures and placing them on another picture, changing the picture size by kb, removing watermarks, changing the background color of ID photos, and adding time, date and location watermarks to the full screen. Help users quickly complete the production of pictures. Some users have created their own pictures and don’t want others to steal them. They want to cover them with their own watermarks, but don’t know how to do it? The editor will now share with you how to add watermarks to beautiful photos! If you like it, come and download it! 1. How to add watermark to beautiful pictures? Share how to add watermark to beautiful photos! 1. Open the 2023 version of Meitu Xiu Xiu downloaded from this site. Meitu Xiu Xiu 2023 version Category: Shooting and beautification Download Meitu Xiu Xiu 2023 version is a feature-rich picture beautification and editing software
 How to solve the problem of automatically saving pictures when publishing on Xiaohongshu? Where is the automatically saved image when posting?
Mar 22, 2024 am 08:06 AM
How to solve the problem of automatically saving pictures when publishing on Xiaohongshu? Where is the automatically saved image when posting?
Mar 22, 2024 am 08:06 AM
With the continuous development of social media, Xiaohongshu has become a platform for more and more young people to share their lives and discover beautiful things. Many users are troubled by auto-save issues when posting images. So, how to solve this problem? 1. How to solve the problem of automatically saving pictures when publishing on Xiaohongshu? 1. Clear the cache First, we can try to clear the cache data of Xiaohongshu. The steps are as follows: (1) Open Xiaohongshu and click the "My" button in the lower right corner; (2) On the personal center page, find "Settings" and click it; (3) Scroll down and find the "Clear Cache" option. Click OK. After clearing the cache, re-enter Xiaohongshu and try to post pictures to see if the automatic saving problem is solved. 2. Update the Xiaohongshu version to ensure that your Xiaohongshu
 How to remove watermark with Scanner
Mar 05, 2024 pm 05:34 PM
How to remove watermark with Scanner
Mar 05, 2024 pm 05:34 PM
Removing watermarks is a useful tool in the software Scanner. Some users are not sure how to remove watermarks in Scanner. You can click Remove Watermark in Edit PDF on the save interface to close it. Next, the editor will explain Users brought us an introduction to how to remove watermarks. If you are interested, come and take a look! Scanner King usage tutorial How to remove the watermark with Scanner King? Answer: You can click on the save interface to edit the watermark removal in the PDF. Details: 1. Enter the software and click the [Camera] icon. 2. Photograph and scan the documents that need to be watermarked. 3. Click [→] to proceed to the next step. 4. After completing editing, click [✓]. 5. Click [Edit PDF]. 6. Select [Remove Watermark] below.
 How to post pictures in TikTok comments? Where is the entrance to the pictures in the comment area?
Mar 21, 2024 pm 09:12 PM
How to post pictures in TikTok comments? Where is the entrance to the pictures in the comment area?
Mar 21, 2024 pm 09:12 PM
With the popularity of Douyin short videos, user interactions in the comment area have become more colorful. Some users wish to share images in comments to better express their opinions or emotions. So, how to post pictures in TikTok comments? This article will answer this question in detail and provide you with some related tips and precautions. 1. How to post pictures in Douyin comments? 1. Open Douyin: First, you need to open Douyin APP and log in to your account. 2. Find the comment area: When browsing or posting a short video, find the place where you want to comment and click the "Comment" button. 3. Enter your comment content: Enter your comment content in the comment area. 4. Choose to send a picture: In the interface for entering comment content, you will see a "picture" button or a "+" button, click
 How to set photo watermark on Xiaomi Mi 14?
Mar 18, 2024 am 11:00 AM
How to set photo watermark on Xiaomi Mi 14?
Mar 18, 2024 am 11:00 AM
In order to make the photos taken more personalized and unique, Xiaomi Mi 14 provides photo watermark settings. By setting photo watermarks, users can add patterns, text and logos to the photos they take, so that each photo can better record precious moments and memories. Next, we will introduce how to set a photo watermark in Xiaomi 14 to make your photos more personalized and vivid. How to set photo watermark on Xiaomi Mi 14? 1. First click “Camera”. 2. Then click "Settings". 3. Then find the watermark, and then you can start shooting.
 6 Ways to Make Pictures Sharper on iPhone
Mar 04, 2024 pm 06:25 PM
6 Ways to Make Pictures Sharper on iPhone
Mar 04, 2024 pm 06:25 PM
Apple's recent iPhones capture memories with crisp detail, saturation and brightness. But sometimes, you may encounter some issues that may cause the image to look less clear. While autofocus on iPhone cameras has come a long way, allowing you to take photos quickly, the camera can mistakenly focus on the wrong subject in certain situations, making the photo blurry in unwanted areas. If your photos on your iPhone look out of focus or lack sharpness overall, the following post should help you make them sharper. How to Make Pictures Clearer on iPhone [6 Methods] You can try using the native Photos app to clean up your photos. If you want more features and options
 How to add dots to text in word?
Mar 19, 2024 pm 08:04 PM
How to add dots to text in word?
Mar 19, 2024 pm 08:04 PM
When we create Word documents on a daily basis, we sometimes need to add dots under certain words in the document, especially when there are test questions. To highlight this part of the content, the editor will share with you the tips on how to add dots to text in Word. I hope it can help you. 1. Open a blank word document. 2. For example, add dots under the words "How to add dots to text". 3. We first select the words "How to add dots to text" with the left mouse button. Note that if you want to add dots to that word in the future, you must first use the left button of the mouse to select which word. Today we are adding dots to these words, so we have chosen several words. Select these words, right-click, and click Font in the pop-up function box. 4. Then something like this will appear
