

'C# WeChat Development Series (2)-Customized Menu Management'

2.0自定义菜单管理 ①接口说明: 微信服务号聊天窗口下面的菜单项(有的公众号有启用有的则没有),这个可以在编辑模式简单配置,也可以在开发模式代码配置。微信公众平台开发者文档:微信公众号开发平台创建自定义菜单,可以看到创建菜单的一些注意事项,下
2.0自定义菜单管理①接口说明:
微信服务号聊天窗口下面的菜单项(有的公众号有启用有的则没有),这个可以在编辑模式简单配置,也可以在开发模式代码配置。微信公众平台开发者文档:微信公众号开发平台创建自定义菜单,可以看到创建菜单的一些注意事项,下面的使用网页调试工具调试该接口,只是调试接口是否可以正常调用,并不是直接创建菜单,根据微信自定义菜单管理文档菜单事件可分为两种:
click: 用户点击click类型按钮后,微信服务器会通过消息接口推送消息类型为event 的结构给开发者(参考消息接口指南),并且带上按钮中开发者填写的key值,开发者可以通过自定义的key值与用户进行交互。
view: 用户点击view类型按钮后,微信客户端将会打开开发者在按钮中填写的url值 (即网页链接),达到打开网页的目的,建议与网页授权获取用户基本信息接口结合,获得用户的登入个人信息。
设置菜单JSON格式(可根据需要进行修改):
<span style="color: #000000;">{
     </span><span style="color: #800000;">"</span><span style="color: #800000;">button</span><span style="color: #800000;">"</span><span style="color: #000000;">:[
     {
          </span><span style="color: #800000;">"</span><span style="color: #800000;">type</span><span style="color: #800000;">"</span>:<span style="color: #800000;">"</span><span style="color: #800000;">click</span><span style="color: #800000;">"</span><span style="color: #000000;">,
          </span><span style="color: #800000;">"</span><span style="color: #800000;">name</span><span style="color: #800000;">"</span>:<span style="color: #800000;">"</span><span style="color: #800000;">今日歌曲</span><span style="color: #800000;">"</span><span style="color: #000000;">,
          </span><span style="color: #800000;">"</span><span style="color: #800000;">key</span><span style="color: #800000;">"</span>:<span style="color: #800000;">"</span><span style="color: #800000;">V1001_TODAY_MUSIC</span><span style="color: #800000;">"</span><span style="color: #000000;">
      },
      {
           </span><span style="color: #800000;">"</span><span style="color: #800000;">name</span><span style="color: #800000;">"</span>:<span style="color: #800000;">"</span><span style="color: #800000;">菜单</span><span style="color: #800000;">"</span><span style="color: #000000;">,
           </span><span style="color: #800000;">"</span><span style="color: #800000;">sub_button</span><span style="color: #800000;">"</span><span style="color: #000000;">:[
           {
               </span><span style="color: #800000;">"</span><span style="color: #800000;">type</span><span style="color: #800000;">"</span>:<span style="color: #800000;">"</span><span style="color: #800000;">view</span><span style="color: #800000;">"</span><span style="color: #000000;">,
               </span><span style="color: #800000;">"</span><span style="color: #800000;">name</span><span style="color: #800000;">"</span>:<span style="color: #800000;">"</span><span style="color: #800000;">搜索</span><span style="color: #800000;">"</span><span style="color: #000000;">,
               </span><span style="color: #800000;">"</span><span style="color: #800000;">url</span><span style="color: #800000;">"</span>:<span style="color: #800000;">"</span><span style="color: #800000;">http://www.soso.com/</span><span style="color: #800000;">"</span><span style="color: #000000;">
            },
            {
               </span><span style="color: #800000;">"</span><span style="color: #800000;">type</span><span style="color: #800000;">"</span>:<span style="color: #800000;">"</span><span style="color: #800000;">view</span><span style="color: #800000;">"</span><span style="color: #000000;">,
               </span><span style="color: #800000;">"</span><span style="color: #800000;">name</span><span style="color: #800000;">"</span>:<span style="color: #800000;">"</span><span style="color: #800000;">视频</span><span style="color: #800000;">"</span><span style="color: #000000;">,
               </span><span style="color: #800000;">"</span><span style="color: #800000;">url</span><span style="color: #800000;">"</span>:<span style="color: #800000;">"</span><span style="color: #800000;">http://v.QQ.com/</span><span style="color: #800000;">"</span><span style="color: #000000;">
            },
            {
               </span><span style="color: #800000;">"</span><span style="color: #800000;">type</span><span style="color: #800000;">"</span>:<span style="color: #800000;">"</span><span style="color: #800000;">click</span><span style="color: #800000;">"</span><span style="color: #000000;">,
               </span><span style="color: #800000;">"</span><span style="color: #800000;">name</span><span style="color: #800000;">"</span>:<span style="color: #800000;">"</span><span style="color: #800000;">赞一下我们</span><span style="color: #800000;">"</span><span style="color: #000000;">,
               </span><span style="color: #800000;">"</span><span style="color: #800000;">key</span><span style="color: #800000;">"</span>:<span style="color: #800000;">"</span><span style="color: #800000;">V1001_GOOD</span><span style="color: #800000;">"</span><span style="color: #000000;">
            }]
       }]
}</span>配置菜单的注意点:
1、自定义菜单最多包括3个一级菜单,每个一级菜单最多包含5个二级菜单。
2、一级菜单最多4个汉字,二级菜单最多7个汉字,多出来的部分将会以“...”代替。
3、创建自定义菜单后,由于微信客户端缓存,需要24小时微信客户端才会展现出来。测试时可以尝试取消关注公众账号后再次关注,则可以看到创建后的效果。
接口参数配置:

②请求接口:
接口调用请求说明:
http请求方式:POST(请使用https协议)
https://api.weixin.qq.com/cgi-bin/menu/create?access_token=ACCESS_TOKEN
POST请求接口调用接口凭据ACCESS_TOKEN的获取方式可参见文档(获取ACCESS_TOKEN文档)使用POST方式带上ACCESS_TOKEN以及菜单JSON请求接口,具体实现代码如下:
<span style="color: #008080;"> 1</span> <span style="color: #808080;">///</span> <span style="color: #808080;"><summary></span>
<span style="color: #008080;"> 2</span> <span style="color: #808080;">///</span><span style="color: #008000;"> 创建菜单事件
</span><span style="color: #008080;"> 3</span> <span style="color: #808080;">///</span> <span style="color: #808080;"></summary></span>
<span style="color: #008080;"> 4</span> <span style="color: #808080;">///</span> <span style="color: #808080;"><param name="sender"></param></span>
<span style="color: #008080;"> 5</span> <span style="color: #808080;">///</span> <span style="color: #808080;"><param name="e"></param></span>
<span style="color: #008080;"> 6</span> <span style="color: #0000ff;">PRotected</span> <span style="color: #0000ff;">void</span> creayeMenu_Click(<span style="color: #0000ff;">object</span><span style="color: #000000;"> sender, EventArgs e)
</span><span style="color: #008080;"> 7</span> <span style="color: #000000;">{
</span><span style="color: #008080;"> 8    </span>FileStream fs1 = <span style="color: #0000ff;">new</span> FileStream(Server.MapPath(<span style="color: #800000;">"</span><span style="color: #800000;">~/</span><span style="color: #800000;">"</span>) + <span style="color: #800000;">"</span><span style="color: #800000;">\\menuInfo.txt</span><span style="color: #800000;">"</span><span style="color: #000000;">, FileMode.Open);
</span><span style="color: #008080;"> 9    </span>StreamReader sr = <span style="color: #0000ff;">new</span> StreamReader(fs1, Encoding.GetEncoding(<span style="color: #800000;">"</span><span style="color: #800000;">GBK</span><span style="color: #800000;">"</span><span style="color: #000000;">));
</span><span style="color: #008080;">10    </span><span style="color: #0000ff;">string</span> menu =<span style="color: #000000;"> sr.ReadToEnd();
</span><span style="color: #008080;">11    </span><span style="color: #000000;">sr.Close();
</span><span style="color: #008080;">12    </span><span style="color: #000000;">fs1.Close();
</span><span style="color: #008080;">13    <span style="color: #000000;">CreateMenu</span></span>(<span style="color: #800000;">"</span><span style="color: #800000;">https://api.weixin.qq.com/cgi-bin/menu/create?access_token=ACCESS_TOKEN</span><span style="color: #800000;">"</span><span style="color: #000000;">, menu);
</span><span style="color: #008080;">14</span> }
<span style="color: #008080;"> 1</span> <span style="color: #808080;">///</span> <span style="color: #808080;"><summary></span>
<span style="color: #008080;"> 2</span> <span style="color: #808080;">///</span><span style="color: #008000;"> 创建公众号菜单
</span><span style="color: #008080;"> 3</span> <span style="color: #808080;">///</span> <span style="color: #808080;"></summary></span>
<span style="color: #008080;"> 4</span> <span style="color: #808080;">///</span> <span style="color: #808080;"><param name="posturl"></span><span style="color: #008000;">URL</span><span style="color: #808080;"></param></span>
<span style="color: #008080;"> 5</span> <span style="color: #808080;">///</span> <span style="color: #808080;"><param name="postData"></span><span style="color: #008000;">菜单JSON数据</span><span style="color: #808080;"></param></span>
<span style="color: #008080;"> 6</span> <span style="color: #808080;">///</span> <span style="color: #808080;"><returns></returns></span>
<span style="color: #008080;"> 7</span> <span style="color: #0000ff;">public</span> <span style="color: #0000ff;">void</span> CreateMenu(<span style="color: #0000ff;">string</span> posturl, <span style="color: #0000ff;">string</span><span style="color: #000000;"> postData)
</span><span style="color: #008080;"> 8</span> <span style="color: #000000;">{
</span><span style="color: #008080;"> 9    </span>Stream outstream = <span style="color: #0000ff;">null</span><span style="color: #000000;">;
</span><span style="color: #008080;">10    </span>Stream instream = <span style="color: #0000ff;">null</span><span style="color: #000000;">;
</span><span style="color: #008080;">11    </span>StreamReader sr = <span style="color: #0000ff;">null</span><span style="color: #000000;">;
</span><span style="color: #008080;">12    </span>HttpWebResponse response = <span style="color: #0000ff;">null</span><span style="color: #000000;">;
</span><span style="color: #008080;">13    </span>HttpWebRequest request = <span style="color: #0000ff;">null</span><span style="color: #000000;">;
</span><span style="color: #008080;">14    </span>Encoding encoding =<span style="color: #000000;"> Encoding.UTF8;
</span><span style="color: #008080;">15    </span><span style="color: #0000ff;">byte</span>[] data =<span style="color: #000000;"> encoding.GetBytes(postData);
</span><span style="color: #008080;">16</span>
<span style="color: #008080;">17    </span>request = WebRequest.Create(posturl) <span style="color: #0000ff;">as</span><span style="color: #000000;"> HttpWebRequest;
</span><span style="color: #008080;">18    </span>CookieContainer cookieContainer = <span style="color: #0000ff;">new</span><span style="color: #000000;"> CookieContainer();
</span><span style="color: #008080;">19    </span>request.CookieContainer =<span style="color: #000000;"> cookieContainer;
</span><span style="color: #008080;">20</span>       request.AllowAutoRedirect = <span style="color: #0000ff;">true</span><span style="color: #000000;">;
</span><span style="color: #008080;">21</span>       request.Method = <span style="color: #800000;">"</span><span style="color: #800000;">POST</span><span style="color: #800000;">"</span><span style="color: #000000;">;
</span><span style="color: #008080;">22</span>       request.ContentType = <span style="color: #800000;">"</span><span style="color: #800000;">application/x-www-form-urlencoded</span><span style="color: #800000;">"</span><span style="color: #000000;">;
</span><span style="color: #008080;">23</span>       request.ContentLength =<span style="color: #000000;"> data.Length;
</span><span style="color: #008080;">24</span>       outstream =<span style="color: #000000;"> request.GetRequestStream();
</span><span style="color: #008080;">25</span>       outstream.Write(data, <span style="color: #800080;">0</span><span style="color: #000000;">, data.Length);
</span><span style="color: #008080;">26</span> <span style="color: #000000;">      outstream.Close();
</span><span style="color: #008080;">27</span>       response = request.GetResponse() <span style="color: #0000ff;">as</span><span style="color: #000000;"> HttpWebResponse;
</span><span style="color: #008080;">28</span>       instream =<span style="color: #000000;"> response.GetResponseStream();
</span><span style="color: #008080;">29</span>       sr = <span style="color: #0000ff;">new</span><span style="color: #000000;"> StreamReader(instream, encoding);
</span><span style="color: #008080;">30</span>       <span style="color: #0000ff;">string</span> content =<span style="color: #000000;"> sr.ReadToEnd();
</span><span style="color: #008080;">31</span> <span style="color: #000000;">      Context.Response.Write(content);
</span><span style="color: #008080;">32</span> }接口返回结果:
正确时返回的JSON数据包格式如下:
{"errcode":0,"errmsg":"ok"}
错误时的返回JSON数据包如下(示例为无效菜单名长度):
{"errcode":40018,"errmsg":"invalid button name size"}

Hot AI Tools

Undresser.AI Undress
AI-powered app for creating realistic nude photos

AI Clothes Remover
Online AI tool for removing clothes from photos.

Undress AI Tool
Undress images for free

Clothoff.io
AI clothes remover

AI Hentai Generator
Generate AI Hentai for free.

Hot Article
Hot Tools

Notepad++7.3.1
Easy-to-use and free code editor

SublimeText3 Chinese version
Chinese version, very easy to use

Zend Studio 13.0.1
Powerful PHP integrated development environment

Dreamweaver CS6
Visual web development tools

SublimeText3 Mac version
God-level code editing software (SublimeText3)
Hot Topics
 1376
1376
 52
52

 Windows 11: The easy way to import and export start layouts
Aug 22, 2023 am 10:13 AM
Windows 11: The easy way to import and export start layouts
Aug 22, 2023 am 10:13 AM
In Windows 11, the Start menu has been redesigned and features a simplified set of apps arranged in a grid of pages, unlike its predecessor, which had folders, apps, and apps on the Start menu. Group. You can customize the Start menu layout and import and export it to other Windows devices to personalize it to your liking. In this guide, we’ll discuss step-by-step instructions for importing Start Layout to customize the default layout on Windows 11. What is Import-StartLayout in Windows 11? Import Start Layout is a cmdlet used in Windows 10 and earlier versions to import customizations for the Start menu into
 How to quickly set up a custom avatar in Netflix
Feb 19, 2024 pm 06:33 PM
How to quickly set up a custom avatar in Netflix
Feb 19, 2024 pm 06:33 PM
An avatar on Netflix is a visual representation of your streaming identity. Users can go beyond the default avatar to express their personality. Continue reading this article to learn how to set a custom profile picture in the Netflix app. How to quickly set a custom avatar in Netflix In Netflix, there is no built-in feature to set a profile picture. However, you can do this by installing the Netflix extension on your browser. First, install a custom profile picture for the Netflix extension on your browser. You can buy it in the Chrome store. After installing the extension, open Netflix on your browser and log into your account. Navigate to your profile in the upper right corner and click
 How to customize background image in Win11
Jun 30, 2023 pm 08:45 PM
How to customize background image in Win11
Jun 30, 2023 pm 08:45 PM
How to customize background image in Win11? In the newly released win11 system, there are many custom functions, but many friends do not know how to use these functions. Some friends think that the background image is relatively monotonous and want to customize the background image, but don’t know how to customize the background image. If you don’t know how to define the background image, the editor has compiled the steps to customize the background image in Win11 below. If you are interested If so, take a look below! Steps for customizing background images in Win11: 1. Click the win button on the desktop and click Settings in the pop-up menu, as shown in the figure. 2. Enter the settings menu and click Personalization, as shown in the figure. 3. Enter Personalization and click on Background, as shown in the picture. 4. Enter background settings and click to browse pictures
 How to create and customize Venn diagrams in Python?
Sep 14, 2023 pm 02:37 PM
How to create and customize Venn diagrams in Python?
Sep 14, 2023 pm 02:37 PM
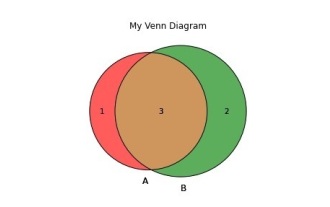
A Venn diagram is a diagram used to represent relationships between sets. To create a Venn diagram we will use matplotlib. Matplotlib is a commonly used data visualization library in Python for creating interactive charts and graphs. It is also used to create interactive images and charts. Matplotlib provides many functions to customize charts and graphs. In this tutorial, we will illustrate three examples to customize Venn diagrams. The Chinese translation of Example is: Example This is a simple example of creating the intersection of two Venn diagrams; first, we imported the necessary libraries and imported venns. Then we create the dataset as a Python set, after that we use the "venn2()" function to create
 How to Default 'Show More Options' in Windows 11's Right-Click Menu
Jul 10, 2023 pm 12:33 PM
How to Default 'Show More Options' in Windows 11's Right-Click Menu
Jul 10, 2023 pm 12:33 PM
One of the most annoying changes that we users never want is the inclusion of "Show more options" in the right-click context menu. However, you can remove it and get back the classic context menu in Windows 11. No more multiple clicks and looking for these ZIP shortcuts in context menus. Follow this guide to return to a full-blown right-click context menu on Windows 11. Fix 1 – Manually adjust the CLSID This is the only manual method on our list. You will adjust specific keys or values in Registry Editor to resolve this issue. NOTE – Registry edits like this are very safe and will work without any issues. Therefore, you should create a registry backup before trying this on your system. Step 1 – Try it
 How to enable and customize crossfades in Apple Music on iPhone with iOS 17
Jun 28, 2023 pm 12:14 PM
How to enable and customize crossfades in Apple Music on iPhone with iOS 17
Jun 28, 2023 pm 12:14 PM
The iOS 17 update for iPhone brings some big changes to Apple Music. This includes collaborating with other users on playlists, initiating music playback from different devices when using CarPlay, and more. One of these new features is the ability to use crossfades in Apple Music. This will allow you to transition seamlessly between tracks, which is a great feature when listening to multiple tracks. Crossfading helps improve the overall listening experience, ensuring you don't get startled or dropped out of the experience when the track changes. So if you want to make the most of this new feature, here's how to use it on your iPhone. How to Enable and Customize Crossfade for Apple Music You Need the Latest
 render function in Vue3: custom rendering function
Jun 18, 2023 pm 06:43 PM
render function in Vue3: custom rendering function
Jun 18, 2023 pm 06:43 PM
Vue is a popular JavaScript framework that provides many convenient functions and APIs to help developers build interactive front-end applications. With the release of Vue3, the render function has become an important update. This article will introduce the concept and purpose of the render function in Vue3 and how to use it to customize the rendering function. What is the render function? In Vue, template is the most commonly used rendering method, but in Vue3, you can use another method: r
 How to create custom pagination in CakePHP?
Jun 04, 2023 am 08:32 AM
How to create custom pagination in CakePHP?
Jun 04, 2023 am 08:32 AM
CakePHP is a powerful PHP framework that provides developers with many useful tools and features. One of them is pagination, which helps us divide large amounts of data into several pages, making browsing and manipulation easier. By default, CakePHP provides some basic pagination methods, but sometimes you may need to create some custom pagination methods. This article will show you how to create custom pagination in CakePHP. Step 1: Create a custom pagination class First, we need to create a custom pagination class. this
