
 Backend Development
PHP Tutorial
RBAC role permission design ideas, rbac role design ideas_PHP tutorial
Backend Development
PHP Tutorial
RBAC role permission design ideas, rbac role design ideas_PHP tutorial
RBAC role permission design ideas, rbac role design ideas_PHP tutorial

RBAC role permissions design ideas, rbac role design ideas
1 Design ideas
In order to design a set of user authentication management with strong scalability, it is necessary to establish database tables such as users, roles and permissions, and establish relationships between them. The specific implementation is as follows. 1.1 User Users are just pure users, used to record user-related information, such as user names, passwords, etc., and the permissions are separated. To have permissions for a certain resource, a user must be associated with a role. Users typically have the following attributes: ü Number, unique in the system. ü Name, unique in the system. ü User password. ü Comments, information describing the user or role. 1.2 Characters A role is the basic unit of permissions. It has a certain number of permissions. User permissions are granted through roles. They usually have the following attributes: ü Number, unique in the system. ü Name, unique in the system. ü Comments, describing character information 1.3 Permissions Permissions refer to the user’s access to certain functions of the program based on their role, such as the ability to read, write, modify, and delete files. They usually have the following attributes: ü Number, unique in the system. ü Name, unique in the system. ü Comments describing permission information 1.4 The relationship between users and roles A user (User) can belong to multiple roles (Role), and a role group can also have multiple users. User roles are objects used to describe the affiliation relationships between them.A user has permissions on a certain resource associated with a role, such as l User (User): UserID UserName UserPwd 1 Zhang San xxxxxx 2 Li Si xxxxxx …… l Role: RoleID 01 System Administrator Monitoring System Maintenance Administrator 02 Monitoring personnel Online monitoring personnel 03 Scheduling staff Scheduling staff 04 General staff Staff … l User_Role: UserRoleID UserID RoleID UserRoleNote 1 1 1 01 The user "Zhang San" is assigned to the role "System Administrator" 2 2 2 02 The user “李思” is assigned to the role “Monitoring Personnel” 3 2 2 03 The user "李思" is assigned to the role "Scheduler" …… It can be seen from this relationship table that specific resources owned by users can be associated through user roles. 1.5 The relationship between permissions and roles A role can have multiple permissions, and the same permission can be assigned to multiple roles.For example: l Role: RoleID 01 System Administrator Monitoring System Maintenance Administrator 02 Monitoring personnel Online monitoring personnel 03 Scheduling staff Scheduling staff 04 General staff Staff … l Permission: PermissionID PermissionName PermissionNote 0001 Add monitoring Allow to add monitoring objects 0002 Modify monitoring Allow modification of monitoring objects 0003 Delete monitoring Allow deletion of monitoring objects 0004 View monitoring information Allow viewing of monitored objects …… l Role permission (Role_Permission): RolePermissionID RoleID PermissionID RolePermissionNote 1 The role "System Administrator" has the permission "Add Monitoring" 2 The role "System Administrator" has the permission "Modify Monitoring" 3 The role "System Administrator" has the permission "Delete Monitoring" 4 The role "System Administrator" has the permission "View Monitoring" 5 02 0001 role "monitoring personnel" with permissions "increase monitoring" 6 02 0004 The role "Monitor" has the permission to "View Monitoring" …… It can be seen from the role permission relationship in the above example that role permissions can establish the corresponding relationship between roles and permissions. 1.6 Establish user permissions The core of the user permission system consists of the following three parts: creating permissions, assigning permissions and using permissions. The first step is for the Creator to create permissions (Permission), which will be divided when the Creator designs and implements the system. Use the stored procedure CreatePermissionInfo (@PermissionName, @PermissionNote) to create permission information and specify what permissions the system module has. The second step is for the system administrator (Administrator) to create users and roles, and specify the relationship between user roles (User-Role) and role permissions (Role-Permission).1) It has the functions of creating users, modifying users and deleting users: Administrator
l The stored procedure CreateUserInfo (@UserName, @UserPwd) creates user information; l The stored procedure ModifyUserInfo (@UserName, @UserPwd) modifies user information; l The stored procedure DeleteUserInfo (@UserID) deletes user information;2) Has the function of creating and deleting roles: Administrator
l The stored procedure CreateRoleInfo (@RoleName, @RoleNote) creates role information; l The stored procedure DeleteRoleInfo(@RoleID) deletes role information; 3) Administrator has the function of establishing relationships between users and roles, roles and permissions: l The stored procedure GrantUserRole (@UserID, @RoleID, @UserRoleNote) establishes the relationship between users and roles; l The stored procedure DeleteUserRole(@UserRoleID) deletes the association between users and roles; l The stored procedure GrantRolePermission(@RoleID,@PermissionID,@RolePermissionNote) establishes the relationship between roles and permissions; l The stored procedure DeleteRolePermission(@RolePermissionID) deletes the association between roles and permissions; The third step is that the user (User) uses the permissions assigned by Administrator to use each system module. Use the stored procedures GetUserRole (@UserID, @UserRoleID output), GetRolePermission (@RoleID, @Role- -PermissinID output) to obtain the user's permission to use the module. 1.7 User Authentication Implementation When the user passes the verification, the system automatically generates a 128-bit TicketID and saves it in the user database table, and establishes the stored process Login (@UserID, @UserPwd, @TicketID output) for user authentication. After passing the authentication, a TicketID is obtained. Otherwise TicketID is null. The flow chart is as follows: <span> </span> Figure 1 Login flow chart After getting the TicketID, the client passes the TicketID when calling the server method, determines the permissions of the user corresponding to the TicketID through the stored procedure JudgeTicketPermission (@TicketID, @PermissionID), and makes method calls based on its permissions. When the user exits the system, create a stored procedure Logout (@UserID) to exit the system. When a user exits the system abnormally, the user's TicketID is determined based on the last login time (LastSignTime), and a stored procedure ExceptionLogout (@UserID, @LastSignTime) is established to handle the user's abnormal exit. <span> </span> Figure 2 Logout flow chart WebService can use the SoapHeader to write the TicketID to pass the TicketID from the client to the server. .Net Remoting can use the CallContext class to pass TicketID from the client to the server. 2 Database Design 2.1 Database table <span> </span> Figure 3 Database relationship diagram 2.2 Database table description 2.2.1 User table (Static_User) <span> </span> Static_User<span> </span>
|
Static_User field name |
Detailed explanation |
Type |
Remarks |
|
UserID |
Route number |
varchar(20) |
PK |
|
UserName |
User Name |
varchar(20) |
<span> </span> <span> </span> |
|
UserPwd |
User password |
varchar(20) |
<span> </span> <span> </span> |
|
LastSignTime |
Last login time |
datatime |
<span> </span> <span> </span> |
|
SignState |
User login status mark |
int |
<span> </span> <span> </span> |
|
TickeID |
Verification ticket record number |
varchar(128) |
<span> </span> <span> </span> |
|
<span> </span> <span> </span> |
<span> </span> <span> </span> |
<span> </span> <span> </span> |
<span> </span> <span> </span> |
<span> </span>
<span> </span>
<span> </span>
2.2.2 Role table (Static_Role) <span> </span> Static_Role<span> </span>
|
Static_User字段名 |
详细解释 |
类型 |
备注 |
|
RoleID |
角色编号 |
varchar(20) |
PK |
|
RoleName |
角色名称 |
varchar(20) |
|
|
RoleNote |
角色信息描述 |
varchar(20) |
|
|
|
|
|
|
Static_User field name
Detailed explanation
Type
|
Static_User字段名 |
详细解释 |
类型 |
备注 |
|
UserRoleID |
用户角色编号 |
varchar(20) |
PK |
|
UserID |
用户编号 |
varchar(20) |
FK |
|
RoleID |
角色编号 |
varchar(20) |
FK |
|
UserRoleNote |
用户角色信息描述 |
varchar(20) |
|
|
|
|
|
|
Static_User field name |
Detailed explanation |
Type |
Remarks
|
||||||||||||||||||||||||
PermissionID
|
Number | varchar(20) | PK | ||||||||||||||||||||||||
| PermissionName | Permission name | varchar(20) | |||||||||||||||||||||||||
| PermissionNote | Holographic information description | varchar(20) | |||||||||||||||||||||||||
| Static_User field name | Detailed explanation | Type | Remarks |
| RolePermissionID | Role permission number | varchar(20) | PK |
| RoleID | Character number | varchar(20) | FK |
| PermissionID | Permission number | varchar(20) | FK |
| RolePermissionNote | Role permission information description | varchar(20) | |
<span> </span>
3 .net technology overview 3.1 WebService SoapHeader Perform custom authentication and authorization against SQL databases. In this case, you should pass custom credentials (such as username and password) to the service and let the service handle authentication and authorization itself. An easy way to pass additional information along with the request to an XML Web service is through SOAP headers. To do this, define a class derived from SOAPHeader in the service and declare the service's public fields to that type. This is exposed in the service's public contract and is available to clients when creating a proxy from WebServiceUtil.exe, as shown in the following example:<span> </span>
<span> </span>
<span> </span><span> </span>
<span> </span>
using System.Web.Services;
using System.Web.Services.Protocols;
<span> </span>
// AuthHeader class extends from SoapHeader
public class AuthHeader : SoapHeader {
public string Username;
public string Password;
}
<span> </span>
public class HeaderService : WebService {
public AuthHeader sHeader;
...
} Each WebMethod in a service can define an associated set of headers using the SoapHeader custom property. By default, the header is required, but optional headers can be defined. The SoapHeader property specifies the name of a public field or property of the Client or Server class (called the Headers property in this title). The WebService sets the value of the Headers property before calling the method for input headers; the WebService retrieves the value when the method returns for output headers.[WebMethod(Description="This method requires a custom soap header set by the caller")]
[SoapHeader("sHeader")]
public string SecureMethod() {
<span> </span>
if (sHeader == null)
return "ERROR: Please supply credentials";
else
return "USER: " sHeader.Username;
<span> </span>
}
The client then sets the header directly on the proxy class before calling a method that requires the header, as shown in the following example:HeaderService h = new HeaderService();
AuthHeader myHeader = new AuthHeader();
myHeader.Username = "username";
myHeader.Password = "password";
h.AuthHeader = myHeader;
String result = h.SecureMethod();
3.2 Security authentication method of .Net Remoting CallContext provides a set of properties that are passed along with the execution code path. CallContext is a dedicated collection object similar to the thread local storage of method calls and provides a data slot that is unique to each logical execution thread. Data slots are not shared between calling contexts on other logical threads. Objects can be added to the CallContext as it propagates back and forth along the execution code path and is inspected by various objects in that path. When a remote method call is made to an object in another AppDomain, the CallContext class generates a LogicalCallContext instance that is propagated with the remote call. Only objects that expose the ILogicalThreadAffinative interface and are stored in the CallContext are propagated outside the AppDomain in the LogicalCallContext. Objects that do not support this interface are not transferred with remote method calls in LogicalCallContext instances. The CallContext.SetData method stores the given object and associates it with the specified name, and the CallContext.GetData method retrieves the object with the specified name from the CallContext. The following code example shows how to use the SetData method to transfer a body and identity object to a remote location for identification.public class ClientClass {
public static void Main() {
GenericIdentity ident = new GenericIdentity("Bob");
GenericPrincipal prpal = new GenericPrincipal(ident,
LogicalCallContextData data =
new LogicalCallContextData(prpal);
//Enter data into the CallContext
CallContext.SetData("test data", data);
Console.WriteLine(data.numOfAccesses); ChannelServices.RegisterChannel(new TcpChannel()); RemotingConfiguration.RegisterActivatedClientType( typeof(HelloServiceClass), "tcp://localhost:8082"); HelloServiceClass service = new HelloServiceClass(); if(service == null) { Console.WriteLine("Could not locate server."); return; } // call remote method Console.WriteLine(); Console.WriteLine("Calling remote object"); Console.WriteLine(service.HelloMethod("Caveman")); Console.WriteLine(service.HelloMethod("Spaceman")); Console.WriteLine(service.HelloMethod("Bob")); Console.WriteLine("Finished remote object call"); Console.WriteLine(); //Extract the returned data from the call context LogicalCallContextData returnedData = (LogicalCallContextData)CallContext.GetData("test data"); Console.WriteLine(data.numOfAccesses); Console.WriteLine(returnedData.numOfAccesses); } } using System; using System.Text; using System.Runtime.Remoting.Messaging; using System.Security.Principal; public class HelloServiceClass : MarshalByRefObject { static int n_instances; int instanceNum; public HelloServiceClass() { n_instances ; instanceNum = n_instances; Console.WriteLine(this.GetType().Name " has been created. Instance # = {0}", instanceNum); } ~HelloServiceClass() { Console.WriteLine("Destroyed instance {0} of HelloServiceClass.", instanceNum); } public String HelloMethod(String name) { //Extract the call context data LogicalCallContextData data = (LogicalCallContextData)CallContext.GetData("test data"); IPrincipal myPrincipal = data.Principal; //Check the user identity if(myPrincipal.Identity.Name == "Bob") { Console.WriteLine("nHello {0}, you are identified!", myPrincipal.Identity.Name); Console.WriteLine(data.numOfAccesses); } else { Console.WriteLine("Go away! You are not identified!"); return String.Empty; } <span> </span> // calculate and return result to client return "Hi there " name "."; } } 1) class UserInfoMng() User information management class, which includes methods: l CreateUserInfo(string UserName string UserPwd) Create user information and call the stored procedure CreateUserInfo(@UserName,@UserPwd) l ModifyUserInfo(string UserName string UserPwd) Modify user information and call the stored procedure ModifyUserInfo(@UserName,@UserPwd) l DeleteUserInfo() Delete user information and call the stored procedure DeleteUserInfo (@UserID) 2) class UserAuthentication() User authentication class, used to set user roles and permissions, including methods: l CreatePermissionInfo(string PermissionName string Permissi- -onNote) Create permission information and call the stored procedure CreatePermissionInfo (@PermissionName,@PermissionNote) l CreateRoleInfo(string RoleName string RoleNote) Create role information and call the stored procedure CreateRoleInfo(@RoleName,@RoleNote) l DeleteRoleInfo() Delete role information and call the stored procedure DeleteRoleInfo (@RoleID) l GrantUserRole(string UserID string RoleID string UserRoleNote) Grants the user role and calls the stored procedure GrantUserRole(@UserID,@RoleID, @UserRoleNote) l DeleteUserRole() Delete the user role and call the stored procedure DeleteUserRole (@UserRoleID) l GrantRolePermission(string RoleID string PermissionID string RolePermissionNote) Grants role permissions and calls the stored procedure GrantRolePermission(@RoleID,@PermissionID,@RolePermissionNote) l DeleteRolePermission() Delete the granted role permissions and call the stored procedure DeleteRolePermission(@RolePermissionID) 1) Permission settings class PermissionInfoMng() User permission information management class, including methods: l CreatePermissionInfo() Create permission information 2) User Management class UserInfoMng() User information management class, including methods: l CreateUserInfo() Create user information l ModifyUserInfo() Modify user information l DeleteUserInfo() Delete user information 3) User authorization management class RoleInfoMng() role information management class, including methods: l CreateRoleInfo() Create role information l DeleteRoleInfo() Delete role information class UserRoleMng() User role management class, including methods: l GrantUserRole() Grants user role l DeleteUserRole() Delete user role class RolePermissionMng() Role permission management class, including methods l GrantRolePermission() Grants role permissions l DeleteRolePermission() Delete role permissions 4) User authentication management class Authentication() User authentication class, including methods: l Login(string UserName string UserPwd) User login authentication. After user authentication, a TicketID is assigned to the user, otherwise the TicketID is null l Logout() The user logs out normally

Hot AI Tools

Undresser.AI Undress
AI-powered app for creating realistic nude photos

AI Clothes Remover
Online AI tool for removing clothes from photos.

Undress AI Tool
Undress images for free

Clothoff.io
AI clothes remover

Video Face Swap
Swap faces in any video effortlessly with our completely free AI face swap tool!

Hot Article
Hot Tools

Notepad++7.3.1
Easy-to-use and free code editor

SublimeText3 Chinese version
Chinese version, very easy to use

Zend Studio 13.0.1
Powerful PHP integrated development environment

Dreamweaver CS6
Visual web development tools

SublimeText3 Mac version
God-level code editing software (SublimeText3)
Hot Topics
 1386
1386
 52
52

 Enable root permissions with one click (quickly obtain root permissions)
Jun 02, 2024 pm 05:32 PM
Enable root permissions with one click (quickly obtain root permissions)
Jun 02, 2024 pm 05:32 PM
It allows users to perform more in-depth operations and customization of the system. Root permission is an administrator permission in the Android system. Obtaining root privileges usually requires a series of tedious steps, which may not be very friendly to ordinary users, however. By enabling root permissions with one click, this article will introduce a simple and effective method to help users easily obtain system permissions. Understand the importance and risks of root permissions and have greater freedom. Root permissions allow users to fully control the mobile phone system. Strengthen security controls, customize themes, and users can delete pre-installed applications. For example, accidentally deleting system files causing system crashes, excessive use of root privileges, and inadvertent installation of malware are also risky, however. Before using root privileges
 How many characters are there in Blazlan Chaos Effect?
Mar 21, 2024 pm 10:56 PM
How many characters are there in Blazlan Chaos Effect?
Mar 21, 2024 pm 10:56 PM
Blue Wings Chaos Effect features a diverse cast of characters, each with a unique identity and backstory. For this reason, the editor has specially compiled an introduction to the characters of BlazBlue Chaos Effect for all players. How many characters are there in BlazBlue Chaos Effect? Answer: There are 7 characters. 1. [God of Death] Ragnar Chad Bradedge (nicknamed RG, Nissan), his brother and sister were raised by church nuns. One day, one of the six heroes of the villain broke in, killed the nuns, and burned them down. Church, took his sister away, leaving behind his younger brother "The Weapon of Things" Ice Sword Snow Girl. 2. Noel Vermillion The adopted daughter of the Vermillion family looks almost the same as Ragnar's sister. After graduation, he joined the governing body as secretary to Ragnar's younger brother. 3. λ-11 is collectively known as Lambda and Eleventh Sister. After the original developer gave up, Kokonoe rescued and
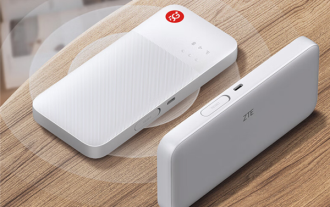 ZTE 5G portable Wi-Fi U50S goes on sale for NT$899 at first launch: top speed 500Mbps
Apr 26, 2024 pm 03:46 PM
ZTE 5G portable Wi-Fi U50S goes on sale for NT$899 at first launch: top speed 500Mbps
Apr 26, 2024 pm 03:46 PM
According to news on April 26, ZTE’s 5G portable Wi-Fi U50S is now officially on sale, starting at 899 yuan. In terms of appearance design, ZTE U50S Portable Wi-Fi is simple and stylish, easy to hold and pack. Its size is 159/73/18mm and is easy to carry, allowing you to enjoy 5G high-speed network anytime and anywhere, achieving an unimpeded mobile office and entertainment experience. ZTE 5G portable Wi-Fi U50S supports the advanced Wi-Fi 6 protocol with a peak rate of up to 1800Mbps. It relies on the Snapdragon X55 high-performance 5G platform to provide users with an extremely fast network experience. Not only does it support the 5G dual-mode SA+NSA network environment and Sub-6GHz frequency band, the measured network speed can even reach an astonishing 500Mbps, which is easily satisfactory.
 Retro trend! HMD and Heineken jointly launch flip phone: transparent shell design
Apr 17, 2024 pm 06:50 PM
Retro trend! HMD and Heineken jointly launch flip phone: transparent shell design
Apr 17, 2024 pm 06:50 PM
According to news on April 17, HMD teamed up with the well-known beer brand Heineken and the creative company Bodega to launch a unique flip phone - The Boring Phone. This phone is not only full of innovation in design, but also returns to nature in terms of functionality, aiming to lead people back to real interpersonal interactions and enjoy the pure time of drinking with friends. Boring mobile phone adopts a unique transparent flip design, showing a simple yet elegant aesthetic. It is equipped with a 2.8-inch QVGA display inside and a 1.77-inch display outside, providing users with a basic visual interaction experience. In terms of photography, although it is only equipped with a 30-megapixel camera, it is enough to handle simple daily tasks.
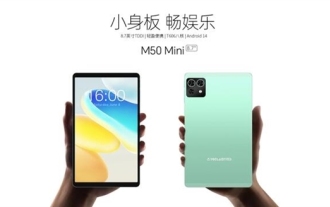 Teclast M50 Mini tablet is here: 8.7-inch IPS screen, 5000mAh battery
Apr 04, 2024 am 08:31 AM
Teclast M50 Mini tablet is here: 8.7-inch IPS screen, 5000mAh battery
Apr 04, 2024 am 08:31 AM
According to news on April 3, Taipower’s upcoming M50 Mini tablet computer is a device with rich functions and powerful performance. This new 8-inch small tablet is equipped with an 8.7-inch IPS screen, providing users with an excellent visual experience. Its metal body design is not only beautiful but also enhances the durability of the device. In terms of performance, the M50Mini is equipped with the Unisoc T606 eight-core processor, which has two A75 cores and six A55 cores, ensuring a smooth and efficient running experience. At the same time, the tablet is also equipped with a 6GB+128GB storage solution and supports 8GB memory expansion, which meets users’ needs for storage and multi-tasking. In terms of battery life, M50Mini is equipped with a 5000mAh battery and supports Ty
 Honor Magic V3 debuts AI defocus eye protection technology: effectively alleviates the development of myopia
Jul 18, 2024 am 09:27 AM
Honor Magic V3 debuts AI defocus eye protection technology: effectively alleviates the development of myopia
Jul 18, 2024 am 09:27 AM
According to news on July 12, the Honor Magic V3 series was officially released today, equipped with the new Honor Vision Soothing Oasis eye protection screen. While the screen itself has high specifications and high quality, it also pioneered the introduction of AI active eye protection technology. It is reported that the traditional way to alleviate myopia is "myopia glasses". The power of myopia glasses is evenly distributed to ensure that the central area of sight is imaged on the retina, but the peripheral area is imaged behind the retina. The retina senses that the image is behind, promoting the eye axis direction. grow later, thereby deepening the degree. At present, one of the main ways to alleviate the development of myopia is the "defocus lens". The central area has a normal power, and the peripheral area is adjusted through optical design partitions, so that the image in the peripheral area falls in front of the retina.
 How to design the end page of ppt to be attractive enough
Mar 20, 2024 pm 12:30 PM
How to design the end page of ppt to be attractive enough
Mar 20, 2024 pm 12:30 PM
At work, ppt is an office software often used by professionals. A complete ppt must have a good ending page. Different professional requirements give different ppt production characteristics. Regarding the production of the end page, how can we design it more attractively? Let’s take a look at how to design the end page of ppt! The design of the ppt end page can be adjusted in terms of text and animation, and you can choose a simple or dazzling style according to your needs. Next, we will focus on how to use innovative expression methods to create a ppt end page that meets the requirements. So let’s start today’s tutorial. 1. For the production of the end page, any text in the picture can be used. The important thing about the end page is that it means that my presentation is over. 2. In addition to these words,
 Discuz Forum Permission Management: Read Permission Setting Guide
Mar 10, 2024 pm 05:33 PM
Discuz Forum Permission Management: Read Permission Setting Guide
Mar 10, 2024 pm 05:33 PM
Discuz forum permission management: Read the permission setting guide In Discuz forum management, permission setting is a crucial part. Among them, the setting of reading permissions is particularly important, as it determines the scope of content that different users can see in the forum. This article will introduce in detail the reading permission settings of the Discuz forum and how to flexibly configure it for different needs. 1. Basic concepts of reading permissions In the Discuz forum, reading permissions mainly include the following concepts that need to be understood: Default reading permissions: Default after new user registration
