
 Backend Development
PHP Tutorial
There were a lot of pitfalls when installing laravel5.1 under win8.1, but it was not easy to finally figure it out. , win8.1laravel5.1_PHP tutorial
Backend Development
PHP Tutorial
There were a lot of pitfalls when installing laravel5.1 under win8.1, but it was not easy to finally figure it out. , win8.1laravel5.1_PHP tutorial
There were a lot of pitfalls when installing laravel5.1 under win8.1, but it was not easy to finally figure it out. , win8.1laravel5.1_PHP tutorial

I encountered a lot of pitfalls when installing laravel5.1 under win8.1, but I finally figured it out. It was not easy. , win8.1laravel5.1
After installing php, there are several ways to install laravel. 1. Install composer first, then use composer to download resources and install them. The command is as follows:composer create-project laravel/laravel your-project-name --prefer-dist
2. First use composer to globally download to the main directory of composer, then enter the superior directory of the website project and run laravel new project-name to install. The commands are:
composer global require <span>"</span><span>laravel/installer=~1.1</span><span>"</span>
laravel new project-name
3. Download the laravel installer installation package and extract it to the specified directory, or design your own composer.json file and put it in the specified directory, and then enter the directory to run the installation:
composer <span>install</span>
laravel new blog
Note that in this place, it will usually prompt that the laravel command cannot be found. The official document mentions that ~/.composer/vendor/bin should be placed in the PATH variable of the system. This is a pitfall. There are many People don't know where this is, but it is actually in the composer's home directory. The composer's home directory can be viewed through composer config. For win8 systems, this directory is in C:UsersMyUserNameAppDataRoamingComposevendorbin by default.
After typing the above command, in many cases it will be very slow, and the prompt line will always display a short message such as application crafting.... Please be patient and wait. Generally, the installation can be successful.
The fourth method does not require installation, but you have to run the following code in the project root directory to generate a KEY to access the system homepage.php artisan generate:key
3. For all the above methods, after the installation is completed, if your system is placed in the htdocs subdirectory blog, it can be accessed through http://localhost/blog/public.

php -S localhost:<span>8888</span> -t public
Then you can access the homepage by entering http://localhost:8888 in your browser. This purpose can also be achieved through the following command:
php artisan serve
This command sets the port to 8000 by default and automatically sets the website root directory to public, so you can access the homepage through http://localhost:8000.
Some people think that it is inconvenient to always bring a port. It would be great if it could be changed to a domain name. There is no problem. The method is as follows. First, add a virtual host through apache (UPUPW is recommended). Note Be sure to set the public directory to the directory of the website, and set a virtual domain name (if it is blog.dev) to point to it, and then find the system hosts file. For win8.1, the file is located under: C: windowssystem32driversetc, and add it inside One item is as follows:
<span>127.0</span>.<span>0.1</span> blog.dev
If nothing else goes wrong, you can see laravel’s welcome page by visiting http://blog.dev/!
However, many people find errors after reaching this step. There are two situations, one is a blank page, and the other is an error message. At this time, you will find that other PHP codes in the public directory can be accessed, such as http://blog.dev/test.php, but the laravel welcome page cannot be displayed. There is really a pit here. There is a blank space, which means that the server's error information is not displayed, but it was previously accessible through http://localhost/blog/public! But this is indeed the case after I tried it. Change the
in php.inidisplay_errors = Off
changed to:
display_errors = On
In this way, you can see that the blank page has turned into an error message page, and you will see the following error message: Warning: require(): open_basedir restriction in effect.
Enter the http.conf file or http.vhosts.conf file to modify the value of open_basedir. Many LAMP components will set open_basedir to match the website by default
The root directory is the same, but laravel is a bit abnormal. It must be set to the upper-level directory, which is the blog directory here. After the settings are completed, restart apache and the error is finally eliminated.
At this point, the installation of laravel5 has been completed and the use of local virtual host has been implemented.
补充说说composer的几个坑: composer安装时,有两个方法,第一种是下载composer.setup.exe点击安装,此处不表,且看第二种方法,简单介绍如下: 先下载composer.phar到某个目录,运行如下代码:
php -r <span>"</span><span>readfile('https://getcomposer.org/installer');</span><span>"</span> | php然后在该目录运行:
<span>echo</span> @php <span>"</span><span>%~dp0composer.phar</span><span>"</span> %*>composer.bat
生成一个composer的批处理文件,可以在任意地方直接通过composer这个命令来代替php composer.phar.
别忘了将此目录的路径写入系统的path变量中. 注意: 1.如果是直接点击安装composer.setup.exe文件,那么一般会在C:\ProgramData\ComposerSetup\bin目录下也会生成一个laravel.bat 这就会和installer造成冲突,最好的办法是把这个文件改个名字,比如laravel_start.bat,然后复制到wwwroot目录下,这样就不用每次CMD都从C盘开始了。 2.composer.phar将会被安装到默认的用户目录下,这本来就是composer的home目录。 3.不管怎么安装composer,其home目录在windows下都是用户的一个特定子目录,具体可以通过如下命令查看:composer config -l -g
composer安装之后,由于packagist.org无法访问导致,无法安装laravel,需要将服务器地址修改为国内的镜像。
运行如下代码,可以全局修改您的packagist目标服务器:composer config -g repositories.packagist composer http:<span>//</span><span>packagist.phpcomposer.com </span>
或者针对某次安装,您可以在你的具体的composer.json文件中加入如下代码:
<span>"</span><span>repositories</span><span>"</span>: [ <br /> {<span>"</span><span>type</span><span>"</span>: <span>"</span><span>composer</span><span>"</span>, <span>"</span><span>url</span><span>"</span>: <span>"</span><span>http://packagist.phpcomposer.com</span><span>"</span>}, <br /> {<span>"</span><span>packagist</span><span>"</span>: <span>false</span>} <br /> ]

Hot AI Tools

Undresser.AI Undress
AI-powered app for creating realistic nude photos

AI Clothes Remover
Online AI tool for removing clothes from photos.

Undress AI Tool
Undress images for free

Clothoff.io
AI clothes remover

Video Face Swap
Swap faces in any video effortlessly with our completely free AI face swap tool!

Hot Article
Hot Tools

Notepad++7.3.1
Easy-to-use and free code editor

SublimeText3 Chinese version
Chinese version, very easy to use

Zend Studio 13.0.1
Powerful PHP integrated development environment

Dreamweaver CS6
Visual web development tools

SublimeText3 Mac version
God-level code editing software (SublimeText3)
Hot Topics
 1386
1386
 52
52

 Solution to the problem that Win11 system cannot install Chinese language pack
Mar 09, 2024 am 09:48 AM
Solution to the problem that Win11 system cannot install Chinese language pack
Mar 09, 2024 am 09:48 AM
Solution to the problem that Win11 system cannot install Chinese language pack With the launch of Windows 11 system, many users began to upgrade their operating system to experience new functions and interfaces. However, some users found that they were unable to install the Chinese language pack after upgrading, which troubled their experience. In this article, we will discuss the reasons why Win11 system cannot install the Chinese language pack and provide some solutions to help users solve this problem. Cause Analysis First, let us analyze the inability of Win11 system to
 Unable to install guest additions in VirtualBox
Mar 10, 2024 am 09:34 AM
Unable to install guest additions in VirtualBox
Mar 10, 2024 am 09:34 AM
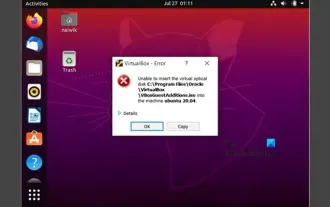
You may not be able to install guest additions to a virtual machine in OracleVirtualBox. When we click on Devices>InstallGuestAdditionsCDImage, it just throws an error as shown below: VirtualBox - Error: Unable to insert virtual disc C: Programming FilesOracleVirtualBoxVBoxGuestAdditions.iso into ubuntu machine In this post we will understand what happens when you What to do when you can't install guest additions in VirtualBox. Unable to install guest additions in VirtualBox If you can't install it in Virtua
 What should I do if Baidu Netdisk is downloaded successfully but cannot be installed?
Mar 13, 2024 pm 10:22 PM
What should I do if Baidu Netdisk is downloaded successfully but cannot be installed?
Mar 13, 2024 pm 10:22 PM
If you have successfully downloaded the installation file of Baidu Netdisk, but cannot install it normally, it may be that there is an error in the integrity of the software file or there is a problem with the residual files and registry entries. Let this site take care of it for users. Let’s introduce the analysis of the problem that Baidu Netdisk is successfully downloaded but cannot be installed. Analysis of the problem that Baidu Netdisk downloaded successfully but could not be installed 1. Check the integrity of the installation file: Make sure that the downloaded installation file is complete and not damaged. You can download it again, or try to download the installation file from another trusted source. 2. Turn off anti-virus software and firewall: Some anti-virus software or firewall programs may prevent the installation program from running properly. Try disabling or exiting the anti-virus software and firewall, then re-run the installation
 How to install Android apps on Linux?
Mar 19, 2024 am 11:15 AM
How to install Android apps on Linux?
Mar 19, 2024 am 11:15 AM
Installing Android applications on Linux has always been a concern for many users. Especially for Linux users who like to use Android applications, it is very important to master how to install Android applications on Linux systems. Although running Android applications directly on Linux is not as simple as on the Android platform, by using emulators or third-party tools, we can still happily enjoy Android applications on Linux. The following will introduce how to install Android applications on Linux systems.
 How to install creo-creo installation tutorial
Mar 04, 2024 pm 10:30 PM
How to install creo-creo installation tutorial
Mar 04, 2024 pm 10:30 PM
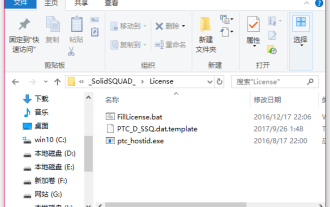
Many novice friends still don’t know how to install creo, so the editor below brings relevant tutorials on creo installation. Friends in need should take a look at it. I hope it can help you. 1. Open the downloaded installation package and find the License folder, as shown in the figure below: 2. Then copy it to the directory on the C drive, as shown in the figure below: 3. Double-click to enter and see if there is a license file, as shown below As shown in the picture: 4. Then copy the license file to this file, as shown in the following picture: 5. In the PROGRAMFILES file of the C drive, create a new PLC folder, as shown in the following picture: 6. Copy the license file as well Click in, as shown in the figure below: 7. Double-click the installation file of the main program. To install, check the box to install new software.
 How to install Podman on Ubuntu 24.04
Mar 22, 2024 am 11:26 AM
How to install Podman on Ubuntu 24.04
Mar 22, 2024 am 11:26 AM
If you have used Docker, you must understand daemons, containers, and their functions. A daemon is a service that runs in the background when a container is already in use in any system. Podman is a free management tool for managing and creating containers without relying on any daemon such as Docker. Therefore, it has advantages in managing containers without the need for long-term backend services. Additionally, Podman does not require root-level permissions to be used. This guide discusses in detail how to install Podman on Ubuntu24. To update the system, we first need to update the system and open the Terminal shell of Ubuntu24. During both installation and upgrade processes, we need to use the command line. a simple
 How to Install and Run the Ubuntu Notes App on Ubuntu 24.04
Mar 22, 2024 pm 04:40 PM
How to Install and Run the Ubuntu Notes App on Ubuntu 24.04
Mar 22, 2024 pm 04:40 PM
While studying in high school, some students take very clear and accurate notes, taking more notes than others in the same class. For some, note-taking is a hobby, while for others, it is a necessity when they easily forget small information about anything important. Microsoft's NTFS application is particularly useful for students who wish to save important notes beyond regular lectures. In this article, we will describe the installation of Ubuntu applications on Ubuntu24. Updating the Ubuntu System Before installing the Ubuntu installer, on Ubuntu24 we need to ensure that the newly configured system has been updated. We can use the most famous "a" in Ubuntu system
 Detailed steps to install Go language on Win7 computer
Mar 27, 2024 pm 02:00 PM
Detailed steps to install Go language on Win7 computer
Mar 27, 2024 pm 02:00 PM
Detailed steps to install Go language on Win7 computer Go (also known as Golang) is an open source programming language developed by Google. It is simple, efficient and has excellent concurrency performance. It is suitable for the development of cloud services, network applications and back-end systems. . Installing the Go language on a Win7 computer allows you to quickly get started with the language and start writing Go programs. The following will introduce in detail the steps to install the Go language on a Win7 computer, and attach specific code examples. Step 1: Download the Go language installation package and visit the Go official website
