
 Backend Development
PHP Tutorial
How to integrate apache and PHP together, apachephp integration_PHP tutorial
Backend Development
PHP Tutorial
How to integrate apache and PHP together, apachephp integration_PHP tutorial
How to integrate apache and PHP together, apachephp integration_PHP tutorial

How to integrate apache and PHP, apachephp integration
Generally after installing PHP, apache cannot process php files. To integrate php with the apache server, you must Modify the configuration file. Here I will teach you how to configure the php installation file.
Method/Steps
First add the following code to httpd.conf in the conf directory of apache:
LoadModulephp5_module~php installation path/php5apache2_2.dll
PHPIniDir "~php module installation path"
AddTypeapplication/x-httpd-php.php.phtml
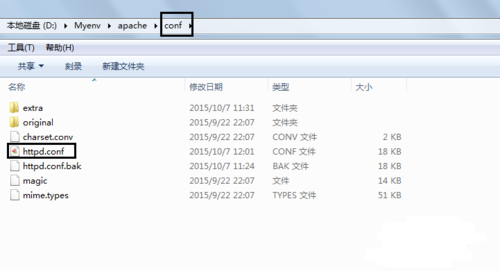
Here I will briefly explain the above code. The whole code means to let apache load the php processing module (LoadModulephp5_module). The "~php installation path" in the code changes according to the location where you install php. For example I installed it in the D drive, so my path is: D:Myenvphp-5.3.5 (note that the diagonal bar here is a reverse diagonal bar "", which needs to be changed to a forward diagonal bar "/" in the code), the code The place to join is to add it under a lot of LoadModules in httpd.conf, as shown in the figure below:

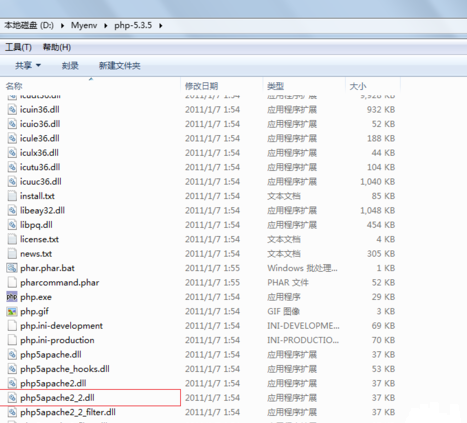
Then you need to check whether there is this file "php5apache2_2.dll" in the directory you just added. In theory, it should be there. Just in case, you must check it. This file is very important and serves as a bridge. .
Next step we need to specify the PHP initialization directory, that is, the code "PHPIniDir '~php module installation path'". This code is used to specify the ini file of php, which will configure php. In layman's terms, you need Tell apache where to put your php. In the same way, we replace the "~php module installation path" in the code with the installation path just now

Then I will explain to you the meaning of the last line of code. The sentence "AddTypeapplication/x-httpd-php.php.phtml" means to add the application type. To explain in vernacular, it means that when *.php appears file, php will start processing the file. You can add comments to the configuration file to facilitate your own understanding, as shown below:

So, there are two places where we need to change the path. Mark the part in red in the picture below. Just change the red part to the path where you actually installed PHP (note the forward slope)

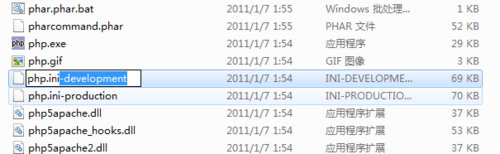
In addition, the php file settings are also very important. Find the php.ini-development file in your php installation directory and change its suffix name to php.ini. The reason for changing this is: our php settings need to be in php.ini modification. As shown below: Just delete the dark blue part of the name.
After the modification, the file will look like this, as shown below:

Now we need to specify the corresponding function module in php.ini. The specific method is to change the following code "
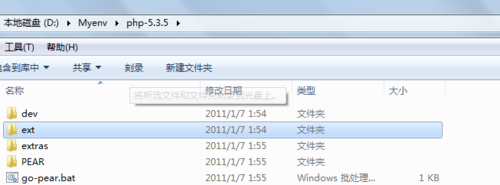
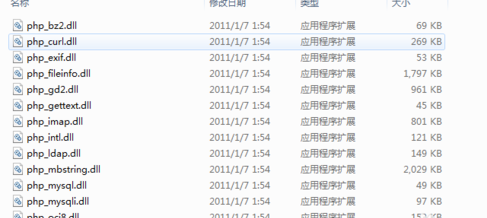
extension_dir="php extension library path" is added to the php.ini file you just modified. The purpose of this is to be able to use various powerful libraries of php, and the "php extension library path" has an "ext" folder under the folder where you installed php. Open this folder and it will contain php. Extension library. As shown below:
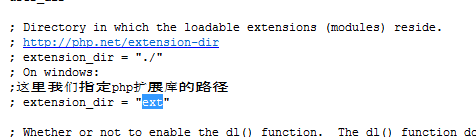
Now let's add the extension library path. Use your notepad to open the "php.ini" file and find the "extension_dir" location. You can use search to quickly locate the location. As shown below:

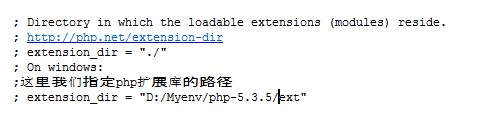
Then replace the location "extension_dir='ext'" with the path of your php library. Taking mine as an example, my library path is: D:/Myenv/php-5.3.5/ext (also note that it is correct Slant bar), as shown below: Replace the blue part with your library path.
The final replacement result is as shown below:
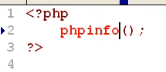
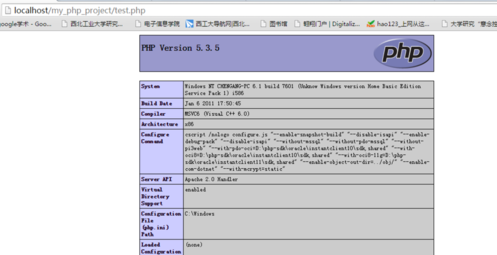
Now our integration has been completed and we can test whether it is successful. Test method: Call a simple php function, the function code is as follows:
<?php phpinfo(); ?>
Then restart your apache to see if it can be used.
If you integrate successfully, you will be able to see the shocking effect below.
How to integrate apache and PHP? After reading the above, everyone’s ideas will be clearer. If you are satisfied with this article, please give it a like

Hot AI Tools

Undresser.AI Undress
AI-powered app for creating realistic nude photos

AI Clothes Remover
Online AI tool for removing clothes from photos.

Undress AI Tool
Undress images for free

Clothoff.io
AI clothes remover

AI Hentai Generator
Generate AI Hentai for free.

Hot Article
Hot Tools

Notepad++7.3.1
Easy-to-use and free code editor

SublimeText3 Chinese version
Chinese version, very easy to use

Zend Studio 13.0.1
Powerful PHP integrated development environment

Dreamweaver CS6
Visual web development tools

SublimeText3 Mac version
God-level code editing software (SublimeText3)
Hot Topics


 CakePHP Project Configuration
Sep 10, 2024 pm 05:25 PM
CakePHP Project Configuration
Sep 10, 2024 pm 05:25 PM
In this chapter, we will understand the Environment Variables, General Configuration, Database Configuration and Email Configuration in CakePHP.
 PHP 8.4 Installation and Upgrade guide for Ubuntu and Debian
Dec 24, 2024 pm 04:42 PM
PHP 8.4 Installation and Upgrade guide for Ubuntu and Debian
Dec 24, 2024 pm 04:42 PM
PHP 8.4 brings several new features, security improvements, and performance improvements with healthy amounts of feature deprecations and removals. This guide explains how to install PHP 8.4 or upgrade to PHP 8.4 on Ubuntu, Debian, or their derivati
 CakePHP Date and Time
Sep 10, 2024 pm 05:27 PM
CakePHP Date and Time
Sep 10, 2024 pm 05:27 PM
To work with date and time in cakephp4, we are going to make use of the available FrozenTime class.
 CakePHP File upload
Sep 10, 2024 pm 05:27 PM
CakePHP File upload
Sep 10, 2024 pm 05:27 PM
To work on file upload we are going to use the form helper. Here, is an example for file upload.
 CakePHP Routing
Sep 10, 2024 pm 05:25 PM
CakePHP Routing
Sep 10, 2024 pm 05:25 PM
In this chapter, we are going to learn the following topics related to routing ?
 Discuss CakePHP
Sep 10, 2024 pm 05:28 PM
Discuss CakePHP
Sep 10, 2024 pm 05:28 PM
CakePHP is an open-source framework for PHP. It is intended to make developing, deploying and maintaining applications much easier. CakePHP is based on a MVC-like architecture that is both powerful and easy to grasp. Models, Views, and Controllers gu
 How To Set Up Visual Studio Code (VS Code) for PHP Development
Dec 20, 2024 am 11:31 AM
How To Set Up Visual Studio Code (VS Code) for PHP Development
Dec 20, 2024 am 11:31 AM
Visual Studio Code, also known as VS Code, is a free source code editor — or integrated development environment (IDE) — available for all major operating systems. With a large collection of extensions for many programming languages, VS Code can be c
 CakePHP Creating Validators
Sep 10, 2024 pm 05:26 PM
CakePHP Creating Validators
Sep 10, 2024 pm 05:26 PM
Validator can be created by adding the following two lines in the controller.
