
 Backend Development
PHP Tutorial
A brief introduction to building apache php mysql development environment under win7, win7apache_PHP tutorial
Backend Development
PHP Tutorial
A brief introduction to building apache php mysql development environment under win7, win7apache_PHP tutorial
A brief introduction to building apache php mysql development environment under win7, win7apache_PHP tutorial

A brief introduction to building apache php mysql development environment under win7, win7apache
Environment directory: E:dev
1. Apache
Download address: http://www.apachelounge.com/download/
We download the VC11 runtime library
1. Installation instructions:
Run the apache installation program. The method is very simple. After popping up the installation interface, keep "next"
An interface will then appear, requiring you to fill in 3 fields: Network Domain, Server Name, and Administrator's Email Address. Just fill in whatever you want without affecting the content.
There are 2 options below. The default selection is port 80, and the second one is port 8080. You can choose it according to your personal needs. Generally, the default port is 80.
Let’s continue the installation, select Custom (custom installation)-“next”
There is a component with a red Installed on local hard drive". -"next"
Then select "change" in the lower right corner to change the installation path and install it into the directory just created "D:WAMPApache"-"next"
After the installation is completed, there will be an additional icon in the lower right corner of the computer. Double-click to open it, select start or restart, and it will run normally. The installation is now complete.
2. Modify configuration:
Open the installation record and download the D:WAMPApacheconfhttpd.conf file (it is not recommended to use Notepad when modifying the configuration file, as it may affect it. It is recommended to use Notepad or other editing software to open and modify)
Ctrl F after opening to find the content you want to modify
Add under #LoadModule vhost_alias_module modules/mod_vhost_alias.so:
LoadModule php5_module “D:/WAMP/PHP/php5apache2_2.dll”
PHPIniDir “D:/WAMP/PHP”
AddType application/x-httpd-php .php
AddType application/x-httpd-php .htm
AddType application/x-httpd-php .html

DocumentRoot “E:/WAMP/Apache/htdocs”
Modify to (the path here is the same as the wwwroot directory in IIS, used to store web pages, customized or not modified by default): DocumentRoot "D:/WAMP/www"
Modify to (customized or default without modification):
DirectoryIndex index.html
Modify to: DirectoryIndex index.php default.php index.html index.htm default.html default.htm
2. PHP
Download address: http://windows.php.net/download
The latest version is PHP 5.6.11
1. Architecture X86 and X64
2. Safety mode Thread Safe (thread safety) Non Thread Safe (non-thread safety)
Select Thread Safe for apache and Non Thread Safe for IIS
3. Runtime library, VC11
I am Win7 64-bit, so I choose VC11 x64 Thread Safe (2015-Jul-10 06:25:47)
1. Installation instructions
Since we downloaded the ZIP package, we only need to extract the file to the "D:WAMPPHP" directory
2. Modify configuration
Modify the D:WAMPPHPphp.ini-development file to php.ini
Open php.ini
; extension_dir = “ext”
Modify to: extension_dir = “E:WAMPPHPext”
Remove the ";" in front of these files on line 947
extension=php_curl.dll
extension=php_gd2.dll
extension=php_mbstring.dll
extension=php_mysql.dll
extension=php_mysqli.dll
extension=php_pdo_mysql.dll
extension=php_xmlrpc.dll
; date.timezone =
Modify it to (many websites do not mention that it needs to be modified here, and the default is US time. If not modified, an error will be reported): date.timezone = Asia/Shanghai
3. MySQL
Installation method:
1. .msi MSI Installer http://dev.mysql.com/downloads/installer/
2. Unzip and install http://dev.mysql.com/downloads/mysql/
1. Installation instructions:
Open the installer and click "next"
Select custom, the component is the default selection, we will not make any changes - "next"
The path is set to "D:WAMPMysql"-"next"
After installation, click "finish"
A configuration wizard will appear - "next"
Select "Detailed Configuration" - "next"
There are 3 options here:
Developer Machine will use as little memory as possible;
Server Machine, will use a medium amount of memory;
Dedicated MySQL Server Machine, this server only runs the mysql database and will occupy all the memory.
You can choose according to your own needs. Here we choose the second type of "Server Machine" - "next"
Select the database purpose, there are also 3 options:
Mutltifunctional Database is multifunctional and will optimize the database into a good innodb storage type and an efficient myisam storage type;
Transactional Database Only is only used for transaction processing types, the best optimization for innodb, but also supports myisam;
Non-Transactional Databse Only non-transaction processing type, suitable for simple applications, only the myisam type that does not support transactions is supported.
Generally choose the first multi-functional one, and we do the same. -"next"
Select the data storage location of InnodDB. Generally, the default is fine. For the sake of unification, I filled in "WAMP/MySQL Datafiles"-"next"
Choose the maximum number of connections allowed by mysql. The first is a maximum of 20 concurrent connections, the second is a maximum of 500 concurrent connections, and the last is custom. You can choose according to your needs. I choose the second - "next"
The following is the port for selecting the database listening port. Generally, the default is 3306. If it is changed to another port, you must remember the modified port when connecting to the database in the future. Otherwise, you cannot connect to the mysql database, which is more troublesome. No modifications are made here. Use The default port of mysq: 3306-"next"
This step sets the default encoding of mysql. We choose the third one, and in the Character Set menu, select "gbk" encoding-"next"
(Note: If you want to use data from the original database, it is best to determine what encoding the original database uses. If the encoding set here is inconsistent with the encoding of the original database data, garbled characters may appear when using it.)
This step is whether to set mysql to windows. Generally, it is set to a service, so that the mysql database can be started and closed through the service in the future. The checkbox below is also checked, so that in cmd mode, there is no need to go to the bin directory of mysql to execute the command. That is to say, check both the upper and lower boxes, and the middle one defaults to "next"
This step is to set the super user password of mysql. This super user is very important and has all the permissions on mysql. Please set and remember the super user password. There is a checkbox below to select whether to allow the remote machine to use root. Users connect to your mysql server. If you have this requirement, please also check it. Here we use the default selection and enter the password in New root password and Confirm. “next”
Click "execute" to configure, wait for a while, and all the check marks on the dots are marked, which means the configuration is complete.
2. Modify configuration:
Open D:WAMPMySQLmy.ini
Set datadir to D:/WAMP/MySQL/data/ or the directory where you want to store the data.
4. Memcached
Download address: http://blog.couchbase.com/memcached-windows-64-bit-pre-release-available
Directory: dev/memcached
Installation: Execute from the command line E:devmemcachedmemcached.exe -d install
Start: E:devmemcachedmemcached.exe -d start
php memcache extension download: http://pecl.php.net/package/memcache
php.ini opens the extension extension=php_memcache.dll
5. Redis and PHP redis extension
redis download address: https://github.com/MSOpenTech/redis/releases
php redis extension download address: http://pecl.php.net/package/redis
Put the downloaded php_redis.dll into the php extension directory ext, and then open it in php.ini
6. Ending
Now the PHP environment under Windows 7 has been set up. Let’s use it to your heart’s content.

Hot AI Tools

Undresser.AI Undress
AI-powered app for creating realistic nude photos

AI Clothes Remover
Online AI tool for removing clothes from photos.

Undress AI Tool
Undress images for free

Clothoff.io
AI clothes remover

AI Hentai Generator
Generate AI Hentai for free.

Hot Article
Hot Tools

Notepad++7.3.1
Easy-to-use and free code editor

SublimeText3 Chinese version
Chinese version, very easy to use

Zend Studio 13.0.1
Powerful PHP integrated development environment

Dreamweaver CS6
Visual web development tools

SublimeText3 Mac version
God-level code editing software (SublimeText3)
Hot Topics


 What should I do if the Win7 taskbar does not display the icon? How to solve the problem of the computer taskbar icon disappearing
Jun 09, 2024 pm 01:49 PM
What should I do if the Win7 taskbar does not display the icon? How to solve the problem of the computer taskbar icon disappearing
Jun 09, 2024 pm 01:49 PM
Recently, many users using Win7 system have found that the icons in the taskbar suddenly disappeared, which makes the operation very inconvenient and they do not know how to solve the problem. This article will introduce to you how to solve the problem of disappearing taskbar icons in Win7 system. Bar! Cause Analysis When encountering such a situation, there are generally two situations: one is that the taskbar on the computer does not really disappear, but is just hidden, and the other is that the taskbar does disappear. Method 1: 1. There is a situation that you need to confirm first, that is, when the mouse is placed at the bottom of the screen, the taskbar will be displayed. You can directly click the mouse on the taskbar and select "Properties". 2. In the dialog box that opens, click & on the "Hide taskbar" option.
 How to clear all desktop background images in Win7? Tips for deleting personalized background images in Win7
Jun 02, 2024 am 09:01 AM
How to clear all desktop background images in Win7? Tips for deleting personalized background images in Win7
Jun 02, 2024 am 09:01 AM
In Win7 system, many users want to delete personalized desktop background images, but do not know how to delete them. This article will show you how to delete personalized background images in Win7 system. 1. First, open the control panel interface of the Win7 system and click to enter the "Appearance and Personalization" settings; 2. Then, in the opened interface, click the "Change Desktop Background" setting; 3. Then, click below "Desktop background" option; 4. Then, select Select all, and then click Clear all. Of course, you can also use it under "Customize", right-click the theme you want to delete, and then click &q on the shortcut menu
 Where is the network discovery in Win7? Tips for enabling the network discovery function in Win7
Jun 04, 2024 am 09:02 AM
Where is the network discovery in Win7? Tips for enabling the network discovery function in Win7
Jun 04, 2024 am 09:02 AM
Many computer users know that network discovery is a network setting. This setting will affect whether the computer can find other computers and devices on the network and whether it can find the computer when other computers on the network are found. So how to enable network discovery in win7? The following computer System Home U Disk Installation will introduce you to the tutorial on how to enable network discovery in win7 system. 1. First, click the "Start Menu" icon on the desktop taskbar and choose to open the "Control Panel" interface. 2. Then, in the interface that opens, set "View by" to "Category", and then choose to enter "Network and Internet"
 What to do if explore.exe file system error occurs? How to solve the problem of lost exeplorer file on win7 computer
Jun 04, 2024 pm 07:38 PM
What to do if explore.exe file system error occurs? How to solve the problem of lost exeplorer file on win7 computer
Jun 04, 2024 pm 07:38 PM
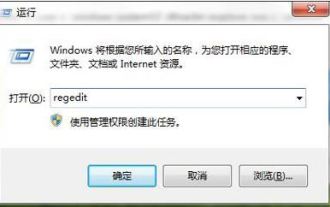
How to solve the problem that win7 system prompts that the exeplorer file is missing? Some of our users still use win7. When accessing the web page through the browser, a prompt that the exeplorer file is missing will pop up, which will cause many pages to be inaccessible. Faced with this problem, many people do not know what method to use. To solve it, then this issue of win7 tutorial will share the solution with everyone. Friends in need can follow the steps in the text. The solution is as follows 1. First, we press win+r and enter "regedit" in the pop-up run interface to open the registry editor function. 2. Then we open it in order: HKEY_LOCAL_MACHI
 How to conduct concurrency testing and debugging in Java concurrent programming?
May 09, 2024 am 09:33 AM
How to conduct concurrency testing and debugging in Java concurrent programming?
May 09, 2024 am 09:33 AM
Concurrency testing and debugging Concurrency testing and debugging in Java concurrent programming are crucial and the following techniques are available: Concurrency testing: Unit testing: Isolate and test a single concurrent task. Integration testing: testing the interaction between multiple concurrent tasks. Load testing: Evaluate an application's performance and scalability under heavy load. Concurrency Debugging: Breakpoints: Pause thread execution and inspect variables or execute code. Logging: Record thread events and status. Stack trace: Identify the source of the exception. Visualization tools: Monitor thread activity and resource usage.
 How to add a server in eclipse
May 05, 2024 pm 07:27 PM
How to add a server in eclipse
May 05, 2024 pm 07:27 PM
To add a server to Eclipse, follow these steps: Create a server runtime environment Configure the server Create a server instance Select the server runtime environment Configure the server instance Start the server deployment project
 The evasive module protects your website from application layer DOS attacks
Apr 30, 2024 pm 05:34 PM
The evasive module protects your website from application layer DOS attacks
Apr 30, 2024 pm 05:34 PM
There are a variety of attack methods that can take a website offline, and the more complex methods involve technical knowledge of databases and programming. A simpler method is called a "DenialOfService" (DOS) attack. The name of this attack method comes from its intention: to cause normal service requests from ordinary customers or website visitors to be denied. Generally speaking, there are two forms of DOS attacks: the third and fourth layers of the OSI model, that is, the network layer attack. The seventh layer of the OSI model, that is, the application layer attack. The first type of DOS attack - the network layer, occurs when a large number of of junk traffic flows to the web server. When spam traffic exceeds the network's ability to handle it, the website goes down. The second type of DOS attack is at the application layer and uses combined
 Black screen when booting, mouse does not display desktop, explorer kills by mistake
Jun 18, 2024 pm 04:05 PM
Black screen when booting, mouse does not display desktop, explorer kills by mistake
Jun 18, 2024 pm 04:05 PM
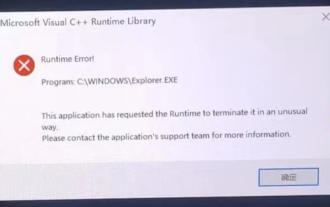
Yesterday (2024/06/17), many users suddenly experienced a black screen on startup, and the following interface popped up: MicrosoftVisualC++RuntimeLibraryRuntimeError!Program:C:\WINDOWS\Explorer.EXEThis application has requested theRuntimetoterminateitinanunusualway.Pleasecontacttheapplication'ssupportteamformoreinformation. It may also be this
