
 Backend Development
PHP Tutorial
Detailed explanation of Grunt plug-in LiveReload to realize automatic page refresh (two options), gruntlivereload_PHP tutorial
Backend Development
PHP Tutorial
Detailed explanation of Grunt plug-in LiveReload to realize automatic page refresh (two options), gruntlivereload_PHP tutorial
Detailed explanation of Grunt plug-in LiveReload to realize automatic page refresh (two options), gruntlivereload_PHP tutorial

Detailed explanation of Grunt plug-in LiveReload to realize automatic page refresh (two options), gruntlivereload
Option 1: grunt-livereload Chrome Plug-in
Advantages: Installation and configuration are simple and convenient.
Disadvantages: Need to cooperate with specified browser plug-ins (Firefox also has related plug-ins, IE you know).
1. 2 plug-ins need to be installed: grunt-contrib-watch, connect-livereload
Execute command:
Copy code The code is as follows:
npm install --save-dev grunt-contrib-watch connect-livereload
2. Install browser plug-in: Chrome LiveReload
3. Configure a web server (IIS/Apache), LiveReload needs to run in the local server environment (support for file:/// file path is not very good).
4. Modify the Gruntfile.js file:
module.exports = function(grunt) {
 // 项目配置(任务配置)
 grunt.initConfig({
  pkg: grunt.file.readJSON('package.json'),
  watch: {
   client: {
    files: ['*.html', 'css/*', 'js/*', 'images/**/*'],
    options: {
     livereload: true
    }
   }
  }
 });
 // 加载插件
 grunt.loadNpmTasks('grunt-contrib-watch');
 // 自定义任务
 grunt.registerTask('live', ['watch']);
};
5. Execution: grunt live
When you see the following prompt, it means that the monitoring task has started:
Copy code The code is as follows:
Running "watch" task
Waiting...
6. Open our page, for example: http://localhost/
7. Click the ICON of the Chrome LiveReload plug-in again. At this time, the small dot in the center of the ICON circle becomes solid, indicating that the plug-in is executed successfully. At this time, you can change the website files and see if they are updated in real time?
Option 2: grunt-contrib-watch grunt-contrib-connect grunt-livereload
Advantages: Automatically build a static file server, no need to build a Web server on your own computer.
Does not require browser plug-in support (not currently limited to a specific browser).
There is no need to manually add livereload.js to the web page.
Disadvantages: For those who are new to it, the configuration is slightly complicated.
1. Install the 3 plug-ins we need: grunt-contrib-watch, grunt-contrib-connect, connect-livereload
Execute command:
Copy code The code is as follows:
npm install --save-dev grunt-contrib-watch grunt-contrib-connect connect-livereload
2. Modify the Gruntfile.js file:
module.exports = function(grunt) {
// LiveReload的默认端口号,你也可以改成你想要的端口号
var lrPort = 35729;
// 使用connect-livereload模块,生成一个与LiveReload脚本
// <script src="http://127.0.0.1:35729/livereload.js?snipver=1" type="text/javascript"></script>
var lrSnippet = require('connect-livereload')({ port: lrPort });
// 使用 middleware(中间件),就必须关闭 LiveReload 的浏览器插件
var lrMiddleware = function(connect, options) {
return [
// 把脚本,注入到静态文件中
lrSnippet,
// 静态文件服务器的路径
connect.static(options.base[0]),
// 启用目录浏览(相当于IIS中的目录浏览)
connect.directory(options.base[0])
];
};
// 项目配置(任务配置)
grunt.initConfig({
// 读取我们的项目配置并存储到pkg属性中
pkg: grunt.file.readJSON('package.json'),
// 通过connect任务,创建一个静态服务器
connect: {
options: {
// 服务器端口号
port: 8000,
// 服务器地址(可以使用主机名localhost,也能使用IP)
hostname: 'localhost',
// 物理路径(默认为. 即根目录) 注:使用'.'或'..'为路径的时,可能会返回403 Forbidden. 此时将该值改为相对路径 如:/grunt/reloard。
base: '.'
},
livereload: {
options: {
// 通过LiveReload脚本,让页面重新加载。
middleware: lrMiddleware
}
}
},
// 通过watch任务,来监听文件是否有更改
watch: {
client: {
// 我们不需要配置额外的任务,watch任务已经内建LiveReload浏览器刷新的代码片段。
options: {
livereload: lrPort
},
// '**' 表示包含所有的子目录
// '*' 表示包含所有的文件
files: ['*.html', 'css/*', 'js/*', 'images/**/*']
}
}
}); // grunt.initConfig配置完毕
// 加载插件
grunt.loadNpmTasks('grunt-contrib-connect');
grunt.loadNpmTasks('grunt-contrib-watch');
// 自定义任务
grunt.registerTask('live', ['connect', 'watch']);
};
5. Execution: grunt live
See the following prompt, indicating that the web server has been set up and the monitoring task has started:
Copy code The code is as follows:
Running "connect:livereload" (connect) task
Started connect web server on 127.0.0.1:8000.
Running "watch" task
Waiting...
Note: Before executing this command, if you have installed the LiveReload browser plug-in, it must be closed.
6. Open our page, for example: http://localhost:8000/ or http://127.0.0.1: 8000/
Note: The local server address opened here is the static file server address we just built through connect, instead of the Web server address you used to build your own using IIS or Apache.
The above is a detailed explanation of the Grunt plug-in LiveReload to realize automatic page refresh (two options) in this article. I hope you like it.

Hot AI Tools

Undresser.AI Undress
AI-powered app for creating realistic nude photos

AI Clothes Remover
Online AI tool for removing clothes from photos.

Undress AI Tool
Undress images for free

Clothoff.io
AI clothes remover

Video Face Swap
Swap faces in any video effortlessly with our completely free AI face swap tool!

Hot Article
Hot Tools

Notepad++7.3.1
Easy-to-use and free code editor

SublimeText3 Chinese version
Chinese version, very easy to use

Zend Studio 13.0.1
Powerful PHP integrated development environment

Dreamweaver CS6
Visual web development tools

SublimeText3 Mac version
God-level code editing software (SublimeText3)
Hot Topics
 1387
1387
 52
52

 How to set up web page automatic refresh
Oct 26, 2023 am 10:52 AM
How to set up web page automatic refresh
Oct 26, 2023 am 10:52 AM
To set the automatic refresh of a web page, you can use the HTML "meta" tag, the JavaScript "setTimeout" function, the "setInterval" function or the HTTP "Refresh" header. Detailed introduction: 1. Use the "meta" tag of HTML. In the "<head>" tag of the HTML document, you can use the "meta" tag to set the automatic refresh of the web page; 2. The "setTimeout" function of JavaScript, etc.
 Using Python and WebDriver to automatically refresh web pages
Jul 08, 2023 pm 01:46 PM
Using Python and WebDriver to automatically refresh web pages
Jul 08, 2023 pm 01:46 PM
Using Python and WebDriver to implement automatic web page refresh Introduction: In daily web browsing, we often encounter scenarios that require frequent web page refreshes, such as monitoring real-time data, automatically refreshing dynamic pages, etc. Manually refreshing the web page will waste a lot of time and energy, so we can use Python and WebDriver to implement the function of automatically refreshing the web page and improve our work efficiency. 1. Installation and configuration environment Before starting, we need to install and configure the corresponding environment. Install Python
 Python script automatically refreshes Excel spreadsheet
Sep 09, 2023 pm 06:21 PM
Python script automatically refreshes Excel spreadsheet
Sep 09, 2023 pm 06:21 PM
Python and Excel are two powerful tools that when combined can open up a world of automation. Python has versatile libraries and user-friendly syntax that enable us to write scripts to perform various tasks efficiently. Excel, on the other hand, is a widely used spreadsheet program that provides a familiar interface for data analysis and manipulation. In this tutorial, we will explore how to leverage Python to automate the process of refreshing Excel spreadsheets, saving us time and effort. Do you find yourself spending valuable time manually refreshing your Excel spreadsheet with updated data? This is a repetitive and time-consuming task that can really kill productivity. In this article we will guide you through using Py
 What should I do if my win11 desktop frequently refreshes automatically?
Jun 29, 2023 pm 02:56 PM
What should I do if my win11 desktop frequently refreshes automatically?
Jun 29, 2023 pm 02:56 PM
What should I do if my win11 desktop frequently refreshes automatically? The win11 system is the latest Windows system launched by Microsoft. It is built with the latest technology and can provide you with the latest high-quality services, but at the same time, there are also some new types of problems. Recently, some friends reported that the desktop often refreshes after win11 is updated. This is most likely because there are some problems with the system. So, how should we solve this problem? Below, the editor will bring you a solution to the frequent automatic refresh of the Win11 desktop. The win11 desktop often automatically refreshes the solution. Method 1: Uninstall updates 1. First, we use the keyboard "ctrl+shift+esc" key combination to open the task manager. 2. After opening, click
 How to solve the problem of automatic refresh of Win10 desktop?
Jun 30, 2023 pm 11:13 PM
How to solve the problem of automatic refresh of Win10 desktop?
Jun 30, 2023 pm 11:13 PM
How to solve the problem that the Win10 system desktop frequently refreshes automatically? We all use computers for study and entertainment in our daily life, and there are many files and applications we need on the desktop. However, recently when some friends are using win10, the desktop keeps refreshing automatically. If you don't know how to solve it, the editor below has compiled a guide to solving the problem of frequent automatic refresh of the Win10 system desktop. If you are interested, follow the editor to read below! Solution guide for Win10 system desktop frequently refreshing automatically 1. Right-click the "Start" menu and select "Task Manager", as shown in the figure. 2. In the "Task Manager" interface, find "Windows Explorer" in the process, as shown in the figure. 3. Right-click it and select in the interface that appears.
 How to solve the problem of automatic refresh of Win11 desktop
Jan 09, 2024 am 09:57 AM
How to solve the problem of automatic refresh of Win11 desktop
Jan 09, 2024 am 09:57 AM
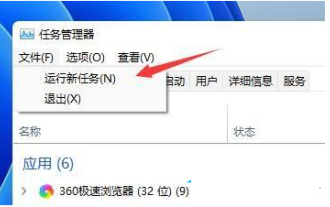
Although the Win11 system has been launched for a long time, we still encounter many problems during use. For example, some friends often encounter the situation where the screen and desktop keep refreshing automatically during use. At this time, we need to How to solve it? Let’s take a look at the solution with the editor below. Solution to automatic refresh of Win11 desktop 1. First, we use the keyboard "ctrl+shift+esc" key combination to open the Task Manager. 2. After opening, click "File" in the upper left corner and select "Run New Task". 3. Then check the option "Create this task with system administrative rights".
 Python implements automatic page refresh and scheduled task function analysis for headless browser collection applications
Aug 08, 2023 am 08:13 AM
Python implements automatic page refresh and scheduled task function analysis for headless browser collection applications
Aug 08, 2023 am 08:13 AM
Python implements automatic page refresh and scheduled task function analysis for headless browser collection applications. With the rapid development of the network and the popularization of applications, the collection of web page data has become more and more important. The headless browser is one of the effective tools for collecting web page data. This article will introduce how to use Python to implement the automatic page refresh and scheduled task functions of a headless browser. The headless browser adopts a browser operation mode without a graphical interface, which can simulate human operation behavior in an automated way, thereby enabling the user to access web pages, click buttons, and fill in information.
 How to set up automatic refresh in Firefox. Steps to set up automatic refresh.
Mar 12, 2024 pm 02:30 PM
How to set up automatic refresh in Firefox. Steps to set up automatic refresh.
Mar 12, 2024 pm 02:30 PM
The Firefox browser app is used by many mobile phone users. The search function is very powerful. As long as you want to know and see, you can find the results and answers immediately. All browsing sections are open, and you can enjoy the most comfortable Internet access. Browse services. Automatically blocks annoying advertising pop-ups. The search bar on the homepage is very clean and concise, and you only need to enter keywords to find the corresponding results. Files and documents in different formats can be downloaded and cached. News information and video content are free to read and watch. Yes, you can also set automatic refresh, freeing your hands to surf the Internet faster, without any lag, and the recorded data will be automatically saved and will not be lost. Now the editor will carefully provide Firefox browser users with the steps to set automatic refresh one by one. 1. First open the Firefox browser
