
 Backend Development
PHP Tutorial
Tutorial on configuring LNMP under Debian system, debianlnmp_PHP tutorial
Backend Development
PHP Tutorial
Tutorial on configuring LNMP under Debian system, debianlnmp_PHP tutorial
Tutorial on configuring LNMP under Debian system, debianlnmp_PHP tutorial

Tutorial on configuring LNMP under Debian system, debianlnmp
The configuration of the LNMP environment requires that our host supports Nginx, MySQL, PHP, and phpMyAdmin. After configuration, you can Use this environment directly and run the website on it. Let me configure the method below.
Let’s take a look at the official description first
LNMP one-click installation package is a Shell program written in Linux Shell that can install LNMP (Nginx, MySQL, PHP, phpMyAdmin) production environment for CentOS/RadHat, Debian/Ubuntu VPS (VDS) or independent host
1. Install MySQL
Execute command:
apt-get install -y mysql-server mysql-client
You can install MySQL. During the installation process, you will be asked for the root password. Type in the password you need and press Enter.
After the installation is complete, execute the following command to perform one-step security settings:
mysql_secure_installation
Follow the prompts. During the process, you will be asked whether to change the root password, whether to remove anonymous users, whether to prohibit root remote login, etc.
2. Install PHP
Execute command:
apt-get install php5-fpm php5-gd php5-mysql php5-memcache php5-curl
The above command installs the php5-memcache extension, so continue to install Memcached.
apt-get install memcached
After installation, use php5-fpm -v to check the PHP version:
root@ztbox:~# php5-fpm -v
PHP 5.4.16-1~dotdeb.1 (fpm-fcgi) (built: Jun 8 2013 22:20:42)
Copyright (c) 1997-2013 The PHP Group
Zend Engine v2.4.0, Copyright (c) 1998-2013 Zend Technologies
3. Install Nginx
Here I directly installed all the extension functions of Nginx (nginx-full) to cope with possible functional enhancements in the future.
apt-get install -y nginx-full
Then start Nginx:
service nginx start
The access result is as shown above. Next, configure Nginx.
vim /etc/nginx/sites-available/default
……
Location ~ .php$ {
fastcgi_split_path_info ^(. .php)(/. )$;
# NOTE: You should have "cgi.fix_pathinfo = 0;" in php.ini
#
# # With php5-cgi alone:
# fastcgi_pass 127.0.0.1:9000;
# # With php5-fpm:
fastcgi_pass unix:/var/run/php5-fpm.sock;
fastcgi_index index.php;
include fastcgi_params;
}
…
Restart Nginx after saving the changes:
service nginx restart
Next we create a new phpinfo to view the detailed information of php:
vim /usr/share/nginx/html/phpinfo.php <?php phpinfo(); ?>
After saving, visit http://ip/phpinfo.php. If the phpinfo page appears, you are done.
How to create a new site
Different from Jun Ge’s one-click package, the LNMP installed by this method requires manual addition of site configuration files.
cd /etc/nginx/conf.d
Enter the configuration file directory and create a new site configuration file, such as
vi dearroy.com.conf


server {
  listen 80;

 #ipv6
  #listen [::]:80 default_server;

  root /usr/share/nginx/html/dearroy.com;

 #默认首页文件名
  index index.php index.html index.htm;

 #绑定域名
  server_name localhost;

 #伪静态规则
 include wordpress.conf;

  location / {
    try_files $uri $uri/ /index.html;
  }
 #定义错误页面
  #error_page 404 /404.html;

  location ~ .php$ {
    fastcgi_split_path_info ^(.+.php)(/.+)$;
    fastcgi_pass 127.0.0.1:9000;
     fastcgi_index index.php;
     include fastcgi_params;
   }
   #PHP
}
After saving, restart Nginx, and adding and binding the website is complete.
Finally, here are the two most commonly used programs, Nginx pseudo-static:
WordPress:
Copy code The code is as follows: location / {
if (-f $request_filename/index.html){
rewrite (.*) $1/index.html break;
}
if (-f $request_filename/index.php){
rewrite (.*) $1/index.php;
}
if (!-f $request_filename){
rewrite (.*) /index.php;
}
}
Discuz X:
Copy code The code is as follows: rewrite ^([^.]*)/topic-(. ).html$ $1/portal.php?mod=topic&topic=$2 last ;
rewrite ^([^.]*)/article-([0-9] )-([0-9] ).html$ $1/portal.php?mod=view&aid=$2&page=$3 last;
rewrite ^([^.]*)/forum-(w )-([0-9] ).html$ $1/forum.php?mod=forumdisplay&fid=$2&page=$3 last;
rewrite ^([^.]*)/thread-([0-9] )-([0-9] )-([0-9] ).html$ $1/forum.php?mod=viewthread&tid=$2&extra =page=$4&page=$3 last;
rewrite ^([^.]*)/group-([0-9] )-([0-9] ).html$ $1/forum.php?mod=group&fid=$2&page=$3 last;
rewrite ^([^.]*)/space-(username|uid)-(. ).html$ $1/home.php?mod=space&$2=$3 last;
rewrite ^([^.]*)/([a-z] )-(. ).html$ $1/$2.php?rewrite=$3 last;
if (!-e $request_filename) {
Return 404;

Hot AI Tools

Undresser.AI Undress
AI-powered app for creating realistic nude photos

AI Clothes Remover
Online AI tool for removing clothes from photos.

Undress AI Tool
Undress images for free

Clothoff.io
AI clothes remover

Video Face Swap
Swap faces in any video effortlessly with our completely free AI face swap tool!

Hot Article
Hot Tools

Notepad++7.3.1
Easy-to-use and free code editor

SublimeText3 Chinese version
Chinese version, very easy to use

Zend Studio 13.0.1
Powerful PHP integrated development environment

Dreamweaver CS6
Visual web development tools

SublimeText3 Mac version
God-level code editing software (SublimeText3)
Hot Topics
 1393
1393
 52
1207
24
52
1207
24

 How to install Snap on Debian 12
Mar 20, 2024 pm 08:51 PM
How to install Snap on Debian 12
Mar 20, 2024 pm 08:51 PM
Snap is an external package manager designed for Linux systems that provides you with a convenient way to install containerized applications. Snap allows you to easily download and install packages without worrying about installing additional dependencies. The manager automatically resolves the dependencies required by the package, ensuring that the package runs smoothly on your system. Snap complements the native apt package manager, giving you another option for installing and running applications on your system. In this guide, you will find a complete guide on how to install Snap on Debian12. Outline: How to install Snap on Debian12 How to find package availability on Snap How to find information about packages on Snap
 Debian installation of Wine and Debian installation of Wine tutorial
Feb 12, 2024 am 10:36 AM
Debian installation of Wine and Debian installation of Wine tutorial
Feb 12, 2024 am 10:36 AM
Wine is a compatibility layer that can run Windows applications on Linux systems. It allows users to seamlessly run Windows applications on Linux systems without the need for dual-system installation or virtual machine setup. This article will introduce how to run Windows applications on Debian systems. Install Wine and provide some related tutorials. Installing Wine Installing Wine on a Debian system is very simple, just use the apt command, open a terminal, and enter the following command: ```shellsudoapt-getupdatesudoapt-getinstallwine```This will update your package list and install Wine , after the installation is complete, you can
 A complete guide to installing Debian and deb files under Windows
Feb 14, 2024 pm 11:03 PM
A complete guide to installing Debian and deb files under Windows
Feb 14, 2024 pm 11:03 PM
Installing Debian in Windows systems and installing deb files directly in Windows are ways for many Linux enthusiasts to explore dual systems or try new software. This article will detail the steps and precautions for these two installation methods. Installing Debian under Windows To install Debian in a Windows system, you usually need to use virtual machine software, such as VirtualBox. The following are the specific steps: 1. Download and install VirtualBox, which is a free virtualization software that can run on the same computer. Multiple operating systems. 2. Download the Debian ISO image file. You can find the download link on the Debian official website. 3. in
 How to install Steam on Debian 12
Mar 21, 2024 pm 10:10 PM
How to install Steam on Debian 12
Mar 21, 2024 pm 10:10 PM
STEAM is a popular gaming platform developed by Valve Corporation that allows you to buy, download, install and play games. It provides features such as automatic updates, matchmaking, and a community forum to resolve software-related issues. In addition to this, you can also use Steam to interact with other players and developers as it has extensive community support. In this guide you will learn: How to install Steam on Debian12 How to run Steam on Debian12 How to remove Steam from Debian12 Conclusion How to install Steam on Debian12 You can install Steam on Debian12: Debian Official Repository deb packages
 How to log out or shut down the system in Debian 11
Dec 27, 2023 pm 02:22 PM
How to log out or shut down the system in Debian 11
Dec 27, 2023 pm 02:22 PM
How to shut down the system in Debian11? Let’s take a look at the specific operations with the editor. Method 1: Click [All Apps] - [Log Out]. In the pop-up interface, click [Shut Down]. Method 2: Execute the following command in the terminal: sudoshutdown-hnow
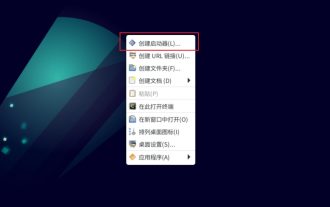 How to add desktop shortcut icon on Debian11
Jan 09, 2024 am 10:06 AM
How to add desktop shortcut icon on Debian11
Jan 09, 2024 am 10:06 AM
How to create application shortcuts on the desktop in Debian11? Windows system installation programs generally create application shortcuts on the desktop. How to create them in Debian11? Let’s take a look at the detailed tutorial below. Right-click on a blank space on the desktop and select [Create Launcher]. In the pop-up interface, set the program to create a shortcut in [Command]. The editor takes the terminal emulator as an example. The user can set the icon by himself. After the setting is completed, click [Create]. Then you can see the shortcut, as shown in the picture below. When the shortcut is no longer needed, right-click on the icon and select [Delete].
 Detailed guide to installing GCC and GCC10 on Debian
Feb 10, 2024 pm 03:57 PM
Detailed guide to installing GCC and GCC10 on Debian
Feb 10, 2024 pm 03:57 PM
Debian is a popular Linux distribution, widely used in servers and desktop systems. GCC (GNUCompilerCollection) is an open source compiler suite used to compile C, C++, Fortran and other programming languages. In the Debian system, Installing GCC and GCC10 is very simple. This article will provide you with a detailed installation guide. Install GCC1. Open Terminal and use the following command to update the package list: ```shellsudoaptupdate``` 2. Install GCC and its related tools: sudoaptinstallbuild-essential This command will install
 How to build Nginx and Tomcat servers under Debian to achieve load balancing
May 19, 2023 pm 10:31 PM
How to build Nginx and Tomcat servers under Debian to achieve load balancing
May 19, 2023 pm 10:31 PM
The basic concept of load balancing Load balancing (loadbalancing) is a computer network technology used to distribute load among multiple computers (computer clusters), network connections, CPUs, disk drives or other resources to achieve optimal resource usage. The purpose is to maximize throughput, minimize response time, and avoid overload. Using multiple server components with load balancing instead of a single component can improve reliability through redundancy. Load balancing services are usually performed by specialized software and hardware. One of the most important applications of load balancing is the use of multiple servers to provide a single service. This solution is sometimes called a server farm. Usually, load balancing is mainly used in web websites, large-scale Internet
