
 Backend Development
PHP Tutorial
How to store and rename files uploaded by fckeditor by date, upload files by fckeditor_PHP tutorial
Backend Development
PHP Tutorial
How to store and rename files uploaded by fckeditor by date, upload files by fckeditor_PHP tutorial
How to store and rename files uploaded by fckeditor by date, upload files by fckeditor_PHP tutorial

How to store and rename files uploaded by fckeditor by date, upload files by fckeditor
1. Implement fckeditor to store uploaded files in directories by date, For example, today is May 5, 2015, then the files uploaded today will be placed in this directory, and the files uploaded tomorrow will be automatically created and placed in a directory similar to 2015-05-06.
(1) Find the config.php file in the editoreditorfilemanagerconnectorsphp folder
(2) Find the following configuration variables
View code print
Copy code The code is as follows:
$Config['UserFilesPath'] = '/uploadfiles/';
Change its value to:
View code print
Copy code The code is as follows:
$Config['UserFilesPath'] = '/uploadfiles/'.date('Y-m-d').'/';
The uploaded files are stored according to date.
2. How to rename files uploaded by fckeditor
(1) Find the editoreditorfilemanagerconnectorsphpio.php file:
(2) Find the following content:
Copy code The code is as follows:
......
function SanitizeFileName( $sNewFileName ){
global $Config ;
$sNewFileName = stripslashes( $sNewFileName ) ;
if ( $Config['ForceSingleExtension'] )
$sNewFileName = preg_replace( '/\.(?![^.]*$)/', '_', $sNewFileName ) ;
$sNewFileName = preg_replace( '/\\|\/|\||\:|\?|\*|"|<|>/', '_', $sNewFileName );
return $sNewFileName ;
}
......
was changed to:
Copy code The code is as follows:
function SanitizeFileName( $sNewFileName ){
global $Config ;
$sNewFileName = stripslashes( $sNewFileName ) ;
if ( $Config['ForceSingleExtension'] )
$sNewFileName = preg_replace( '/\.(?![^.]*$)/', '_', $sNewFileName ) ;
//Get extension
$sExtension = substr( $sNewFileName, ( strrpos($sNewFileName, '.') 1 ) ) ;
$sExtension = strtolower( $sExtension ) ;
$sNewFileName = date("YmdHis").'.'.$sExtension;
return $sNewFileName ;
}
Uploaded files will now be automatically renamed.

Hot AI Tools

Undresser.AI Undress
AI-powered app for creating realistic nude photos

AI Clothes Remover
Online AI tool for removing clothes from photos.

Undress AI Tool
Undress images for free

Clothoff.io
AI clothes remover

AI Hentai Generator
Generate AI Hentai for free.

Hot Article
Hot Tools

Notepad++7.3.1
Easy-to-use and free code editor

SublimeText3 Chinese version
Chinese version, very easy to use

Zend Studio 13.0.1
Powerful PHP integrated development environment

Dreamweaver CS6
Visual web development tools

SublimeText3 Mac version
God-level code editing software (SublimeText3)
Hot Topics


 The driver cannot load ene.sys on this device in Windows 11
May 05, 2023 am 09:13 AM
The driver cannot load ene.sys on this device in Windows 11
May 05, 2023 am 09:13 AM
Many Windows 11 users have encountered the error message “The driver could not be loaded on this device (ene.sys)” which prevents the driver from loading on the system and is marked as vulnerable. However, this issue is mainly reported by users who have upgraded their PC to Windows 11. This error is closely related to drivers and files that get corrupted due to system operating system update issues. If you are encountering this “ene.sys” error every time you turn on your Windows 11 computer after an update, continue reading this article. Here you will find some troubleshooting methods that you can use if you see this error on your PC. Fix 1 – Install Optional Update Step 1. Use Windows+R group
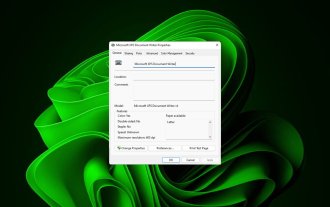 4 Ways to Quickly Rename a Printer on Windows 11
Sep 11, 2023 pm 03:26 PM
4 Ways to Quickly Rename a Printer on Windows 11
Sep 11, 2023 pm 03:26 PM
If you have a lot of printers in your office, the printer list can be long and make getting work done tedious. What's more, multiple printers usually mean similar names, which can be a bit confusing. The last thing you want is to scroll through an endless list and still end up sending your print job to the wrong printer. Fortunately, you can solve all of these problems with a simple renaming trick, which we'll show you below. How do I rename my printer in Windows 11? 1. Using the Settings app tap the key and click Settings. Windows click Bluetooth and Devices and select Printers and Scanners. Select the printer you want to rename. Click Printer Properties. Navigate to the General tab, key
![Explorer.exe does not start on system startup [Fix]](https://img.php.cn/upload/article/000/887/227/168575230155539.png?x-oss-process=image/resize,m_fill,h_207,w_330) Explorer.exe does not start on system startup [Fix]
Jun 03, 2023 am 08:31 AM
Explorer.exe does not start on system startup [Fix]
Jun 03, 2023 am 08:31 AM
Nowadays, many Windows users start encountering severe Windows system problems. The problem is that Explorer.exe cannot start after the system is loaded, and users cannot open files or folders. Although, Windows users can open Windows Explorer manually using Command Prompt in some cases and this must be done every time the system restarts or after system startup. This can be problematic and is due to the following factors mentioned below. Corrupted system files. Enable fast startup settings. Outdated or problematic display drivers. Changes were made to some services in the system. Modified registry file. Keeping all the above factors in mind, we have come up with some that will surely help the users
 How to upload files to 123 cloud disk
Feb 24, 2024 pm 05:30 PM
How to upload files to 123 cloud disk
Feb 24, 2024 pm 05:30 PM
How to upload files to 123 Cloud Disk? You can upload files to 123 Cloud Disk for storage, but most friends don’t know how to upload files to 123 Cloud Disk. Next is the picture and text of how to upload files to 123 Cloud Disk brought by the editor for players. Tutorial, interested users come and take a look! How to upload files on 123 Cloud Disk 1. First open 123 Cloud Disk and enter the main page, register or log in to the account; 2. Then enter the page as shown below, click the [Upload] button guided by the arrow; 3. Then the bottom will expand In the function bar window, click the [Select File] function; 4. Finally, select the file to be uploaded and wait patiently for the upload to complete.
 What is the shortcut key for renaming? What is the shortcut key for renaming?
Feb 22, 2024 pm 02:50 PM
What is the shortcut key for renaming? What is the shortcut key for renaming?
Feb 22, 2024 pm 02:50 PM
The shortcut key for renaming is F2. Analysis 1 The shortcut key for renaming is F2. 2 If you want to rename a file or folder, you can press F2 after selecting the file, modify it directly and press Enter. 3 Sometimes you can also use the mouse to select the file, right-click, select Rename, and press Enter after the modification is completed. 4 Shortcut keys refer to the special combination or sequence of keys on the keyboard to quickly complete a certain command, which can effectively improve work efficiency. Supplement: What are shortcut keys? 1 Shortcut keys, also called hot keys, refer to completing an operation through certain specific keys, key sequences or key combinations. You can use shortcut keys to do some work instead of the mouse. You can use keyboard shortcuts to open, close, and navigate the start menu, desktop, menus, and dialog boxes.
 How to change file type on Windows 11/10
Oct 27, 2023 pm 02:13 PM
How to change file type on Windows 11/10
Oct 27, 2023 pm 02:13 PM
Changing the file type (extension) is a simple task. However, sometimes simpler things can get tricky, and changing file extensions is one of them. Extreme care should be taken when changing file types, as a simple mistake can brick the file and render it inoperable. So, we discussed various ways to change file types on Windows 11, 10. How to Change File Type on Windows 11, 10 There are two ways to do this. You can use the direct GUI method (in File Explorer) or you can change the file type from the terminal. Way 1 – Using File Explorer Way 2 – Using CMD Terminal Way 1 – Changing the file type directly You can directly change the file type from up and down in File Explorer
 How to batch rename file suffixes in win10
Jul 06, 2023 pm 07:37 PM
How to batch rename file suffixes in win10
Jul 06, 2023 pm 07:37 PM
How to batch rename file suffixes in win10? Nowadays, many users are using the Win10 system, and when we usually use computers, we often use a lot of shortcut keys, because shortcut keys can make our operations more convenient, so how do we rename files in batches? Below, the editor will introduce to you the operation of batch renaming files in Win10. How to batch rename files in Win10 1. Select all the files you want to rename. 2. Right-click on a selected file and select Rename. 3. After a file is renamed, other files will be marked with serial numbers in turn. The method is very simple, but when modifying, you need to pay attention to the order of the files and the sorting position of the modified sample files. The serial number starts from the modified sample file.
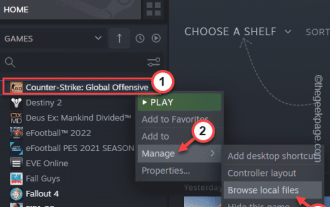 CS:GO crashes, freezes and black screen issues in Windows 10/11
Apr 30, 2023 pm 06:40 PM
CS:GO crashes, freezes and black screen issues in Windows 10/11
Apr 30, 2023 pm 06:40 PM
Just like any other game on your PC, Counter-Strike: Global Offensive can crash, freeze, or get stuck in a black screen on launch. Counter-Strike is one of the low resource fps games on the market and it even runs on Tudou PC. Although CSGO is a CPU-oriented game, the system GPU also plays an important role. The black screen issue is related to GPU issues. Follow these simple solutions to solve the problem. Fix 1 – Turn off compatibility If you are running the game in compatibility mode on Windows 8 or 7, turn it off. CSGO works with every version of Windows (WindowsXP or higher)
