php implements dynamic random verification code mechanism
CAPTCHA is the abbreviation of "Completely Automated Public Turing test to tell Computers and Humans Apart". It is a public fully automated program that distinguishes whether the user is a computer or a human. It can prevent: malicious cracking of passwords, ticket fraud, forum flooding, and effectively prevents a hacker from using a specific program to brute force a specific registered user to continuously log in. In fact, using verification codes is a common method for many websites now. We use This function is implemented in a relatively simple way.
This question can be generated and judged by a computer, but only humans can answer it. Since computers cannot answer CAPTCHA questions, the user who answers the questions can be considered a human.
The production of dynamic verification codes in Php is based on the image processing of PHP. Let’s first introduce the image processing of PHP.
1.Introduction to php image processing
In PHP5, processing dynamic images is much easier than before. PHP5 includes the GD extension package in the php.ini file. You only need to remove the corresponding comments of the GD extension package to use it normally. The GD library included in PHP5 is the upgraded GD2 library, which contains some useful JPG functions that support true color image processing.
Generally generated graphics are stored in PHP’s document format, but dynamic graphics can be obtained directly through HTML’s image insertion method SRC. For example, verification code, watermark, thumbnail, etc.
General process for creating images:
1). Set the header to tell the browser the MIME type you want to generate.
2). Create an image area, and all subsequent operations will be based on this image area.
3). Draw a filled background in the blank image area.
4). Draw graphic outlines on the background to enter text.
5). Output the final graphics.
6). Clear all resources.
7). Call images from other pages.
The first step is to set the file MIME type and output type. Change the output type to image stream
header('Content-Type: image/png;');
Generally generated images can be png, jpeg, gif, wbmp
The second step is to create a graphics area and image background
imagecreatetruecolor() returns an image identifier representing a black image of size x_size and y_size. Syntax: resource imagecreatetruecolor ( int $width , int $height )
$im = imagecreatetruecolor(200,200);
The third step is to draw a filled background in the blank image area
Requires a color filler; imagecolorallocate -- assigns a color to an image; syntax: int imagecolorallocate ( resource $image , int $red , int $green , int $blue )
$blue = imagecolorallocate($im,0,102,255);
Fill this blue color into the background; imagefill -- area filling; syntax: bool imagefill ( resource $image , int $x , int $y , int $color )
imagefill($im,0,0,$blue);
The fourth step is to enter some lines, text, etc. on the blue background
Color Filler
$white = imagecolorallocate($im,255,255,255);
Draw two line segments: imageline
imageline() draws a line segment in the image image from coordinates x1, y1 to x2, y2 (the upper left corner of the image is 0, 0) using color color. Syntax: bool imageline ( resource $image , int $x1 , int $y1 , int $x2 , int $y2 , int $color )
imageline($im,0,0,200,200,$white);
imageline($im,200,0,0,200,$white);
Draw a line of string horizontally: imagestring
imagestring() uses col color to draw the string s to the x, y coordinates of the image represented by image (this is the coordinate of the upper left corner of the string, and the upper left corner of the entire image is 0, 0). If font is 1, 2, 3, 4 or 5, the built-in font is used. Syntax: bool imagestring ( resource $image , int $font , int $x , int $y , string $s , int $col )
imagestring($im,5,66,20,'jingwhale',$white);
Step 5, output the final graphics
imagepng() Outputs a GD image stream (image) in PNG format to standard output (usually a browser), or to a file if filename is given. Syntax: bool imagepng ( resource $image [, string $filename ] )
imagepng($im);
The sixth step is to clear all resources
imagedestroy() releases the memory associated with image. Syntax: bool imagedestroy ( resource $image )
imagedestroy($im);
Graphics created by calling other pages (html)
The sample code is as follows:
Copy code
//The first step is to set the file MIME type
header('Content-Type: image/png;');
//The second step is to create a graphics area and image background
$im = imagecreatetruecolor(200,200);
//The third step is to draw a filled background in the blank image area
$blue = imagecolorallocate($im,0,102,255);
imagefill($im,0,0,$blue);
//Step 4, enter some lines, text, etc. on the blue background
$white = imagecolorallocate($im,255,255,255);
imageline($im,0,0,200,200,$white);
imageline($im,200,0,0,200,$white);
imagestring($im,5,66,20,'Jing.Whale',$white);
//Step 5, output the final graphic
imagepng($im);
//Step six, I want to clear all resources
imagedestroy($im);
?>
Copy code
Display effect:
image
2. Create dynamic verification code
Attachment: Code source address https://github.com/cnblogs-/php-captcha
1. Create a picture with verification code and blur the background
The random code uses hexadecimal; the blurred background means adding lines, snowflakes, etc. to the background of the picture.
1) Create random code
for ($i=0;$i<$_rnd_code;$i++) {
$_nmsg .= dechex(mt_rand(0,15));
}
string dechex (int $number), returns a string containing the hexadecimal representation of the given number parameter.
2) Save in session
$_SESSION['code'] = $_nms
3) Create pictures
Copy code
//Create an image
$_img = imagecreatetruecolor($_width,$_height);
//White
$_white = imagecolorallocate($_img,255,255,255);
//Filling
imagefill($_img,0,0,$_white);
if ($_flag) {
//Black, border
$_black = imagecolorallocate($_img,0,0,0);
imagerectangle($_img,0,0,$_width-1,$_height-1,$_black);
}
Copy code
4) Blurred background
Copy code
//Draw 6 lines randomly
for ($i=0;$i<6;$i++) {
$_rnd_color = imagecolorallocate($_img,mt_rand(0,255),mt_rand(0,255),mt_rand(0,255));
imageline($_img,mt_rand(0,$_width),mt_rand(0,$_height),mt_rand(0,$_width),mt_rand(0,$_height),$_rnd_color);
}
//Random snowflakes
for ($i=0;$i<100;$i++) {
$_rnd_color = imagecolorallocate($_img,mt_rand(200,255),mt_rand(200,255),mt_rand(200,255));
imagestring($_img,1,mt_rand(1,$_width),mt_rand(1,$_height),'*',$_rnd_color);
}
Copy code
5) Output and destruction
Copy code
//Output verification code
for ($i=0;$i
$_rnd_color = imagecolorallocate($_img,mt_rand(0,100),mt_rand(0,150),mt_rand(0,200));
imagestring($_img,5,$i*$_width/$_rnd_code+mt_rand(1,10),mt_rand(1,$_height/2),$_SESSION['code'][$i],$_rnd_color );
}
//Output image
header('Content-Type: image/png');
imagepng($_img);
//Destroy
imagedestroy($_img);
Copy code
Encapsulate it in the global.func.php global function library, and the function name is _code() for easy calling. We will set the four parameters $_width, $_height, $_rnd_code, $_flag to enhance the flexibility of the function.
* @param int $_width The length of the verification code: if you want 6 digits, 75+50 is recommended; if you want 8 digits, 75+50+50 is recommended, and so on
* @param int $_height The height of the verification code
* @param int $_rnd_code The number of digits in the verification code
* @param bool $_flag Whether the verification code requires a border: true with border, false without border (default)
The encapsulated code is as follows:
Copy code
/**
* [verification-code] (C)2015-2100 jingwhale.
*
* This is a freeware
* $Id: global.func.php 2015-02-05 20:53:56 jingwhale$
*/
/**
* _code() is the verification code function
* @access public
* @param int $_width Verification code length: If you want 6 digits, 75+50 is recommended; if you want 8 digits, 75+50+50 is recommended, and so on
* @param int $_height The height of the verification code
* @param int $_rnd_code The number of digits in the verification code
* @param bool $_flag Whether the verification code requires a border: true with border, false without border (default)
* @return void This function generates a verification code after execution
*/
function _code($_width = 75,$_height = 25,$_rnd_code = 4,$_flag = false) {
//Create random code
for ($i=0;$i<$_rnd_code;$i++) {
$_nmsg .= dechex(mt_rand(0,15));
}
//Save in session
$_SESSION['code'] = $_nmsg;
//Create an image
$_img = imagecreatetruecolor($_width,$_height);
//White
$_white = imagecolorallocate($_img,255,255,255);
//Fill
imagefill($_img,0,0,$_white);
if ($_flag) {
//Black, border
$_black = imagecolorallocate($_img,0,0,0);
imagerectangle($_img,0,0,$_width-1,$_height-1,$_black);
}
//Draw 6 lines immediately
for ($i=0;$i<6;$i++) {
$_rnd_color = imagecolorallocate($_img,mt_rand(0,255),mt_rand(0,255),mt_rand(0,255));
imageline($_img,mt_rand(0,$_width),mt_rand(0,$_height),mt_rand(0,$_width),mt_rand(0,$_height),$_rnd_color);
}
//Snowflakes will follow soon
for ($i=0;$i<100;$i++) {
$_rnd_color = imagecolorallocate($_img,mt_rand(200,255),mt_rand(200,255),mt_rand(200,255));
imagestring($_img,1,mt_rand(1,$_width),mt_rand(1,$_height),'*',$_rnd_color);
}
//Output verification code
for ($i=0;$i
$_rnd_color = imagecolorallocate($_img,mt_rand(0,100),mt_rand(0,150),mt_rand(0,200));
imagestring($_img,5,$i*$_width/$_rnd_code+mt_rand(1,10),mt_rand(1,$_height/2),$_SESSION['code'][$i],$_rnd_color );
}
//Output image
header('Content-Type: image/png');
imagepng($_img);
//Destroy
imagedestroy($_img);
}
?>
Copy code
2. Create a verification mechanism
Create a PHP verification page and check whether the verification code is consistent through session.
1) Create verification-code.php verification page
Copy code
/**
* [verification-code] (C)2015-2100 jingwhale.
*
* This is a freeware
* $Id: verification-code.php 2015-02-05 20:53:56 jingwhale$
*/
//Set character set encoding
header('Content-Type: text/html; charset=utf-8');
?>
verification code
复制代码
显示如下:
image
2)创建产生验证码图片页面
创建codeimg.php为verification-code.php html代码里的img提供验证码图片
首先必须在codeimg.php页面开启session;
其次,将我们封装好的global.func.php全局函数库引入进来;
最后,运行_code();
复制代码
/**
* [verification-code] (C)2015-2100 jingwhale.
*
* This is a freeware
* $Id: codeimg.php 2015-02-05 20:53:56 jingwhale$
*/
//开启session
session_start();
//引入全局函数库(自定义)
require dirname(__FILE__).'/includes/global.func.php';
//运行验证码函数。通过数据库的_code方法,设置验证码的各种属性,生成图片
_code(125,25,6,false);
?>
复制代码
image
3)创建session检验机制
首先必须在verification-code.php页面也开启session;
其次,设计提交验证码的方式,本文以get方式提交,当action=verification时提交成功;
最后,创建验证函数,原理是将客户端用户提交的验证码同服务器codeimg.php中session的验证码是否一致;这里有一个js弹窗函数_alert_back(),我们也把它封装在global.func.php里;
修改verification-code.php中php代码如下:
复制代码
/**
* [verification-code] (C)2015-2100 jingwhale.
*
* This is a freeware
* $Id: verification-code.php 2015-02-05 20:53:56 jingwhale$
*/
//设置字符集编码
header('Content-Type: text/html; charset=utf-8');
//开启session
session_start();
//引入全局函数库(自定义)
require dirname(__FILE__).'/includes/global.func.php';
//检验验证码
if ($_GET['action'] == 'verification') {
if (!($_POST['code'] == $_SESSION['code'])) {
_alert_back('验证码不正确!');
}else{
_alert_back('验证码通过!');
}
}
?>
verification code
& lt; dd & gt; verification code: & lt; input type = "text" name = "code" class = "code" /& gt; & lt; img src = "codeimg.php" id = "codeimg" /& g. t; & lt ;/dd>
& lt; dd & gt; & lt; input type = "submit" class = "submit" value = "verification" /& gt; & lt; /dd & gt;
1
3. Click on the verification code image to update the verification code
If you want to update the verification code above, you must refresh the page; we write a codeimg.js function to update the verification code by clicking on the verification code image
Copy code
window.onload = function () {
var code = document.getElementById('codeimg');//Find the img tag in html by id
code.onclick = function () {//Add a click event to the label
this.src='codeimg.php?tm='+Math.random();//Modify time and redirect to codeimg.php
};
}
http://www.bkjia.com/PHPjc/954738.htmlwww.bkjia.comtruehttp: //www.bkjia.com/PHPjc/954738.htmlTechArticlephp implements dynamic random verification code mechanism verification code (CAPTCHA) is Completely Automated Public Turing test to tell Computers and Humans Apart (Fully automatic Turing test to distinguish computers and humans...
Statement of this Website
The content of this article is voluntarily contributed by netizens, and the copyright belongs to the original author. This site does not assume corresponding legal responsibility. If you find any content suspected of plagiarism or infringement, please contact admin@php.cn
 Fix: Windows 11's dynamic refresh rate doesn't work
Apr 13, 2023 pm 08:52 PM
Fix: Windows 11's dynamic refresh rate doesn't work
Apr 13, 2023 pm 08:52 PM
You can measure a screen's refresh rate by counting the number of times the image updates per second. DRR is a new feature included in Windows 11 that helps you save battery life while still providing a smoother display, but it's no surprise when it doesn't work properly. Screens with higher refresh rates are expected to become more common as more manufacturers announce plans to stop producing 60Hz monitors. This will result in smoother scrolling and better gaming, but it will come at the cost of reduced battery life. However, the dynamic refresh rate feature in this iteration of the OS is a nifty addition that can have a big impact on your overall experience. Read on as we discuss what to do if Windows 11’s dynamic refresh rate isn’t working
How to Hide Dynamic Island and Red Indicator in iPhone Screen Recording
Apr 13, 2023 am 09:13 AM
On iPhone, Apple's screen recording feature records a video of what you're doing on the screen, which is useful if you want to capture gameplay, walk someone through a tutorial in an app, demonstrate a bug, or anything else. On older iPhones that have a notch at the top of the display, the notch is not visible in screen recording, as it should be. But on newer iPhones with the Dynamic Island cutout, such as the iPhone 14 Pro and iPhone 14 Pro Max, the Dynamic Island animation displays the red recording indicator, which causes the cutout to be visible in captured videos. this might
Convert VirtualBox fixed disk to dynamic disk and vice versa
Mar 25, 2024 am 09:36 AM
When creating a virtual machine, you will be asked to select a disk type, you can select fixed disk or dynamic disk. What if you choose fixed disks and later realize you need dynamic disks, or vice versa? Good! You can convert one to the other. In this post, we will see how to convert VirtualBox fixed disk to dynamic disk and vice versa. A dynamic disk is a virtual hard disk that initially has a small size and grows in size as you store data in the virtual machine. Dynamic disks are very efficient at saving storage space because they only take up as much host storage space as needed. However, as disk capacity expands, your computer's performance may be slightly affected. Fixed disks and dynamic disks are commonly used in virtual machines
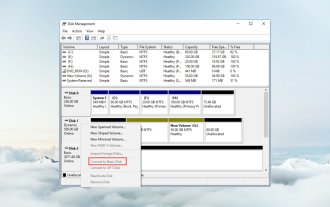
How to convert dynamic disk to basic disk on Windows 11
Sep 23, 2023 pm 11:33 PM
If you want to convert a dynamic disk to a basic disk in Windows 11, you should create a backup first as the process will erase all data in it. Why should you convert dynamic disk to basic disk in Windows 11? According to Microsoft, dynamic disks have been deprecated from Windows and their use is no longer recommended. Additionally, Windows Home Edition does not support dynamic disks, so you will not be able to access these logical drives. If you want to combine more disks into a larger volume, it is recommended to use Basic Disks or Storage Spaces. In this article, we will show you how to convert dynamic disk to basic disk on Windows 11 How to convert dynamic disk to basic disk in Windows 11? In the beginning
How to Get Live Tiles on the Desktop and Start Menu in Windows 11
Apr 14, 2023 pm 05:07 PM
Imagine you are looking for something on your system but are not sure which application to open or select. This is where the Live Tiles feature comes into play. A live tile for any supported application can be added to the desktop or Windows system's Start menu, with its tiles changing frequently. LiveTiles make application widgets come alive in a very pleasing way. Not just for its appearance, but even for convenience. Suppose you are using whatsapp or facebook application on your system, wouldn't it be convenient if the number of notifications is displayed on the application icon? This is possible if any such supported app is added as a live tile. Let’s see how to do it in Windows
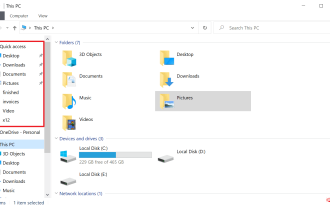
How to disable dynamic display of folders and files to prevent quick access in Windows 10 and 11?
May 06, 2023 pm 04:58 PM
Microsoft introduced Quick Access in Windows 10 and retained the feature in the recently released Windows 11 operating system. Quick Access replaces the Favorites system in File Explorer. One of the core differences between the two features is that Quick Access adds a dynamic component to its list. Some folders appear permanently, while others appear based on usage. Fixed folders are displayed with a pin icon, while dynamic folders do not have such an icon. You can see a comparison between My Favorites and Quick Access here for more details. Quick Access is more powerful than Favorites, but dynamic folder lists add an element of clutter to it. Files that are useless or should not be highlighted in File Explorer may be displayed
How to use Dynamic Lock on Windows 11
Apr 13, 2023 pm 08:31 PM
What is dynamic locking on Windows 11? Dynamic Lock is a Windows 11 feature that locks your computer when a connected Bluetooth device (your phone or wearable) goes out of range. The Dynamic Lock feature automatically locks your PC even if you forget to use the Windows Key + L shortcut while walking away. Dynamic Lock works with any connected device with Bluetooth, but it's best to use a device with enough battery power and range, such as your phone. Once your device becomes inaccessible for 30 seconds, Windows will automatically lock the screen. Pair a Bluetooth device with Windows 11 For everything to work properly, you need to first
How to create a dynamic image carousel using HTML, CSS and jQuery
Oct 25, 2023 am 10:09 AM
How to use HTML, CSS and jQuery to create a dynamic image carousel. In website design and development, image carousel is a frequently used function for displaying multiple images or advertising banners. Through the combination of HTML, CSS and jQuery, we can achieve a dynamic image carousel effect, adding vitality and appeal to the website. This article will introduce how to use HTML, CSS and jQuery to create a simple dynamic image carousel, and provide specific code examples. Step 1: Set up HTML junction
See all articles


 Backend Development


 1389
1389
 52
52

 Fix: Windows 11's dynamic refresh rate doesn't work
Apr 13, 2023 pm 08:52 PM
Fix: Windows 11's dynamic refresh rate doesn't work
Apr 13, 2023 pm 08:52 PM
 How to Hide Dynamic Island and Red Indicator in iPhone Screen Recording
Apr 13, 2023 am 09:13 AM
How to Hide Dynamic Island and Red Indicator in iPhone Screen Recording
Apr 13, 2023 am 09:13 AM
 Convert VirtualBox fixed disk to dynamic disk and vice versa
Mar 25, 2024 am 09:36 AM
Convert VirtualBox fixed disk to dynamic disk and vice versa
Mar 25, 2024 am 09:36 AM
 How to convert dynamic disk to basic disk on Windows 11
Sep 23, 2023 pm 11:33 PM
How to convert dynamic disk to basic disk on Windows 11
Sep 23, 2023 pm 11:33 PM
 How to Get Live Tiles on the Desktop and Start Menu in Windows 11
Apr 14, 2023 pm 05:07 PM
How to Get Live Tiles on the Desktop and Start Menu in Windows 11
Apr 14, 2023 pm 05:07 PM
 How to disable dynamic display of folders and files to prevent quick access in Windows 10 and 11?
May 06, 2023 pm 04:58 PM
How to disable dynamic display of folders and files to prevent quick access in Windows 10 and 11?
May 06, 2023 pm 04:58 PM
 How to use Dynamic Lock on Windows 11
Apr 13, 2023 pm 08:31 PM
How to use Dynamic Lock on Windows 11
Apr 13, 2023 pm 08:31 PM
 How to create a dynamic image carousel using HTML, CSS and jQuery
Oct 25, 2023 am 10:09 AM
How to create a dynamic image carousel using HTML, CSS and jQuery
Oct 25, 2023 am 10:09 AM