
 Backend Development
PHP Tutorial
Thinkphp+AJAX dynamically verifies whether user input is legal_PHP tutorial
Backend Development
PHP Tutorial
Thinkphp+AJAX dynamically verifies whether user input is legal_PHP tutorial
Thinkphp+AJAX dynamically verifies whether user input is legal_PHP tutorial

Thinkphp+AJAX dynamically verifies whether user input is legal
When encountering user registration and other situations, if you wait for the user to enter all the information, click the registration button to submit, and then verify whether the input is correct, the experience will be very bad, it will waste the user's time and increase the registration cost. Here is an example , demonstrates how to use ajax for single-step verification, using thinkphp 3.2 framework, environment WAMPServer 2.4, version PHP 5.4.16+ Apache 2.4.4+ MySql 5.6.12
1. Database design:
Database name thinkphp
Table name tp_user where tp_ is the table prefix, which can be defined in config.php. When operating the table, just use user

CREATE TABLE IF NOT EXISTS `tp_user` (
  `id` int(11) NOT NULL AUTO_INCREMENT,
  `username` varchar(30) NOT NULL,
  `password` varchar(255) NOT NULL,
  `email` varchar(50) NOT NULL,
  PRIMARY KEY (`id`)
) ENGINE=MyISAM DEFAULT CHARSET=utf8 AUTO_INCREMENT=1 ;
2. Page design

3. HTML part
view/Index/index.html
4. thinkphp automatic verification
protected $_validate=array(
		array('username','require','用户名不能为空!'),
		array('username','','用户名已经存在',0,'unique',1),
		array('username','/^[a-zA-Z][a-zA-Z0-9_]{1,19}$/','用户名不合法!'),

		array('email','require','邮箱不能为空!'),
		array('email','email','邮箱格式不正确!'),
		array('email','','该邮箱已经注册过!',0,'unique',1),
	);

	protected $_auto = array(
		array('password', 'md5', 1, 'function'), // 对password字段在新增的时候使md5函数处理
	);
5. Use ajax
After the user enters the username, the blur event will be triggered when the input box loses focus. You can verify whether the username input is correct at this time
jQuery.post( url, [data], [callback], [type] ): Use POST method to make asynchronous requests
Parameters:
url (String): URL address to send the request.
data (Map): (optional) The data to be sent to the server, expressed in the form of key-value pairs of Key
 alue.
alue. callback (Function): (optional) Callback function when loading is successful (this method is called only when the return status of Response is success).
type (String): (optional) The official description is: Type of data to be sent. In fact, it should be the type requested by the client (JSON, XML, etc.)
$('#username').blur(
			function() {
				var username = $(this).val();
				$.post(index.php/Home/Index/checkName, {
					'username' : username//前一个username需要跟UserModel对应,即跟数据库字段对应
				}, function(data) {
					if (data == 0) {
						error['username'] = 0;
						$('#tooltip1').attr('class',
								'tooltip-info visible-inline success');
					} else {
						error['username'] = 1;
						$('#tooltip1').attr('class',
								'tooltip-info visible-inline error');
						$('#mess1').html(data);
					}
				})
				return false;
});Password, repeat password, email verification are similar
You need to pay attention when verifying the email. If the user clicks the registration button immediately after entering the email, the click event of the registration button and the blur event of the email input box will be executed at the same time. Since the email verification is $.post, it is asynchronous. The post has not been executed yet, error['email']=1 in the click event, $('#submit1').submit(); will not be executed, so at this time, set a flag error['submit'] = 0;0 Indicates that the registration button has been clicked. The default is 1. In the email blur callback function, it is judged whether error['submit'] is equal to 0, that is, whether it has been clicked. If it has been clicked, the form is submitted. If not, only the email needs to be verified.
After the user enters the email address and clicks the mouse elsewhere on the screen, only blur will be executed, the same as the username and password.
6. Server processing
public function checkName() {
		$user = D ( 'user' );
		if (! $user->create ()) {
			exit ( $user->getError () );
		} else {
			echo 0;//这是回传给$.post的数据,对应上面的data
		}
}The above is the method of single-step verification of user name. Let’s see how to submit all data to the server
7. Submit all data to the server
Through the above html code, I noticed that a form is used here, the form is submitted in post mode, and the action points to the address that the server can handle
When clicking the registration button, first determine whether all inputs are correct. If correct, submit the form
$('#submit1').click(function() {
		if ($('#username').val() == '') {
			$('#tooltip1').attr('class', 'tooltip-info visible-inline error');
			$('#mess1').html(用户名不能为空!);
		}
		if ($('#password').val() == '') {
			$('#tooltip2').attr('class', 'tooltip-info visible-inline error');
			$('#mess2').html(密码不能为空!);
		}
		if ($('#repassword').val() == '') {
			$('#tooltip22').attr('class', 'tooltip-info visible-inline error');
			$('#mess22').html(确认密码不能为空!);
		}
		if ($('#email').val() == '') {
			$('#tooltip3').attr('class', 'tooltip-info visible-inline error');
			$('#mess3').html(邮箱不能为空!);
		}
		if (error['username'] == 1) {
			var scroll_offset = $(#tooltip1).offset(); // 如果用户名验证失败,屏幕会滚动到用户名的位置,让用户重新输入
			$(body,html).animate({
				scrollTop : scroll_offset.top
			// 让body的scrollTop等于pos的top,就实现了滚动
			}, 0);
			return false;
		} else if (error['password'] == 1) {

			return false;
		} else if (error['email'] == 1) {
			error['submit'] = 0;
			return true;
		} else {
			$('#submit1').submit();
			return true;
		}
});The server-side register method receives all data. If successful, it will jump to the Home/index page. If it fails, it will jump to the error page.
public function register() {
		$user = D ( 'user' );
		if (! $user->create ()) {
			dump ( $user->getError () );
		}
		$uid = $user->add ();

		if ($uid) {
			$_SESSION ['username'] = $_POST ['username'];
			$this->redirect ( 'Home/index' );
		} else {
			$this->error ( 注册失败! );
		}
	}
8. config.php configuration
<!--?php
return array(
/* 数据库配置 */
'DB_TYPE' =--> 'mysql', // 数据库类型
'DB_HOST' => '127.0.0.1', // 服务器地址
'DB_NAME' => 'thinkphp', // 数据库名
'DB_USER' => 'root', // 用户名
'DB_PWD' => '123', // 密码
'DB_PORT' => '3306', // 端口
'DB_PREFIX' => 'tp_', // 数据库表前缀
);

Hot AI Tools

Undresser.AI Undress
AI-powered app for creating realistic nude photos

AI Clothes Remover
Online AI tool for removing clothes from photos.

Undress AI Tool
Undress images for free

Clothoff.io
AI clothes remover

Video Face Swap
Swap faces in any video effortlessly with our completely free AI face swap tool!

Hot Article
Hot Tools

Notepad++7.3.1
Easy-to-use and free code editor

SublimeText3 Chinese version
Chinese version, very easy to use

Zend Studio 13.0.1
Powerful PHP integrated development environment

Dreamweaver CS6
Visual web development tools

SublimeText3 Mac version
God-level code editing software (SublimeText3)
Hot Topics
 1387
1387
 52
52

 How to use Xiaohongshu account to find users? Can I find my mobile phone number?
Mar 22, 2024 am 08:40 AM
How to use Xiaohongshu account to find users? Can I find my mobile phone number?
Mar 22, 2024 am 08:40 AM
With the rapid development of social media, Xiaohongshu has become one of the most popular social platforms. Users can create a Xiaohongshu account to show their personal identity and communicate and interact with other users. If you need to find a user’s Xiaohongshu number, you can follow these simple steps. 1. How to use Xiaohongshu account to find users? 1. Open the Xiaohongshu APP, click the "Discover" button in the lower right corner, and then select the "Notes" option. 2. In the note list, find the note posted by the user you want to find. Click to enter the note details page. 3. On the note details page, click the "Follow" button below the user's avatar to enter the user's personal homepage. 4. In the upper right corner of the user's personal homepage, click the three-dot button and select "Personal Information"
 Local users and groups are missing on Windows 11: How to add it
Sep 22, 2023 am 08:41 AM
Local users and groups are missing on Windows 11: How to add it
Sep 22, 2023 am 08:41 AM
The Local Users and Groups utility is built into Computer Management and can be accessed from the console or independently. However, some users find that local users and groups are missing in Windows 11. For some people who have access to it, the message suggests that this snap-in may not work with this version of Windows 10. To manage user accounts for this computer, use the User Accounts tool in Control Panel. The issue has been reported in previous iterations of Windows 10 and is usually caused by issues or oversights on the user's side. Why are local users and groups missing in Windows 11? You are running Windows Home edition, local users and groups are available on Professional edition and above. Activity
 Log in to Ubuntu as superuser
Mar 20, 2024 am 10:55 AM
Log in to Ubuntu as superuser
Mar 20, 2024 am 10:55 AM
In Ubuntu systems, the root user is usually disabled. To activate the root user, you can use the passwd command to set a password and then use the su- command to log in as root. The root user is a user with unrestricted system administrative rights. He has permissions to access and modify files, user management, software installation and removal, and system configuration changes. There are obvious differences between the root user and ordinary users. The root user has the highest authority and broader control rights in the system. The root user can execute important system commands and edit system files, which ordinary users cannot do. In this guide, I'll explore the Ubuntu root user, how to log in as root, and how it differs from a normal user. Notice
 Convert VirtualBox fixed disk to dynamic disk and vice versa
Mar 25, 2024 am 09:36 AM
Convert VirtualBox fixed disk to dynamic disk and vice versa
Mar 25, 2024 am 09:36 AM
When creating a virtual machine, you will be asked to select a disk type, you can select fixed disk or dynamic disk. What if you choose fixed disks and later realize you need dynamic disks, or vice versa? Good! You can convert one to the other. In this post, we will see how to convert VirtualBox fixed disk to dynamic disk and vice versa. A dynamic disk is a virtual hard disk that initially has a small size and grows in size as you store data in the virtual machine. Dynamic disks are very efficient at saving storage space because they only take up as much host storage space as needed. However, as disk capacity expands, your computer's performance may be slightly affected. Fixed disks and dynamic disks are commonly used in virtual machines
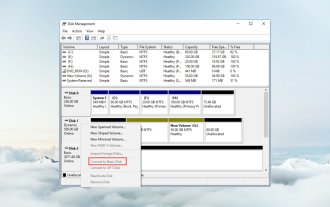 How to convert dynamic disk to basic disk on Windows 11
Sep 23, 2023 pm 11:33 PM
How to convert dynamic disk to basic disk on Windows 11
Sep 23, 2023 pm 11:33 PM
If you want to convert a dynamic disk to a basic disk in Windows 11, you should create a backup first as the process will erase all data in it. Why should you convert dynamic disk to basic disk in Windows 11? According to Microsoft, dynamic disks have been deprecated from Windows and their use is no longer recommended. Additionally, Windows Home Edition does not support dynamic disks, so you will not be able to access these logical drives. If you want to combine more disks into a larger volume, it is recommended to use Basic Disks or Storage Spaces. In this article, we will show you how to convert dynamic disk to basic disk on Windows 11 How to convert dynamic disk to basic disk in Windows 11? In the beginning
 Explore Windows 11 guide: How to access user folders on your old hard drive
Sep 27, 2023 am 10:17 AM
Explore Windows 11 guide: How to access user folders on your old hard drive
Sep 27, 2023 am 10:17 AM
Certain folders are not always accessible due to permissions, and in today’s guide we will show you how to access user folders on your old hard drive on Windows 11. The process is simple but can take a while, sometimes even hours, depending on the size of the drive, so be extra patient and follow the instructions in this guide closely. Why can't I access my user folders on my old hard drive? User folders are owned by another computer, so you cannot modify them. You don't have any permissions on the folder other than ownership. How to open user files on old hard drive? 1. Take ownership of the folder and change permissions Find the old user directory, right-click on it and select Properties. Navigate to "An
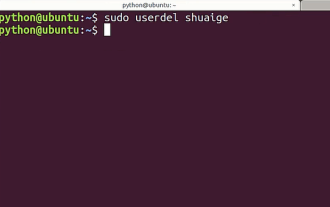 Tutorial: How to delete a normal user account in Ubuntu system?
Jan 02, 2024 pm 12:34 PM
Tutorial: How to delete a normal user account in Ubuntu system?
Jan 02, 2024 pm 12:34 PM
Many users have been added to the Ubuntu system. I want to delete the users that are no longer in use. How to delete them? Let’s take a look at the detailed tutorial below. 1. Open the terminal command line and use the userdel command to delete the specified user. Be sure to add the sudo permission command, as shown in the figure below. 2. When deleting, be sure to be in the administrator directory. Ordinary users do not have this permission. , as shown in the figure below 3. After the delete command is executed, how to judge whether it has been truly deleted? Next we use the cat command to open the passwd file, as shown in the figure below 4. We see that the deleted user information is no longer in the passwd file, which proves that the user has been deleted, as shown in the figure below 5. Then we enter the home file
 What is sudo and why is it important?
Feb 21, 2024 pm 07:01 PM
What is sudo and why is it important?
Feb 21, 2024 pm 07:01 PM
sudo (superuser execution) is a key command in Linux and Unix systems that allows ordinary users to run specific commands with root privileges. The function of sudo is mainly reflected in the following aspects: Providing permission control: sudo achieves strict control over system resources and sensitive operations by authorizing users to temporarily obtain superuser permissions. Ordinary users can only obtain temporary privileges through sudo when needed, and do not need to log in as superuser all the time. Improved security: By using sudo, you can avoid using the root account during routine operations. Using the root account for all operations may lead to unexpected system damage, as any mistaken or careless operation will have full permissions. and
