
 Backend Development
PHP Tutorial
Personalize your own QR code, personalize your own QR code_PHP tutorial
Backend Development
PHP Tutorial
Personalize your own QR code, personalize your own QR code_PHP tutorial
Personalize your own QR code, personalize your own QR code_PHP tutorial

Personalize your own QR code, personalize your own QR code
1. What is a QR code
2. How do we make QR code
3. How to make your own personalized QR code
1. The first step. Download the Php class library phpqrcode, (with download address: http://sourceforge.net/projects/phpqrcode/)
The use cases given online are:
<?php
/*
$errorCorrectionLevel 纠错级别:L、M、Q、H
$matrixPointSize表示图片每个黑点的像素	点的大小:1到10
*/
include '/phpqrcode/phpqrcode.php';//引入PHP QR库文件
$value="个性化自己的二维码";			// 二维码数据
$errorCorrectionLevel = "l";		// 纠错级别:L、M、Q、H
$matrixPointSize = "10";			// 点的大小:1到10
QRcode::png($value, false, $errorCorrectionLevel);
exit;
?>
2. Understand the above code
What wonderful journey happened in the above code?
Let us open phpqrcode.php and take a look. The code is too long, so I won’t post it. You can download it yourself.
Combine the above code with phpqrcode.php and take a look:
<?php
/*
$errorCorrectionLevel 纠错级别:L、M、Q、H
$matrixPointSize表示图片每个黑点的像素	点的大小:1到10
*/
include 'phpqrcode/phpqrcode.php';	//引入PHP QR库文件
$intext="个性化自己的二维码";			// 二维码数据
$errorCorrectionLevel = "l";		// 纠错级别:L、M、Q、H
$matrixPointSize = "2";				// 点的大小:1到10
$margin = 1;
$size = 10;
$outfile = false;
$saveandprint=false;
$enc = QRencode::factory($errorCorrectionLevel, $size, $margin);
//$enc->encodePNG($value, false, $saveandprint=false);
try {
	ob_start();
	$tab = $enc->encode($intext);
	print_r($tab);
	$err = ob_get_contents();
	ob_end_clean();

	if ($err != '')
		QRtools::log($outfile, $err);
	/*标记*/
	$maxSize = (int)(QR_PNG_MAXIMUM_SIZE / (count($tab)+2*$enc->margin));

	QRimage::png($tab, $outfile, min(max(1, $enc->size), $maxSize), $enc->margin,$saveandprint);

} catch (Exception $e) {

	QRtools::log($outfile, $e->getMessage());

}
exit;
?>We can find that the php class library phpqrcode first converts the text we need into the array $tab through an algorithm, and then draws a picture through image manipulation, which is our QR code.
If you print the array $tab, you will find that it looks like this:
Array
(
    [0] => 1111111010101001001111111
    [1] => 1000001001111001001000001
    [2] => 1011101011100001101011101
    [3] => 1011101011101110101011101
    [4] => 1011101010011010001011101
    [5] => 1000001000110111001000001
    [6] => 1111111010101010101111111
    [7] => 0000000000101111100000000
    [8] => 1111001010110000110011101
    [9] => 1010100010101110100111100
    [10] => 1011011111111111111000111
    [11] => 0010010011100000100001000
    [12] => 0101111111101001100101100
    [13] => 0100010111010111010001001
    [14] => 0110101010110111010100001
    [15] => 1001110110101100110111101
    [16] => 0000101100110100111110000
    [17] => 0000000011110101100010101
    [18] => 1111111001010110101011010
    [19] => 1000001001101100100010101
    [20] => 1011101001100001111110001
    [21] => 1011101010010110000000011
    [22] => 1011101011000111011001110
    [23] => 1000001011001010001001000
    [24] => 1111111011000100100101111
)Okay, do you understand...
Now it’s simple, just draw based on the array $tab:
QRimage::png($tab, $outfile, min(max(1, $enc->size), $maxSize), $enc->margin,$saveandprint);
3. How to draw
If we all study the source code, we will find that the most critical method is this:
private static function image($frame, $pixelPerPoint = 4, $outerFrame = 4);
The source code I commented is posted below (the original class library has no comments)
<?php
function image($frame, $pixelPerPoint = 4, $outerFrame = 4){
//$frame就是数组$tab,$pixelPerPoint,$outerFrame现在看不出来是什么,待会解释
$h = count($frame);
$w = strlen($frame[0]);
//计算应该画多长多宽的画,$h表示高,$w表示宽
$imgW = $w + 2*$outerFrame;
$imgH = $h + 2*$outerFrame;
//它把画布变大了一点!说明$outerFrame是周围留白大小
$base_image =ImageCreate($imgW, $imgH);
//imagecreate — 新建一个基于调色板的图像,换句话说,我们现在可以基于$base_image画画了
$col[0] = ImageColorAllocate($base_image,255,255,255);
$col[1] = ImageColorAllocate($base_image,0,0,0);
//imagecolorallocate — 为一幅图像分配颜色
//第一个参数是建立的,后面三个分别是R,G,B(大小都是从0到255),你可以理解为颜料……,三个颜料不同比例混合产生了不同的颜色,所以$col[0]就是白色的画笔啦,$col[1]是黑色的画笔(为什么三个255是白色,三个0是黑色,你可以想象一下中学物理里面白光可以分解的实验……)
imagefill($base_image, 0, 0, $col[0]);
//imagefill — 区域填充 ,整个画布上面都是白色的啊
for($y=0; $y<$h; $y++) {
for($x=0; $x<$w; $x++) {
if ($frame[$y][$x] == '1') {
ImageSetPixel ($base_image,$x+$outerFrame,$y+$outerFrame,$col[1]);
}
}
}
//通过两个循环,将$tab数组中的1填充为黑色,剩下的0为白
//$outerFrame表示留白
$target_image =ImageCreate($imgW * $pixelPerPoint, $imgH * $pixelPerPoint);
//ImageCreate这个函数刚刚介绍过了,干嘛又调用…………而且大小是原来的$pixelPerPoint倍!
//好吧,$pixelPerPoint是放大倍数,这里开始将刚刚生成的画按需放大(现在只是生成放大的画布)
ImageCopyResized($target_image, $base_image, 0, 0, 0, 0, $imgW * $pixelPerPoint, $imgH * $pixelPerPoint, $imgW, $imgH);
//imagecopyresized — 拷贝部分图像并调整大小
//将刚刚的画放大$pixelPerPoint倍之后复制到新建的画布里面
ImageDestroy($base_image);
//imagedestroy — 销毁一图像
return $target_image;
//返回生成的最后图像!
}
4. What is yours is what is practical.
So…………
(1) Can "black dots" be turned into colored dots? Become love? , turns into a photo of your girlfriend? Become text?
(2) Can you add something in the middle of the image, a word "love", or something that can express your heart?
5. Write your own method
private static function myImage($frame, $pixelPerPoint = 4, $outerFrame = 4, $point, $centerPoint ){
/*
 * array $point 表示所填充的点的样式
 * array $centerPoint 表示图片中间部分的样式
 * $point = array
	(
		'kind'=>'',//col,img,word
		'info'=>'' //rgb,filename
	)
 * $centerPoint = array
	(
		'kind'=>'',//col,img,word
		'info'=>''
	)
 * 没有编写完,但是思路是一样的
 */

	if($point['kind'] == 'col'){
		$R1 = $point['info']['0']['R'];
		$G1 = $point['info']['0']['G'];
		$B1 = $point['info']['0']['B'];
		$R2 = $point['info']['1']['R'];
		$G2 = $point['info']['1']['G'];
		$B2 = $point['info']['1']['B'];

		$h = count($frame);
		$w = strlen($frame[0]);

		$imgW = $w + 2*$outerFrame;
		$imgH = $h + 2*$outerFrame;

		$base_image =ImageCreate($imgW, $imgH);

		$col[0] = ImageColorAllocate($base_image,$R1,$G1,$B1);
		$col[1] = ImageColorAllocate($base_image,$R2,$G2,$B2);

		imagefill($base_image, 0, 0, $col[0]);

		for($y=0; $y<$h; $y++) {
			for($x=0; $x<$w; $x++) {
				if ($frame[$y][$x] == '1') {
					ImageSetPixel ($base_image,$x+$outerFrame,$y+$outerFrame,$col[1]);
				}
			}
		}
		//////////////////////x
		$target_image =ImageCreate($imgW * $pixelPerPoint, $imgH * $pixelPerPoint);
		ImageCopyResized($target_image, $base_image, 0, 0, 0, 0, $imgW * $pixelPerPoint, $imgH * $pixelPerPoint, $imgW, $imgH);
		ImageDestroy($base_image);

		return $target_image;
	}elseif($point['kind'] == 'img'){
		function getSquare($image, $multi){
			$imgW = imagesx($image);
			$imgH = imagesy($image);
			$imgMin = min($imgH,$imgW);
			$target_image =imagecreatetruecolor($imgMin,$imgMin);
			imagecopyresampled($target_image, $image, 0, 0, 0, 0, $imgMin , $imgMin, $imgW, $imgH);
			//ImageCopyResized($target_image, $image, 0, 0, 0, 0, $imgW * $multi, $imgH * $multi, $imgW, $imgH);

			$multi_image =imagecreatetruecolor($imgMin*$multi,$imgMin*$multi);
			imagecopyresampled($multi_image, $target_image, 0, 0, 0, 0, $imgMin*$multi,$imgMin*$multi, $imgMin, $imgMin);
			//ImageCopyResized($target_image, $image, 0, 0, 0, 0, $imgW * $multi, $imgH * $multi, $imgW, $imgH);


			ImageDestroy($image);
			return $multi_image;
		}

		function getSameSize($image,$pixelPerPoint){
			$imgW = imagesx($image);
			$imgH = imagesy($image);


			$target_image =imagecreatetruecolor($pixelPerPoint,$pixelPerPoint);

			ImageCopyResized($target_image, $image, 0, 0, 0, 0, $pixelPerPoint , $pixelPerPoint, $imgW, $imgH);
			//ImageCopyResized($target_image, $image, 0, 0, 0, 0, $imgW * $multi, $imgH * $multi, $imgW, $imgH);

			ImageDestroy($image);
			return $target_image;
		}

		$h = count($frame);
		$w = strlen($frame[0]);

		$imgW = $w + 2*$outerFrame;
		$imgH = $h + 2*$outerFrame;

		$base_image =ImageCreate($imgW*$pixelPerPoint, $imgH*$pixelPerPoint);


		imagefill($base_image, 0, 0, ImageColorAllocate($base_image,255,255,255));

		$pointimg = imagecreatefromjpeg ($point['info']);
		$newimg = getSquare($pointimg, 1);
		$newimgpoint = getSameSize($newimg,$pixelPerPoint);


		for($y=0; $y<$h; $y++) {
			for($x=0; $x<$w; $x++) {
				if ($frame[$y][$x] == '1') {
					imagecopyresampled($base_image, $newimgpoint, $y*$pixelPerPoint, $x*$pixelPerPoint, 0, 0, $pixelPerPoint, $pixelPerPoint, $pixelPerPoint, $pixelPerPoint);
				}
			}
		}

		return $base_image;
	}elseif($point['kind'] == 'word'){

	}else{
		$h = count($frame);
		$w = strlen($frame[0]);

		$imgW = $w + 2*$outerFrame;
		$imgH = $h + 2*$outerFrame;

		$base_image =ImageCreate($imgW, $imgH);

		$col[0] = ImageColorAllocate($base_image,255,255,255);
		$col[1] = ImageColorAllocate($base_image,0,0,0);

		imagefill($base_image, 0, 0, $col[0]);

		for($y=0; $y<$h; $y++) {
			for($x=0; $x<$w; $x++) {
				if ($frame[$y][$x] == '1') {
					ImageSetPixel ($base_image,$x+$outerFrame,$y+$outerFrame,$col[1]);
				}
			}
		}
		//////////////////////x
		$target_image =ImageCreate($imgW * $pixelPerPoint, $imgH * $pixelPerPoint);
		ImageCopyResized($target_image, $base_image, 0, 0, 0, 0, $imgW * $pixelPerPoint, $imgH * $pixelPerPoint, $imgW, $imgH);
		ImageDestroy($base_image);

		return $target_image;
	}


} At present, both corporate and personal websites, and even media platforms have posted their own QR codes. Firstly, they can cater to market demand, and secondly, they can attract everyone’s attention. Due to the continuous expansion of the demand for QR codes, there are more and more types of QR code generators on the market. However, the QR codes generated by most QR code generators are black and white, with a relatively simple appearance and no distinctive features. If you want to pursue individuality and generate colorful QR codes, you can take a look at how Sesame does it.
The QR code generated by the QR code generator that we see most in our daily life is nothing more than a regular square matrix QR code with a regular square in the upper right, upper left, and lower left. It has information acquisition (text, With functions such as business cards, maps, WIFI passwords, website addresses, text messages, and videos, Sesame QR code generator is not limited to these. Sesame QR code generator can not only generate QR codes by inputting text, business cards, website addresses, WIFI, maps, pictures, MP3, Sesame numbers and other information, but can also change the shape and color according to user preferences and even create personalized templates to generate personalized patterns and colors. QR code.
Interface for generating QR codes on Sesame.com
How to generate color QR codes on Sesame.com
1. Register as a Sesame user
2. Select text, business card, website, WIFI, map, picture, MP3 , any type of Sesame account
3. Fill in the content to be generated to generate a QR code. You can choose between ordinary QR codes and personalized templates. If you choose a normal QR code, you can choose your favorite color according to your personal preferences, add a LOGO or adjust the shape to generate a QR code; if you choose a personalized template, you can choose your favorite template to generate a personalized and fun QR code, which can be displayed in real time on the right Preview the generated QR code, and finally download the generated QR code to your local computer!
Normal QR code
Personalized template
Generating color QR code is very simple, try it now! Sodium)
There are many generator software online now, but most of them are nothing new. I recently tried the new QR code generator from Sesame.com, and I was not disappointed. The generator can adjust the color and gradient at will. , you can also adjust the shape, add a logo, and especially you can choose a personalized template to make the QR code cute and lively.

Hot AI Tools

Undresser.AI Undress
AI-powered app for creating realistic nude photos

AI Clothes Remover
Online AI tool for removing clothes from photos.

Undress AI Tool
Undress images for free

Clothoff.io
AI clothes remover

Video Face Swap
Swap faces in any video effortlessly with our completely free AI face swap tool!

Hot Article
Hot Tools

Notepad++7.3.1
Easy-to-use and free code editor

SublimeText3 Chinese version
Chinese version, very easy to use

Zend Studio 13.0.1
Powerful PHP integrated development environment

Dreamweaver CS6
Visual web development tools

SublimeText3 Mac version
God-level code editing software (SublimeText3)
Hot Topics
 1386
1386
 52
52

 How to set up the keyboard boot function on a GIGABYTE motherboard (enable keyboard boot mode on GIGABYTE motherboard)
Dec 31, 2023 pm 05:15 PM
How to set up the keyboard boot function on a GIGABYTE motherboard (enable keyboard boot mode on GIGABYTE motherboard)
Dec 31, 2023 pm 05:15 PM
How to set up keyboard startup on Gigabyte's motherboard. First, if it needs to support keyboard startup, it must be a PS2 keyboard! ! The setting steps are as follows: Step 1: Press Del or F2 to enter the BIOS after booting, and go to the Advanced (Advanced) mode of the BIOS. Ordinary motherboards enter the EZ (Easy) mode of the motherboard by default. You need to press F7 to switch to the Advanced mode. ROG series motherboards enter the BIOS by default. Advanced mode (we use Simplified Chinese to demonstrate) Step 2: Select to - [Advanced] - [Advanced Power Management (APM)] Step 3: Find the option [Wake up by PS2 keyboard] Step 4: This option The default is Disabled. After pulling down, you can see three different setting options, namely press [space bar] to turn on the computer, press group
 What is the best graphics card for i7 3770?
Dec 29, 2023 am 09:12 AM
What is the best graphics card for i7 3770?
Dec 29, 2023 am 09:12 AM
What graphics card is good for Core i73770? RTX3070 is a very powerful graphics card with excellent performance and advanced technology. Whether you're playing games, rendering graphics, or performing machine learning, the RTX3070 can handle it with ease. It uses NVIDIA's Ampere architecture, has 5888 CUDA cores and 8GB of GDDR6 memory, which can provide a smooth gaming experience and high-quality graphics effects. RTX3070 also supports ray tracing technology, which can present realistic light and shadow effects. All in all, the RTX3070 is a powerful and advanced graphics card suitable for those who pursue high performance and high quality. RTX3070 is an NVIDIA series graphics card. Powered by 2nd generation NVID
 Unable to open Win10 personalization options
Jan 11, 2024 pm 04:06 PM
Unable to open Win10 personalization options
Jan 11, 2024 pm 04:06 PM
Many friends have found that after the win10 system is updated, the personalized settings cannot be opened. It keeps showing that the file does not have a program related to it to perform the operation. Please install a program. What is going on? Use winR to open "Run" , right-click to delete the entire ms-seeting, and you can open it. Let’s take a look at the details together. How to open personalization in win10 1. First, we press "Win+R" to call out the run, click and enter "services.msc", and then press Enter to confirm. 2. Then we click to open "windowsupdate" in the pop-up window and set the startup type to "disabled". 3. Then we put SoftwareDist in C:\Windows
 Beautiful pictures change every day! A complete guide to focusing on desktop and lock screen settings in Windows 11
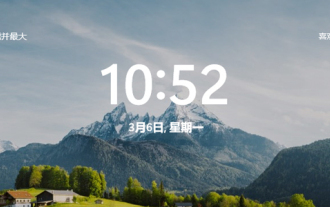
Mar 25, 2024 am 09:01 AM
Beautiful pictures change every day! A complete guide to focusing on desktop and lock screen settings in Windows 11
Mar 25, 2024 am 09:01 AM
Windows 11’s Focus feature can automatically update your desktop wallpapers, themes, and lock screen interface, presenting you with a selection of beautiful pictures of landscapes, cities, animals, etc. every day. These images are all sourced from Bing search, which not only makes the user experience more personalized, but also occasionally displays practical suggestions and tips on the lock screen, bringing additional surprises and help to users. Method 1 to use Windows 11 Focus Desktop: Set Windows Focus Desktop Wallpaper 1 Press the Windows+I shortcut key to open "Settings" and select "Personalization" > "Background". 2 In the "Personalize background" drop-down list, select the "Windows Focus" option. Select Windows Spotlight Wallpaper
 Choosing the right tablet for music students
Jan 10, 2024 pm 10:09 PM
Choosing the right tablet for music students
Jan 10, 2024 pm 10:09 PM
Which tablet is suitable for musicians? The 12.9-inch speaker in Huawei’s iPad is a very good product. It comes with four speakers and the sound is excellent. Moreover, it belongs to the pro series, which is slightly better than other styles. Overall, ipad pro is a very good product. The speaker of this mini4 mobile phone is small and the effect is average. It cannot be used to play music externally, you still need to rely on headphones to enjoy music. Headphones with good sound quality will have a slightly better effect, but cheap headphones worth thirty or forty yuan cannot meet the requirements. What tablet should I use for electronic piano music? If you want to buy an iPad larger than 10 inches, I recommend using two applications, namely Henle and Piascore. Provided by Henle
 Specific method to create film movement effect in PPT
Mar 26, 2024 pm 04:00 PM
Specific method to create film movement effect in PPT
Mar 26, 2024 pm 04:00 PM
1. Start PPT, create a new blank document, select all text boxes and delete them. 2. Execute the Insert-Shape command, drag a rectangle in the document, and fill the shape with black. 3. Drag the rectangle to elongate it, execute the Insert-Shape command, drag out the small square, and set the fill color to white. 4. Copy and paste the small squares one by one so that the top and bottom are evenly distributed on both sides of the film. After selecting them all with ctrl+a, right-click and select Group. 5. Execute the Insert-Picture command, find the picture to be inserted in the pop-up dialog box, click to open, and adjust the size and position of the picture. 6. Repeat step 5 to insert and set the remaining pictures in order to form a film picture. 7. Select the film, execute animation-add animation command
 How to make a tomato novel cover
Feb 23, 2024 pm 01:55 PM
How to make a tomato novel cover
Feb 23, 2024 pm 01:55 PM
How to make the cover of Tomato novel? You can make exclusive novel cover in Tomato novel, but most friends don’t know how to make the cover of Tomato novel. Next is the picture of how to make the cover of Tomato novel brought by the editor to the players. Tutorial, interested players come and take a look! Tomato Novel usage tutorial How to make a Tomato Novel cover 1. First open the Tomato Novel APP, enter the work management page to create a new book, and select the [Cover Template] as shown by the arrow below; 2. Then enter the cover template page and select your favorite cover Template; 3. After finally selecting the cover, click [Confirm] in the upper right corner.
 Operation guide for creating mobile Excel tables
Feb 18, 2024 pm 02:41 PM
Operation guide for creating mobile Excel tables
Feb 18, 2024 pm 02:41 PM
Mobile Excel table creation tutorial With the popularity of mobile devices and the continuous advancement of technology, mobile phones have become one of the indispensable tools in our daily life and work. Using Excel spreadsheets on your mobile phone can easily record, calculate and analyze data and improve work efficiency. This article will share with you the basic operations and techniques for creating mobile Excel tables. 1. Choose the right application. There are many mobile Excel applications on the market to choose from, such as GoogleSheets, Micro
