

Mac系统下使用brew搭建PHP(LNMP/LAMP)开发环境_php技巧

Mac下搭建lamp开发环境很容易,有xampp和mamp现成的集成环境。但是集成环境对于经常需要自定义一些配置的开发者来说会非常麻烦,而且Mac本身自带apache和php,在brew的帮助下非常容易手动搭建,可控性很高。
Brew
brew对于mac,就像apt-get对于ubuntu,安装软件的好帮手,不能方便更多…
brew的安装方式如下:
ruby -e "$(curl -fsSL https://raw.github.com/mxcl/homebrew/go/install)"
brew常用选项
brew install xxx
brew uninstall xxx
brew list
brew update xxx
Apache || Nginx
Apache
Apache的话使用mac自带的基本就够了,我的系统是10.9,可以使用以下命令控制Apache
sudo apachectl start
sudo apachectl restart
sudo apachectl stop
唯一要改的是主目录,mac默认在home下有个sites(站点)目录,访问路径是
http://localhost/~user_name
这样很不适合做开发用,修改/etc/apache2/httpd.conf内容
DocumentRoot "/Users/username/Sites"
Options Indexes MultiViews
AllowOverride All
Order allow,deny
Allow from all
这样sites目录就是网站根目录了,代码都往这个下头丢
Nginx
要使用Nginx也比较方便,首先安装
brew install nginx
启动关闭Nginx的命令如下(如果想要监听80端口,必须以管理员身份运行)
#打开 nginx
sudo nginx
#重新加载配置|重启|停止|退出 nginx
nginx -s reload|reopen|stop|quit
#测试配置是否有语法错误
nginx -t
配置Nginx
cd /usr/local/etc/nginx/
mkdir conf.d
修改Nginx配置文件
vim nginx.conf
主要修改位置是最后的include
worker_processes 1;
error_log /usr/local/var/log/nginx/error.log warn;
pid /usr/local/var/run/nginx.pid;
events {
worker_connections 256;
}
http {
include mime.types;
default_type application/octet-stream;
log_format main '$remote_addr - $remote_user [$time_local] "$request" '
'$status $body_bytes_sent "$http_referer" '
'"$http_user_agent" "$http_x_forwarded_for"';
access_log /usr/local/var/log/nginx/access.log main;
port_in_redirect off;
sendfile on;
keepalive_timeout 65;
include /usr/local/etc/nginx/conf.d/*.conf;
}
修改自定义文件
vim ./conf.d/default.conf
增加一个监听端口
server {
listen 80;
server_name localhost;
root /Users/username/Sites/; # 该项要修改为你准备存放相关网页的路径
location / {
index index.php;
autoindex on;
}
#proxy the php scripts to php-fpm
location ~ \.php$ {
include /usr/local/etc/nginx/fastcgi.conf;
fastcgi_intercept_errors on;
fastcgi_pass 127.0.0.1:9000;
}
}
这个时候还不能访问php站点,因为还没有开启php-fpm。
虽然mac 10.9自带了php-fpm,但是由于我们使用了最新的PHP,PHP中自带php-fpm,所以使用PHP中的php-fpm可以保证版本的一致。
这里的命令在安装完下一步的php后再执行
sudo nginx
sudo php-fpm -D
PHP
PHP在mac下默认安装了,但是不好控制版本,利用brew可以再mac下安装最新版本,甚至是多个版本,我装了php5.5
brew update
brew tap homebrew/dupes
brew tap josegonzalez/homebrew-php
# brew install php55 --with-fpm #Nginx
brew install php55 #Apache
然后修改php的cli路径和apache使用的php模块。在.bashrc或.zshrc里头加以下内容
#export PATH="$(brew --prefix josegonzalez/php/php55)/bin:$PATH"
export PATH="/usr/local/bin:/usr/local/sbin:$PATH"
就用刚刚安装的php代替了系统默认cli的php版本。然后在/etc/apache2/httpd.conf下增加
LoadModule php5_module /usr/local/Cellar/php55/5.5.8/libexec/apache2/libphp5.so
这样就对apache使用的php版本也进行了修改。
后面会用到mongo和mysql,所以可以直接利用下面命令安装php模块,其他模块也类似
brew install php55-mysql
brew install php55-mongo
MySQL
mac不自带mysql,这里需要重新安装,方法依然很简单
brew install mysql
unset TMPDIR
mysql_install_db --verbose --user=`whoami` --basedir="$(brew --prefix mysql)" --datadir=/usr/local/var/mysql --tmpdir=/tmp
sudo chown -R your_user /usr/local/var/mysql/
第一句是安装,后面的是确保正常使用。然后是启动命令
mysql.server start
最好给mysql设个密码,方法如下
mysqladmin -u root password 'xxx'
如果想修改mysql的配置,在/usr/local/etc下建立一个my.cnf,例如增加log
[mysqld]
general-log
general_log_file = /usr/local/var/log/mysqld.log
MongoDB
MongoDB可以说是最简单的一个,直接执行
brew install mongodb
启动方法
mongod --fork
PHPMyAdmin
phpmyadmin几乎是管理mysql最容易的web应用了吧,每次我都顺道装上。
1.去官网下载最新的版本
2.解压到~/Sites/phpmyadmin下
3.在phpmyadmin目录下创建一个可写的config目录
4.打开http://localhost/phpmyadmin/setup,安装一个服务,最后保存(这里只需要输入帐号密码就够了)
5.将config下生成的config.inc.php移到phpmyadmin根目录下
6.删除config
这样就装好了,虽然可能有点小复杂,但是来一次就习惯了。
这里很可能会遇到2002错误,就是找不到mysql.sock的问题,用下面方法解决
sudo mkdir /var/mysql
sudo ln -s /tmp/mysql.sock /var/mysql/mysql.sock
RockMongo
RockMongo是MongoDB很好用的一个web应用,安装也很容易
1.去官网下载最新版本
2.解压到~/Sites/rockmongo下
3.运行http://localhost/rockmongo即可
完成
这样就在mac下配置好一个php开发环境了,enjoy it!

Hot AI Tools

Undresser.AI Undress
AI-powered app for creating realistic nude photos

AI Clothes Remover
Online AI tool for removing clothes from photos.

Undress AI Tool
Undress images for free

Clothoff.io
AI clothes remover

AI Hentai Generator
Generate AI Hentai for free.

Hot Article
Hot Tools

Notepad++7.3.1
Easy-to-use and free code editor

SublimeText3 Chinese version
Chinese version, very easy to use

Zend Studio 13.0.1
Powerful PHP integrated development environment

Dreamweaver CS6
Visual web development tools

SublimeText3 Mac version
God-level code editing software (SublimeText3)
Hot Topics
 1359
1359
 52
52

 How to change the system default input method on Mac system-How to change the system default input method
Mar 18, 2024 pm 03:00 PM
How to change the system default input method on Mac system-How to change the system default input method
Mar 18, 2024 pm 03:00 PM
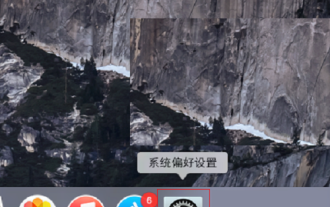
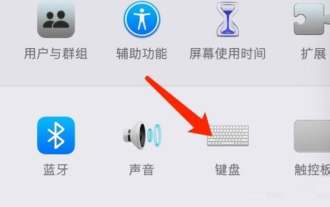
Friends, do you know how to change the system default input method on Mac system? Today I will explain how to change the system default input method on Mac system. If you are interested, come and take a look with me. I hope it can help you. Step 1: On the Mac system desktop, click System Preferences to enter. Step 2: Enter the system preferences interface and click on the keyboard to enter. Step 3: In the keyboard interface, click the input source to enter. Step 4: Enter the input source interface and check the option to automatically switch to the input source of the document.
 How to set Launchpad shortcut keys on Mac system - How to set Launchpad shortcut keys on Mac system
Mar 18, 2024 pm 12:40 PM
How to set Launchpad shortcut keys on Mac system - How to set Launchpad shortcut keys on Mac system
Mar 18, 2024 pm 12:40 PM
Friends, do you know how to set the launch pad shortcut keys on Mac system? Today I will explain how to set the launch pad shortcut keys on Mac system. If you are interested, come and take a look with me. I hope it can help you. Step 1: After opening Mac System Preferences, click Keyboard. Step 2: On the keyboard settings page, click Shortcut Keys. Step 3: After selecting the launch pad, enter the launch pad shortcut key.
 How to enable detection of password leaks in Mac system - How to enable detection of password leaks in Mac system
Mar 18, 2024 pm 02:50 PM
How to enable detection of password leaks in Mac system - How to enable detection of password leaks in Mac system
Mar 18, 2024 pm 02:50 PM
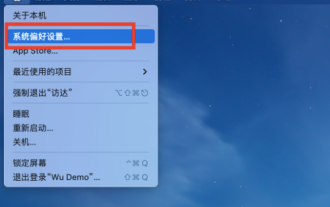
Recently, some friends have asked me how to turn on the detection of password leaks in the Mac system. The following is a method to turn on the detection of password leaks in the Mac system. Friends in need can come and learn more. Step 1: In the system start menu, select [System Preferences]. Step 2: In System Preferences, select the [Password] setting item. Step 3: On the password setting page, turn on the [Detect leaked passwords] setting.
 How to set the scroll bar to always show on Mac system - How to set the scroll bar to always show
Mar 18, 2024 pm 06:22 PM
How to set the scroll bar to always show on Mac system - How to set the scroll bar to always show
Mar 18, 2024 pm 06:22 PM
Recently, some friends have consulted the editor about how to set the scroll bar of the Mac system to always display. The following will bring you the method of setting the scroll bar of the Mac system to always display. Friends who need it can learn more. Step 1: In the system start menu, select the [System Preferences] option. Step 3: On the System Preferences page, select the [General] option. Step 3: On the general page, select [Always] to display scroll bars.
 A complete guide to installing and configuring Maven on Mac systems
Jan 28, 2024 am 09:42 AM
A complete guide to installing and configuring Maven on Mac systems
Jan 28, 2024 am 09:42 AM
Detailed explanation of the methods and techniques of installing Maven on Mac system. As a developer, installing Maven on Mac system is a very common requirement, because Maven is a very popular build tool for managing the dependencies and build process of Java projects. This article will introduce in detail the methods and techniques of installing Maven on Mac system, and provide specific code examples. 1. Download Maven first, you need to download it from the official website (https://maven.apache.org/down
 How to change the keyboard type on Mac system - How to change the keyboard type on Mac system
Mar 18, 2024 pm 05:40 PM
How to change the keyboard type on Mac system - How to change the keyboard type on Mac system
Mar 18, 2024 pm 05:40 PM
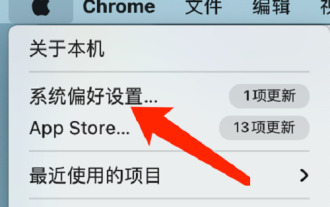
Recently, some friends have consulted the editor about how to change the keyboard type on Mac system. The following is a method for changing the keyboard type on Mac system. Friends in need can come and learn more. Step 1: After clicking the Apple icon on the system menu bar, click System Preferences. Step 2: After opening System Preferences, click Keyboard. Step 3: On the keyboard settings page, click Change Keyboard Type.
 How to use the script editor on Mac system - How to use the script editor on Mac system
Mar 18, 2024 pm 03:52 PM
How to use the script editor on Mac system - How to use the script editor on Mac system
Mar 18, 2024 pm 03:52 PM
Friends, do you know how to use the script editor on Mac system? Today I will explain how to use the script editor on Mac system. If you are interested, come and take a look with me. I hope it can help you. Step 1: Open the Go option (as shown in the picture). Step 2: Select the utility option (as shown in the picture). Step 3: Open the script editor (as shown in the picture). Step 4: Now you can enter the apple script (as shown in the picture). Step 5: Click the play switch button above to execute the script (as shown in the picture).
 How to not display the volume icon on Mac system-How to not display the volume icon on Mac system
Mar 18, 2024 pm 11:10 PM
How to not display the volume icon on Mac system-How to not display the volume icon on Mac system
Mar 18, 2024 pm 11:10 PM
Recently, some friends have asked me how to prevent the volume icon from being displayed on the Mac system. The following is a method to prevent the volume icon from being displayed on the Mac system. Friends who need it can learn more. Step 1: In the system menu bar, click System Preferences. Step 2: On the volume settings page, uncheck Show volume in menu bar. Step 3: In the system menu bar, the volume icon will no longer be displayed.
