

swfupload configuration and usage_PHP tutorial

swfupload is a component used for file upload. We think it is very good for large files. Let me introduce the configuration and use of swfupload.
swfupload is easy to use for uploading large files. Let’s take the classic form demo as an example to briefly explain the usage.
Download address: http://code.google.com/p/swfupload/downloads/ list
Among them, SWFUpload_v250_beta_3_samples.zip is the example code. After decompression, rename it to swfupload and save it to the local main folder (nginx+php environment). You can then use
http://localhost /swfupload/demos/ Access two folders in
. demos is an instance of the client, and samples provides file saving codes in each language.
Switch to http://localhost/swfupload/demos/formsdemo/, which is the normal form mode
Create a new folder uploads under /demos/formsdemo/
Change /smaples Copy the code in /php/upload.php to the beginning of /demos/formsdemo/upload.php, that is,
// The Demos don't save files
below the comment.
Modify
| The code is as follows | Copy code | ||||
| |||||
| 代码如下 | 复制代码 |
|
if (isset($_FILES["resume_file"]) && is_uploaded_file($_FILES["resume_file"]["tmp_name"]) && $_FILES["resume_file"]["error"] == 0) { echo rand(1000000, 9999999); // Create a pretend file id, this might have come from a database. } | |
In the database processing part, the following code should be modified:
| The code is as follows | Copy code | ||||
|
if (isset($_FILES["resume_file"]) && is_uploaded_file($_FILES["resume_file"]["tmp_name"]) && $_FILES["resume_file"]["error"] == 0) { echo rand(1000000, 9999999); // Create a pretend file id, this might have come from a database.
| |||||
| 代码如下 | 复制代码 |
|
view sourceprint?http { ... client_max_body_size 128M ... } | |
| The code is as follows | Copy code |
| /demos/formsdemo/index.php in view sourceprint?file_size_limit: " 100 MB", | |
| The code is as follows | Copy code |
| view sourceprint?http { ... client_max_body_size 128M ... } | |
At the same time, you need to modify the server configuration php.ini, /etc/init.d/php-cgi reload
The code is as follows
|
Copy code
|
||||
| view sourceprint?upload_max_filesize 100M | |||||
memory_limit 128M www.bkjia.com

Hot AI Tools

Undresser.AI Undress
AI-powered app for creating realistic nude photos

AI Clothes Remover
Online AI tool for removing clothes from photos.

Undress AI Tool
Undress images for free

Clothoff.io
AI clothes remover

AI Hentai Generator
Generate AI Hentai for free.

Hot Article
Hot Tools

Notepad++7.3.1
Easy-to-use and free code editor

SublimeText3 Chinese version
Chinese version, very easy to use

Zend Studio 13.0.1
Powerful PHP integrated development environment

Dreamweaver CS6
Visual web development tools

SublimeText3 Mac version
God-level code editing software (SublimeText3)
Hot Topics
 1386
1386
 52
52

 How to use DirectX repair tool? Detailed usage of DirectX repair tool
Mar 15, 2024 am 08:31 AM
How to use DirectX repair tool? Detailed usage of DirectX repair tool
Mar 15, 2024 am 08:31 AM
The DirectX repair tool is a professional system tool. Its main function is to detect the DirectX status of the current system. If an abnormality is found, it can be repaired directly. There may be many users who don’t know how to use the DirectX repair tool. Let’s take a look at the detailed tutorial below. 1. Use repair tool software to perform repair detection. 2. If it prompts that there is an abnormal problem in the C++ component after the repair is completed, please click the Cancel button, and then click the Tools menu bar. 3. Click the Options button, select the extension, and click the Start Extension button. 4. After the expansion is completed, re-detect and repair it. 5. If the problem is still not solved after the repair tool operation is completed, you can try to uninstall and reinstall the program that reported the error.
 What to do if the 0x80004005 error code appears. The editor will teach you how to solve the 0x80004005 error code.
Mar 21, 2024 pm 09:17 PM
What to do if the 0x80004005 error code appears. The editor will teach you how to solve the 0x80004005 error code.
Mar 21, 2024 pm 09:17 PM
When deleting or decompressing a folder on your computer, sometimes a prompt dialog box "Error 0x80004005: Unspecified Error" will pop up. How should you solve this situation? There are actually many reasons why the error code 0x80004005 is prompted, but most of them are caused by viruses. We can re-register the dll to solve the problem. Below, the editor will explain to you the experience of handling the 0x80004005 error code. Some users are prompted with error code 0X80004005 when using their computers. The 0x80004005 error is mainly caused by the computer not correctly registering certain dynamic link library files, or by a firewall that does not allow HTTPS connections between the computer and the Internet. So how about
 How to transfer files from Quark Cloud Disk to Baidu Cloud Disk?
Mar 14, 2024 pm 02:07 PM
How to transfer files from Quark Cloud Disk to Baidu Cloud Disk?
Mar 14, 2024 pm 02:07 PM
Quark Netdisk and Baidu Netdisk are currently the most commonly used Netdisk software for storing files. If you want to save the files in Quark Netdisk to Baidu Netdisk, how do you do it? In this issue, the editor has compiled the tutorial steps for transferring files from Quark Network Disk computer to Baidu Network Disk. Let’s take a look at how to operate it. How to save Quark network disk files to Baidu network disk? To transfer files from Quark Network Disk to Baidu Network Disk, you first need to download the required files from Quark Network Disk, then select the target folder in the Baidu Network Disk client and open it. Then, drag and drop the files downloaded from Quark Cloud Disk into the folder opened by the Baidu Cloud Disk client, or use the upload function to add the files to Baidu Cloud Disk. Make sure to check whether the file was successfully transferred in Baidu Cloud Disk after the upload is completed. That's it
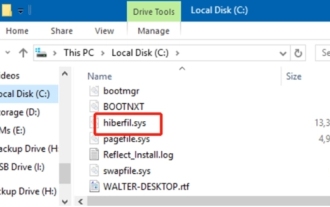 What is hiberfil.sys file? Can hiberfil.sys be deleted?
Mar 15, 2024 am 09:49 AM
What is hiberfil.sys file? Can hiberfil.sys be deleted?
Mar 15, 2024 am 09:49 AM
Recently, many netizens have asked the editor, what is the file hiberfil.sys? Can hiberfil.sys take up a lot of C drive space and be deleted? The editor can tell you that the hiberfil.sys file can be deleted. Let’s take a look at the details below. hiberfil.sys is a hidden file in the Windows system and also a system hibernation file. It is usually stored in the root directory of the C drive, and its size is equivalent to the size of the system's installed memory. This file is used when the computer is hibernated and contains the memory data of the current system so that it can be quickly restored to the previous state during recovery. Since its size is equal to the memory capacity, it may take up a larger amount of hard drive space. hiber
 Understand Linux Bashrc: functions, configuration and usage
Mar 20, 2024 pm 03:30 PM
Understand Linux Bashrc: functions, configuration and usage
Mar 20, 2024 pm 03:30 PM
Understanding Linux Bashrc: Function, Configuration and Usage In Linux systems, Bashrc (BourneAgainShellruncommands) is a very important configuration file, which contains various commands and settings that are automatically run when the system starts. The Bashrc file is usually located in the user's home directory and is a hidden file. Its function is to customize the Bashshell environment for the user. 1. Bashrc function setting environment
 Simple steps to upload your own music on Kugou
Mar 25, 2024 pm 10:56 PM
Simple steps to upload your own music on Kugou
Mar 25, 2024 pm 10:56 PM
1. Open Kugou Music and click on your profile picture. 2. Click the settings icon in the upper right corner. 3. Click [Upload Music Works]. 4. Click [Upload Works]. 5. Select the song and click [Next]. 6. Finally, click [Upload].
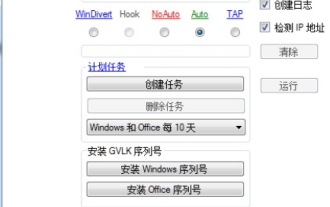 What is the KMS activation tool? How to use the KMS activation tool? How to use KMS activation tool?
Mar 18, 2024 am 11:07 AM
What is the KMS activation tool? How to use the KMS activation tool? How to use KMS activation tool?
Mar 18, 2024 am 11:07 AM
The KMS Activation Tool is a software tool used to activate Microsoft Windows and Office products. KMS is the abbreviation of KeyManagementService, which is key management service. The KMS activation tool simulates the functions of the KMS server so that the computer can connect to the virtual KMS server to activate Windows and Office products. The KMS activation tool is small in size and powerful in function. It can be permanently activated with one click. It can activate any version of the window system and any version of Office software without being connected to the Internet. It is currently the most successful and frequently updated Windows activation tool. Today I will introduce it Let me introduce to you the kms activation work
 How to configure and install FTPS in Linux system
Mar 20, 2024 pm 02:03 PM
How to configure and install FTPS in Linux system
Mar 20, 2024 pm 02:03 PM
Title: How to configure and install FTPS in Linux system, specific code examples are required. In Linux system, FTPS is a secure file transfer protocol. Compared with FTP, FTPS encrypts the transmitted data through TLS/SSL protocol, which improves Security of data transmission. In this article, we will introduce how to configure and install FTPS in a Linux system and provide specific code examples. Step 1: Install vsftpd Open the terminal and enter the following command to install vsftpd: sudo
