

php_imagick实现图片剪切、旋转、锐化、减色或增加特效的方法_php技巧

本文实例讲述了php_imagick实现图片剪切、旋转、锐化、减色或增加特效的方法。分享给大家供大家参考。具体分析如下:
一个可以供PHP调用ImageMagick功能的PHP扩展。使用这个扩展可以使PHP具备和ImageMagick相同的功能。
ImageMagick是一套功能强大、稳定而且免费的工具集和开发包,可以用来读、写和处理超过185种基本格式的图片文件,包括流行的TIFF, JPEG, GIF, PNG, PDF以及PhotoCD等格式。利用ImageMagick,你可以根据web应用程序的需要动态生成图片, 还可以对一个(或一组)图片进行改变大小、旋转、锐化、减色或增加特效等操作,并将操作的结果以相同格式或其它格式保存。
php_imagick是PHP对图片处理的一个扩展包,可以完成对图片改变大小、旋转、锐化、减色或增加特效等操作。
一、windows下安装Imagick扩展:
1、下载 ImageMagick并安装
http://image_magick.veidrodis.com/image_magick/binaries/ImageMagick-6.6.2-10-Q16-windows-dll.exe
2、下载php_imagick.dll
http://valokuva.org/outside-blog-content/imagick-windows-builds/php53/imagick-2.3.0-dev/vc9_nts/php_imagick.dll
如果你用的是线程安全的php,请下载
http://valokuva.org/outside-blog-content/imagick- windows-builds/php53/imagick-2.3.0-dev/vc9_zts/php_imagick.dll
3、设置
在php.ini中添加
extension=php_imagick.dll ,重启web server
二、linux下安装Imagick扩展:
1.yum安装ImageMagick
yum install ImageMagick ImageMagick-devel
2.测试是否安装成功
convert -version
3.安装imagick扩展
01.wget http://pecl.php.net/get/imagick-3.1.0RC2.tgz02.tar xzvf imagick-3.1.0RC2.tgz03.cd imagick-3.1.0RC204.phpize05../configure06.make07.make install
4.编辑php.ini文件,在文件末尾添加如下代码
extension=imagick.so
5. 重新启动apache服务器
service httpd restart
三、案例
1. 边框处理
$image = new Imagick('test.jpg');
$color=new ImagickPixel();
$color->setColor("rgb(220,220,220)");
$image->borderImage($color,5,4);
$image->blurImage(5,5,imagick::CHANNEL_GREEN);
echo $image;
我们先来看个简单的实例
php_imagick程序示例
1.创建一个缩略图并显示出来
$image = new Imagick('image.jpg');
// If 0 is provided as a width or height parameter,// aspect ratio is maintained
$image->thumbnailImage(100, 0);
echo $image;
?>
2.创建一个目录下的缩略图,并保存
foreach($images as $image) {
// Providing 0 forces thumbnailImage to maintain aspect ratio
$image->thumbnailImage(1024,0);
}
$images->writeImages();
?>
3.缩略GIF动画图片
$im = new Imagick("example.gif");
/* Resize all frames */
foreach ($im as $frame) {
/* 50x50 frames */
$frame->thumbnailImage(50, 50);
/* Set the virtual canvas to correct size */
$frame->setImagePage(50, 50, 0, 0);
}/* Notice writeImages instead of writeImage */
$im->writeImages("example_small.gif", true);
?>
现在我们进入正题吧,
示例:
裁切/生成缩略图/添加水印, 自动检测和处理 GIF
调用方式:
$image = new lib_image_imagick();
$image->open('a.gif');
$image->resize_to(100, 100, 'scale_fill');
$image->add_text('1024i.com', 10, 20);
$image->add_watermark('1024i.gif', 10, 50);
$image->save_to('x.gif');
imagick.class.php
class lib_image_imagick
{
private $image = null;
private $type = null;
// 构造函数
public function __construct(){}
// 析构函数
public function __destruct()
{
if($this->image!==null) $this->image->destroy();
}
// 载入图像
public function open($path)
{
$this->image = new Imagick( $path );
if($this->image)
{
$this->type = strtolower($this->image->getImageFormat());
}
return $this->image;
}
public function crop($x=0, $y=0, $width=null, $height=null)
{
if($width==null) $width = $this->image->getImageWidth()-$x;
if($height==null) $height = $this->image->getImageHeight()-$y;
if($width
if($this->type=='gif')
{
$image = $this->image;
$canvas = new Imagick();
$images = $image->coalesceImages();
foreach($images as $frame){
$img = new Imagick();
$img->readImageBlob($frame);
$img->cropImage($width, $height, $x, $y);
$canvas->addImage( $img );
$canvas->setImageDelay( $img->getImageDelay() );
$canvas->setImagePage($width, $height, 0, 0);
}
$image->destroy();
$this->image = $canvas;
}
else
{
$this->image->cropImage($width, $height, $x, $y);
}
}
/*
* 更改图像大小
$fit: 适应大小方式
'force': 把图片强制变形成 $width X $height 大小
'scale': 按比例在安全框 $width X $height 内缩放图片, 输出缩放后图像大小 不完全等于 $width X $height
'scale_fill': 按比例在安全框 $width X $height 内缩放图片,安全框内没有像素的地方填充色, 使用此参数时可设置背景填充色 $bg_color = array(255,255,255)(红,绿,蓝, 透明度) 透明度(0不透明-127完全透明))
其它: 智能模能 缩放图像并载取图像的中间部分 $width X $height 像素大小
$fit = 'force','scale','scale_fill' 时: 输出完整图像
$fit = 图像方位值 时, 输出指定位置部分图像
字母与图像的对应关系如下:
north_west north north_east
west center east
south_west south south_east
*/
public function resize_to($width = 100, $height = 100, $fit = 'center', $fill_color = array(255,255,255,0) )
{
switch($fit)
{
case 'force':
if($this->type=='gif')
{
$image = $this->image;
$canvas = new Imagick();
$images = $image->coalesceImages();
foreach($images as $frame){
$img = new Imagick();
$img->readImageBlob($frame);
$img->thumbnailImage( $width, $height, false );
$canvas->addImage( $img );
$canvas->setImageDelay( $img->getImageDelay() );
}
$image->destroy();
$this->image = $canvas;
}
else
{
$this->image->thumbnailImage( $width, $height, false );
}
break;
case 'scale':
if($this->type=='gif')
{
$image = $this->image;
$images = $image->coalesceImages();
$canvas = new Imagick();
foreach($images as $frame){
$img = new Imagick();
$img->readImageBlob($frame);
$img->thumbnailImage( $width, $height, true );
$canvas->addImage( $img );
$canvas->setImageDelay( $img->getImageDelay() );
}
$image->destroy();
$this->image = $canvas;
}
else
{
$this->image->thumbnailImage( $width, $height, true );
}
break;
case 'scale_fill':
$size = $this->image->getImagePage();
$src_width = $size['width'];
$src_height = $size['height'];
$x = 0;
$y = 0;
$dst_width = $width;
$dst_height = $height;
if($src_width*$height > $src_height*$width)
{
$dst_height = intval($width*$src_height/$src_width);
$y = intval( ($height-$dst_height)/2 );
}
else
{
$dst_width = intval($height*$src_width/$src_height);
$x = intval( ($width-$dst_width)/2 );
}
$image = $this->image;
$canvas = new Imagick();
$color = 'rgba('.$fill_color[0].','.$fill_color[1].','.$fill_color[2].','.$fill_color[3].')';
if($this->type=='gif')
{
$images = $image->coalesceImages();
foreach($images as $frame)
{
$frame->thumbnailImage( $width, $height, true );
$draw = new ImagickDraw();
$draw->composite($frame->getImageCompose(), $x, $y, $dst_width, $dst_height, $frame);
$img = new Imagick();
$img->newImage($width, $height, $color, 'gif');
$img->drawImage($draw);
$canvas->addImage( $img );
$canvas->setImageDelay( $img->getImageDelay() );
$canvas->setImagePage($width, $height, 0, 0);
}
}
else
{
$image->thumbnailImage( $width, $height, true );
$draw = new ImagickDraw();
$draw->composite($image->getImageCompose(), $x, $y, $dst_width, $dst_height, $image);
$canvas->newImage($width, $height, $color, $this->get_type() );
$canvas->drawImage($draw);
$canvas->setImagePage($width, $height, 0, 0);
}
$image->destroy();
$this->image = $canvas;
break;
default:
$size = $this->image->getImagePage();
$src_width = $size['width'];
$src_height = $size['height'];
$crop_x = 0;
$crop_y = 0;
$crop_w = $src_width;
$crop_h = $src_height;
if($src_width*$height > $src_height*$width)
{
$crop_w = intval($src_height*$width/$height);
}
else
{
$crop_h = intval($src_width*$height/$width);
}
switch($fit)
{
case 'north_west':
$crop_x = 0;
$crop_y = 0;
break;
case 'north':
$crop_x = intval( ($src_width-$crop_w)/2 );
$crop_y = 0;
break;
case 'north_east':
$crop_x = $src_width-$crop_w;
$crop_y = 0;
break;
case 'west':
$crop_x = 0;
$crop_y = intval( ($src_height-$crop_h)/2 );
break;
case 'center':
$crop_x = intval( ($src_width-$crop_w)/2 );
$crop_y = intval( ($src_height-$crop_h)/2 );
break;
case 'east':
$crop_x = $src_width-$crop_w;
$crop_y = intval( ($src_height-$crop_h)/2 );
break;
case 'south_west':
$crop_x = 0;
$crop_y = $src_height-$crop_h;
break;
case 'south':
$crop_x = intval( ($src_width-$crop_w)/2 );
$crop_y = $src_height-$crop_h;
break;
case 'south_east':
$crop_x = $src_width-$crop_w;
$crop_y = $src_height-$crop_h;
break;
default:
$crop_x = intval( ($src_width-$crop_w)/2 );
$crop_y = intval( ($src_height-$crop_h)/2 );
}
$image = $this->image;
$canvas = new Imagick();
if($this->type=='gif')
{
$images = $image->coalesceImages();
foreach($images as $frame){
$img = new Imagick();
$img->readImageBlob($frame);
$img->cropImage($crop_w, $crop_h, $crop_x, $crop_y);
$img->thumbnailImage( $width, $height, true );
$canvas->addImage( $img );
$canvas->setImageDelay( $img->getImageDelay() );
$canvas->setImagePage($width, $height, 0, 0);
}
}
else
{
$image->cropImage($crop_w, $crop_h, $crop_x, $crop_y);
$image->thumbnailImage( $width, $height, true );
$canvas->addImage( $image );
$canvas->setImagePage($width, $height, 0, 0);
}
$image->destroy();
$this->image = $canvas;
}
}
// 添加水印图片
public function add_watermark($path, $x = 0, $y = 0)
{
$watermark = new Imagick($path);
$draw = new ImagickDraw();
$draw->composite($watermark->getImageCompose(), $x, $y, $watermark->getImageWidth(), $watermark->getimageheight(), $watermark);
if($this->type=='gif')
{
$image = $this->image;
$canvas = new Imagick();
$images = $image->coalesceImages();
foreach($image as $frame)
{
$img = new Imagick();
$img->readImageBlob($frame);
$img->drawImage($draw);
$canvas->addImage( $img );
$canvas->setImageDelay( $img->getImageDelay() );
}
$image->destroy();
$this->image = $canvas;
}
else
{
$this->image->drawImage($draw);
}
}
// 添加水印文字
public function add_text($text, $x = 0 , $y = 0, $angle=0, $style=array())
{
$draw = new ImagickDraw();
if(isset($style['font'])) $draw->setFont($style['font']);
if(isset($style['font_size'])) $draw->setFontSize($style['font_size']);
if(isset($style['fill_color'])) $draw->setFillColor($style['fill_color']);
if(isset($style['under_color'])) $draw->setTextUnderColor($style['under_color']);
if($this->type=='gif')
{
foreach($this->image as $frame)
{
$frame->annotateImage($draw, $x, $y, $angle, $text);
}
}
else
{
$this->image->annotateImage($draw, $x, $y, $angle, $text);
}
}
// 保存到指定路径
public function save_to( $path )
{
if($this->type=='gif')
{
$this->image->writeImages($path, true);
}
else
{
$this->image->writeImage($path);
}
}
// 输出图像
public function output($header = true)
{
if($header) header('Content-type: '.$this->type);
echo $this->image->getImagesBlob();
}
public function get_width()
{
$size = $this->image->getImagePage();
return $size['width'];
}
public function get_height()
{
$size = $this->image->getImagePage();
return $size['height'];
}
// 设置图像类型, 默认与源类型一致
public function set_type( $type='png' )
{
$this->type = $type;
$this->image->setImageFormat( $type );
}
// 获取源图像类型
public function get_type()
{
return $this->type;
}
// 当前对象是否为图片
public function is_image()
{
if( $this->image )
return true;
else
return false;
}
public function thumbnail($width = 100, $height = 100, $fit = true){ $this->image->thumbnailImage( $width, $height, $fit );} // 生成缩略图 $fit为真时将保持比例并在安全框 $width X $height 内生成缩略图片
/*
添加一个边框
$width: 左右边框宽度
$height: 上下边框宽度
$color: 颜色: RGB 颜色 'rgb(255,0,0)' 或 16进制颜色 '#FF0000' 或颜色单词 'white'/'red'...
*/
public function border($width, $height, $color='rgb(220, 220, 220)')
{
$color=new ImagickPixel();
$color->setColor($color);
$this->image->borderImage($color, $width, $height);
}
public function blur($radius, $sigma){$this->image->blurImage($radius, $sigma);} // 模糊
public function gaussian_blur($radius, $sigma){$this->image->gaussianBlurImage($radius, $sigma);} // 高斯模糊
public function motion_blur($radius, $sigma, $angle){$this->image->motionBlurImage($radius, $sigma, $angle);} // 运动模糊
public function radial_blur($radius){$this->image->radialBlurImage($radius);} // 径向模糊
public function add_noise($type=null){$this->image->addNoiseImage($type==null?imagick::NOISE_IMPULSE:$type);} // 添加噪点
public function level($black_point, $gamma, $white_point){$this->image->levelImage($black_point, $gamma, $white_point);} // 调整色阶
public function modulate($brightness, $saturation, $hue){$this->image->modulateImage($brightness, $saturation, $hue);} // 调整亮度、饱和度、色调
public function charcoal($radius, $sigma){$this->image->charcoalImage($radius, $sigma);} // 素描
public function oil_paint($radius){$this->image->oilPaintImage($radius);} // 油画效果
public function flop(){$this->image->flopImage();} // 水平翻转
public function flip(){$this->image->flipImage();} // 垂直翻转
}
希望本文所述对大家的PHP程序设计有所帮助。

Hot AI Tools

Undresser.AI Undress
AI-powered app for creating realistic nude photos

AI Clothes Remover
Online AI tool for removing clothes from photos.

Undress AI Tool
Undress images for free

Clothoff.io
AI clothes remover

AI Hentai Generator
Generate AI Hentai for free.

Hot Article
Hot Tools

Notepad++7.3.1
Easy-to-use and free code editor

SublimeText3 Chinese version
Chinese version, very easy to use

Zend Studio 13.0.1
Powerful PHP integrated development environment

Dreamweaver CS6
Visual web development tools

SublimeText3 Mac version
God-level code editing software (SublimeText3)
Hot Topics
 1386
1386
 52
52

 How to write a novel in the Tomato Free Novel app. Share the tutorial on how to write a novel in Tomato Novel.
Mar 28, 2024 pm 12:50 PM
How to write a novel in the Tomato Free Novel app. Share the tutorial on how to write a novel in Tomato Novel.
Mar 28, 2024 pm 12:50 PM
Tomato Novel is a very popular novel reading software. We often have new novels and comics to read in Tomato Novel. Every novel and comic is very interesting. Many friends also want to write novels. Earn pocket money and edit the content of the novel you want to write into text. So how do we write the novel in it? My friends don’t know, so let’s go to this site together. Let’s take some time to look at an introduction to how to write a novel. Share the Tomato novel tutorial on how to write a novel. 1. First open the Tomato free novel app on your mobile phone and click on Personal Center - Writer Center. 2. Jump to the Tomato Writer Assistant page - click on Create a new book at the end of the novel.
 How to solve the problem of automatically saving pictures when publishing on Xiaohongshu? Where is the automatically saved image when posting?
Mar 22, 2024 am 08:06 AM
How to solve the problem of automatically saving pictures when publishing on Xiaohongshu? Where is the automatically saved image when posting?
Mar 22, 2024 am 08:06 AM
With the continuous development of social media, Xiaohongshu has become a platform for more and more young people to share their lives and discover beautiful things. Many users are troubled by auto-save issues when posting images. So, how to solve this problem? 1. How to solve the problem of automatically saving pictures when publishing on Xiaohongshu? 1. Clear the cache First, we can try to clear the cache data of Xiaohongshu. The steps are as follows: (1) Open Xiaohongshu and click the "My" button in the lower right corner; (2) On the personal center page, find "Settings" and click it; (3) Scroll down and find the "Clear Cache" option. Click OK. After clearing the cache, re-enter Xiaohongshu and try to post pictures to see if the automatic saving problem is solved. 2. Update the Xiaohongshu version to ensure that your Xiaohongshu
 How to recover deleted contacts on WeChat (simple tutorial tells you how to recover deleted contacts)
May 01, 2024 pm 12:01 PM
How to recover deleted contacts on WeChat (simple tutorial tells you how to recover deleted contacts)
May 01, 2024 pm 12:01 PM
Unfortunately, people often delete certain contacts accidentally for some reasons. WeChat is a widely used social software. To help users solve this problem, this article will introduce how to retrieve deleted contacts in a simple way. 1. Understand the WeChat contact deletion mechanism. This provides us with the possibility to retrieve deleted contacts. The contact deletion mechanism in WeChat removes them from the address book, but does not delete them completely. 2. Use WeChat’s built-in “Contact Book Recovery” function. WeChat provides “Contact Book Recovery” to save time and energy. Users can quickly retrieve previously deleted contacts through this function. 3. Enter the WeChat settings page and click the lower right corner, open the WeChat application "Me" and click the settings icon in the upper right corner to enter the settings page.
 How to post pictures in TikTok comments? Where is the entrance to the pictures in the comment area?
Mar 21, 2024 pm 09:12 PM
How to post pictures in TikTok comments? Where is the entrance to the pictures in the comment area?
Mar 21, 2024 pm 09:12 PM
With the popularity of Douyin short videos, user interactions in the comment area have become more colorful. Some users wish to share images in comments to better express their opinions or emotions. So, how to post pictures in TikTok comments? This article will answer this question in detail and provide you with some related tips and precautions. 1. How to post pictures in Douyin comments? 1. Open Douyin: First, you need to open Douyin APP and log in to your account. 2. Find the comment area: When browsing or posting a short video, find the place where you want to comment and click the "Comment" button. 3. Enter your comment content: Enter your comment content in the comment area. 4. Choose to send a picture: In the interface for entering comment content, you will see a "picture" button or a "+" button, click
 How to make ppt pictures appear one by one
Mar 25, 2024 pm 04:00 PM
How to make ppt pictures appear one by one
Mar 25, 2024 pm 04:00 PM
In PowerPoint, it is a common technique to display pictures one by one, which can be achieved by setting animation effects. This guide details the steps to implement this technique, including basic setup, image insertion, adding animation, and adjusting animation order and timing. Additionally, advanced settings and adjustments are provided, such as using triggers, adjusting animation speed and order, and previewing animation effects. By following these steps and tips, users can easily set up pictures to appear one after another in PowerPoint, thereby enhancing the visual impact of the presentation and grabbing the attention of the audience.
 What should I do if the images on the webpage cannot be loaded? 6 solutions
Mar 15, 2024 am 10:30 AM
What should I do if the images on the webpage cannot be loaded? 6 solutions
Mar 15, 2024 am 10:30 AM
Some netizens found that when they opened the browser web page, the pictures on the web page could not be loaded for a long time. What happened? I checked that the network is normal, so where is the problem? The editor below will introduce to you six solutions to the problem that web page images cannot be loaded. Web page images cannot be loaded: 1. Internet speed problem The web page cannot display images. It may be because the computer's Internet speed is relatively slow and there are more softwares opened on the computer. And the images we access are relatively large, which may be due to loading timeout. As a result, the picture cannot be displayed. You can turn off the software that consumes more network speed. You can go to the task manager to check. 2. Too many visitors. If the webpage cannot display pictures, it may be because the webpages we visited were visited at the same time.
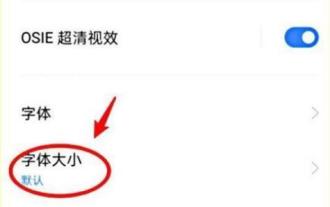 How to set font size on mobile phone (easily adjust font size on mobile phone)
May 07, 2024 pm 03:34 PM
How to set font size on mobile phone (easily adjust font size on mobile phone)
May 07, 2024 pm 03:34 PM
Setting font size has become an important personalization requirement as mobile phones become an important tool in people's daily lives. In order to meet the needs of different users, this article will introduce how to improve the mobile phone use experience and adjust the font size of the mobile phone through simple operations. Why do you need to adjust the font size of your mobile phone - Adjusting the font size can make the text clearer and easier to read - Suitable for the reading needs of users of different ages - Convenient for users with poor vision to use the font size setting function of the mobile phone system - How to enter the system settings interface - In Find and enter the "Display" option in the settings interface - find the "Font Size" option and adjust it. Adjust the font size with a third-party application - download and install an application that supports font size adjustment - open the application and enter the relevant settings interface - according to the individual
 The secret of hatching mobile dragon eggs is revealed (step by step to teach you how to successfully hatch mobile dragon eggs)
May 04, 2024 pm 06:01 PM
The secret of hatching mobile dragon eggs is revealed (step by step to teach you how to successfully hatch mobile dragon eggs)
May 04, 2024 pm 06:01 PM
Mobile games have become an integral part of people's lives with the development of technology. It has attracted the attention of many players with its cute dragon egg image and interesting hatching process, and one of the games that has attracted much attention is the mobile version of Dragon Egg. To help players better cultivate and grow their own dragons in the game, this article will introduce to you how to hatch dragon eggs in the mobile version. 1. Choose the appropriate type of dragon egg. Players need to carefully choose the type of dragon egg that they like and suit themselves, based on the different types of dragon egg attributes and abilities provided in the game. 2. Upgrade the level of the incubation machine. Players need to improve the level of the incubation machine by completing tasks and collecting props. The level of the incubation machine determines the hatching speed and hatching success rate. 3. Collect the resources required for hatching. Players need to be in the game
