
 Backend Development
PHP Tutorial
Analysis of how to create a FORM form under zend Farmework_PHP tutorial
Backend Development
PHP Tutorial
Analysis of how to create a FORM form under zend Farmework_PHP tutorial
Analysis of how to create a FORM form under zend Farmework_PHP tutorial

1. First, let us set up our program so that Zend can automatically load the method without us having to manually load it
require_once 'Zend/Loader/Autoloader.php' //Load the autoloading class
$loader = Zend_Loader_Autoloader::getInstance();//Automatic instantiation
$loader->registerNamespace('Application_');//Register namespace (only the system default and registered ones can be automatically loaded)
$loader->registerNamespace(array('Foo_ ', 'Bar_')); //Registration method for multiple namespaces
$loader->setFallbackAutoloader(true); //A method to increase consumption, no namespace is required, and all classes are loaded directly (no Recommended)
Then please pay attention to whether your include directory has been included, and your own directory that needs to be loaded
set_include_path(implode(PATH_SEPARATOR, array(
realpath(APPLICATION_PATH . '/../library'),
realpath(APPLICATION_PATH . '/ forms/'),
get_include_path(),
)));
//Here we include our forms directory to facilitate the loading of the program
2. Confirm the directory of the form
Create a Guestbook.phps
under application/forms/ as the class file of our form, as follows:
class Application_Form_Guestbook extends Zend_Form
{
public function init()
{
// Set the method for the display form to POST
$this->setMethod('post');//Set submission method
/ Definition of original type, noun, and some other information
'label' ('StringTrim'),
'validators' => array(
'EmailAddress',
)
));
// Add the comment element
$ this->addElement('textarea', 'comment', array(
'label' => 'Please Comment:',
'required' => true,
'validators' => ; array(
array('validator' => a captcha
$this->addElement('captcha', 'captcha', array(
'label' => 'Please enter the 5 letters displayed below:',
'required' => ; true,
'captcha' => array(
'captcha' => 'Figlet',
'wordLen' => 5,
'timeout' => 300
)
); ,
'Sign Guestbook', csrf', array(
'ignore' => true,
)); controller/GuestbookController.php
Copy code
The code is as follows:
class GuestbookController extends Zend_Controller_Action
{
// snipping indexAction()...
public function signAction()
{
$request = $this->getRequest(); //Get the received information
// include_once("../application/forms/Guestbook.php"); Manually load the class, only when it cannot be loaded automatically. Need
$form = new Application_Form_Guestbook;//Instantiate this method
if ($this->getRequest()->isPost()) {//If it is the result of POST delivery
mapper = new Application_Model_GuestbookMapper();
$mapper->save($comment);
return $this->_helper->redirector('index');
}
}
$this->view->form = $form;//Assign the form to the view
}
}
Address: application/views/scripts/guestbook/sgin.php
echo $this->form;
http://www.bkjia.com/PHPjc/327948.html

Hot AI Tools

Undresser.AI Undress
AI-powered app for creating realistic nude photos

AI Clothes Remover
Online AI tool for removing clothes from photos.

Undress AI Tool
Undress images for free

Clothoff.io
AI clothes remover

AI Hentai Generator
Generate AI Hentai for free.

Hot Article
Hot Tools

Notepad++7.3.1
Easy-to-use and free code editor

SublimeText3 Chinese version
Chinese version, very easy to use

Zend Studio 13.0.1
Powerful PHP integrated development environment

Dreamweaver CS6
Visual web development tools

SublimeText3 Mac version
God-level code editing software (SublimeText3)
Hot Topics
 1378
1378
 52
52

 How to make Google Maps the default map in iPhone
Apr 17, 2024 pm 07:34 PM
How to make Google Maps the default map in iPhone
Apr 17, 2024 pm 07:34 PM
The default map on the iPhone is Maps, Apple's proprietary geolocation provider. Although the map is getting better, it doesn't work well outside the United States. It has nothing to offer compared to Google Maps. In this article, we discuss the feasible steps to use Google Maps to become the default map on your iPhone. How to Make Google Maps the Default Map in iPhone Setting Google Maps as the default map app on your phone is easier than you think. Follow the steps below – Prerequisite steps – You must have Gmail installed on your phone. Step 1 – Open the AppStore. Step 2 – Search for “Gmail”. Step 3 – Click next to Gmail app
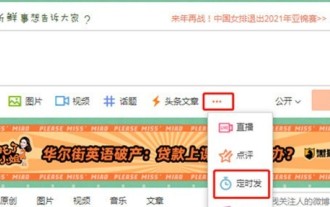
 How to set the scheduled time for publishing works on Douyin? How does it set the video duration?
Mar 27, 2024 pm 06:11 PM
How to set the scheduled time for publishing works on Douyin? How does it set the video duration?
Mar 27, 2024 pm 06:11 PM
Publishing works on Douyin can attract more attention and likes, but sometimes it may be difficult for us to publish works in real time. In this case, we can use Douyin's scheduled release function. Douyin’s scheduled release function allows users to automatically publish works at a scheduled time, which can better plan the release plan and increase the exposure and influence of the work. 1. How to set the scheduled time for publishing works on Douyin? To set a scheduled release time, first go to Douyin's personal homepage, find the "+" button in the upper right corner, and click to enter the release page. There is a clock icon in the lower right corner of the publishing page. Click to enter the scheduled publishing interface. In the interface, you can choose the type of work you want to publish, including short videos, long videos, and live broadcasts. Next, you need to set a time for your work to be published. TikTok provides
 Clock app missing in iPhone: How to fix it
May 03, 2024 pm 09:19 PM
Clock app missing in iPhone: How to fix it
May 03, 2024 pm 09:19 PM
Is the clock app missing from your phone? The date and time will still appear on your iPhone's status bar. However, without the Clock app, you won’t be able to use world clock, stopwatch, alarm clock, and many other features. Therefore, fixing missing clock app should be at the top of your to-do list. These solutions can help you resolve this issue. Fix 1 – Place the Clock App If you mistakenly removed the Clock app from your home screen, you can put the Clock app back in its place. Step 1 – Unlock your iPhone and start swiping to the left until you reach the App Library page. Step 2 – Next, search for “clock” in the search box. Step 3 – When you see “Clock” below in the search results, press and hold it and
 Where is the Douyin tag set? How can it be tagged so that it can be pushed accurately?
Mar 27, 2024 am 11:01 AM
Where is the Douyin tag set? How can it be tagged so that it can be pushed accurately?
Mar 27, 2024 am 11:01 AM
As one of the most popular short video platforms in the world, Douyin allows everyone to become a creator and share every moment of life. For Douyin users, tags are a very important function. It can help users better classify and retrieve content, and also allows the platform to push appropriate content to users more accurately. So, where are the Douyin tags set? This article will explain in detail how to set up and use tags on Douyin. 1. Where is the Douyin tag set? Using tags on Douyin can help users better classify and label their works, making it easier for other users to find and follow them. The method to set the label is as follows: 1. Open the Douyin APP and log in to your account. 2. Click the "+" sign at the bottom of the screen and select the "Publish" button. 3.
 Can't allow access to camera and microphone in iPhone
Apr 23, 2024 am 11:13 AM
Can't allow access to camera and microphone in iPhone
Apr 23, 2024 am 11:13 AM
Are you getting "Unable to allow access to camera and microphone" when trying to use the app? Typically, you grant camera and microphone permissions to specific people on a need-to-provide basis. However, if you deny permission, the camera and microphone will not work and will display this error message instead. Solving this problem is very basic and you can do it in a minute or two. Fix 1 – Provide Camera, Microphone Permissions You can provide the necessary camera and microphone permissions directly in settings. Step 1 – Go to the Settings tab. Step 2 – Open the Privacy & Security panel. Step 3 – Turn on the “Camera” permission there. Step 4 – Inside, you will find a list of apps that have requested permission for your phone’s camera. Step 5 – Open the “Camera” of the specified app
 How to set up scheduled publishing on Weibo_Tutorial on how to set up scheduled publishing on Weibo
Mar 29, 2024 pm 03:51 PM
How to set up scheduled publishing on Weibo_Tutorial on how to set up scheduled publishing on Weibo
Mar 29, 2024 pm 03:51 PM
1. Open the Weibo client, click the three little dots on the editing page, and then click Scheduled Post. 2. After clicking on scheduled posting, there will be a time option on the right side of the publishing time. Set the time, edit the article, and click on the yellow words in the lower right corner to schedule posting. 3. The mobile version of Weibo does not currently support scheduled publishing. This function can only be used on the PC client!
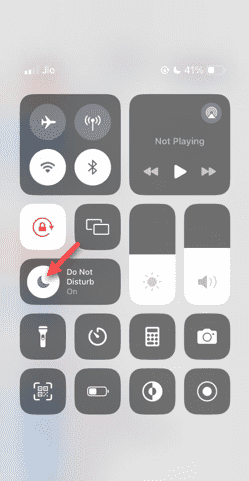 Do Not Disturb Mode Not Working in iPhone: Fix
Apr 24, 2024 pm 04:50 PM
Do Not Disturb Mode Not Working in iPhone: Fix
Apr 24, 2024 pm 04:50 PM
Even answering calls in Do Not Disturb mode can be a very annoying experience. As the name suggests, Do Not Disturb mode turns off all incoming call notifications and alerts from emails, messages, etc. You can follow these solution sets to fix it. Fix 1 – Enable Focus Mode Enable focus mode on your phone. Step 1 – Swipe down from the top to access Control Center. Step 2 – Next, enable “Focus Mode” on your phone. Focus Mode enables Do Not Disturb mode on your phone. It won't cause any incoming call alerts to appear on your phone. Fix 2 – Change Focus Mode Settings If there are some issues in the focus mode settings, you should fix them. Step 1 – Open your iPhone settings window. Step 2 – Next, turn on the Focus mode settings
 Where to set Douyin recommendations and selections
Mar 27, 2024 pm 05:06 PM
Where to set Douyin recommendations and selections
Mar 27, 2024 pm 05:06 PM
Where are the recommendations and selections on Douyin? In Douyin short videos, there are two categories: selection and recommendation. Most users don’t know how to set up recommendations and selections. Next is the Douyin tutorial that the editor brings to users. Audio recommendations and selected setting method tutorials, interested users come and take a look! Douyin usage tutorial Where to set up Douyin recommendations and selections 1. First open the Douyin short video APP and enter the main page, click on the [Me] area in the lower right corner and select [three horizontal lines] in the upper right corner; 2. Then on the right The function bar will expand, slide the page to select [Settings] at the bottom; 3. Then on the settings function page, find the [Personal Information Management] service; 4. Finally jump to the personal information management page, slide [Personalized Content Recommendations] 】The buttons on the back can be set.
