

Pear DB Beginner's Guide Tutorial Page 1/3_PHP Tutorial

1. Introduction This is a guide on how to use Pear DB extension. Pear DB provides a series of classes:
n Database abstraction
n Advanced error handling mechanism
n and others
2. Download and install Pear
Since the Pear project is still under intensive development, the best way to get it is to get it from CVS (the Pear DB distribution package has been bundled with PHP4.0.6 and later versions). Therefore, we only need to put the root directory of Pear in the php.ini configuration file include_path. It can also be set like this: _set('include_path', '/pear_base_dir').
The following is an example of strp by step:
<font face="黑体">存放</font>Pear<font face="黑体">的目录:</font> Copy after login <b># cd /usr/local/lib</b> Copy after login <font face="黑体">用“</font>phpfi<font face="黑体">“口令登录</font>: Copy after login <b># cvs -d :pserver:cvsread@cvs.php.net:/repository login</b> Copy after login <font face="黑体">用以下命令得到所有的</font>pear<font face="黑体">文件,同时也可以用来更新已经下载的文件。其他的参数有:</font>"today", "last month",<font face="黑体">等。我推荐用</font>"last week"<font face="黑体">参数,因为一般</font>bugs<font face="黑体">的提交和修改都是每周一次。</font> Copy after login <b># cvs -d :pserver:cvsread@cvs.php.net:/repository export -D "last week" php4/pear</b> Copy after login <font face="黑体">编辑</font>php.ini<font face="黑体">文件加上下面一段在</font>include_path<font face="黑体">处:</font><i> /usr/local/lib/php4/pear</i> <font face="黑体">如果没有修改的权限,可以通过这条语句在代码中实现:</font> <i>ini_set('include_path', 'path_to_pear');</i>Copy after login |
Get full documentation for PHP CVS
Note that PHP DB requires PHP version 4.0.4 or above, and some other packages in Pear such as XML Parser of the pear installer script require PHP 4.0.5 or above.
3. UsePear DB
3.1 Connect and disconnect from database
<code> </code> Copy after login Copy after login Copy after login Copy after login Copy after login Copy after login <code><?php</CODE><BR> <CODE>// The pear base directory must be in your include_path</CODE><BR> <CODE>require_once </CODE><CODE>'DB.php'</CODE><CODE>;</CODE><BR> <CODE>$user </CODE><CODE>= </CODE><CODE>'foo'</CODE><CODE>;</CODE><BR> <CODE>$pass </CODE><CODE>= </CODE><CODE>'bar'</CODE><CODE>;</CODE><BR> <CODE>$host </CODE><CODE>= </CODE><CODE>'localhost'</CODE><CODE>;</CODE><BR> <CODE>$db_name </CODE><CODE>= </CODE><CODE>'clients_db'</CODE><CODE>;</CODE><br><br> <CODE>// Data Source Name: This is the universal connection string</CODE><BR> <CODE>$dsn </CODE><CODE>= </CODE><CODE>"mysql://$user:$pass@$host/$db_name"</CODE><CODE>;</CODE><br><br> <CODE>// DB::connect will return a Pear DB object on success</CODE><BR> <CODE>// or a Pear DB Error object on error</CODE><BR> <CODE>// You can also set to TRUE the second param</CODE><BR> <CODE>// if you want a persistent connection:</CODE><BR> <CODE>// $db = DB::connect($dsn, true);</CODE><BR> <CODE>$db </CODE><CODE>= </CODE><CODE>DB</CODE><CODE>::</CODE><CODE>connect</CODE><CODE>(</CODE><CODE>$dsn</CODE><CODE>);</CODE><br><br> <CODE>// With DB::isError you can differentiate between an error or</CODE><BR> <CODE>// a valid connection.</CODE><BR> <CODE>if (</CODE><CODE>DB</CODE><CODE>::</CODE><CODE>isError</CODE><CODE>(</CODE><CODE>$db</CODE><CODE>)) {</CODE><BR> <CODE> die (</CODE><CODE>$db</CODE><CODE>-></code><code>getMessage</code><code>());</code><br> <code>}</code><br> <code>....</code><br> <code>// You can disconnect from the database with:</code><br> <code>$db</code><code>-></code><code>disconnect</code><code>();</code><br> <code>?></code><code></code>Copy after login <code> </code> Copy after login Copy after login Copy after login Copy after login Copy after login Copy after login |
Data source($dsn Parameter) in the above example has the following allowed formats: (from parseDSN method of 🎜>Pear/DB.php)
<code> </code> Copy after login Copy after login Copy after login Copy after login Copy after login Copy after login <code> * phptype: Database backend used in PHP (mysql, odbc etc.)</code><br> <code> * dbsyntax: Database used with regards to SQL syntax etc.</code><br> <code> * protocol: Communication protocol to use (tcp, unix etc.)</code><br> <code> * hostspec: Host specification (hostname[:port])</code><br> <code> * database: Database to use on the DBMS server</code><br> <code> * username: User name for login</code><br> <code> * password: Password for login</code><br> <code> *</code><br> <code> * The format of the supplied DSN is in its fullest form:</code><br> <code> *</code><br> <code> * phptype(dbsyntax)://username:password@protocol+hostspec/database</code><br> <code> *</code><br> <code> * Most variations are allowed:</code><br> <code> *</code><br> <code> * phptype://username:password@protocol+hostspec:110//usr/db_file.db</code><br> <code> * phptype://username:password@hostspec/database_name</code><br> <code> * phptype://username:password@hostspec</code><br> <code> * phptype://username@hostspec</code><br> <code> * phptype://hostspec/database</code><br> <code> * phptype://hostspec</code><br> <code> * phptype(dbsyntax)</code><br> <code> * phptype</code><code></code> Copy after login |
The databases currently supported are ( in the phptype DSN section):
<code> </code> Copy after login Copy after login Copy after login Copy after login Copy after login Copy after login <code>mysql -> MySQL</code><br> <code>pgsql -> PostgreSQL</code><br> <code>ibase -> InterBase</code><br> <code>msql -> Mini SQL</code><br> <code>mssql -> Microsoft SQL Server</code><br> <code>oci8 -> Oracle 7/8/8i</code><br> <code>odbc -> ODBC (Open Database Connectivity)</code><br> <code>sybase -> SyBase</code><br> <code>ifx -> Informix</code><br> <code>fbsql -> FrontBase</code><code></code> Copy after login |
Note that not all database features are supported, you can start from the root directory > ;/DB/STATUS
<code> </code> Copy after login Copy after login Copy after login Copy after login Copy after login Copy after login <code><?php</CODE><BR> <CODE>// Once you have a valid DB object</CODE><BR> <CODE>...</CODE><BR> <CODE>$sql </CODE><CODE>= </CODE><CODE>"select * from clients"</CODE><CODE>;</CODE><BR> <CODE>// If the query is a "SELECT", $db->query will return</code><br> <code>// a DB Result object on success.</code><br> <code>// Else it simply will return a DB_OK</code><br> <code>// On failure it will return a DB Error object.</code><br> <code>$result </code><code>= </code><code>$db</code><code>-></code><code>query</code><code>(</code><code>$sql</code><code>);</code><br> <code>// Always check that $result is not an error</code><br> <code>if (</code><code>DB</code><code>::</code><code>isError</code><code>(</code><code>$result</code><code>)) {</code><br> <code> die (</code><code>$result</code><code>-></code><code>getMessage</code><code>());</code><br> <code>}</code><br> <code>....</code><br> <code>?></code><code></code>Copy after login <code> </code> Copy after login Copy after login Copy after login Copy after login Copy after login Copy after login |
true
http: //www.bkjia.com/PHPjc/319757.html

Hot AI Tools

Undresser.AI Undress
AI-powered app for creating realistic nude photos

AI Clothes Remover
Online AI tool for removing clothes from photos.

Undress AI Tool
Undress images for free

Clothoff.io
AI clothes remover

AI Hentai Generator
Generate AI Hentai for free.

Hot Article
Hot Tools

Notepad++7.3.1
Easy-to-use and free code editor

SublimeText3 Chinese version
Chinese version, very easy to use

Zend Studio 13.0.1
Powerful PHP integrated development environment

Dreamweaver CS6
Visual web development tools

SublimeText3 Mac version
God-level code editing software (SublimeText3)
Hot Topics
 1382
1382
 52
52

 How to use NetEase Mailbox Master
Mar 27, 2024 pm 05:32 PM
How to use NetEase Mailbox Master
Mar 27, 2024 pm 05:32 PM
NetEase Mailbox, as an email address widely used by Chinese netizens, has always won the trust of users with its stable and efficient services. NetEase Mailbox Master is an email software specially created for mobile phone users. It greatly simplifies the process of sending and receiving emails and makes our email processing more convenient. So how to use NetEase Mailbox Master, and what specific functions it has. Below, the editor of this site will give you a detailed introduction, hoping to help you! First, you can search and download the NetEase Mailbox Master app in the mobile app store. Search for "NetEase Mailbox Master" in App Store or Baidu Mobile Assistant, and then follow the prompts to install it. After the download and installation is completed, we open the NetEase email account and log in. The login interface is as shown below
 How to use Baidu Netdisk app
Mar 27, 2024 pm 06:46 PM
How to use Baidu Netdisk app
Mar 27, 2024 pm 06:46 PM
Cloud storage has become an indispensable part of our daily life and work nowadays. As one of the leading cloud storage services in China, Baidu Netdisk has won the favor of a large number of users with its powerful storage functions, efficient transmission speed and convenient operation experience. And whether you want to back up important files, share information, watch videos online, or listen to music, Baidu Cloud Disk can meet your needs. However, many users may not understand the specific use method of Baidu Netdisk app, so this tutorial will introduce in detail how to use Baidu Netdisk app. Users who are still confused can follow this article to learn more. ! How to use Baidu Cloud Network Disk: 1. Installation First, when downloading and installing Baidu Cloud software, please select the custom installation option.
 BTCC tutorial: How to bind and use MetaMask wallet on BTCC exchange?
Apr 26, 2024 am 09:40 AM
BTCC tutorial: How to bind and use MetaMask wallet on BTCC exchange?
Apr 26, 2024 am 09:40 AM
MetaMask (also called Little Fox Wallet in Chinese) is a free and well-received encryption wallet software. Currently, BTCC supports binding to the MetaMask wallet. After binding, you can use the MetaMask wallet to quickly log in, store value, buy coins, etc., and you can also get 20 USDT trial bonus for the first time binding. In the BTCCMetaMask wallet tutorial, we will introduce in detail how to register and use MetaMask, and how to bind and use the Little Fox wallet in BTCC. What is MetaMask wallet? With over 30 million users, MetaMask Little Fox Wallet is one of the most popular cryptocurrency wallets today. It is free to use and can be installed on the network as an extension
 In summer, you must try shooting a rainbow
Jul 21, 2024 pm 05:16 PM
In summer, you must try shooting a rainbow
Jul 21, 2024 pm 05:16 PM
After rain in summer, you can often see a beautiful and magical special weather scene - rainbow. This is also a rare scene that can be encountered in photography, and it is very photogenic. There are several conditions for a rainbow to appear: first, there are enough water droplets in the air, and second, the sun shines at a low angle. Therefore, it is easiest to see a rainbow in the afternoon after the rain has cleared up. However, the formation of a rainbow is greatly affected by weather, light and other conditions, so it generally only lasts for a short period of time, and the best viewing and shooting time is even shorter. So when you encounter a rainbow, how can you properly record it and photograph it with quality? 1. Look for rainbows. In addition to the conditions mentioned above, rainbows usually appear in the direction of sunlight, that is, if the sun shines from west to east, rainbows are more likely to appear in the east.
 Extensions and third-party modules for PHP functions
Apr 13, 2024 pm 02:12 PM
Extensions and third-party modules for PHP functions
Apr 13, 2024 pm 02:12 PM
To extend PHP function functionality, you can use extensions and third-party modules. Extensions provide additional functions and classes that can be installed and enabled through the pecl package manager. Third-party modules provide specific functionality and can be installed through the Composer package manager. Practical examples include using extensions to parse complex JSON data and using modules to validate data.
 Tutorial on how to turn off the payment sound on WeChat
Mar 26, 2024 am 08:30 AM
Tutorial on how to turn off the payment sound on WeChat
Mar 26, 2024 am 08:30 AM
1. First open WeChat. 2. Click [+] in the upper right corner. 3. Click the QR code to collect payment. 4. Click the three small dots in the upper right corner. 5. Click to close the voice reminder for payment arrival.
 How to use Xiaomi Auto app
Apr 01, 2024 pm 09:19 PM
How to use Xiaomi Auto app
Apr 01, 2024 pm 09:19 PM
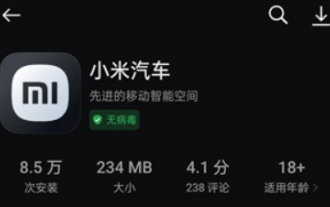
Xiaomi car software provides remote car control functions, allowing users to remotely control the vehicle through mobile phones or computers, such as opening and closing the vehicle's doors and windows, starting the engine, controlling the vehicle's air conditioner and audio, etc. The following is the use and content of this software, let's learn about it together . Comprehensive list of Xiaomi Auto app functions and usage methods 1. The Xiaomi Auto app was launched on the Apple AppStore on March 25, and can now be downloaded from the app store on Android phones; Car purchase: Learn about the core highlights and technical parameters of Xiaomi Auto, and make an appointment for a test drive. Configure and order your Xiaomi car, and support online processing of car pickup to-do items. 3. Community: Understand Xiaomi Auto brand information, exchange car experience, and share wonderful car life; 4. Car control: The mobile phone is the remote control, remote control, real-time security, easy
 PHP Tutorial: How to convert int type to string
Mar 27, 2024 pm 06:03 PM
PHP Tutorial: How to convert int type to string
Mar 27, 2024 pm 06:03 PM
PHP Tutorial: How to Convert Int Type to String In PHP, converting integer data to string is a common operation. This tutorial will introduce how to use PHP's built-in functions to convert the int type to a string, while providing specific code examples. Use cast: In PHP, you can use cast to convert integer data into a string. This method is very simple. You only need to add (string) before the integer data to convert it into a string. Below is a simple sample code
