easyui datagrid paging 4. easyUI-seven layouts (layout)
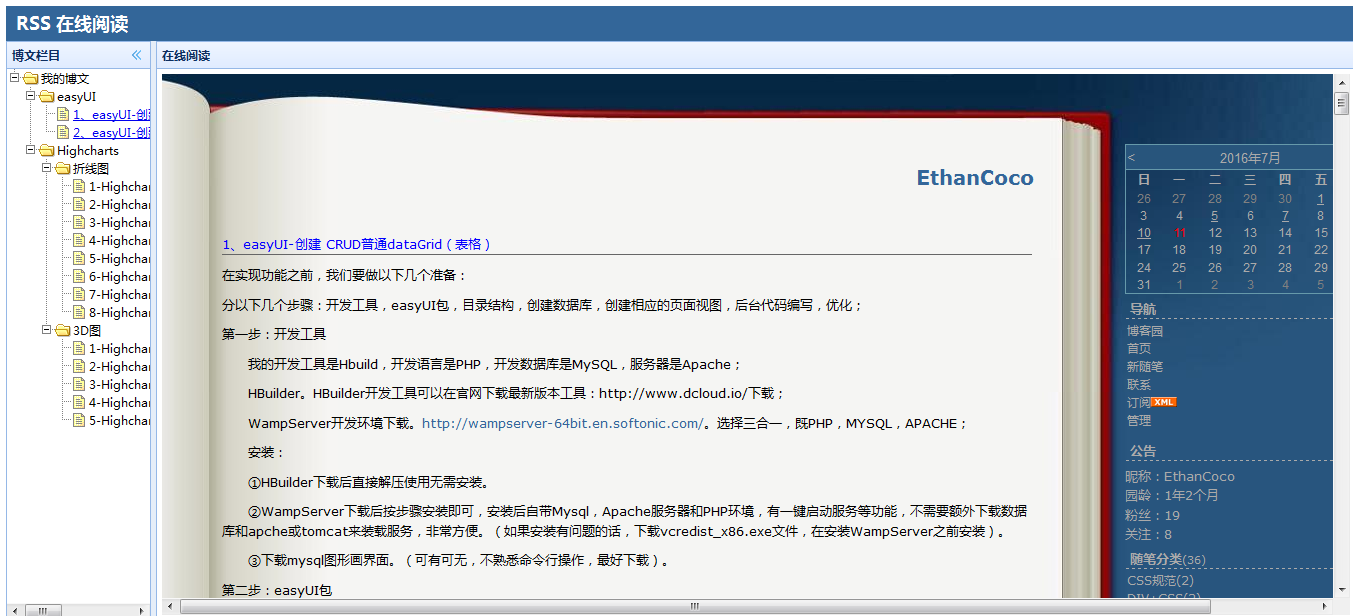
1. Create a border layout for the web page
The border layout provides five areas: east, west, north, south, and center. Here are some common uses: The
north area can be used to display the website’s slogan.
south area can be used to display copyright and some instructions.
west area can be used to display navigation menu.
The east area can be used to display some promoted items.
The center area can be used to display the main content.
<html>
<head>
<meta http-equiv="Content-Type" content="text/html; charset=utf-8">
<title>为网页创建边框布局</title>
<link rel="stylesheet" type="text/css" href="../../../ui/jquery-easyui-1.4.5/themes/default/easyui.css">
<link rel="stylesheet" type="text/css" href="../../../ui/jquery-easyui-1.4.5/themes/icon.css">
<link rel="stylesheet" type="text/css" href="../../../ui/jquery-easyui-1.4.5/themes/color.css">
<script src="../../../ui/jquery-easyui-1.4.5/jquery.min.js"></script>
<script src="../../../ui/jquery-easyui-1.4.5/jquery.easyui.min.js"></script>
<script src="../../../ui/jquery-easyui-1.4.5/locale/easyui-lang-zh_CN.js"></script>
<script src="../../../js/crud/bus_pubuser.js"></script>
<style>
.rtitle{
font-size:18px;
font-weight:bold;
padding:5px 10px;
background:#336699;
color:#fff; } </style>
<script>
$(function(){
showcontent('http://www.cnblogs.com/jianyeLee/p/5656968.html');
}); </script>
</script>
</head>
<body>
<p class="easyui-layout" style="width:100%;height:100%;">
<p region="north" border="false" class="rtitle">
RSS 在线阅读 </p>
<p region="west" split="true" title="博文栏目" style="width:150px;">
<ul class="easyui-tree" lines="true" >
<li>
<span>我的博文</span>
<ul>
<li>
<span>easyUI</span>
<ul>
<li><a href="javascript:void(0)"
onclick="showcontent('http://www.cnblogs.com/jianyeLee/p/5656968.html')"
target="bowen"><span>1、easyUI-创建 CRUD普通dataGrid(表格)</span></a></li>
<li><a href="javascript:void(0)"
onclick="showcontent('http://www.cnblogs.com/jianyeLee/p/5657657.html')"
target="bowen"><span>2、easyUI-创建 CRUD可编辑dataGrid(表格)</span></a></li>
</ul>
</li>
<li state="closed">
<span>Highcharts</span>
<ul>
<li>
<span>折线图</span>
<ul>
<li><span>1-Highcharts环境介绍及配置</span></li>
<li><span>2-Highcharts曲线图之折线图</span></li>
<li><span>3-Highcharts曲线图之显示点值折线图</span></li>
<li><span>4-Highcharts曲线图之时间轴折线图</span></li>
<li><span>5-Highcharts曲线图之轴反转</span></li>
<li><span>6-Highcharts曲线图之带标识</span></li>
<li><span>7-Highcharts曲线图之分辨带</span></li>
<li><span>8-Highcharts曲线图之对数直线图</span></li>
</ul>
</li>
<li>
<span>3D图</span>
<ul>
<li><span>1-Highcharts 3D图之普通3D柱状图与带空值</span></li>
<li><span>2-Highcharts 3D图之3D柱状图带可调试倾斜角度</span></li>
<li><span>3-Highcharts 3D图之3D柱状图分组叠堆3D图</span></li>
<li><span>4-Highcharts 3D图之3D普通饼图</span></li>
<li><span>5-Highcharts 3D图之3D双饼图</span></li>
</ul>
</li>
</ul>
</li>
</ul>
</li>
</ul>
</p>
<p id="content" region="center" title="在线阅读" style="padding:5px;">
<iframe id="bowen" name="bowen" style="border: none;width: 100%;height: 100%;"></iframe>
</p>
</p>
</body>
<html>/*
* layout布局 */function showcontent(url){
$('#bowen').attr('src',url);
}
2. Create complex layouts in the panel
<html>
<head>
<meta http-equiv="Content-Type" content="text/html; charset=utf-8">
<title>在面板中创建复杂布局</title>
<link rel="stylesheet" type="text/css" href="../../../ui/jquery-easyui-1.4.5/themes/default/easyui.css">
<link rel="stylesheet" type="text/css" href="../../../ui/jquery-easyui-1.4.5/themes/icon.css">
<link rel="stylesheet" type="text/css" href="../../../ui/jquery-easyui-1.4.5/themes/color.css">
<script src="../../../ui/jquery-easyui-1.4.5/jquery.min.js"></script>
<script src="../../../ui/jquery-easyui-1.4.5/jquery.easyui.min.js"></script>
<script src="../../../ui/jquery-easyui-1.4.5/locale/easyui-lang-zh_CN.js"></script>
<script src="../../../js/crud/bus_pubuser.js"></script>
<style>
.p-search{
background:#fafafa;
padding:5px;
border:1px solid #ccc;
border-bottom:0;
overflow:hidden;
} .p-search input{
width:300px;
border:1px solid #ccc;
background: #fff url('../../../img/search.png') no-repeat right top; } .p-right{
text-align:center;
border:1px solid #ccc;
border-left:0;
width:150px;
background:#fafafa;
padding-top:10px;
} </style>
</head>
<body>
<p class="easyui-panel" title="可收缩查询框" iconCls="icon-search"
collapsible="true" style="padding:5px;width:100%;height:600;">
<p class="easyui-layout" fit="true">
<p region="north" border="false" class="p-search">
<label>查询:</label><input></input>
</p>
<p region="center" border="false">
<p class="easyui-layout" fit="true">
<p region="east" border="false" class="p-right">
<img src="/static/imghw/default1.png" data-src="../../../img/msn.gif" class="lazy" / alt="easyui datagrid paging 4. easyUI-seven layouts (layout)" >
</p>
<p region="center" border="false" style="border:1px solid #ccc;">
<p class="easyui-layout" fit="true">
<p region="south" split="true" border="false" style="height:60px;">
<textarea style="border:0;width:100%;height:100%;resize:none">Hi,
I am easyui.</textarea>
</p>
<p region="center" border="false">
</p>
</p>
</p>
</p>
</p>
</p>
</p>
</body>
<html>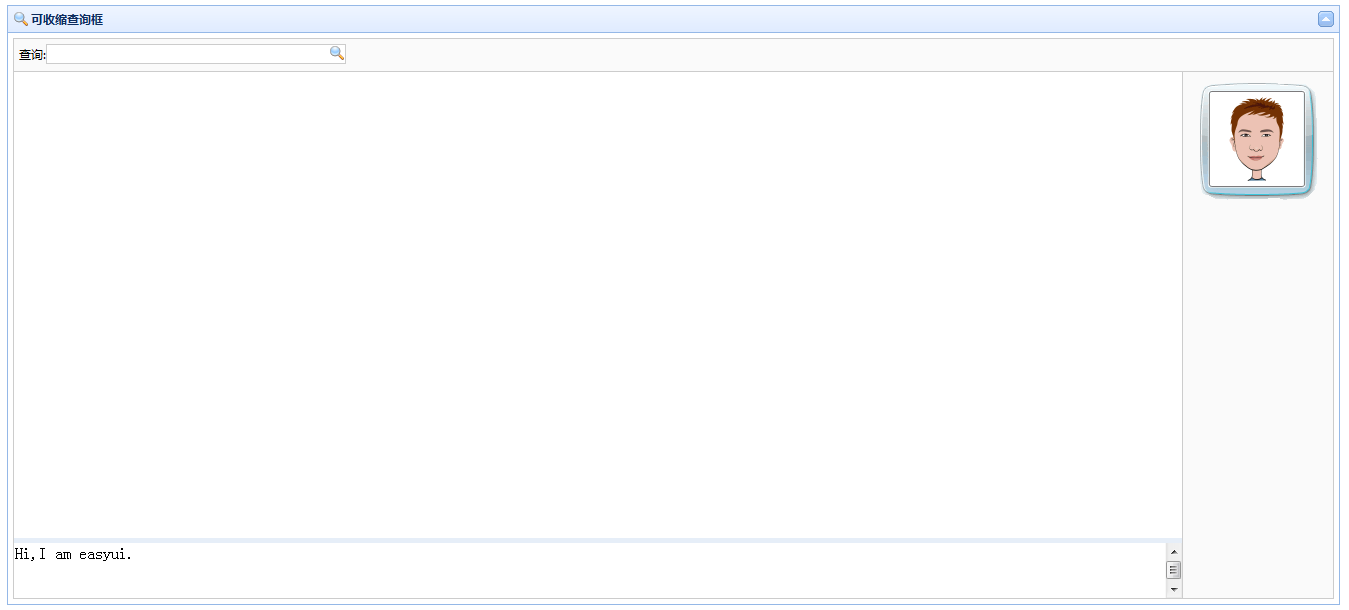
3. Create a folding panel
Attach all icons
<html>
<head>
    <meta http-equiv="Content-Type" content="text/html; charset=utf-8">
    <title>创建折叠面板</title>
    <link rel="stylesheet" type="text/css" href="../../../ui/jquery-easyui-1.4.5/themes/default/easyui.css">
    <link rel="stylesheet" type="text/css" href="../../../ui/jquery-easyui-1.4.5/themes/icon.css">
    <link rel="stylesheet" type="text/css" href="../../../ui/jquery-easyui-1.4.5/themes/color.css">
    <script src="../../../ui/jquery-easyui-1.4.5/jquery.min.js"></script>
    <script src="../../../ui/jquery-easyui-1.4.5/jquery.easyui.min.js"></script>
    <script src="../../../ui/jquery-easyui-1.4.5/locale/easyui-lang-zh_CN.js"></script>
    <script src="../../../js/crud/bus_pubuser.js"></script>
</head>
<body>
    <p class="easyui-accordion" style="width: 400px;height: 1000px;">
        <p title="accordion1" iconCls="icon-ok" >
            <h3 id="Accordion-nbsp-for-nbsp-jQuery">Accordion for jQuery</h3>
            <p>content1</p>
        </p>
        <p title="easyUI" selected="true" iconCls="icon-reload">
            <p>content2</p>
        </p>
        <p title="tree menu" iconCls="icon-cut">
            <ul class="easyui-tree" lines="true">
                <li>
                    <span>menu1</span>
                    <ul>
                        <li>
                            <span>sub menu1</span>
                            <ul>
                                <li>111</li>
                                <li>111</li>
                                <li>111</li>
                            </ul>
                        </li>
                    </ul>
                </li>
                <li>
                    <span>menu2</span>
                </li>
            </ul>
        </p>
        <p title="icon-blank"  iconCls="icon-blank">
            <p>icon-blank</p>
        </p>
        <p title="icon-add"  iconCls="icon-add">
            <p>icon-add</p>
        </p>

        <p title="icon-edit"  iconCls="icon-edit">
            <p>icon-edit</p>
        </p>

        <p title="icon-clear"  iconCls="icon-clear">
            <p>icon-clear</p>
        </p>

        <p title="icon-remove"  iconCls="icon-remove">
            <p>icon-remove</p>
        </p>
        <p title="icon-save"  iconCls="icon-save">
            <p>icon-save</p>
        </p>

        <p title="icon-cut" iconCls="icon-cut">
            <p>icon-cut</p>
        </p>
        <p title="icon-ok"  iconCls="icon-ok">
            <p>icon-ok</p>
        </p>
        <p title="icon-no" iconCls="icon-no">
            <p>icon-no</p>
        </p>
        <p title="icon-cancel"  iconCls="icon-cancel">
            <p>icon-cancel</p>
        </p>
        <p title="icon-reload"  iconCls="icon-reload">
            <p>icon-reload</p>
        </p>

        <p title="icon-search"  iconCls="icon-search">
            <p>icon-search</p>
        </p>

        <p title="icon-print"  iconCls="icon-print">
            <p>icon-print</p>
        </p>

        <p title="icon-help"  iconCls="icon-help">
            <p>icon-help</p>
        </p>

        <p title="icon-undo"  iconCls="icon-undo">
            <p>icon-undo</p>
        </p>

        <p title="icon-redo"  iconCls="icon-redo">
            <p>icon-redo</p>
        </p>

        <p title="icon-back"  iconCls="icon-back">
            <p>icon-back</p>
        </p>

        <p title="icon-sum"  iconCls="icon-sum">
            <p>icon-sum</p>
        </p>

        <p title="icon-tip"  iconCls="icon-tip">
            <p>icon-tip</p>
        </p>

        <p title="icon-filter"  iconCls="icon-filter">
            <p>icon-filter</p>
        </p>

        <p title="icon-man"  iconCls="icon-man">
            <p>icon-man</p>
        </p>

        <p title="icon-lock"  iconCls="icon-lock">
            <p>icon-lock</p>
        </p>

        <p title="icon-more"  iconCls="icon-more">
            <p>icon-more</p>
        </p>

        <p title="icon-mini-add"  iconCls="icon-mini-add">
            <p>icon-mini-add</p>
        </p>

        <p title="icon-mini-edit"  iconCls="icon-mini-edit">
            <p>icon-mini-edit</p>
        </p>

        <p title="icon-mini-refresh"  iconCls="icon-mini-refresh">
            <p>icon-mini-refresh</p>
        </p>

        <p title="icon-large-picture"  iconCls="icon-large-picture">
            <p>icon-large-picture</p>
        </p>

        <p title="icon-large-clipart"  iconCls="icon-large-clipart">
            <p>icon-large-clipart</p>
        </p>

        <p title="icon-large-shapes"  iconCls="icon-large-shapes">
            <p>icon-large-shapes</p>
        </p>

        <p title="icon-large-smartart"  iconCls="icon-large-smartart">
            <p>icon-large-smartart</p>
        </p>
        <p title="icon-large-chart"  iconCls="icon-large-chart">
            <p>icon-large-chart</p>
        </p>
    </p>
</body>
<html>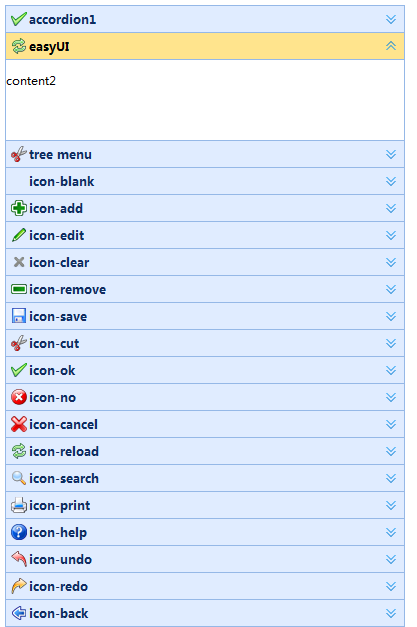
4. Create tabs (Tabs)
<html>
<head>
    <meta http-equiv="Content-Type" content="text/html; charset=utf-8">
    <title>创建标签页(Tabs)</title>
    <link rel="stylesheet" type="text/css" href="../../../ui/jquery-easyui-1.4.5/themes/default/easyui.css">
    <link rel="stylesheet" type="text/css" href="../../../ui/jquery-easyui-1.4.5/themes/icon.css">
    <link rel="stylesheet" type="text/css" href="../../../ui/jquery-easyui-1.4.5/themes/color.css">
    <script src="../../../ui/jquery-easyui-1.4.5/jquery.min.js"></script>
    <script src="../../../ui/jquery-easyui-1.4.5/jquery.easyui.min.js"></script>
    <script src="../../../ui/jquery-easyui-1.4.5/locale/easyui-lang-zh_CN.js"></script>
    <script src="../../../js/crud/bus_pubuser.js"></script>
</head>
<body>
    <p class="easyui-tabs" fit="false" style="width: 100%;height: 100%;" plain="false" >
        <p title="页签1">
            <p>width number 选项卡容器宽度。  </p>
            <p>height number 选项卡容器高度。 </p>
            <p>plain boolean 设置为true时,将不显示控制面板背景。 </p>
            <p>fit boolean 设置为true时,选项卡的大小将铺满它所在的容器。 </p>

        </p>
        <p title="页签2" selected="2">
            <p>selected number 初始化选中一个tab页。 </p>
        </p>
        <p title="页签3">
            <p>showHeader boolean 设置为true时,显示tab页标题。  </p>
        </p>
    </p>
</body>
<html> 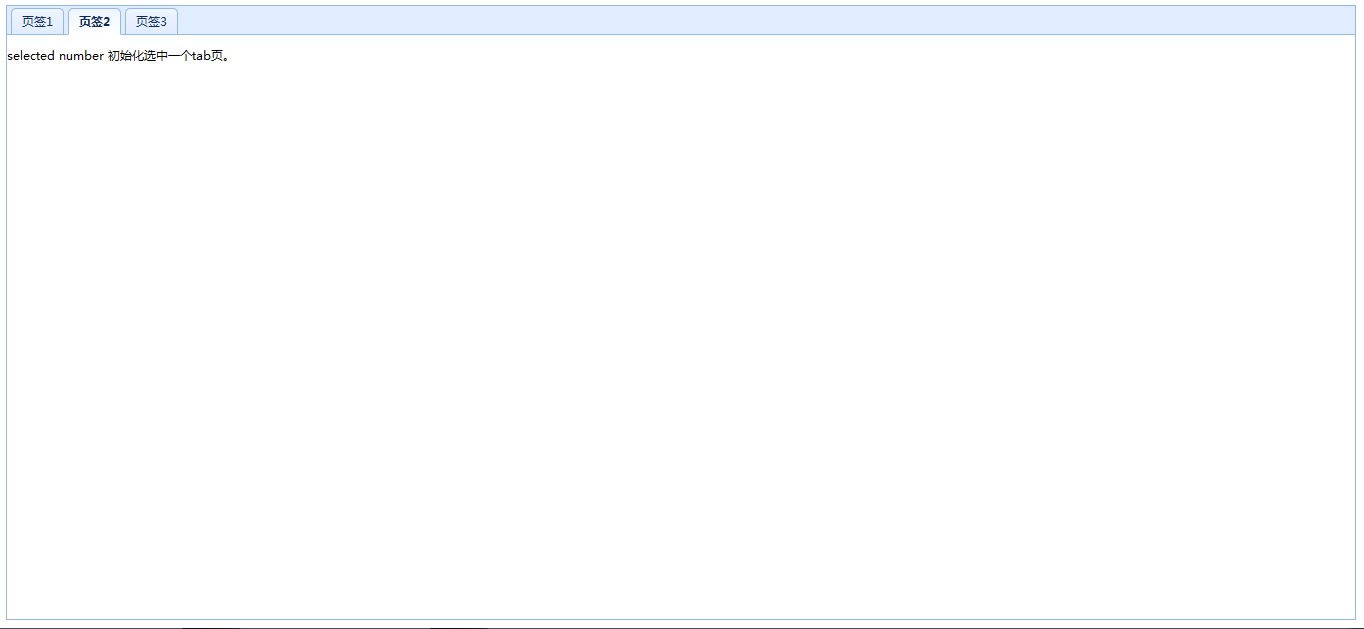
5. Dynamically add tabs (Tabs)
<html>
<head>
<meta http-equiv="Content-Type" content="text/html; charset=utf-8">
<title>动态添加标签页(Tabs)</title>
<link rel="stylesheet" type="text/css" href="../../../ui/jquery-easyui-1.4.5/themes/default/easyui.css">
<link rel="stylesheet" type="text/css" href="../../../ui/jquery-easyui-1.4.5/themes/icon.css">
<link rel="stylesheet" type="text/css" href="../../../ui/jquery-easyui-1.4.5/themes/color.css">
<script src="../../../ui/jquery-easyui-1.4.5/jquery.min.js"></script>
<script src="../../../ui/jquery-easyui-1.4.5/jquery.easyui.min.js"></script>
<script src="../../../ui/jquery-easyui-1.4.5/locale/easyui-lang-zh_CN.js"></script>
<script src="../../../js/crud/bus_pubuser.js"></script>
<style>
.rtitle{
font-size:18px;
font-weight:bold;
padding:5px 5px;
background:#336699;
color:#fff; } </style>
</head>
<body>
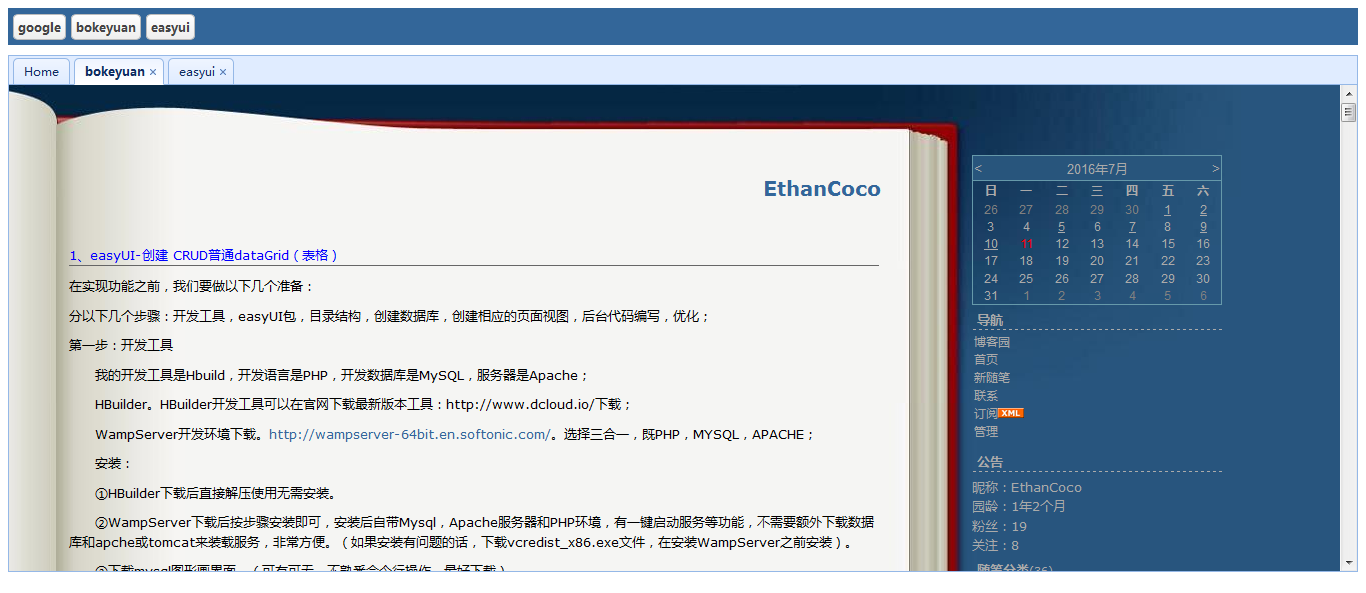
<p style="margin-bottom:10px" class="rtitle">
<a href="#" class="easyui-linkbutton" onclick="addTab('bokeyuan','http://www.cnblogs.com/jianyeLee/p/5656968.html')">bokeyuan</a>
<a href="#" class="easyui-linkbutton" onclick="addTab('jquery','http://jquery.com/')">jquery</a>
<a href="#" class="easyui-linkbutton" onclick="addTab('easyui','http://jeasyui.com/')">easyui</a>
</p>
<p id="tt" class="easyui-tabs" style="width: 100%;height: 90%;" fit="false" pain="true">
<p title="Home">
</p>
</p>
</body>
<html>function addTab(title, url){ if ($('#tt').tabs('exists', title)){
$('#tt').tabs('select', title);
} else { var content = '<iframe scrolling="auto" frameborder="0"
src="'+url+'" style="width:100%;height:100%;"></iframe>';
$('#tt').tabs('add',{
title:title,
content:content,
closable:true
});
}
}
6. Add auto-playing tabs (Tabs)
<html><head>
<meta http-equiv="Content-Type" content="text/html; charset=utf-8">
<title>添加自动播放标签页(Tabs)</title>
<link rel="stylesheet" type="text/css" href="../../../ui/jquery-easyui-1.4.5/themes/default/easyui.css">
<link rel="stylesheet" type="text/css" href="../../../ui/jquery-easyui-1.4.5/themes/icon.css">
<link rel="stylesheet" type="text/css" href="../../../ui/jquery-easyui-1.4.5/themes/color.css">
<script src="../../../ui/jquery-easyui-1.4.5/jquery.min.js"></script>
<script src="../../../ui/jquery-easyui-1.4.5/jquery.easyui.min.js"></script>
<script src="../../../ui/jquery-easyui-1.4.5/locale/easyui-lang-zh_CN.js"></script>
<script src="../../../js/crud/bus_pubuser.js"></script>
<script>
$(function(){ var index = 0; var t = $('#tt'); var tabs = t.tabs('tabs');
setInterval(function(){
t.tabs('select', tabs[index].panel('options').title);
index++; if (index >= tabs.length){
index = 0;
}
}, 1000);
}); </script></head><body>
<p id="tt" class="easyui-tabs" style="width: 100%;height: 100%;" fit="false" pain="true">
<p title="s1">
<img src="/static/imghw/default1.png" data-src="../../../img/shirt1.gif" class="lazy" / alt="easyui datagrid paging 4. easyUI-seven layouts (layout)" >
</p>
<p title="s2">
<img src="/static/imghw/default1.png" data-src="../../../img/shirt2.gif" class="lazy" / alt="easyui datagrid paging 4. easyUI-seven layouts (layout)" >
</p>
<p title="s3">
<img src="/static/imghw/default1.png" data-src="../../../img/shirt3.gif" class="lazy" / alt="easyui datagrid paging 4. easyUI-seven layouts (layout)" >
</p>
<p title="s4">
<img src="/static/imghw/default1.png" data-src="../../../img/shirt4.gif" class="lazy" / alt="easyui datagrid paging 4. easyUI-seven layouts (layout)" >
</p>
<p title="s5">
<img src="/static/imghw/default1.png" data-src="../../../img/shirt5.gif" class="lazy" / alt="easyui datagrid paging 4. easyUI-seven layouts (layout)" >
</p>
</p></body><html>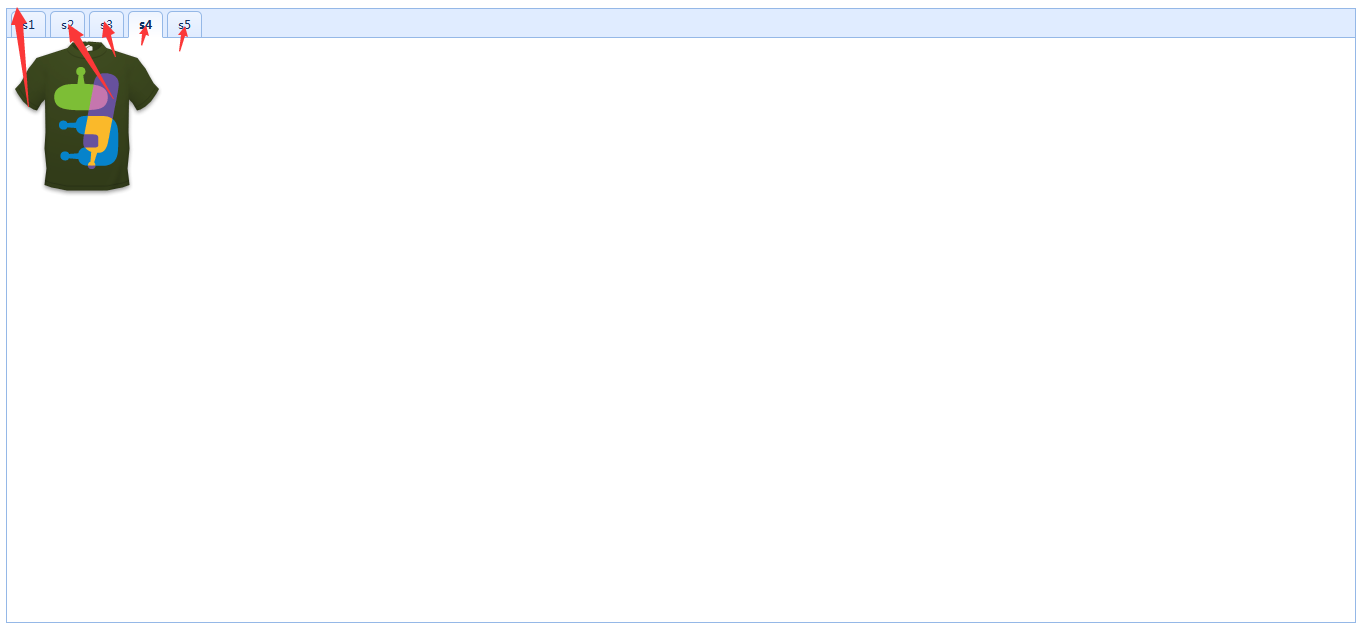
7. Create an XP style left panel
<html><head>
<meta http-equiv="Content-Type" content="text/html; charset=utf-8">
<title>创建 XP 风格左侧面板</title>
<link rel="stylesheet" type="text/css" href="../../../ui/jquery-easyui-1.4.5/themes/default/easyui.css">
<link rel="stylesheet" type="text/css" href="../../../ui/jquery-easyui-1.4.5/themes/icon.css">
<link rel="stylesheet" type="text/css" href="../../../ui/jquery-easyui-1.4.5/themes/color.css">
<script src="../../../ui/jquery-easyui-1.4.5/jquery.min.js"></script>
<script src="../../../ui/jquery-easyui-1.4.5/jquery.easyui.min.js"></script>
<script src="../../../ui/jquery-easyui-1.4.5/locale/easyui-lang-zh_CN.js"></script>
<script src="../../../js/crud/bus_pubuser.js"></script>
<style>
.demo{
width:200px;height:auto;padding:10px;
}
.panel-body{
background:#f0f0f0;
}
.panel-header{
background:#fff url('../../../img/panel_header_bg.gif') no-repeat top right;
}
.panel-tool-collapse{
background:url('../../../img/arrow_up.gif') no-repeat 0px -3px;
}
.panel-tool-expand{
background:url('../../../img/arrow_down.gif') no-repeat 0px -3px;
}
</style></head><body>
<p style="width:200px;height:auto;background:#7190E0;padding:5px;">
<p class="easyui-panel demo" title="工具" collapsible="true">
<p>content</p>
</p>
<br/>
<p class="easyui-panel demo" title="文件夹" collapsible="true" collapsed="true">
<p>content</p>
</p>
<br/>
<p class="easyui-panel demo" title="地址" collapsible="true" collapsed="true">
<p>content</p>
</p>
<br/>
<p class="easyui-panel demo" title="详情" collapsible="true" collapsed="true">
<p>content</p>
</p>
</p></body><html>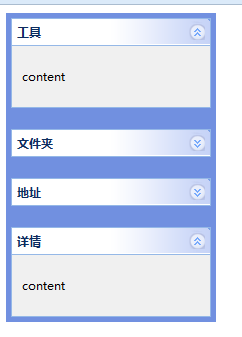
These code layouts are all No js is required, just use class;
The above is the content of easyui datagrid paging 4 and easyUI-seven layouts. For more related content, please pay attention to the PHP Chinese website (www.php.cn)!
Related articles:

Hot AI Tools

Undresser.AI Undress
AI-powered app for creating realistic nude photos

AI Clothes Remover
Online AI tool for removing clothes from photos.

Undress AI Tool
Undress images for free

Clothoff.io
AI clothes remover

AI Hentai Generator
Generate AI Hentai for free.

Hot Article

Hot Tools

Notepad++7.3.1
Easy-to-use and free code editor

SublimeText3 Chinese version
Chinese version, very easy to use

Zend Studio 13.0.1
Powerful PHP integrated development environment

Dreamweaver CS6
Visual web development tools

SublimeText3 Mac version
God-level code editing software (SublimeText3)

Hot Topics
 1385
1385
 52
52
 Alipay PHP SDK transfer error: How to solve the problem of 'Cannot declare class SignData'?
Apr 01, 2025 am 07:21 AM
Alipay PHP...
 Explain JSON Web Tokens (JWT) and their use case in PHP APIs.
Apr 05, 2025 am 12:04 AM
JWT is an open standard based on JSON, used to securely transmit information between parties, mainly for identity authentication and information exchange. 1. JWT consists of three parts: Header, Payload and Signature. 2. The working principle of JWT includes three steps: generating JWT, verifying JWT and parsing Payload. 3. When using JWT for authentication in PHP, JWT can be generated and verified, and user role and permission information can be included in advanced usage. 4. Common errors include signature verification failure, token expiration, and payload oversized. Debugging skills include using debugging tools and logging. 5. Performance optimization and best practices include using appropriate signature algorithms, setting validity periods reasonably,
 Describe the SOLID principles and how they apply to PHP development.
Apr 03, 2025 am 12:04 AM
The application of SOLID principle in PHP development includes: 1. Single responsibility principle (SRP): Each class is responsible for only one function. 2. Open and close principle (OCP): Changes are achieved through extension rather than modification. 3. Lisch's Substitution Principle (LSP): Subclasses can replace base classes without affecting program accuracy. 4. Interface isolation principle (ISP): Use fine-grained interfaces to avoid dependencies and unused methods. 5. Dependency inversion principle (DIP): High and low-level modules rely on abstraction and are implemented through dependency injection.
 How to automatically set permissions of unixsocket after system restart?
Mar 31, 2025 pm 11:54 PM
How to automatically set the permissions of unixsocket after the system restarts. Every time the system restarts, we need to execute the following command to modify the permissions of unixsocket: sudo...
 Explain the concept of late static binding in PHP.
Mar 21, 2025 pm 01:33 PM
Article discusses late static binding (LSB) in PHP, introduced in PHP 5.3, allowing runtime resolution of static method calls for more flexible inheritance.Main issue: LSB vs. traditional polymorphism; LSB's practical applications and potential perfo
 How to send a POST request containing JSON data using PHP's cURL library?
Apr 01, 2025 pm 03:12 PM
Sending JSON data using PHP's cURL library In PHP development, it is often necessary to interact with external APIs. One of the common ways is to use cURL library to send POST�...
 Framework Security Features: Protecting against vulnerabilities.
Mar 28, 2025 pm 05:11 PM
Article discusses essential security features in frameworks to protect against vulnerabilities, including input validation, authentication, and regular updates.
 How to debug CLI mode in PHPStorm?
Apr 01, 2025 pm 02:57 PM
How to debug CLI mode in PHPStorm? When developing with PHPStorm, sometimes we need to debug PHP in command line interface (CLI) mode...


