
 Backend Development
PHP Tutorial
nginx source code study notes (20) - event module 1 - initialization
Backend Development
PHP Tutorial
nginx source code study notes (20) - event module 1 - initialization
nginx source code study notes (20) - event module 1 - initialization

After reading the previous study notes, I believe that I have a certain understanding of the startup process of nginx. From this section on, we want to go deep into each module and learn the main operations within each module.
This article comes from: http://blog.csdn.net/lengzijian/article/details/7598996
Today we will learn about the event module. In the previous startup, we mentioned calling each module many times. The hook function of
This method mainly creates an ngx_event_conf_t structure and allocates memory space. 
For example, the read file has the following lines:
[cpp] view
plaincopyprint?
events
{
use epoll;
- worker_connections 10240; }
- The events in this place are a block instruction. Many instructions can be configured within the brackets. These instructions are defined in src/event/ngx_event.c
- [cpp] view plaincopyprint?
ngx_command_t ngx_event_core_commands[] = {
{ ngx_string(
- "worker_ connections"
- ), NGX_EVENT_CONF|NGX_CONF_TAKE1,
- ngx_event_connections,
- 0, 0,
- NULL },
- ...(omitted here)
- NGX_EVENT_CONF|NGX_CONF_TAKE1,
- ngx_event_connections,
- 0,
- 0, NULL },
- {ngx_string(
- "use" ),
- NGX_EVENT_CONF|NGX_CONF_TAKE1,
- ngx_event_use,
- 0,
- 0, NULL },
- ngx_null_command
- };
- When events are parsed, the following function will be called back:
- [cpp] view plaincopyprint?
-
- src/event/ngx_event.c
- static char *
- ngx_events_block(ngx_conf_t *cf, ngx_command_t *cmd, void *conf)
- {
- char *rv;
- void ***ctx;
- ngx_uint_t i;
- ngx_conf_t pcf;
- ngx_event_module_t *m;
- /* count the number of the event modules and set up their indices */
- //计算event模块数量,并且记录
- ngx_event_max_module = 0;
- for (i = 0; ngx_modules[i]; i++) {
- if (ngx_modules[i]->type != NGX_EVENT_MODULE) {
- continue;
- }
- ngx_modules[i]->ctx_index = ngx_event_max_module++;
- }
- ctx = ngx_pcalloc(cf->pool, sizeof(void *));
- if (ctx == NULL) {
- return NGX_CONF_ERROR;
- }
- //为每一个event模块分配空间,用来保存响应配置结构的地址
- //共分配了ngx_event_max_module个空间
- *ctx = ngx_pcalloc(cf->pool, ngx_event_max_module * sizeof(void *));
- if (*ctx == NULL) {
- return NGX_CONF_ERROR;
- }
- *(void **) conf = ctx;
- for (i = 0; ngx_modules[i]; i++) {
- if (ngx_modules[i]->type != NGX_EVENT_MODULE) {
- continue;
- }
- m = ngx_modules[i]->ctx;
- if
- (m->create_conf) { (*ctx)[ngx_modules[i]->ctx_index] = m->create_conf(cf->cycle);
- ((*ctx)[ngx_modules[i]->ctx_index] == NULL) {
- pcf = *cf; cf->ctx = ctx;
- cf->module_type = NGX_EVENT_MODULE;
- cf->cmd_type = NGX_EVENT_CONF;
- //Since events is a block instruction, many other instructions can be configured in the events domain,
- //For example, the use mentioned before, etc., now start to parse the instructions in the events block and complete the initialization Work.
- rv = ngx_conf_parse(cf, NULL);
- *cf = pcf;
- if (rv != NGX_CONF_OK)
-
- if(ngx_modules[i]-> ;type != NGX_EVENT_MODULE) {
- m = ngx_modules[i]->ctx;
- //Loop to execute each event The init_conf function of the module, the initialization configuration structure
- (m-& gt; init_conf) {
- RV = m-& gt; init_conf (CF-& GT; cycle, (*ctx) [ngx_modules[i]->ctx_index]); return
- rv;
- }
- return NGX_CONF_OK;
- }
The most important process in the ngx_events_block() function is to call ngx_conf_parse(cf, NULL). The function of calling ngx_conf_parse() here is to complete the parsing of the events{} block in the configuration file, thereby calling all configurations under it. The callback function of the instruction completes the initialization of parsing the configuration file. But here I have a personal question. After asking the seniors, I will specify the question and answer******.
2. Initialize conf (init_conf)
ngx_event_init_conf()
This method mainly initializes the ngx_event_conf_t structure.
3.ngx_event_module_init
As the name suggests, it is the initialization operation of the module, but looking at the source code of each module, it is found that many modules do not have init callback functions. I am also struggling with why here, hoping to find the answer after learning all the code.
[cpp] view plaincopyprint?
- src/event/ngx_event.c
- static ngx_int_t
- ngx_event_module_init(ngx_cycle_t *cycle)
- {
- void ***cf;
- u_char *shared;
- size_t size, cl;
- ngx_shm_t shm;
- ngx_time_t *tp;
- ngx_core_conf_t *ccf;
- ngx_event_conf_t *ecf;
- //判断ngx_events_module是否调用过初始化conf操作
- cf = ngx_get_conf(cycle->conf_ctx, ngx_events_module);
- if (cf == NULL) {
- ngx_log_error(NGX_LOG_EMERG, cycle->log, 0,
- "no "events" section in configuration");
- return NGX_ERROR;
- }
- //获取ngx_event_core_module模块的配置结构
- ecf = (*cf)[ngx_event_core_module.ctx_index];
- //查看是否是event中的模块,例如use 。。。。
- if (!ngx_test_config && ngx_process <= NGX_PROCESS_MASTER) {
- ngx_log_error(NGX _LOG_NOTICE, cycle->log, 0,
- "event method", ecf->name);
- }
- //Get the configuration structure of the ngx_core_module module
- ccf = (ngx_core_conf_t *) ngx_get_conf(cycle- >conf_ctx, ngx_core_module);
- //Get the timer_resolution parameter from the configuration structure of the ngx_core_module module ngx_timer_resolution = ccf->timer_resolution;
- #if !(NGX_WIN32)
- { ngx_int_t limit;
- rlimit rlmt;
- //Get the ability of the current process The maximum number of open files man getrlimit
- (getrlimit(RLIMIT_NOFILE, &rlmt) == -1) { x_log_error(NGX_LOG_ALERT, cycle->log, ngx_errno,
- else{
- _The maximum number of connections to a module is unlimited
- / /Or ngx_event_core_module connection is greater than ngx_core_module maximum number of connections
- (ECF-& GT; Connections & GT; (ngx_uint_t) rlmt.rlim_cur
- (ccf-& gt; _NOFILE == ngx_conf_unset limit = (ccf->rlimit_nofile == NGX_CONF_UNSET) ?
- ( ngx_int_t) rlmt.rlim_cur: ccf- & gt; rlimit_nofile;
- " open file resource limit: %i" ); endif /* !(NGX_WIN32) */
- //If the master process is closed, return
- //Because closing the master process means single-process work Method,
- //The subsequent operations create shared memory to implement locks and other work, which is not required for a single process.
- if (ccf->master == 0) {
- NGX_OK; }
- // If the accept mutex already exists, there is no need to create it again.
- NGX_OK;
- }
- /* cl should be equal or bigger than cache line size */
- cl = 128;
- //Create size here Shared memory, this shared memory will be divided into three equal segments
- size = cl + cl
- ,
- shm.size = size;
- shm.name.len = sizeof("nginx_shared_zone" );
- shm.name.data = (u_char *) "nginx_share d_zone" ;
- shm.log = cycle->log;
- (ngx_shm_alloc(&shm) ! = NGX_OK) { NGX_ERROR;
- NGX_ERROR;
- shared = shm.addr;
- //Accept mutex gets the first cl size memory of shared memory
- ngx_accept_mutex_ptr = (ngx_atomic_t *) shared; ngx_accept_mutex.spin = (ngx_uint_t) -1;
- /*Create accept mutex
- The implementation of accept mutex depends on whether it supports atomic operations, if there are corresponding atomic operations;
- That’s it Use the obtained shared memory to implement the accept mutex; otherwise, the file lock will be used to implement the accept mutex.
- The function of the accept mutex is to avoid panic groups and achieve load balancing of worker processes.
- src/event/ngx_event.c
- staticngx_int_t
- ngx_event_process_init(ngx_cycle_t *cycle)
- {
- ngx_uint_t m, i;
- ngx_event_t *rev, *wev;
- ngx_listening_t *ls;
- ngx_connection_t *c, *next, *old;
- ngx_core_conf_t *ccf;
- ngx_event_conf_t *ecf;
- ngx_event_module_t *module;
- //As before, get the configuration structure of the response module
- ccf = (ngx_core_conf_t *) ngx_get_conf( cycle->conf_ctx, ngx_core_module);
- ecf = ngx_event_get_conf(cycle->conf_ctx, ngx_event_core_module);
- //Master process is open, worker process is greater than 1, accept_mutex has been created
- //cai Open the accept mutex
- if (ccf->master &&ccf->worker_processes > 1 &&ecf->accept_mutex) {
- ngx_use_accept_mutex = 1; / /Use mutex
- ngx_accept_mutex_held = 0; //Whether to get accept mutex
- ngx_accept_mutex_delay = ecf->accept_mutex_delay;//After failure to compete for the mutex , waiting for the next scramble time interval
- } else {
- ngx_use_accept_mutex = 0 ;
- }
- #if (NGX_THREADS)
- //Threads aside
- #endif
- //Initialize counter, a red will be created here Black Tree, to maintain the timer, will explain in detail later
- if (ngx_event_timer_init(cycle->log) == NGX_ERROR) {
- return NGX_ERROR; }
- for (m = 0; ngx_modules[m]; m++) {
- //As mentioned here before, skip non-NGX_EVENT_MODULE modules
- }
- // Modules specified by non-use configuration instructions are skipped, Linux default epoll ->use) { module = ngx_modules[m]->ctx;
- /*Call the init function of the specific time module ( These modules are located in the src/event/modules directory), so nginx A layer of abstraction has been made to the time module, which makes it easier for different systems to use different event models and expands new time models. Our focus should be on epoll.
- The init callback here actually calls the ngx_epoll_init function. The module->actions structure encapsulates all interface functions of epoll. nginx registers epoll into the event abstraction layer through the actions structure. The type of actions is ngx_event_action_t, located in src/event/ngx_event.h
- These specific contents will be explained in the next section.
- module->actions.init(cycle, ngx_timer_resolution) != NGX_OK) {
- *fatal */
- exit(2); break ;
- }
- //Omitted here Part of the content
- //Create a global ngx_connection_t array to save all connections
- //Since this process is executed in each worker process, each worker has Own connection array
- cycle->connections = ngx_alloc(sizeof (ngx_connection_t) *cycle->connection_n, cycle->log);
- if (cycle->connections == NULL) {
- c = cycle->connections;
- //Create an array of read events
- cycle->read_events = ngx_alloc(sizeof
- (ngx_event_t) * cycle->connection_n, ;log);
- if
- (cycle->read_events == NULL) {
- NGX_ERROR;
- }
- rev = cycle->read_events;
- for (i = 0; i < cycle->connection_n; i++) {
- rev[i].closed = 1 ;
- [i].instance = 1; #if (NGX_THREADS)
- rev[i].lock = &c[i].lock;
- rev[i].own_lock = &c[i].lock;
- #endif
- }
- //创建一个写事件数组
- cycle->write_events = ngx_alloc(sizeof(ngx_event_t) * cycle->connection_n,
- cycle->log);
- if (cycle->write_events == NULL) {
- return NGX_ERROR;
- }
- wev = cycle->write_events;
- for (i = 0; i < cycle->connection_n; i++) {
- wev[i].closed = 1;
- #if (NGX_THREADS)
- wev[i].lock = &c[i].lock;
- wev[i].own_lock = &c[i].lock;
- #endif
- }
- i = cycle->connection_n;
- next = NULL;
- //初始化整个connection数组
- do {
- i--;
- c[i].data = next;
- c[i].read = &cycle->read_events[i];
- c[i].write = &cycle->write_events[i];
- c[i].fd = (ngx_socket_t) -1;
- next = &c[i];
- #if (NGX_THREADS)
- c[i].lock = 0;
- #endif
- }while (i);
- cycle->free_connections = next;
- cycle->free_connection_n = cycle-> connection_n;
- /* for each listening socket */
- //Assign a connection from the connection array for each listening socket, that is, a slot
- ls = cycle->listening .els; Connect to solt
- _ C = ngx_get_connection (ls [i] .fd, cycle-& gt; log); NGX_ERROR; }
- c->log = &ls[i].log;
- c->listening = &ls[i];
- ls[i].connection = c;
- rev = c->read;
- rev->log = c->log;
- rev->accept = 1; //读时间发生,调用accept
- #if (NGX_HAVE_DEFERRED_ACCEPT)
- //省略
- #endif
- if (!(ngx_event_flags & NGX_USE_IOCP_EVENT)) {
- if (ls[i].previous) {
- /*
- * delete the old accept events that were bound to
- * the old cycle read events array
- */
- old = ls[i].previous->connection;
- if (ngx_del_event(old->read, NGX_READ_EVENT, NGX_CLOSE_EVENT)
- == NGX_ERROR)
- {
- return NGX_ERROR;
- }
- old->fd = (ngx_socket_t) -1;
- }
- }
- //Register the callback function ngx_event_accept
- rev->handler = ngx_even t_accept;
- , do not put the listening socket into epoll for the time being, but
- {
- }
- } else{
- //If the accept mutex is not used, then put this listening socket into epoll.
- #endif
- }
- return
- NGX_OK;
- }
- Until now , event-driven initialization has been completed. The above introduces the nginx source code study notes (20) - event module 1 - initialization, including IOC and counter content. I hope it will be helpful to friends who are interested in PHP tutorials.

Hot AI Tools

Undresser.AI Undress
AI-powered app for creating realistic nude photos

AI Clothes Remover
Online AI tool for removing clothes from photos.

Undress AI Tool
Undress images for free

Clothoff.io
AI clothes remover

AI Hentai Generator
Generate AI Hentai for free.

Hot Article
Hot Tools

Notepad++7.3.1
Easy-to-use and free code editor

SublimeText3 Chinese version
Chinese version, very easy to use

Zend Studio 13.0.1
Powerful PHP integrated development environment

Dreamweaver CS6
Visual web development tools

SublimeText3 Mac version
God-level code editing software (SublimeText3)
Hot Topics
 1377
1377
 52
52

 Solution: Your organization requires you to change your PIN
Oct 04, 2023 pm 05:45 PM
Solution: Your organization requires you to change your PIN
Oct 04, 2023 pm 05:45 PM
The message "Your organization has asked you to change your PIN" will appear on the login screen. This happens when the PIN expiration limit is reached on a computer using organization-based account settings, where they have control over personal devices. However, if you set up Windows using a personal account, the error message should ideally not appear. Although this is not always the case. Most users who encounter errors report using their personal accounts. Why does my organization ask me to change my PIN on Windows 11? It's possible that your account is associated with an organization, and your primary approach should be to verify this. Contacting your domain administrator can help! Additionally, misconfigured local policy settings or incorrect registry keys can cause errors. Right now
 How to adjust window border settings on Windows 11: Change color and size
Sep 22, 2023 am 11:37 AM
How to adjust window border settings on Windows 11: Change color and size
Sep 22, 2023 am 11:37 AM
Windows 11 brings fresh and elegant design to the forefront; the modern interface allows you to personalize and change the finest details, such as window borders. In this guide, we'll discuss step-by-step instructions to help you create an environment that reflects your style in the Windows operating system. How to change window border settings? Press + to open the Settings app. WindowsI go to Personalization and click Color Settings. Color Change Window Borders Settings Window 11" Width="643" Height="500" > Find the Show accent color on title bar and window borders option, and toggle the switch next to it. To display accent colors on the Start menu and taskbar To display the theme color on the Start menu and taskbar, turn on Show theme on the Start menu and taskbar
 How to change title bar color on Windows 11?
Sep 14, 2023 pm 03:33 PM
How to change title bar color on Windows 11?
Sep 14, 2023 pm 03:33 PM
By default, the title bar color on Windows 11 depends on the dark/light theme you choose. However, you can change it to any color you want. In this guide, we'll discuss step-by-step instructions for three ways to change it and personalize your desktop experience to make it visually appealing. Is it possible to change the title bar color of active and inactive windows? Yes, you can change the title bar color of active windows using the Settings app, or you can change the title bar color of inactive windows using Registry Editor. To learn these steps, go to the next section. How to change title bar color in Windows 11? 1. Using the Settings app press + to open the settings window. WindowsI go to "Personalization" and then
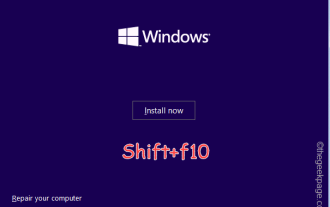 OOBELANGUAGE Error Problems in Windows 11/10 Repair
Jul 16, 2023 pm 03:29 PM
OOBELANGUAGE Error Problems in Windows 11/10 Repair
Jul 16, 2023 pm 03:29 PM
Do you see "A problem occurred" along with the "OOBELANGUAGE" statement on the Windows Installer page? The installation of Windows sometimes stops due to such errors. OOBE means out-of-the-box experience. As the error message indicates, this is an issue related to OOBE language selection. There is nothing to worry about, you can solve this problem with nifty registry editing from the OOBE screen itself. Quick Fix – 1. Click the “Retry” button at the bottom of the OOBE app. This will continue the process without further hiccups. 2. Use the power button to force shut down the system. After the system restarts, OOBE should continue. 3. Disconnect the system from the Internet. Complete all aspects of OOBE in offline mode
 How to enable or disable taskbar thumbnail previews on Windows 11
Sep 15, 2023 pm 03:57 PM
How to enable or disable taskbar thumbnail previews on Windows 11
Sep 15, 2023 pm 03:57 PM
Taskbar thumbnails can be fun, but they can also be distracting or annoying. Considering how often you hover over this area, you may have inadvertently closed important windows a few times. Another disadvantage is that it uses more system resources, so if you've been looking for a way to be more resource efficient, we'll show you how to disable it. However, if your hardware specs can handle it and you like the preview, you can enable it. How to enable taskbar thumbnail preview in Windows 11? 1. Using the Settings app tap the key and click Settings. Windows click System and select About. Click Advanced system settings. Navigate to the Advanced tab and select Settings under Performance. Select "Visual Effects"
 Display scaling guide on Windows 11
Sep 19, 2023 pm 06:45 PM
Display scaling guide on Windows 11
Sep 19, 2023 pm 06:45 PM
We all have different preferences when it comes to display scaling on Windows 11. Some people like big icons, some like small icons. However, we all agree that having the right scaling is important. Poor font scaling or over-scaling of images can be a real productivity killer when working, so you need to know how to customize it to get the most out of your system's capabilities. Advantages of Custom Zoom: This is a useful feature for people who have difficulty reading text on the screen. It helps you see more on the screen at one time. You can create custom extension profiles that apply only to certain monitors and applications. Can help improve the performance of low-end hardware. It gives you more control over what's on your screen. How to use Windows 11
 10 Ways to Adjust Brightness on Windows 11
Dec 18, 2023 pm 02:21 PM
10 Ways to Adjust Brightness on Windows 11
Dec 18, 2023 pm 02:21 PM
Screen brightness is an integral part of using modern computing devices, especially when you look at the screen for long periods of time. It helps you reduce eye strain, improve legibility, and view content easily and efficiently. However, depending on your settings, it can sometimes be difficult to manage brightness, especially on Windows 11 with the new UI changes. If you're having trouble adjusting brightness, here are all the ways to manage brightness on Windows 11. How to Change Brightness on Windows 11 [10 Ways Explained] Single monitor users can use the following methods to adjust brightness on Windows 11. This includes desktop systems using a single monitor as well as laptops. let's start. Method 1: Use the Action Center The Action Center is accessible
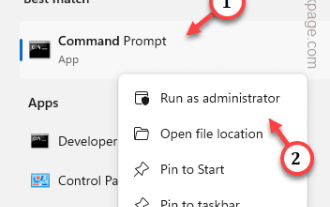 How to Fix Activation Error Code 0xc004f069 in Windows Server
Jul 22, 2023 am 09:49 AM
How to Fix Activation Error Code 0xc004f069 in Windows Server
Jul 22, 2023 am 09:49 AM
The activation process on Windows sometimes takes a sudden turn to display an error message containing this error code 0xc004f069. Although the activation process is online, some older systems running Windows Server may experience this issue. Go through these initial checks, and if they don't help you activate your system, jump to the main solution to resolve the issue. Workaround – close the error message and activation window. Then restart the computer. Retry the Windows activation process from scratch again. Fix 1 – Activate from Terminal Activate Windows Server Edition system from cmd terminal. Stage – 1 Check Windows Server Version You have to check which type of W you are using
