How to upload files to Tencent Cloud Server - Wshenawo21
I have been using Sina sae before, but suddenly my account can no longer be used. I have all kinds of troubles in re-registering, and later I switched to Tencent.
Log in to https://console.qcloud.com/cvm and then change the system, choose to use other images to install, and then select the visual cloud panel in the options 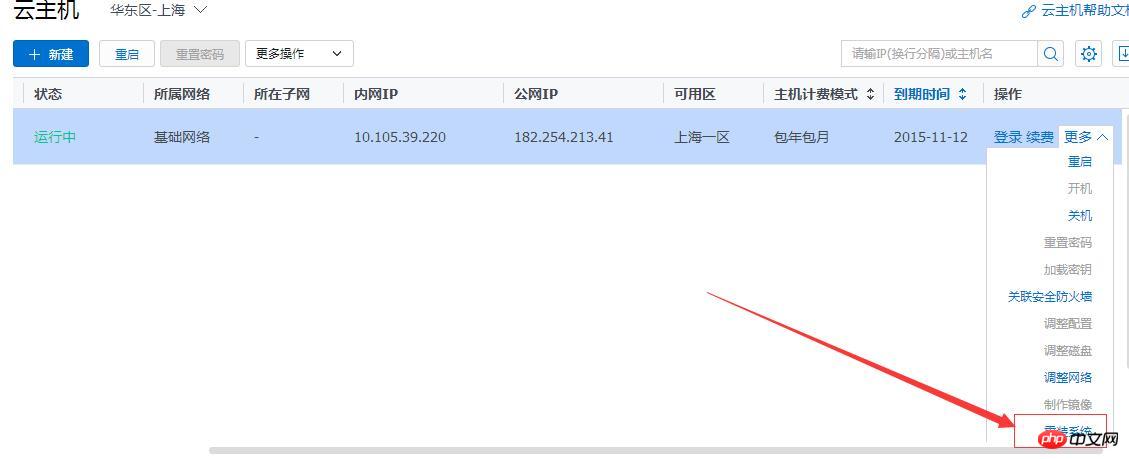

Recommended below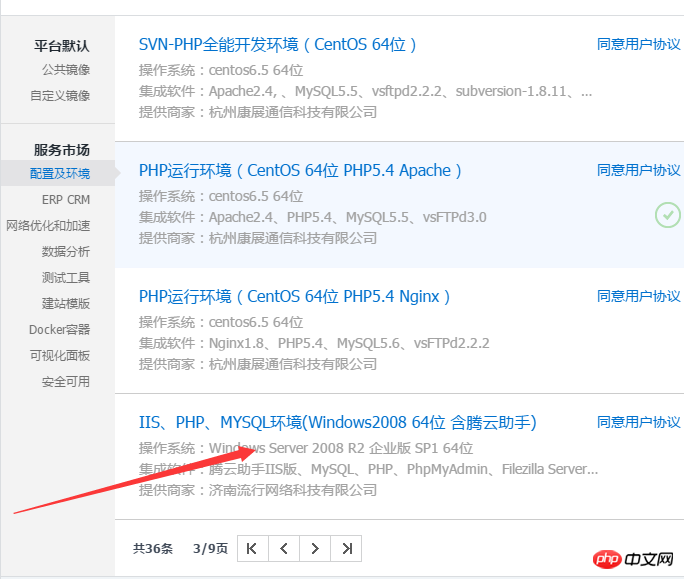
After installation, Start - Find Tengyun Assistant IIS in the program. Note: Do not change the names, file names and locations of all files in the software directory! ! ! !
1. After installing the software, please switch to the WEB environment page first. If you need other web environment support, please install it here.
You can switch the root directory of the Web site at any time. For example, you want to switch from the C:www directory to D:WWW directory, just set it here!
MySQL database file storage path, various settings, etc., just need to be set here. If you use other software, such as PhpMyadmin, to change the root password, you need to reset the password here before you can use the function normally!
Startup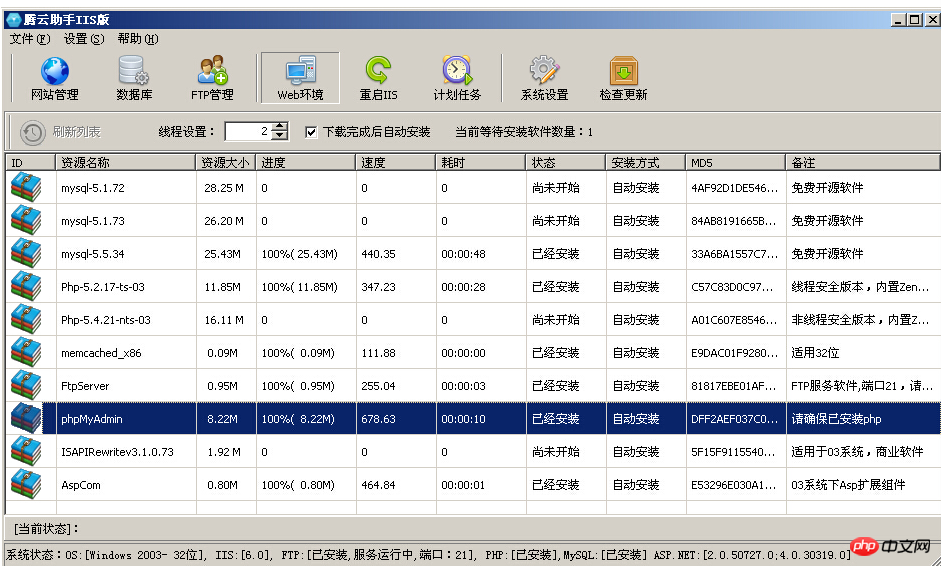 2. Website management (switch between Apache and Nginx server modes and run as usual!)
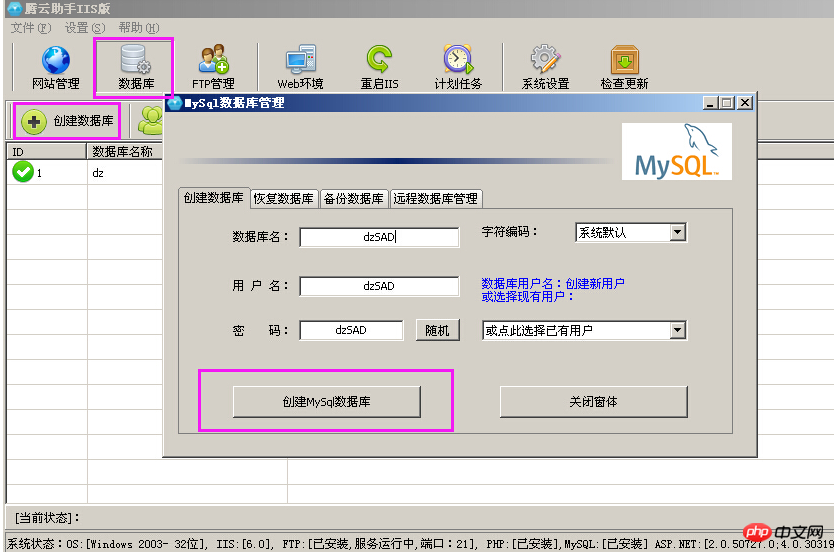
 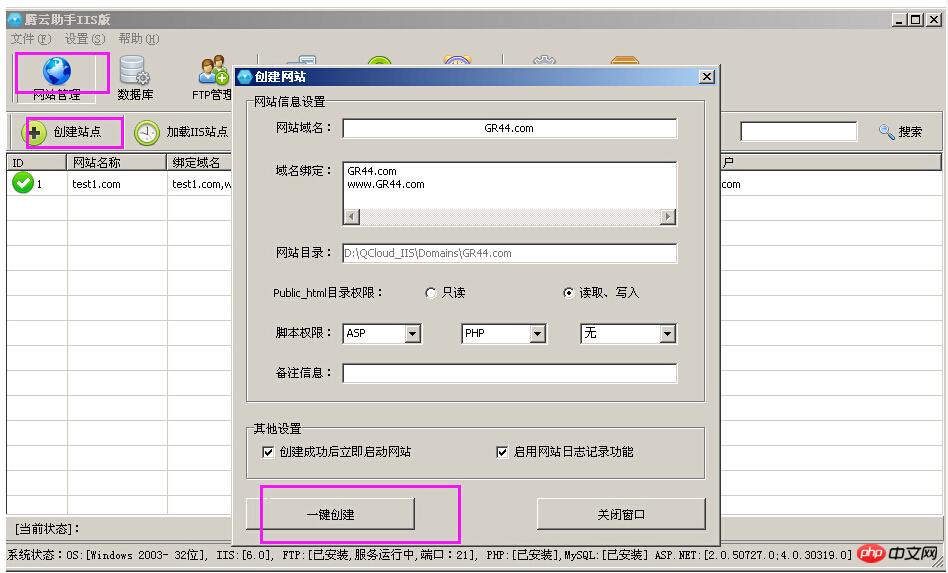 3. Database management
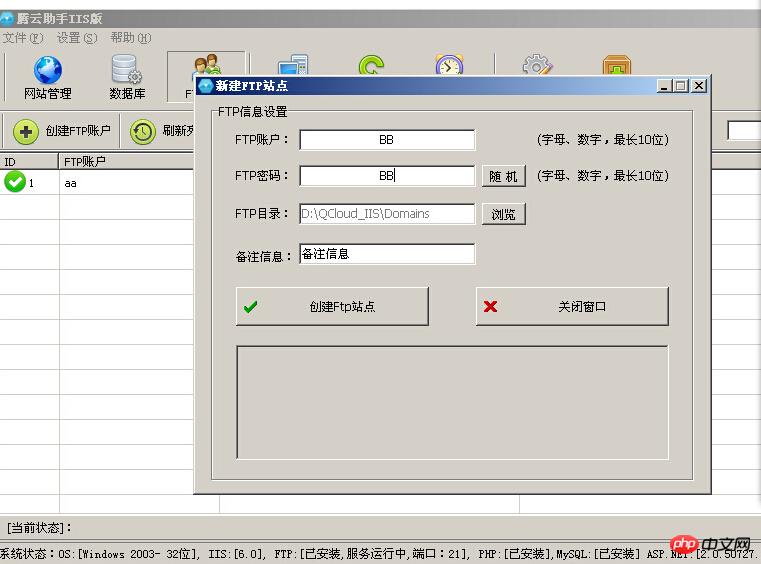
  4. FTP management (please uninstall Microsoft's own FTP before installation, otherwise it will Prompt cannot be installed!)
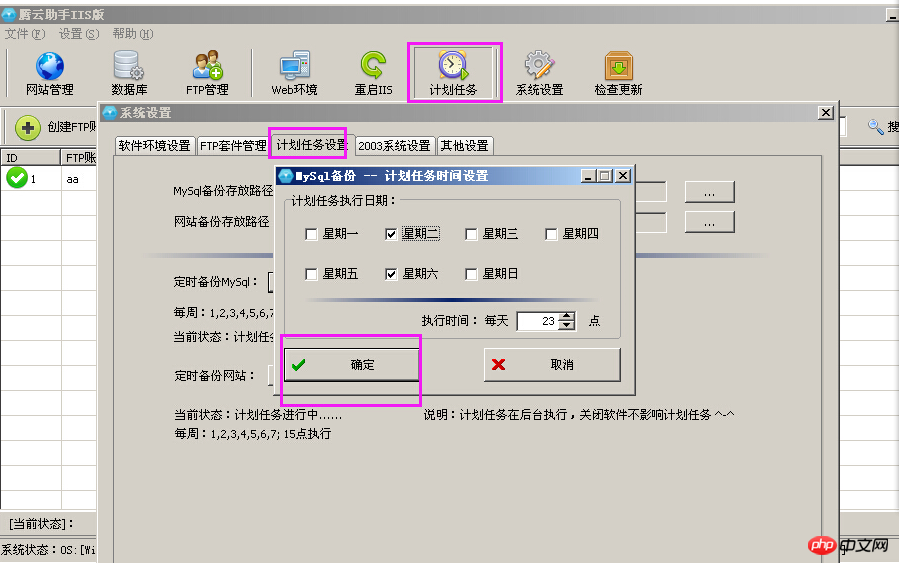
  5. Scheduled tasks (regular backup of website and Mysql database) This function can help you make adequate backups. It is very convenient to use. Just set the execution date and time
  After completion Start uploading the website
On the local computer, which is the client you are using, click Start-Run-mstsc.exe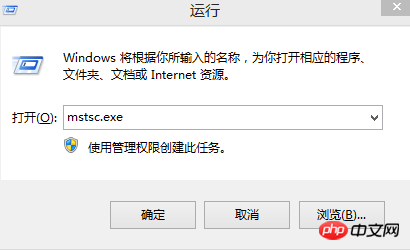
1. Open the Remote Desktop Connection dialog box and click "Options". 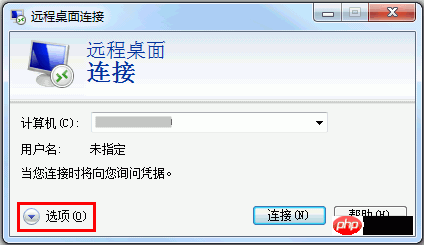
2. In the "Local Resources" tab, click "Details". 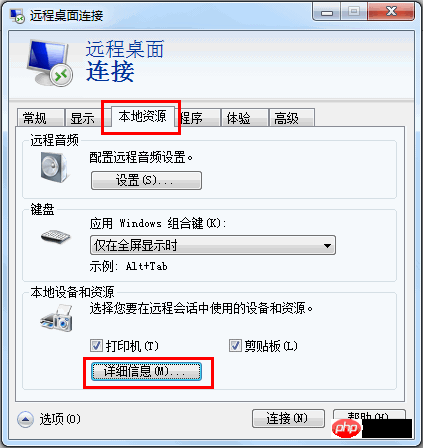
3. In the drive module, select the hard drive where the files to be uploaded to the Windows cloud server are located. 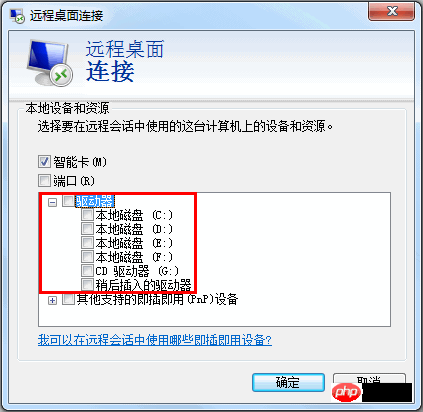
4. After the configuration is completed, log in to the Windows cloud server, select "Start"->"Computer", and you can see the local hard disk mounted on the cloud server. 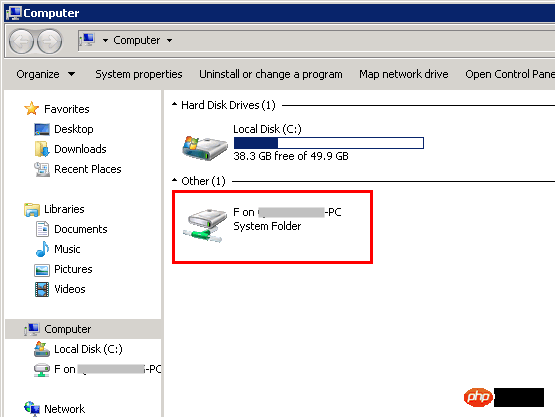

Hot AI Tools

Undresser.AI Undress
AI-powered app for creating realistic nude photos

AI Clothes Remover
Online AI tool for removing clothes from photos.

Undress AI Tool
Undress images for free

Clothoff.io
AI clothes remover

AI Hentai Generator
Generate AI Hentai for free.

Hot Article

Hot Tools

Notepad++7.3.1
Easy-to-use and free code editor

SublimeText3 Chinese version
Chinese version, very easy to use

Zend Studio 13.0.1
Powerful PHP integrated development environment

Dreamweaver CS6
Visual web development tools

SublimeText3 Mac version
God-level code editing software (SublimeText3)

Hot Topics
 What is the purpose of the <datalist> element?
Mar 21, 2025 pm 12:33 PM
The article discusses the HTML <datalist> element, which enhances forms by providing autocomplete suggestions, improving user experience and reducing errors.Character count: 159
 What is the purpose of the <progress> element?
Mar 21, 2025 pm 12:34 PM
The article discusses the HTML <progress> element, its purpose, styling, and differences from the <meter> element. The main focus is on using <progress> for task completion and <meter> for stati
 What is the purpose of the <meter> element?
Mar 21, 2025 pm 12:35 PM
The article discusses the HTML <meter> element, used for displaying scalar or fractional values within a range, and its common applications in web development. It differentiates <meter> from <progress> and ex
 What is the purpose of the <iframe> tag? What are the security considerations when using it?
Mar 20, 2025 pm 06:05 PM
The article discusses the <iframe> tag's purpose in embedding external content into webpages, its common uses, security risks, and alternatives like object tags and APIs.
 How do I use HTML5 form validation attributes to validate user input?
Mar 17, 2025 pm 12:27 PM
The article discusses using HTML5 form validation attributes like required, pattern, min, max, and length limits to validate user input directly in the browser.
 What is the viewport meta tag? Why is it important for responsive design?
Mar 20, 2025 pm 05:56 PM
The article discusses the viewport meta tag, essential for responsive web design on mobile devices. It explains how proper use ensures optimal content scaling and user interaction, while misuse can lead to design and accessibility issues.
 What are the best practices for cross-browser compatibility in HTML5?
Mar 17, 2025 pm 12:20 PM
Article discusses best practices for ensuring HTML5 cross-browser compatibility, focusing on feature detection, progressive enhancement, and testing methods.
 How do I use the HTML5 <time> element to represent dates and times semantically?
Mar 12, 2025 pm 04:05 PM
This article explains the HTML5 <time> element for semantic date/time representation. It emphasizes the importance of the datetime attribute for machine readability (ISO 8601 format) alongside human-readable text, boosting accessibilit


