

Configuration and use of Zend Studio

Perhaps you can use things like Dreamweaver, Notepad++ or Editplus to complete your system, but as the saying goes, "If you want to do your job well, you must first sharpen your tools." I think a powerful IDE is still necessary for novices, and Zend as The most advanced IDE recognized by PHPers has naturally become my choice. The version I installed is 7.2.1. This article will introduce my transformation of this "new" tool. Finally, I will leave a few questions for the experts to solve.
1. Change the Zend working directory

2. Change the Zend font
Go to Window——Preferences——General——Appearance——Colors and Fonts——Basic——Text Font to modify, I still like it Consolas No. 16:

3. Change the default settings for new document templates
By default, the code automatically generated for new PHP files is:
A closed PHP tag can be generated when the file is created, so enter Window -> Preferences -> PHP -> Editor -> Templates -> New simple PHP file modification:
 4. Modify the automatic prompt code speed
Zend is a slow person, and the default code prompt delay is 500 milliseconds, which obviously does not meet the quick temper of Coders, so go to Window -> Preferences -> PHP -> Editor -> Content Assist ->Auto Activation, Set the code automatic prompt speed from 500 to 50:
 5. New template
Zend already comes with many templates. You can go to the place above to modify the default new PHP file template, but It is inevitable that there will not be enough, so we need to create a new template:
 Pay attention to selecting newphp in the context, because the template name cannot be found when creating a new one.
6. Change the shortcut keys
This is similar to VS. I believe you will inevitably be unhappy with the key positions of some shortcut keys. For example, Ctrl+K and C are used as shortcut keys for comments. This is obviously only for two hands. You can operate the completed work quickly, so we will make modifications, such as changing to Ctrl+E, C, etc. The default in Zend is to add block comments is Ctrl+Shift+/, and to cancel block comments is Ctrl+Shift+, and To add or cancel single-line comments, the default switch is Ctrl+/. I still don’t want to use two hands to operate, so I decisively changed it. The single-line comment switch I changed is Ctrl+E, the block comment is Ctrl+R, and the cancel block comment is Ctrl+ G.
In addition, the debugging changes are consistent with the habits of VS. Debugging is changed from F11 to F5, running is changed from Ctrl+F11 to Ctrl+F5, Step into is changed from F5 to F11, and Step Over is changed from F6 to F10.
The changes in the above two parts can be seen by entering "comment" and "debug" in the search box.
 7. Install JSEclipse
The prompt for JS is stronger, but Zend’s own one is slightly weaker. A better choice here is to install the JSEclipse plug-in. We go to Help -> Install newsoftware
There are two There are two installation methods, one is to add the online installation address http://download.macromedia.com/pub/labs/jseclipse/autoinstall, and of course, download the installation package to the local machine and install it. If you unzip it, select Local Find the local folder and confirm, or if you are too lazy to unzip it, you can just select Archive.
 Click Next to complete the installation. .
After installation, you must select JSEclipse as the default Javascript editor before you can use JSEclipse. Go to Window -> Preferences -> General -> Editors -> File Assocaitions:
Set "Default". Similarly, the code prompts are also modified faster:
 The default value of the original "outline reparsing delay (ms)" is 500, and the default value of "Code Completion popup delay (ms)" is 200.
8. Window layout
Use Alt+Shift+Q, V to bring up the variable window to facilitate tracking the values of related variables during debugging
In addition, you can bring up the Debug and Debug OutPut windows to facilitate tracking and debugging
Still in Window ——Call up the PHP Function window in Show View. You can take a look when you are too lazy to open the manual.

In order to make the final layout look pleasing to the eye, it still looks like VS. The lower part can be minimized to increase the work area.

9: Annotation experience
When everyone adds comments to a function in VS, they will enter three / in succession, so that they can add a summary of the function. I thought this function was not available in Zend, but still I discovered it in an accidental comment. Just type /** and press Enter to add a comment to the function. The effect is as shown below:

Okay, the above is probably my transformation of Zend. Finally There are a few that I use frequently in VS, but I haven’t found the implementation problem in Zend yet. I hope the experts can give me some advice:
1. In VS, I will set all files to automatically wrap, that is, one line of code. When the display cannot be completed, it will be displayed in a new line instead of continuing to display, resulting in a horizontal scroll bar. This way the code can be dragged around, which greatly affects the readability of the code. I have only found that there is a "Toggle Word Wrap" option by right-clicking on the workspace to make the current page display a new line, but I have not found a function setting that allows all files to be wrapped uniformly.
2. In addition, there is also a "go to definition" function that is often used, that is, right-click on a function or variable to go to the definition, and then go to the line where the function or variable is initially defined. This is in many files. It is more useful, but it is not found in Zend.
3. Another common function is that if I enter a function or variable, Zend will definitely prompt, OK, suppose I accidentally click on something else, such as touching the touch pad, so because of the mouse click , the smart prompt box must have disappeared, right? At this time, is there a way to press a certain key to bring up the prompt box, without having to delete the function that was typed in half and then start typing from the beginning to make the prompt box appear? . This is Ctrl+J in VS, but I haven't found how to implement it in Zend.
The above introduces the configuration and use of Zend Studio, including aspects of the content. I hope it will be helpful to friends who are interested in PHP tutorials.

Hot AI Tools

Undresser.AI Undress
AI-powered app for creating realistic nude photos

AI Clothes Remover
Online AI tool for removing clothes from photos.

Undress AI Tool
Undress images for free

Clothoff.io
AI clothes remover

AI Hentai Generator
Generate AI Hentai for free.

Hot Article
Hot Tools

Notepad++7.3.1
Easy-to-use and free code editor

SublimeText3 Chinese version
Chinese version, very easy to use

Zend Studio 13.0.1
Powerful PHP integrated development environment

Dreamweaver CS6
Visual web development tools

SublimeText3 Mac version
God-level code editing software (SublimeText3)
Hot Topics
 1384
1384
 52
52

 What does the ctrl+a key mean?
Mar 16, 2023 pm 03:12 PM
What does the ctrl+a key mean?
Mar 16, 2023 pm 03:12 PM
The ctrl+a key means "select all" and is the most common shortcut key in computers. Common keyboard shortcuts include Ctrl+B (organize favorites), Ctrl+C (copy), Ctrl+D ( Delete), Ctrl+E (Search Assistant), Ctrl+V (Paste), etc.
 How to add/remove security options from CTRL+ALT+DEL screen
Apr 26, 2023 pm 12:07 PM
How to add/remove security options from CTRL+ALT+DEL screen
Apr 26, 2023 pm 12:07 PM
Having the ability to customize allows one to explore more. Windows offers its users the greatest amount of customization, and we are all very grateful. So, have you ever considered customizing your CTRL+ALT+DEL screen? Of course you have, otherwise you wouldn’t be reading this article right now. Well, we have good news for you! You do have the ability to customize the security options screen. You can keep only the options you want and delete all the ones you don't need. CTRL+ALT+DEL screen customization can be done through the Local Group Policy Editor or the Registry Editor. You can choose the method of your choice, both have the same effect. So, what are you waiting for, let’s dive into the article! Hope you like it! Method 1: Edit through local group policy
 What does ctrl+spacebar do?
Mar 09, 2023 pm 04:18 PM
What does ctrl+spacebar do?
Mar 09, 2023 pm 04:18 PM
The function of "ctrl+spacebar" is to switch between Chinese and English input methods; through "ctrl+spacebar" you can switch back and forth between Chinese and English input methods; "ctrl" is a commonly used key on the keyboard, and its full name is "control". In computer basics they are called "control keys".
 What is ctrl plus shift?
Mar 09, 2023 pm 04:23 PM
What is ctrl plus shift?
Mar 09, 2023 pm 04:23 PM
ctrl+shift is a combination shortcut key for switching input methods; when pressing "ctrl+shift" at the same time, you can also hold down other keys to achieve other functions, such as pressing "ctrl+shift+N" at the same time key to create a new folder, etc.
 Detailed explanation of what to add to ctrl when taking a screenshot of a win10 computer
Jul 20, 2023 am 11:09 AM
Detailed explanation of what to add to ctrl when taking a screenshot of a win10 computer
Jul 20, 2023 am 11:09 AM
Many netizens do not know much about the newly installed win10 system and do not know how to use many functions, such as the commonly used screenshot function. Some netizens want to know how to quickly take screenshots in Win10 and what to add to Ctrl to take screenshots on Win10 computers. Today I will share with you how to quickly take screenshots using the screenshot shortcut keys on Windows 10 computers. 1. Take a local screenshot of the computer. If you are using a Windows computer, the shortcut key for taking a local screenshot should be Windows logo key + shift + S. 2. Take a full-screen screenshot by pressing the PrtScSysRq key on the keyboard to take a full-screen screenshot. At the same time, you only need to press ctrl+V to paste in the chat box or office documents such as Word, and you can paste the
 What is the undo shortcut key ctrl? What is the undo shortcut key?
Feb 22, 2024 pm 04:10 PM
What is the undo shortcut key ctrl? What is the undo shortcut key?
Feb 22, 2024 pm 04:10 PM
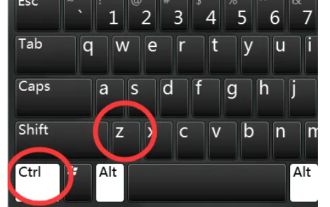
The undo shortcut key is ctrl plus Z. Tutorial Applicable Model: Lenovo AIO520C System: Windows 10 Professional Edition Analysis 1 The undo shortcut key is ctrl plus Z. If you want to cancel the undo and restore the previous step, you can use the shortcut key Ctrl plus Y. If you accidentally delete a file on your computer or If you made a typo in the document, you can use the shortcut key Ctrl+Z to restore to the previous step. Supplement: What is the cutting and pasting shortcut key ctrl plus X? ctrl+V is to paste, ctrl+W is to close the current window, ctrl+N is to create a new file, ctrl+esc is to open the start menu, ctrl+S saves the current The file to operate on. Summary/Notes: The shortcut key for undo is ctrl+
 PHP Implementation Framework: Zend Framework Getting Started Tutorial
Jun 19, 2023 am 08:09 AM
PHP Implementation Framework: Zend Framework Getting Started Tutorial
Jun 19, 2023 am 08:09 AM
PHP implementation framework: ZendFramework introductory tutorial ZendFramework is an open source website framework developed by PHP and is currently maintained by ZendTechnologies. ZendFramework adopts the MVC design pattern and provides a series of reusable code libraries to serve the implementation of Web2.0 applications and Web Serve. ZendFramework is very popular and respected by PHP developers and has a wide range of
 How to use ACL (Access Control List) for permission control in Zend Framework
Jul 29, 2023 am 09:24 AM
How to use ACL (Access Control List) for permission control in Zend Framework
Jul 29, 2023 am 09:24 AM
How to use ACL (AccessControlList) for permission control in Zend Framework Introduction: In a web application, permission control is a crucial function. It ensures that users can only access the pages and features they are authorized to access and prevents unauthorized access. The Zend framework provides a convenient way to implement permission control, using the ACL (AccessControlList) component. This article will introduce how to use ACL in Zend Framework
