

apache2.2 integrates tomcat6.0 using proxy_ajp method

小wolf@http://blog.csdn.net/xiaolangyangyang
There are quite a few articles like this on Google. But some of them are not complete and not suitable for me. I had to write it myself
This article mainly uses httpd2.2's porny_ajp to connect to tomcat
My environment is: Centos5.2
Download the latest version of apache. The latest version is httpd-2.2.10.tar.gz
Download the latest version of tomcat. The latest version is apache-tomcat-6.0.18.tar.gz
jdk1.6
at http://apr.apache.org Download the latest apr-1.3.3 and apr-util-1.3.4
1. Start the installation
1. #Compile apr
#tar - zxvf apr - 1 . 3 . 3 . tar . gz
#cd apr - 1 . 3 . 3
#. / configure - - prefix = / usr / local / apr - httpd /
#make
#make install
2. #compile apr-util
#tar - zxvf apr - util - 1 . 3 . 4 . tar . gz #cd apr - util - 1 . 3 . 4 #. / configure - - prefix = / usr / local / apr - util - httpd / - - with - apr = / usr / local / apr - httpd / #make #make install
3. #compile httpd
#tar - zxvf httpd - 2 . 2 . 10 . tar . gz #cd httpd - 2 . 2 . 10 #. / configure - - prefix = / usr / local / apache2 / - - with - apr = / usr / local / apr - httpd / - - with - apr - util = / usr / local / apr - util - httpd / - - enable - so - - enable - mods - shared = most - - enable - rewrite = shared - - enable - proxy = shared - - enable - proxy - ajp = shared - - enable - proxy - balancer = shared - - enable - speling = shared #make #make install
Start:
#/ usr / local / apache2 / bin / apachectl start
Test whether the installation is correct. Use this http://yourip/ to display the apache default page. It works!
4. Configure tomcat
1) #Install JDK1.6
Download jdk from java.sun.com and install it directly
2) #Set environment variables
vim /etc/profile Add:
export JAVA_HOME=/usr/java/jdk
export JRE_HOME=$JAVA_HOME/jre
export PATH=$JAVA_HOME/bin:$JRE_HOME/bin:$PATH
export CLASSPATH=.:$JAVA_HOME/lib/dt.jar:$JAVA_HOME/lib/tools.jar
Copy after login
3 ) #Install tomcat
#tar - zxvf apache - tomcat - 6 . 0 . 18 . tar . gz - C / usr / local / #mv / usr / local / apache - tomcat - 6 . 0 . 18 tomcat
4) Start tomcat and test
#/ usr / local / tomcat / bin / startup . sh
5) 访问:http://yourip:8080/如果看到默认首页证明安装成功
二.整合apache和tomcat
我这里的apache的根目录和tomcat的根目录不在同一目录,当然了你完全可以放在同一目录下
我的apache的根目录在/www tomcat的根目录在/usr/local/tomcat/webapps
修改apache的httpd.conf
添加模块:
LoadModule proxy_module modules/mod_proxy.so
LoadModule proxy_ajp_module modules/mod_proxy_ajp.so
Copy after login
打开Virtual hosts 即去掉Include conf/extra/httpd-vhosts.conf一行的注释
注释掉DocumentRoot和ServerAdmin
编辑httpd-vhosts.conf
添加:
如何有多个虚拟主机可以再添加.例如:<VirtualHost*:80> ServerAdmin jsjzhang@gmail.com DocumentRoot "/www/web" #此虚拟主机的主目录为/www/web <Directory "/www/web"> Options Indexes FollowSymLinks AllowOverride None Order allow,deny Allow from all </Directory> ServerName www.terr.com #只是测试,生产环境可以写为对应的域名 ProxyPass /images ! #以下几行的意思是对/images,/sna 和/news/images几个目录的访问请求由apache处理其它都由tomcat处理. ProxyPass /sna ! ProxyPass /news/images! ProxyPass / ajp://localhost:8009/ ProxyPassReverse / ajp://localhost:8009/ ErrorLog "logs/3.249-error_log" CustomLog "logs/3.249-access_log" common </VirtualHost>Copy after login<VirtualHost*:80> ServerAdmin jsjzhang@gmail.com DocumentRoot "/www/web2" <Directory "/www/web2"> Options Indexes FollowSymLinks AllowOverride None Order allow,deny Allow from all </Directory> ServerName www.terr2.com ProxyPass /images ! ProxyPass /sna ! ProxyPass /news/images! ProxyPass / ajp://localhost:8009/ ProxyPassReverse / ajp://localhost:8009/ ErrorLog "logs/3.249-error_log" CustomLog "logs/3.249-access_log" common </VirtualHost>Copy after login
注: 生产环境下这些虚拟主机都是用域名访问的.因为他们都对应同一个IP。如何用IP访问一般打开的为最一个虚拟主机的主页。
把web这个网站放到tomcat的主目录/usr/local/tomcat/webapps下,其中images,sna和/news/images这三个目录放到/www/web下当然了我的apache还有其它用处所以没有和tomcat设为同一主目录为了简单你当然可以这么做,但一定要记得把apache中虚拟主机中的
修改为和你tomcat一致的主目录,例如我这里应 该设为:
三.测试
现在启动tomcat启动apache在浏览器输入http://www.terr.com/web看看效果吧,因为是测试所以我在只在hosts里面对www.terr.com做了解析。
以上就介绍了apache2.2用proxy_ajp方式整合tomcat6.0,包括了方面的内容,希望对PHP教程有兴趣的朋友有所帮助。

Hot AI Tools

Undresser.AI Undress
AI-powered app for creating realistic nude photos

AI Clothes Remover
Online AI tool for removing clothes from photos.

Undress AI Tool
Undress images for free

Clothoff.io
AI clothes remover

Video Face Swap
Swap faces in any video effortlessly with our completely free AI face swap tool!

Hot Article
Hot Tools

Notepad++7.3.1
Easy-to-use and free code editor

SublimeText3 Chinese version
Chinese version, very easy to use

Zend Studio 13.0.1
Powerful PHP integrated development environment

Dreamweaver CS6
Visual web development tools

SublimeText3 Mac version
God-level code editing software (SublimeText3)
Hot Topics
 1389
1389
 52
52

 3 Easy Ways to Create a Windows 11 USB Installer on Mac
May 13, 2023 pm 09:43 PM
3 Easy Ways to Create a Windows 11 USB Installer on Mac
May 13, 2023 pm 09:43 PM
Windows 11 introduces a wealth of new features and a comprehensively improved appearance, placing greater emphasis on unity and efficiency. So, today’s topic is how to create a Windows 11 USB installer on Mac. Performing a clean installation of Windows 11, rather than an upgrade, is the method that yields the best results when getting the operating system. Using a drive bootable in Windows 11, you can perform this task. If you have a Windows PC, making a bootable CD for Windows 11 is a very simple process. On the other hand, if you are using a Mac, the process is a little more complicated. This article will describe how to use the base
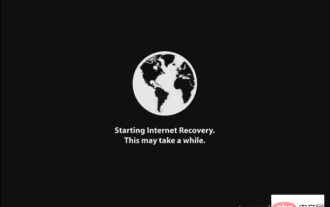 How to install macOS on a new SSD
Apr 13, 2023 pm 04:01 PM
How to install macOS on a new SSD
Apr 13, 2023 pm 04:01 PM
How to Use macOS Recovery to Install macOS on a New SSD On any Mac built after 2009, there is a built-in recovery system. This allows you to boot your Mac into recovery mode. In this mode, you can repair the internal disk, restore files from a Time Machine backup, get online help, or reinstall macOS. You must have an Internet connection to use these tools. You can use the macOS installation tool to install macOS on a new SSD installed in your computer. To use Internet Recovery to install macOS on an SSD: Follow the manufacturer's instructions
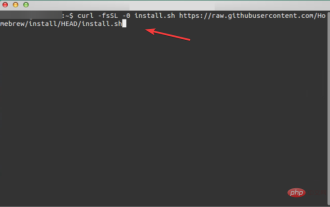
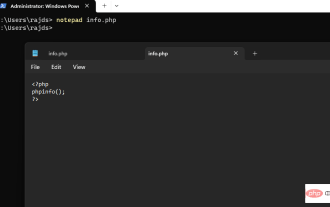 How to install PHP on Windows 10 using Command Prompt
May 08, 2023 pm 05:13 PM
How to install PHP on Windows 10 using Command Prompt
May 08, 2023 pm 05:13 PM
Install PHP on Windows using Command Prompt or PowerShell Install ChocolateyChoco Package Manager I tried the Windows default package manager Winget but could not install PHP through it. Therefore, the other best option left is to use the popular Chocolatey package manager. But unlike Winget, Choco does not exist in our Windows system by default, so we need to install it manually on our system. Go to your Windows 10 or 11 search box and type CMD, when it appears select "Run as administrator" to copy the given command
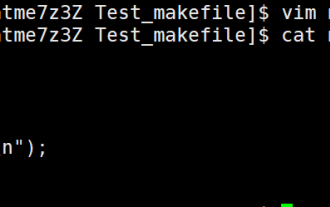
 What is the linux make command?
Mar 25, 2023 am 09:14 AM
What is the linux make command?
Mar 25, 2023 am 09:14 AM
The linux make command is one of the most frequently used commands by system administrators and programmers. It also refers to an "automatic compilation manager", where "automatic" means that it can automatically discover newer files based on file timestamps and reduce workload, at the same time, he can perform a large amount of compilation work by reading the contents of the makefile file.
 How to use make command under linux
May 15, 2023 pm 12:37 PM
How to use make command under linux
May 15, 2023 pm 12:37 PM
How make works For those who don't know the mechanics behind it, the make command accepts targets like command line arguments. These targets are usually stored in special files named "makefiles", and the files also contain operations corresponding to the targets. For more information, read this series of articles on how makefiles work. When the make command is executed for the first time, it scans the makefile to find the target and its dependencies. If these dependencies are themselves targets, continue scanning the makefiles for these dependencies to establish their dependencies, and then compile them. Once the main dependencies are compiled, then the main target is compiled (which is passed in through the make command). Now, assuming you make changes to a source file, you
 How to use the Linux automated build tools make and Makefile
May 14, 2023 pm 04:22 PM
How to use the Linux automated build tools make and Makefile
May 14, 2023 pm 04:22 PM
1. The role of make and Makefile. The source files in a project are not counted. They are placed in several directories according to type, function, and module. The makefile defines a series of rules to specify which files need to be compiled first and which files Post-compilation is required, which files need to be recompiled, and even more complex functional operations can be performed. Therefore, the benefit brought by makefile is - "automated compilation". Once written, only one make command is needed, and the entire project is completely automatically compiled, which greatly improves the efficiency of software development. Make is a command tool that interprets the instructions in the makefile. Generally speaking, most
 What is the difference between make and new in go language
Jan 09, 2023 am 11:44 AM
What is the difference between make and new in go language
Jan 09, 2023 am 11:44 AM
Differences: 1. Make can only be used to allocate and initialize data of types slice, map, and chan; while new can allocate any type of data. 2. New allocation returns a pointer, which is the type "*Type"; while make returns a reference, which is Type. 3. The space allocated by new will be cleared; after make allocates the space, it will be initialized.
 The Linux-compatible Windows Subsystem is now generally available in the Microsoft Store.
Apr 23, 2023 pm 07:19 PM
The Linux-compatible Windows Subsystem is now generally available in the Microsoft Store.
Apr 23, 2023 pm 07:19 PM
Microsoft brings Windows Subsystem for Linux (WSL) to the Microsoft Store on Windows 11 in preview status. For those who don’t know, WSL is a very useful feature that Microsoft added to Windows 10 in 2017. It enables developers to run GNU/Linux environments directly within Windows without the need for a virtual machine (VM) or dual-boot configuration. Today, the company has made WS generally available in the Microsoft Store for Windows 10 and Windows 11
