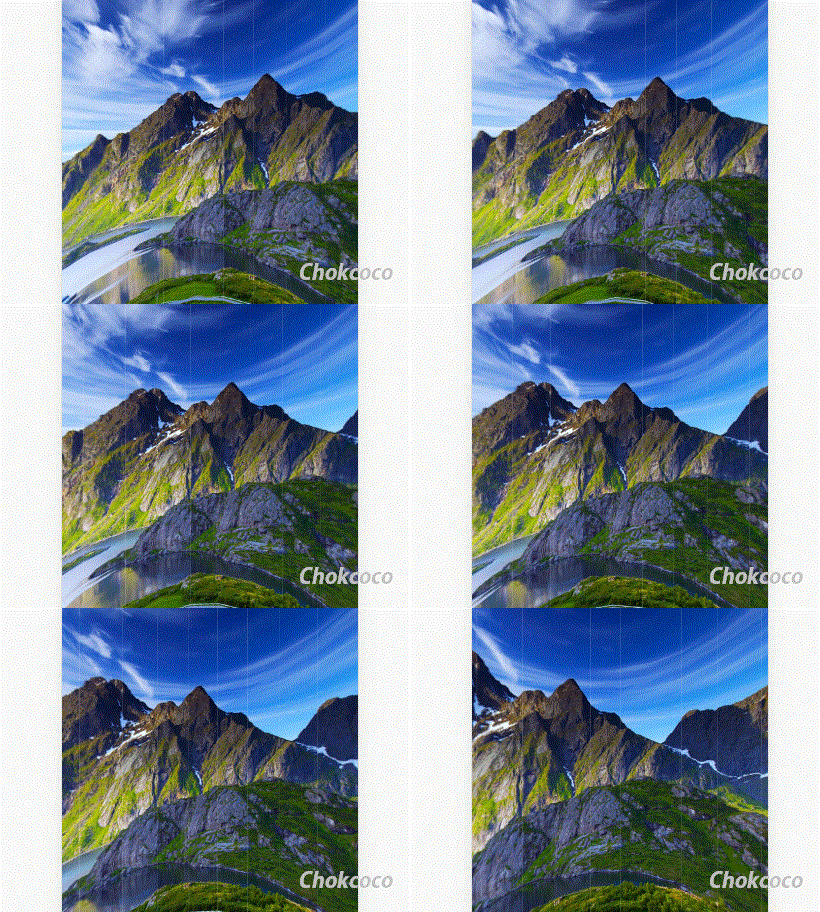
The reason why I wrote this article is because I saw this page:
Click me to have a look (mobile page, use emulator to watch)
Using CSS3 to create a 3D perspective, although there is some 3D blur, the interactive experience that makes people immersed in it feels great. It is very eye-catching to use it to create some H5 pages on the mobile side.
And after mastering the principles, making it is not a waste of effort. After a careful study, I will share some learning processes with everyone.
Enter the text below: (Some Gif pictures are larger, you need to wait for a while)
Seeing is better than hearing a hundred times. Let’s first intuitively feel the effect I mentioned above:
It’s best to click in and take a look. Here I use a div with a background color as an example. Our perspective is in a cube. The rotation animation of the cube gives us a 3D feeling.
So what does the original picture look like? Let’s zoom out and find out:
looks like this:

Compared with the first effect, what it actually does is push our perspective into the cube, giving us an immersive feeling.
With reasonable use of some 3D properties provided by CSS3, it is easy to achieve the above effects.
To create such a 3D graphic, I have described the process in detail in my previous article. If you are interested, you can click in and take a look:
【CSS3 Advanced】Cool 3D rotating perspective
To reiterate briefly, two CSS properties are mainly used:
To use CSS3 to achieve 3D effects, the most important thing is to use the transform-style attribute.
transform-style has only two values to choose from:
// 语法:
transform-style: flat|preserve-3d;

transform-style: flat; // 默认,子元素将不保留其 3D 位置
transform-style: preserve-3d; // 子元素将保留其 3D 位置。
当父元素设置了 transform-style:preserve-3d 后,就可以对子元素进行 3D 变形操作了,3D 变形和 2D 变形一样可以,使用 transform 属性来设置,或者可以通过制定的函数或者通过三维矩阵来对元素变型操作:当我们指定一个容器的 transform-style 的属性值为 preserve-3d 时,容器的后代元素便会具有 3D 效果,这样说有点抽象,也就是当前父容器设置了 preserve-3d 值后,它的子元素就可以相对于父元素所在的平面,进行 3D 变形操作。
使用 translateX(length) 、translateY(length) 、 translateZ(length) 来进行 3D 位移操作,与 2D 操作一样,对元素进行位移操作,也可以合并为 translate3d(x,y,z) 这种写法;
使用 scaleX() 、scaleY() 、scaleY() 来进行3D 缩放操作,也可以合并为 scale3d(number,number,number) 这种写法;
使用 rotateX(angle) 、rotateY(angle) 、rotateZ(angle) 来进行 3D 旋转操作,也可以合并为 rotate3d(Xangle,Yangle,Zangle) 这种写法。
// 语法
perspective: number|none;
简单来说,当元素没有设置 perspective 时,也就是当 perspective:none/0 时所有后代元素被压缩在同一个二维平面上,不存在景深的效果。perspective 为一个元素设置三维透视的距离,仅作用于元素的后代,而不是其元素本身。
而如果设置 perspective 后,将会看到三维的效果。
我们上面之所以能够在正方体外围看到正方体,以及深入正方体内,都是因为 perspective 这个属性。它让我们能够选择推进视角,还是远离视角,因此便有了 3D 的感觉。
为了完成这样一个效果,需要一个灵活的布局,去控制整个 3D 效果的展示。
下面是我觉得比较好的一种方式:
<!-- 最外层容器,控制图形的位置及在整个页面上的布局-->
<div class="container">
	<!-- 舞台层,设置 preserve-3d 与 perspective 视距  -->
	<div class="stage">
		<!-- 控制层,动画的控制层,通过这一层可以添加旋转动画或者触摸动画 -->
		<div class="control">
			<!-- 图片层,装入我们要拼接的图片 -->
			<div class="imgWrap">
				<div class="img img1"></div>
				<div class="img img2"></div>
				<div class="img img3"></div>
				<div class="img img4"></div>
			</div>
		</div>
	</div>
</div>
container ,控制图形的位置及在整个页面上的布局;stage 层,舞台层,从这里开始设置 3D 景深效果,添加 perspective 视距;control 层,动画的控制层,通过这一层可以添加旋转动画或者在移动端的触摸动画,通过更改translateZ 属性也可以拉近拉远视角;imgWrap 层,图片层,装入我们要拼接的图片,下文会提及。图片拼接其实才是个技术活,需要许多的计算。
以上述 Demo 中的正方体为例子,class 为 img 的 div 块的高宽为 400px*400px。那么要利用 4 个 这样的 div 拼接成一个正方体,需要分别将 4 个 div 绕 Y 轴旋转 [90°, 180°, 270°, 360°],再 translateY(200px) 。
值得注意的是,一定是先旋转角度,再偏移距离,这个顺序很重要。
看看俯视图,也就是这个意思:

这是最简单的情况了,都是直角。
如果是一张图需要分割成八份,假设每张图分割出来的高宽为 400 400 , 8 张图需要做的操作是依次绕 Y 轴旋转 [45°, 90°, 135°, 180°, 225°, 270°, 315°, 360°] ,偏移的距离为 translateY(482.84px) ,也就是 (200 + 200√2)。
看看俯视图:

效果图:
上面的示例都是使用的带背景色的 div 块,现在我们选取一张真正的图片,将其拼接成一个柱体。
下面这张图,大小为 3480px * 2000px :

我们把它分割为 20 份,拼成一个正 20 边形,当然不用一块一块切图下来,利用 background-position 就可以完成了。而且分割的份数越多,最终做出来的效果越像一个圆柱,效果也更加真实。
正 20 边形,需要 20 个 div ,假设容器是 .img-bg1 ~ .img-bg20 ,那么每块图片的宽度为 174px,依次需要递增的角度为 18° ,并且我们需要计算出需要偏移的距离为 translateZ(543px)。
可以利用一些 CSS 预处理器处理这段代码,下面是 Sass 的写法:
// Sass 的写法
$imgCount : 20 !default;
@for $i from 1 through $imgCount {
	.img-bg#{$i}{
		background-position:($i * -174px + 174px) 0;
		transform: rotateY($i * 18deg) translateZ(543px);
	}
}See the effect: Demo can be clicked here

You can see that the near view in the picture is a cylindrical shape, but there are some small problems:
control layer, enter the cylindrical screenAfter achieving this step, the only last step left is to advance our perspective and enter the inside of the cylinder to create the feeling of a 3D view.
We control this effect through class for the control div, but the attribute that controls us to enter the inside of the cylinder
is not to adjust or modify the perspective attribute, but to adjust the translateZ attribute. The picture obtained by controlling translateZ is more realistic. You can try to control the effects of perspective and translateZ respectively, and you will have a deep feeling.
Final effect: Demo can be clicked here. Since it is a mobile effect, it is better to open the simulator to view it
The entire rendering is too big, so I only cut out part of it and made it into a GIF:

There is another small problem, that is, after entering the inside of the cylinder, the entire image is turned upside down, so we may need to use PS to flip the original image left and right, so that after entering the inside, what we see is the original image effect.
At this point, the entire page is complete. The next step is to add some touch events and add some details. Maybe some details were missed during the writing process. If there is anything that is difficult to understand at once, you can leave a message in the comments.
The example Demo of this article has been uploaded on my Github:
Css33DView
This is the end of this article. If you still have any questions or suggestions, you can communicate more. It is an original article. The writing style is limited and the knowledge is shallow. If there is anything wrong in the article, please let me know.


