Android Basics: Use of Toolbar
Toolbar was launched in Android 5.0 and is used to replace the ActionBar control. It can be highly customized and flexible to use. The official ToolBar must be used in systems above 5.0. If you need to use it in a lower version, you need to use support v7 Toolbar in the package.
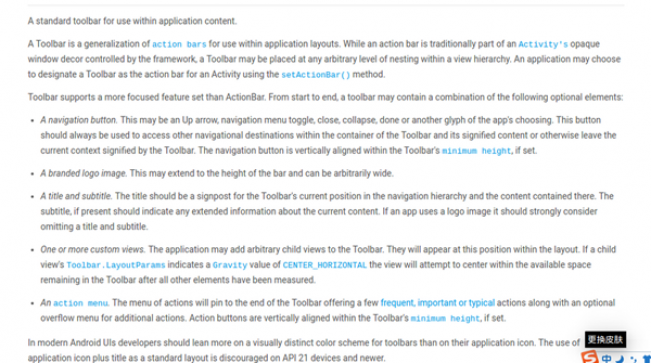
The next step is the introduction of the Toolbar on the official website:
Toolbar
extends ViewGroup
java.lang.Object
   ↳    android.view.View
       ↳    android.view.ViewGroup
           ↳    android.support.v7.widget.Toolbar
Prerequisites for use
To use the ToolBar, you need to hide the ActionBar of the activity. So how to hide it? There are three methods. The following introduces each
Method 1:
Modify in the res/values/styles.xml file
<style name="AppTheme.Base" parent="Theme.AppCompat">
 <item name="windowActionBar">false</item>
 <item name="android:windowNoTitle">true</item>
</style>
You can also directly use the theme without ActionBar
<style name="AppTheme" parent="Theme.AppCompat.Light.NoActionBar">
Method 2:
Modify the theme of the activity in the manifest file, as shown below:
<activity android:name="MainActivity"
           android:theme="@style/Theme.AppCompat.Light.NoActionBar">
</activity>Method 3 :
Cancel directly in the code. Before setContentView.
requestWindowFeature(Window.FEATURE_NO_TITLE);
       setContentView(R.layout.activity_main);
//supportRequestWindowFeature(Window.FEATURE_NO_TITLE); 在AppCompatActivity中How to use
In the layout file. Add the following code. The position is not fixed.
<android.support.v7.widget.Toolbar
    android:id="@+id/toolbar"
    android:layout_width="match_parent"
    android:layout_height="?android:attr/actionBarSize"
    android:background="?attr/colorPrimaryDark"
    app:title="Title"
    app:titleTextColor="#222222"
    app:logo="@mipmap/ic_launcher"
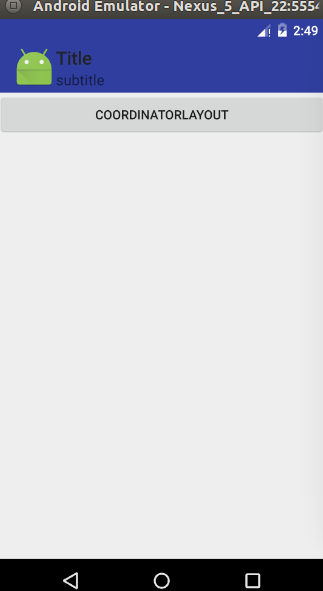
app:subtitle="subtitle"></android.support.v7.widget.Toolbar>title is used to set the title. subtitle is used to set the subtitle. titleTextColor is used to set the title font color. background is used to set the background color. The effect is as follows:

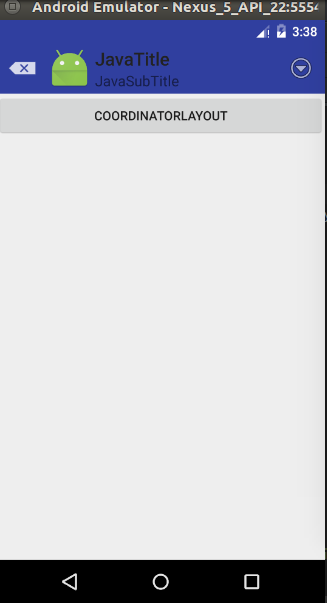
These values can also be set dynamically in java code.
mToolbar.setTitle("JavaTitle");
       mToolbar.setSubtitle("JavaSubTitle");
       mToolbar.setLogo(R.mipmap.ic_launcher);
       mToolbar.setNavigationIcon(android.R.drawable.ic_input_delete);
       mToolbar.setOverflowIcon(ContextCompat.getDrawable(this, android.R.drawable.ic_menu_more));
/        setActionBar(mToolbar);  //activity中
setSupportActionBar(mToolbar); //AppCompatActivity中Add Menu
To add menu first we need to have menu, here I choose to create main.xml in res/menu/ to define the menu file. The code is as follows
<?xml version="1.0" encoding="utf-8"?>
<menu xmlns:android="http://schemas.android.com/apk/res/android"
      xmlns:app="http://schemas.android.com/apk/res-auto">
    <item
        android:id="@+id/add"
        android:icon="@android:drawable/ic_menu_add"
        android:title="Add"
        app:showAsAction="never|withText"/>
    <item
        android:id="@+id/delete"
        android:icon="@android:drawable/ic_menu_delete"
        android:title="Delete"
        app:showAsAction="never|withText"/>
    <item
        android:id="@+id/edit"
        android:icon="@android:drawable/ic_menu_edit"
        android:title="Edit"
        app:showAsAction="never|withText"/>
    <item
        android:id="@+id/email"
        android:icon="@android:drawable/sym_action_email"
        android:title="Email"
        app:showAsAction="never|withText"/>

</menu>The following is the code in the java file.
@Override
    public boolean onCreateOptionsMenu(Menu menu) {
        getMenuInflater().inflate(R.menu.main, menu);
        return true;
    }

    @Override
    public boolean onOptionsItemSelected(MenuItem item) {
        switch (item.getItemId()) {
            case android.R.id.home:
                Toast.makeText(MainActivity.this, "您点击了NavigationIcon", Toast.LENGTH_SHORT).show();
                break;
            case R.id.add:
                Toast.makeText(MainActivity.this, "Add", Toast.LENGTH_SHORT).show();
                break;
            case R.id.delete:
                Toast.makeText(MainActivity.this, "Delete", Toast.LENGTH_SHORT).show();
                break;
            case R.id.edit:
                Toast.makeText(MainActivity.this, "Edit", Toast.LENGTH_SHORT).show();
                break;
            case R.id.email:
                Toast.makeText(MainActivity.this, "Email", Toast.LENGTH_SHORT).show();
                break;
        }
        return true;
    }
Show the Icon in the Menu
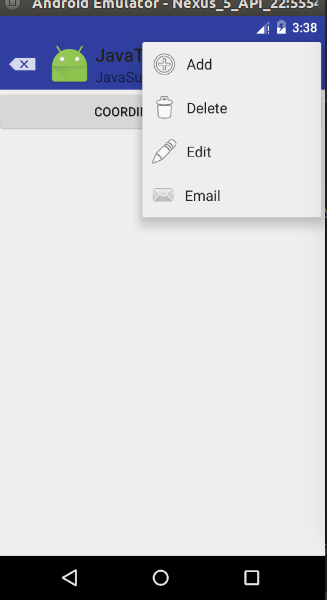
After writing this, we will find that the hidden menu does not display the icon, so how do we set it up:
Just need to re-do the method: The activity here is AppCompatActivity
@Override
   protected boolean onPrepareOptionsPanel(View view, Menu menu) {
       if (menu != null) {
           if (menu.getClass() == MenuBuilder.class) {
               try {
                   Method m = menu.getClass().getDeclaredMethod("setOptionalIconsVisible", Boolean.TYPE);
                   m.setAccessible(true);
                   m.invoke(menu, true);
               } catch (Exception e) {
                   Log.i("tag", "onPrepareOptionsPanel: " +
                           getClass().getSimpleName() +
                           "onMenuOpened...unable to set icons for overflow menu"
                           + e);
               }
           }
       }
       return super.onPrepareOptionsPanel(view, menu);
}The effect is as follows:


Hot AI Tools

Undresser.AI Undress
AI-powered app for creating realistic nude photos

AI Clothes Remover
Online AI tool for removing clothes from photos.

Undress AI Tool
Undress images for free

Clothoff.io
AI clothes remover

AI Hentai Generator
Generate AI Hentai for free.

Hot Article

Hot Tools

Notepad++7.3.1
Easy-to-use and free code editor

SublimeText3 Chinese version
Chinese version, very easy to use

Zend Studio 13.0.1
Powerful PHP integrated development environment

Dreamweaver CS6
Visual web development tools

SublimeText3 Mac version
God-level code editing software (SublimeText3)

Hot Topics
 New report delivers damning assessment of rumoured Samsung Galaxy S25, Galaxy S25 Plus and Galaxy S25 Ultra camera upgrades
Sep 12, 2024 pm 12:23 PM
In recent days, Ice Universe has been steadily revealing details about the Galaxy S25 Ultra, which is widely believed to be Samsung's next flagship smartphone. Among other things, the leaker claimed that Samsung only plans to bring one camera upgrade
 Samsung Galaxy S25 Ultra leaks in first render images with rumoured design changes revealed
Sep 11, 2024 am 06:37 AM
OnLeaks has now partnered with Android Headlines to provide a first look at the Galaxy S25 Ultra, a few days after a failed attempt to generate upwards of $4,000 from his X (formerly Twitter) followers. For context, the render images embedded below h
 IFA 2024 | TCL\'s NXTPAPER 14 won\'t match the Galaxy Tab S10 Ultra in performance, but it nearly matches it in size
Sep 07, 2024 am 06:35 AM
Alongside announcing two new smartphones, TCL has also announced a new Android tablet called the NXTPAPER 14, and its massive screen size is one of its selling points. The NXTPAPER 14 features version 3.0 of TCL's signature brand of matte LCD panels
 Vivo Y300 Pro packs 6,500 mAh battery in a slim 7.69 mm body
Sep 07, 2024 am 06:39 AM
The Vivo Y300 Pro just got fully revealed, and it's one of the slimmest mid-range Android phones with a large battery. To be exact, the smartphone is only 7.69 mm thick but features a 6,500 mAh battery. This is the same capacity as the recently launc
 New report delivers damning assessment of rumoured Samsung Galaxy S25, Galaxy S25 Plus and Galaxy S25 Ultra camera upgrades
Sep 12, 2024 pm 12:22 PM
In recent days, Ice Universe has been steadily revealing details about the Galaxy S25 Ultra, which is widely believed to be Samsung's next flagship smartphone. Among other things, the leaker claimed that Samsung only plans to bring one camera upgrade
 Samsung Galaxy S24 FE billed to launch for less than expected in four colours and two memory options
Sep 12, 2024 pm 09:21 PM
Samsung has not offered any hints yet about when it will update its Fan Edition (FE) smartphone series. As it stands, the Galaxy S23 FE remains the company's most recent edition, having been presented at the start of October 2023. However, plenty of
 Motorola Razr 50s shows itself as possible new budget foldable in early leak
Sep 07, 2024 am 09:35 AM
Motorola has released countless devices this year, although only two of them are foldables. For context, while most of the world has received the pair as the Razr 50 and Razr 50 Ultra, Motorola offers them in North America as the Razr 2024 and Razr 2
 Xiaomi Redmi Note 14 Pro Plus arrives as first Qualcomm Snapdragon 7s Gen 3 smartphone with Light Hunter 800 camera
Sep 27, 2024 am 06:23 AM
The Redmi Note 14 Pro Plus is now official as a direct successor to last year'sRedmi Note 13 Pro Plus(curr. $375 on Amazon). As expected, the Redmi Note 14 Pro Plus heads up the Redmi Note 14 series alongside theRedmi Note 14and Redmi Note 14 Pro. Li


