

Flask framework study guide to create a simple blog system

I wrote an article about setting up a flask development environment before. Today I will continue with a practical small project - a blog system.
The blog system is very simple, with only one page, and it is small and well-organized. The purpose here is not to do projects for the sake of doing projects. The original intention of this article is to convey the following knowledge points through this exercise:
1. Understand the directory structure of the flask project from a global perspective
2. The operating mechanism of the flask project
3. Flask framework implements MVC architecture
4. flask-sqlalchemy operates mysql database
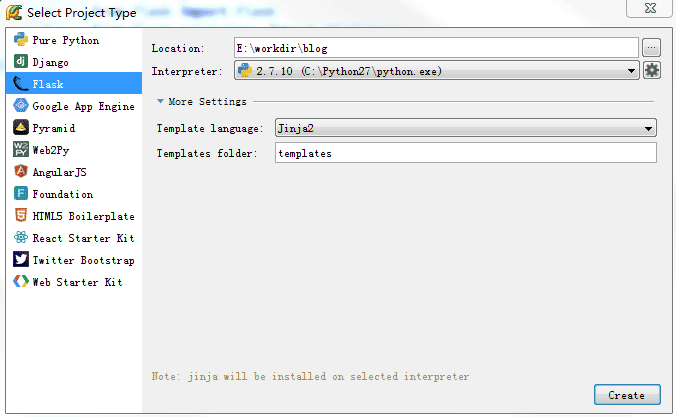
1. New project: blog system
In pycharm, create a new flask project, as shown below:
The completed directory structure is like this: very simple, a static folder, a templates folder, and a py file
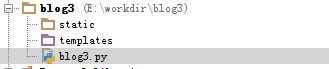
The above directory structure is the initial structure of flask. This can only cope with small projects. For large and complex projects, we need to introduce package management and MVC architecture design.
2. Restructure the directory structure and introduce package management
For the above structure, in the top-level blog3 directory,
1. Create a new runserver.py file as a unified entry file for the project
2. Create a new blog folder, move the existing static, templates, blog3.py to the blog folder, and then create controller and model folders respectively. Rename blog3.py to __init__.py,
The directory now looks like this:
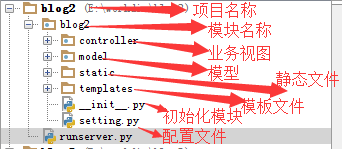
This is equivalent to a large engineering structure:
1) The top-level blog2 directory is the project name. A project can include multiple modules, that is, applications. Each application has its own configuration file, initialization file, and MVC architecture.
2) runserver.py: at the same level as the application module, as the project startup file
3) Second level blog2 directory: module name
Controller directory: C in MVC, mainly stores view functions
Model directory: M in MVC, mainly stores entity class files and maps tables in the database
Templates: V in MVC, stores html files
Static: Static files, mainly storing css, js and other files
__init__.py: Module initialization file, Flask The creation of program objects must be completed in the __init__.py file, and then we can safely import and reference each package.
Setting.py: Configuration file, database username and password, etc.
3. Develop code
1. Run the project first:
1) Write the __init__.py file and create the project object. The code is as follows:
# -*- coding: utf-8 -*-
from flask import Flask

#创建项目对象
app = Flask(__name__)
2) Add the following code to the runserver.py file:
from blog3 import app

@app.route('/')
def hello_world():
  return 'Hello World!'
if __name__ == '__main__':
  app.run(debug=True)
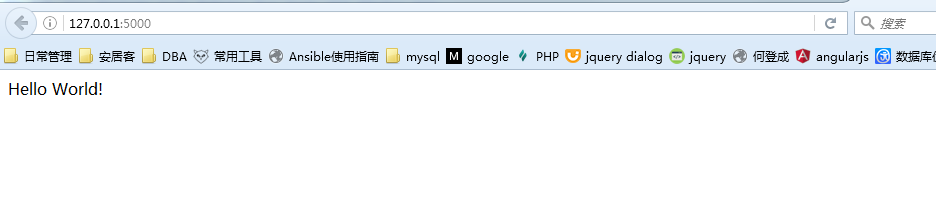
3) Run the runserver.py file:
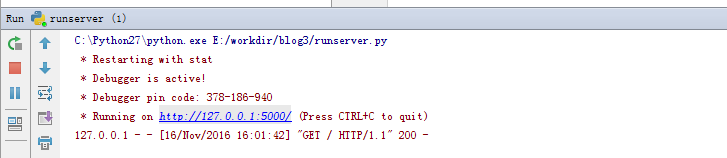
Then enter: http://127.0.0.1:5000/ in the browser, the words helloworld will be displayed
At this point, the prototype of the project can run normally. The next thing is simple. Add content to make the project flesh and blood.
2. Design database
This exercise is relatively simple, with only two tables, one user table and one article table. We use Python's ORM framework flask-sqlalchemy to implement table creation, addition, deletion, modification and query functions.
Add the User.py and Category.py files in the model folder with the following content:
1) User.py:
from blog2 import db

class User(db.Model):
  __tablename__ = 'b_user'
  id = db.Column(db.Integer,primary_key=True)
  username = db.Column(db.String(10),unique=True)
  password = db.Column(db.String(16))

  def __init__(self,username,password):
    self.username = username
    self.password = password
  def __repr__(self):
    return '<User %r>' % self.username
2) Category.py
from blog2 import db

class Category(db.Model):
  __tablename__ = 'b_category'
  id = db.Column(db.Integer,primary_key=True)
  title = db.Column(db.String(20),unique=True)
  content = db.Column(db.String(100))

  def __init__(self,title,content):
    self.title = title
    self.content = content
  def __repr__(self):
    return '<Category %r>' % self.title
3) Create a new setting.py file under the module directory blog2 to configure the database connection information
# _*_ coding: utf-8 _*_

#调试模式是否开启
DEBUG = True

SQLALCHEMY_TRACK_MODIFICATIONS = False
#session必须要设置key
SECRET_KEY='A0Zr98j/3yX R~XHH!jmN]LWX/,?RT'

#mysql数据库连接信息,这里改为自己的账号
SQLALCHEMY_DATABASE_URI = "mysql://username:password@ip:port/dbname"
4) Let the project read the configuration file
Modify __init__.py: Add the following content (red part):
# -*- coding: utf-8 -*-
from flask import Flask
from flask_sqlalchemy import SQLAlchemy
app = Flask(__name__)#import os#print os.environ.keys()#print os.environ.get('FLASKR_SETTINGS')#加载配置文件内容app.config.from_object('blog2.setting')   #模块下的setting文件名,不用加py后缀 app.config.from_envvar('FLASKR_SETTINGS')  #环境变量,指向配置文件setting的路径#创建数据库对象 db = SQLAlchemy(app)
Note: The FLASKR_SETTINGS environment variable needs to be set manually separately. You can enter it in the command line under window:
E:\workdir\blog2> set FLASKR_SETTINGS=E:\workdir\blog2\blog2\setting.py
Or click My Computer-->Advanced-->Environment Variables to create a new one.
5) Create database and tables
In Windows command line mode, cd to the directory of the project runserver.py and enter the python shell:
Enter the red part:
E:\workdir\blog2>python
Python 2.7.10 (default, May 23 2015, 09:44:00) [MSC v.1500 64 bit (AMD64)] on wi
n32
Type "help", "copyright", "credits" or "license" for more information.
>>> from blog2 import db
>>> db.create_all()
>>>
>>>
If there is no error output, it means the database and table were created successfully. At this time we go to the database to check:
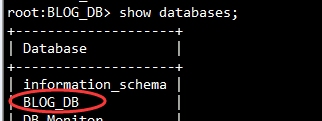
数据库已经存在了,再看看表情况:发现没有对应的b_user和b_category表。这是为什么呢?是不是没有找到model目录下的两个类呢。问题在于:__init__.py文件没有引入model包,导致__init__.py无法找到实体类。记住:一切模块对象的创建都在__init__.py中完成
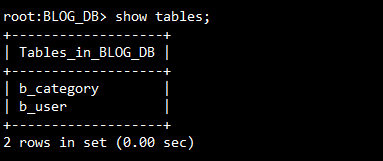
在blog2目录下的__init__.py添加如下代码:
#只有在app对象之后声明,用于导入model否则无法创建表
from blog2.model import User,Category
再次运行上面命令:db.create_all()方法。这时表已经创建成功了。
3、添加界面模板:如登陆页面,显示blog文章页面,添加blog页面
在templates目录下添加三个html文件:
layout.html:
 <!doctype html>
 <title>Flaskr</title>
 <link rel=stylesheet type=text/css href="{{ url_for('static', filename='style.css') }}">
 <div class=page>
  <h1>Flaskr</h1>
  <div class=metanav>
  {% if not session.logged_in %}
   <a href="{{ url_for('login') }}">log in</a>
  {% else %}
   <a href="{{ url_for('logout') }}">log out</a>
  {% endif %}
  </div>
  {% for message in get_flashed_messages() %}
   <div class=flash>{{ message }}</div>
  {% endfor %}
  {% block body %}{% endblock %}
</div>login.html:
{% extends "layout.html" %}
{% block body %}
 <h2>Login</h2>
 {% if error %}<p class=error><strong>Error:</strong> {{ error }}{% endif %}
 <form action="{{ url_for('login') }}" method=post>
  <dl>
   <dt>Username:
   <dd><input type=text name=username>
   <dt>Password:
   <dd><input type=password name=password>
   <dd><input type=submit value=Login>
  </dl>
 </form>
{% endblock %}
show_entries.html:
{% extends "layout.html" %}
{% block body %}
 {% if session.logged_in %}
  <form action="{{ url_for('add_entry') }}" method='POST' class=add-entry>
   <dl>
    <dt>Title:
    <dd><input type=text size=30 name=title>
    <dt>Text:
    <dd><textarea name=text rows=5 cols=40></textarea>
    <dd><input type=submit value=Share>
   </dl>
  </form>
 {% endif %}
 <ul class=entries>
 {% for entry in entries %}
  <li><h2>{{ entry.title }}</h2>{{ entry.content|safe }}
 {% else %}
  <li><em>Unbelievable. No entries here so far</em>
 {% endfor %}
 </ul>
{% endblock %}
对应static中添加css文件:style.css
body      { font-family: sans-serif; background: #eee; }
a, h1, h2    { color: #377BA8; }
h1, h2     { font-family: 'Georgia', serif; margin: 0; }
h1       { border-bottom: 2px solid #eee; }
h2       { font-size: 1.2em; }

.page      { margin: 2em auto; width: 35em; border: 5px solid #ccc;
         padding: 0.8em; background: white; }
.entries    { list-style: none; margin: 0; padding: 0; }
.entries li   { margin: 0.8em 1.2em; }
.entries li h2 { margin-left: -1em; }
.add-entry   { font-size: 0.9em; border-bottom: 1px solid #ccc; }
.add-entry dl  { font-weight: bold; }
.metanav    { text-align: right; font-size: 0.8em; padding: 0.3em;
         margin-bottom: 1em; background: #fafafa; }
.flash     { background: #CEE5F5; padding: 0.5em;
         border: 1px solid #AACBE2; }
.error     { background: #F0D6D6; padding: 0.5em; }
4、添加业务逻辑
在controller目录下新建blog_message.py文件:
from blog2.model.User import User
from blog2.model.Category import Category
import os

from blog2 import app,db
from flask import request,render_template,flash,abort,url_for,redirect,session,Flask,g

@app.route('/')
def show_entries():
categorys = Category.query.all()
return render_template('show_entries.html',entries=categorys)

@app.route('/add',methods=['POST'])
def add_entry():
if not session.get('logged_in'):
abort(401)
title = request.form['title']
content = request.form['text']
category = Category(title,content)
db.session.add(category)
db.session.commit()
flash('New entry was successfully posted')
return redirect(url_for('show_entries'))

@app.route('/login',methods=['GET','POST'])
def login():
error = None
if request.method == 'POST':
username = request.form['username']
password = request.form['password']
user = User.query.filter_by(username=request.form['username']).first()
passwd = User.query.filter_by(password=request.form['password']).first()

if user is None:
error = 'Invalid username'
elif passwd is None:
error = 'Invalid password'
else:
session['logged_in'] = True
flash('You were logged in')
return redirect(url_for('show_entries'))
return render_template('login.html', error=error)

@app.route('/logout')
def logout():
session.pop('logged_in', None)
flash('You were logged out')
return redirect(url_for('show_entries'))千万不要忘了在模块级目录下(blog2目录)的__init__.py文件引入视图模块,代码如下:
#只有在app对象之后声明,用于导入view模块
from blog2.controller import blog_manage
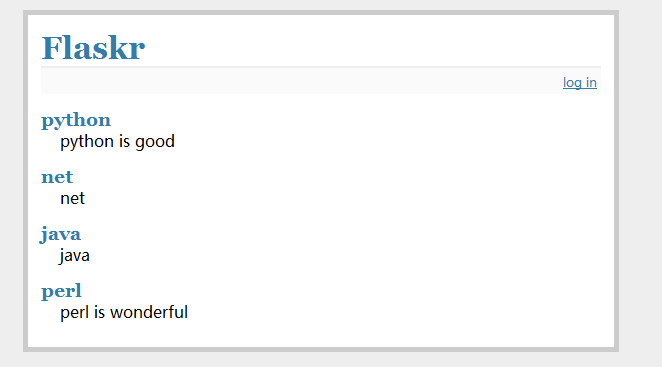
5、运行项目,效果如下:
1)输入http://127.0.0.1:5000/,正常情况下你的应该是空白的,因为还没有任何数据。
2)点击log in
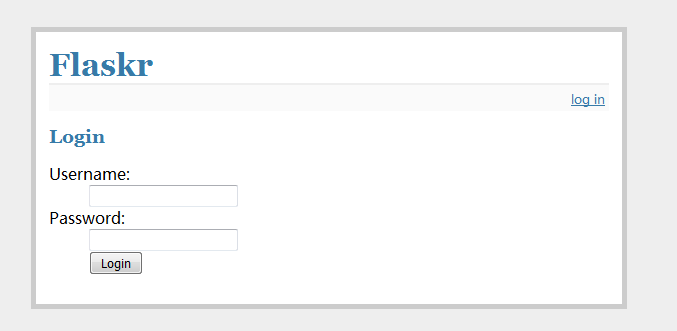
忘了告诉你了,你要事先在b_user表中添加一个用户喔,因为登陆要验证用户的,否则你是无法登陆成功的。
3) 添加条目
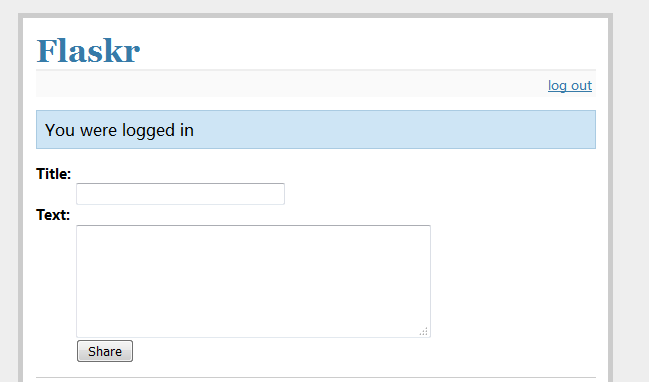
以上就是这个小项目的所有页面,很简单吧。你一定能搞定!!!
【总结】:通过本次练习,是否对flask框架运行机制有所了解呢,是不是已经有了全局的认识了,如果ok,那么这个小练习就有存在价值了。
参考文献:
【flask快速入门中文版】http://docs.jinkan.org/docs/flask/
【flask快速入门英文版】http://flask.pocoo.org/docs/0.11/
【flask-sqlalchemy中文版】http://www.pythondoc.com/flask-sqlalchemy/index.html
【flask-sqlalchemy英文版】http://flask-sqlalchemy.pocoo.org/2.1/

Hot AI Tools

Undresser.AI Undress
AI-powered app for creating realistic nude photos

AI Clothes Remover
Online AI tool for removing clothes from photos.

Undress AI Tool
Undress images for free

Clothoff.io
AI clothes remover

AI Hentai Generator
Generate AI Hentai for free.

Hot Article
Hot Tools

Notepad++7.3.1
Easy-to-use and free code editor

SublimeText3 Chinese version
Chinese version, very easy to use

Zend Studio 13.0.1
Powerful PHP integrated development environment

Dreamweaver CS6
Visual web development tools

SublimeText3 Mac version
God-level code editing software (SublimeText3)
Hot Topics
 1378
1378
 52
52

 How to use Debian Apache logs to improve website performance
Apr 12, 2025 pm 11:36 PM
How to use Debian Apache logs to improve website performance
Apr 12, 2025 pm 11:36 PM
This article will explain how to improve website performance by analyzing Apache logs under the Debian system. 1. Log Analysis Basics Apache log records the detailed information of all HTTP requests, including IP address, timestamp, request URL, HTTP method and response code. In Debian systems, these logs are usually located in the /var/log/apache2/access.log and /var/log/apache2/error.log directories. Understanding the log structure is the first step in effective analysis. 2. Log analysis tool You can use a variety of tools to analyze Apache logs: Command line tools: grep, awk, sed and other command line tools.
 Python: Games, GUIs, and More
Apr 13, 2025 am 12:14 AM
Python: Games, GUIs, and More
Apr 13, 2025 am 12:14 AM
Python excels in gaming and GUI development. 1) Game development uses Pygame, providing drawing, audio and other functions, which are suitable for creating 2D games. 2) GUI development can choose Tkinter or PyQt. Tkinter is simple and easy to use, PyQt has rich functions and is suitable for professional development.
 PHP and Python: Comparing Two Popular Programming Languages
Apr 14, 2025 am 12:13 AM
PHP and Python: Comparing Two Popular Programming Languages
Apr 14, 2025 am 12:13 AM
PHP and Python each have their own advantages, and choose according to project requirements. 1.PHP is suitable for web development, especially for rapid development and maintenance of websites. 2. Python is suitable for data science, machine learning and artificial intelligence, with concise syntax and suitable for beginners.
 How debian readdir integrates with other tools
Apr 13, 2025 am 09:42 AM
How debian readdir integrates with other tools
Apr 13, 2025 am 09:42 AM
The readdir function in the Debian system is a system call used to read directory contents and is often used in C programming. This article will explain how to integrate readdir with other tools to enhance its functionality. Method 1: Combining C language program and pipeline First, write a C program to call the readdir function and output the result: #include#include#include#includeintmain(intargc,char*argv[]){DIR*dir;structdirent*entry;if(argc!=2){
 The role of Debian Sniffer in DDoS attack detection
Apr 12, 2025 pm 10:42 PM
The role of Debian Sniffer in DDoS attack detection
Apr 12, 2025 pm 10:42 PM
This article discusses the DDoS attack detection method. Although no direct application case of "DebianSniffer" was found, the following methods can be used for DDoS attack detection: Effective DDoS attack detection technology: Detection based on traffic analysis: identifying DDoS attacks by monitoring abnormal patterns of network traffic, such as sudden traffic growth, surge in connections on specific ports, etc. This can be achieved using a variety of tools, including but not limited to professional network monitoring systems and custom scripts. For example, Python scripts combined with pyshark and colorama libraries can monitor network traffic in real time and issue alerts. Detection based on statistical analysis: By analyzing statistical characteristics of network traffic, such as data
 Python and Time: Making the Most of Your Study Time
Apr 14, 2025 am 12:02 AM
Python and Time: Making the Most of Your Study Time
Apr 14, 2025 am 12:02 AM
To maximize the efficiency of learning Python in a limited time, you can use Python's datetime, time, and schedule modules. 1. The datetime module is used to record and plan learning time. 2. The time module helps to set study and rest time. 3. The schedule module automatically arranges weekly learning tasks.
 Nginx SSL Certificate Update Debian Tutorial
Apr 13, 2025 am 07:21 AM
Nginx SSL Certificate Update Debian Tutorial
Apr 13, 2025 am 07:21 AM
This article will guide you on how to update your NginxSSL certificate on your Debian system. Step 1: Install Certbot First, make sure your system has certbot and python3-certbot-nginx packages installed. If not installed, please execute the following command: sudoapt-getupdatesudoapt-getinstallcertbotpython3-certbot-nginx Step 2: Obtain and configure the certificate Use the certbot command to obtain the Let'sEncrypt certificate and configure Nginx: sudocertbot--nginx Follow the prompts to select
 How to configure HTTPS server in Debian OpenSSL
Apr 13, 2025 am 11:03 AM
How to configure HTTPS server in Debian OpenSSL
Apr 13, 2025 am 11:03 AM
Configuring an HTTPS server on a Debian system involves several steps, including installing the necessary software, generating an SSL certificate, and configuring a web server (such as Apache or Nginx) to use an SSL certificate. Here is a basic guide, assuming you are using an ApacheWeb server. 1. Install the necessary software First, make sure your system is up to date and install Apache and OpenSSL: sudoaptupdatesudoaptupgradesudoaptinsta
