Leaflet development introductory tutorial
Leaflet brief introduction
Leaflet is a modern, open source JavaScript library developed for building interactive maps suitable for mobile devices. The code is only 33 KB, but it has most of the functionality for developing online maps. Leaflet design adheres to the philosophy of simplicity, high performance and good usability, and can operate efficiently on all major desktop and mobile platforms. It will take advantage of HTML5 and CSS3 on modern browsers, while also supporting old browser access. Supports plug-in extensions, has a friendly, easy-to-use API documentation and a simple, readable source code. Leaflet's powerful open source library plug-ins involve more than 140 plug-ins in all aspects of map applications, including map services, data provision, data formats, geocoding, routes and route searches, map controls and interactions.
September 27, 2016 - 1.0leaflet, the fastest, most stable and rigorous leaflet, is finally out!
leaflet is the leading open source JavaScript library for interactive maps designed for mobile devices. Weighs 33 KB of JS, mapping all the features most developers need.
leaflet is designed for simplicity, performance and usability. It works effectively on all major desktop and mobile platforms, can be extended with plugins, has a beautiful, easy-to-use and well-documented API and a simple, readable source code that is a joy to contribute to.
Let’s start with a small example: prepare a blank page
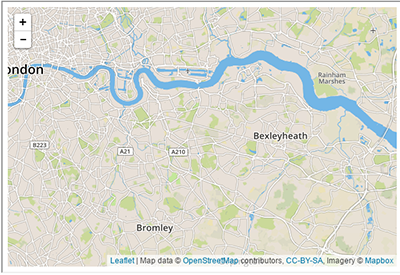
Here we create a map in the map div, add a tile selection, and then add a marker with some text that pops up:
Map Before writing any code, you You need to do the preparation steps on the following page:
Documents including the title part of the leaflet CSS file:
<link rel="stylesheet" href="https://unpkg.com/leaflet@1.0.1/dist/leaflet.css" />
(If you don’t have this file, you can download it, or you can introduce it yourself, which will not be described here), click download (stable) version);
Include the leaflet JavaScript file:
<script src="https://unpkg.com/leaflet@1.0.1/dist/leaflet.js"></script>
Put a div element with the specific id that you want your map to be:
<div id="mapid"></div>
(id名字可以随便设定,但是必须与下面js代码定义个一样。。)
Make sure the defined map container has a height, e.g. By setting CSS (a height must be defined, because the specified id name cannot be obtained, so this library does not handle height processing and setting, you must set the height yourself, just like div has no height by default):
#mapid { height: 180px; }
Now you are ready to initialize the map and do some stuff with it.
Set up map

Let’s create a map with beautiful Mapbox street tiles of a certain location in the center of Beijing. First we initialize and set its view to map to the geographical coordinates and zoom level of our choice (the mapid inside must be consistent with the set id):
var mymap = L.map('mapid').setView([39.9788, 116.30226], 14);
By default (we did not create it with any options Map instance) When all mouse and touch interactions are enabled on the map, it has zoom and attribution controls. (These can all be controlled through js. It is just an introduction at the moment. Those with in-depth knowledge can explore by themselves)
Note that the setView call returns the map object - most leaflet methods do not return an explicit value when doing this, which allows convenience jQuery-like method control.
Next, we'll add a brick layer to augment our map, in this case it's a Mapbox Streets brick layer. Creating a tile layer usually involves setting the URL of the tile image in the template (which you get in Mapbox), the attributed text and the maximum zoom level of the layer:
L.tileLayer('https://api.tiles.mapbox.com/v4/{id}/{z}/{x}/{y}.png?access_token={accessToken}', {
attribution: 'Map data © <a href="http://openstreetmap.org">OpenStreetMap</a> contributors, <a href="http://creativecommons.org/licenses/by-sa/2.0/">CC-BY-SA</a>, Imagery © <a href="http://mapbox.com">Mapbox</a>',
maxZoom: 18,
id: 'your.mapbox.project.id',
accessToken: 'your.mapbox.public.access.token'
}).addTo(mymap);
Make sure all the code is called divs and leaflets. js contains. That's it! Now you have a working leaflet map.
Markers, Circles and Polygons

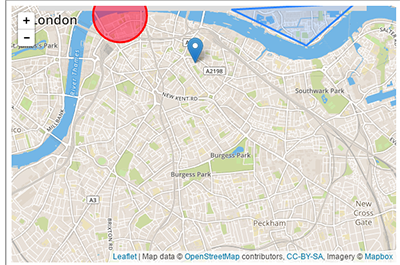
In addition to brick layers, you can easily add other things to your map, including markers, polylines, polygons, circles and pop-ups. Let's add a marker:
L.marker([39.9788, 116.30226]).addTo(mymap)
 .bindPopup("北京大厦<br>").openPopup();
Adding a circle is the same (except specifying the radius in meters as the second argument), but allows you to control how it looks by selecting as the last argument when creating the object:
L.circle([39.9908, 116.26625], 500, {
 color: 'red',
 fillColor: '#f03',
 fillOpacity: 0.5
}).addTo(mymap).bindPopup("颐和园欢迎你");
Adding a polygon is simple:
L.polygon([
 [39.92096, 116.38591],
 [39.91079, 116.38676],
 [39.91118, 116.3962],
 [39.92014, 116.39482]
]).addTo(mymap).bindPopup("故宫");
Pop-ups are usually used when you want to attach some information to a specific object on the map. Leaflets have a very convenient shortcut (the same as the above method of adding it, add it directly or add it separately, it is actually the same openPopup means whether it is open by default):
marker.bindPopup("北京大厦").openPopup();
circle.bindPopup("颐和园");
polygon.bindPopup(故宫");
Try to click on our object. The bindPopup method specifies the height of your popup's HTML content with the popup marker appearing when you click on the object, and the openPopup method (marker) opens the popup immediately.
You can also use a popup layer (when you need more stuff than attaching a popup to an object):
var popup = L.popup()
 .setLatLng([51.5, -0.09])
 .setContent("I am a standalone popup.")
 .openOn(mymap);
Here we use openOn instead because it handles auto-closing before opening a popup when opening a new one of good usability.
Handling events
每次发生在leaflet,比如用户点击地图上标记或缩放变化,相应的对象发送一个事件,你可以订阅功能。它允许您对用户交互(这里显示的是每次你点击位置的经纬度):
function onMapClick(e) {
 alert("You clicked the map at " + e.latlng);
}
 mymap.on('click', onMapClick);
每个对象都有自己的一组事件,有关详细信息,请参阅文档。侦听器函数的第一个参数是一个事件对象,它包含有用的信息的事件发生。例如,地图点击事件对象(e在上面的示例中)latlng属性点击出现的位置。
让我们改善我们的例子中,使用一个弹出一个警告:
var popup = L.popup();
function onMapClick(e) {
 popup
  .setLatLng(e.latlng)
  .setContent("You clicked the map at " + e.latlng.toString())
  .openOn(mymap);
}
mymap.on('click', onMapClick);

Hot AI Tools

Undresser.AI Undress
AI-powered app for creating realistic nude photos

AI Clothes Remover
Online AI tool for removing clothes from photos.

Undress AI Tool
Undress images for free

Clothoff.io
AI clothes remover

AI Hentai Generator
Generate AI Hentai for free.

Hot Article

Hot Tools

Notepad++7.3.1
Easy-to-use and free code editor

SublimeText3 Chinese version
Chinese version, very easy to use

Zend Studio 13.0.1
Powerful PHP integrated development environment

Dreamweaver CS6
Visual web development tools

SublimeText3 Mac version
God-level code editing software (SublimeText3)


