WebMatrix Advanced Tutorial (3): How to implement a certain style
Csdn.NET will soon release an advanced tutorial on Microsoft's new Web development tool WebMatrix to help developers understand this, which is known as the most powerful Web development tool in Microsoft's history. Following the last post on how to install and use Microsoft's new development tool WebMatrix and teaching you how to use WebMatrix to create your first web page. This issue will continue to introduce you to the following tutorials.
Introduction: Microsoft WebMatrix is a free tool that can be used to create, customize, and publish websites on the Internet.
WebMatrix enables you to create websites easily. You can start with an open source application (such as WordPress, Joomla, DotNetNuke or Orchard) and WebMatrix handles the task of downloading, installing and configuring the application for you. Or you can write the code yourself using the many built-in templates that will help you get started quickly. Whatever you choose, WebMatrix provides everything your website needs to run, including web servers, databases, and frameworks. By using the same stack on your development desktop that you would use on your web host, the process of bringing your website online is easy and smooth.
You can download it from http://web.ms/webmatrix.
Now you can learn to use WebMatrix, CSS, HTML, HTML5, ASP.Net, SQL, databases, and how to write simple web applications in just a few hours. It reads:
In Part 2, you saw how to use WebMatrix to create a very simple web page, and how this page ran in a number of different browsers. In this section, you'll learn how to change the visual style of a web page using Cascading Style Sheets (CSS) technology.
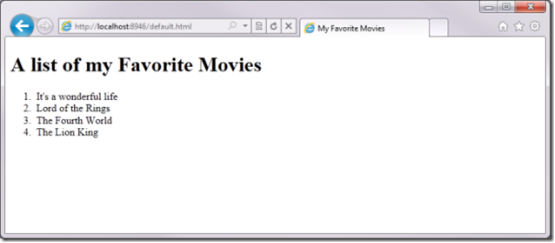
Here is a simple list of movies you can build into your web page:

Prepare to style your web page using cascading style sheets
In the next few days In this step, you will see more HTML tags that can be used to implement functions such as hyperlinks, web page sections, and script tags. You will also learn how to use cascading style sheets (CSS) to edit this web page and set its appearance. Finally, layouts will be used to get the same content between this page and other pages on the site, making it easier to edit the same content.
Using Separators
In HTML, you can use the
Here is the HTML for your page in the first part:
<!DOCTYPE html>

<html lang="en">
    <head>
        <meta charset="utf-8" />
        <title>My Favorite Movies</title>
    </head>
    <body>
    <h1 id="A-nbsp-list-nbsp-of-nbsp-my-nbsp-Favorite-nbsp-Movies">A list of my Favorite Movies</h1>
       <ol>
            <li>Its a wonderful life</li>
            <li>Lord of the Rings</li>
            <li>The Fourth World</li>
            <li>The Lion King</li>
       </ol>
    </body>
</html>The first thing to do is wrap the list containing the movies into it's own
<!DOCTYPE html>
<html lang="en">
<head>
  <meta charset="utf-8" />
  <title>My Favorite Movies</title>
</head>
<body>
  <h1 id="A-nbsp-list-nbsp-of-nbsp-my-nbsp-Favorite-nbsp-Movies">A list of my Favorite Movies</h1>
  <div id="movieslist">
  <ul>
    <li>Its a wonderful life</li>
    <li>Lord of the Rings</li>
    <li>The Fourth World</li>
    <li>The Lion King</li>
  </ul>
</div>
</body>
</html>You can now see that the
- list containing the movies is now contained within a tag. If you look at the page now, you'll see that it's not much different than before. This is because thetag is a logical separator. It has no physical appearance.
Using Hyperlinks
You may already be familiar with hyperlinks – clickable areas on one page that link to another page. Although these areas are called hyperlinks, in HTML they were originally called anchor tags, so you use the tag whenever you wish to create a hyperlink.
(or positioning) tag makes the content between and clickable. When a user clicks on this content, the browser will redirect to a HREF (hyperreference) indicated using the href attribute in the tag.
Attributes are defined on the tag itself, rather than within the tag, similar to:
content So, to create a hyperlink, you would use syntax like this:
The href doesn't have to be a website like the one above, it can be a JavaScript function that performs an operation used by programmers. A special href can be used as a placeholder during development so that you can test whether the style of the hyperlink works. To do this, use the "#" character as href.
So, in order to convert all
- items containing movies into hyperlinks, we wrap the movie's text in an tag, setting the HREF to #, similar to the following:
<!DOCTYPE html>
<html lang="en">
<head>
  <meta charset="utf-8" />
  <title>My Favorite Movies</title>
</head>
<body>
  <h1 id="A-nbsp-list-nbsp-of-nbsp-my-nbsp-Favorite-nbsp-Movies">A list of my Favorite Movies</h1>
  <div id="movieslist">
    <ol>
      <li><a href="#">Its a wonderful life</a></li>
      <li><a href="#">Lord of the Rings</a></li>
      <li><a href="#">The Fourth World</a></li>
      <li><a href="#">The Lion King</a></li>
  </ol>
  </div>
</html>
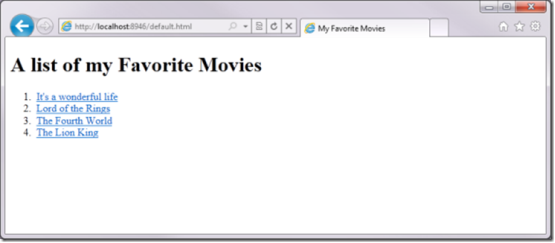
Copy after loginIf you run the web page, you will see that the elements on the list will use the familiar hyperlink style, also known as a blue underline:

Add header and footer
将要做的下一件事是向网页添加页眉和页脚。您将使用Html5中提供的新
和 <!DOCTYPE html> <html lang="en"> <head> <meta charset="utf-8" /> <title>My Favorite Movies</title> </head> <body> <header> <h1 id="A-nbsp-list-nbsp-of-nbsp-my-nbsp-Favorite-nbsp-Movies">A list of my Favorite Movies</h1> </header> <div id="movieslist"> <ol> <li><a href="#">Its a wonderful life</a></li> <li><a href="#">Lord of the Rings</a></li> <li><a href="#">The Fourth World</a></li> <li><a href="#">The Lion King</a></li> </ol> </div> <footer> This site was built using Microsoft WebMatrix. <a href="http://web.ms/webmatrix">Download it now.</a> </footer> </html>Copy after login可以看到,它们是非常简单的HTML代码。
对于页眉,我们将前面创建的包装在
标记中,对于页脚,我们创建一些文本和一个超链接。 在浏览器中查看网页,它现在将类似于以下界面:
除了页脚不同,它没有太多差异,但不用担心,这种情况很快就会改变!
定义网页的外观
在前面一节中,在介绍定位标记时您了解了属性,属性描述元素的行为。对于定位标记,您通过指定HREF属性定义了在单击时发生的行为。
可以想象,您可以使用属性指定元素的外观,包括字体样式、字体大小、颜色、边框等等。
所以,举例来说,对于我们前面在网页上定义的
(其内容为“A list of my Favorite Movies”),您可以更改它的字体和颜色如下:
A list of my Favorite Movies
可以看到,
标记的样式属性包含该样式的定义列表。上面的标记将颜色设为蓝色,将字体设置为 32,将字体系列设置为Verdana,并将文本装饰设置为下划线.
尽管这样能很好地生效,但它并不是设置网页样式的最好方式。想象一下,如果您必须通过这种方式设置每个元素的样式,将会是什么结果。您的网页上最终会有很多文本,减缓下载和浏览的速度。
幸运的是,还有另一种方式,那就是在网页上使用样式表。样式表使用级联样式表概念来定义,其中元素上的样式集可以由子元素继承。举例来说,如果您在
上设置了一个样式,并且具有子元素- 和
- ,那么该样式也将应用于它们,除非开发人员改写了此样式。w3cschools是一个了解CSS的好地方:http://w3schools.com/css/default.asp。
我们看一下如何在
标记上定义样式,而无需在样式属性上使用很多内联代码。
不用将所有样式代码放在
标记本身内,我们只需要指定它的类属性,如下所示:
A list of my Favorite Movies
现在标记有了一个类,我们可以告诉浏览器为拥有此类的所有内容使用一种特定样式。这使用CSS代码语法来完成,类似于:
.Title {
font-size: xx-large;
font-weight: normal;
padding: 0px;
margin: 0px;
}
Copy after login样式“语言”包括一组以分号分隔并包含在花括号({..})中的属性。如果要将此样式应用到一个类,该类会使用“点”语法进行定义,也就是在类名称前添加一个点。
此代码放在网页页眉中的
- items containing movies into hyperlinks, we wrap the movie's text in an tag, setting the HREF to #, similar to the following:


