WebMatrix Advanced Tutorial (7): Create a data editing web page
So far, you have created a movie web page, styled it, designed it to be data-driven, and then created a form to add movies to the database. The next step will be to create a very similar form for editing an existing movie list.
Introduction: Microsoft WebMatrix is a free tool that can be used to create, customize, and publish websites on the Internet.
WebMatrix enables you to create websites easily. You can start with an open source application (such as WordPress, Joomla, DotNetNuke or Orchard) and WebMatrix handles the task of downloading, installing and configuring the application for you. Or you can write the code yourself using the many built-in templates that will help you get started quickly. Whatever you choose, WebMatrix provides everything your website needs to run, including web servers, databases, and frameworks. By using the same stack on your development desktop that you would use on your web host, the process of bringing your website online is easy and smooth.
You can download it from http://web.ms/webmatrix.
Now you can learn to use WebMatrix, CSS, HTML, HTML5, ASP.NET, SQL, databases, and how to write simple web applications in just a few hours. The content is as follows:
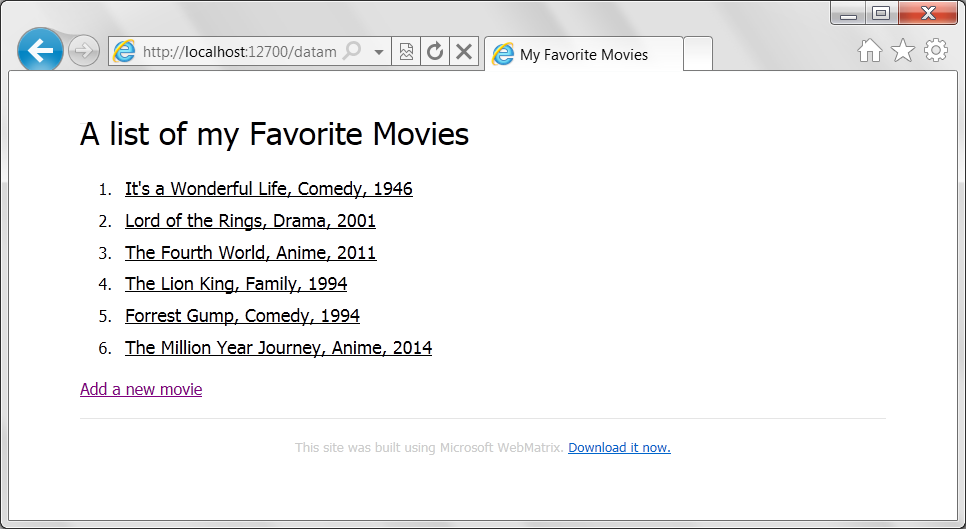
Let's take a look at the application so far:
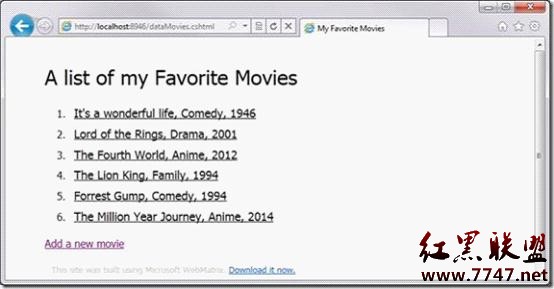
As you can see, it has a list of movies and the ability to add movies through the link at the bottom. To create a mouseover effect, we use the tag to set each movie entry in the list as a hyperlink. It would be useful if you could just use this hyperlink when you wish to edit your movie, so let's take a look at how to implement this functionality.
Create an edit web page
First, create a new CSHTML web page in WebMatrix and name it EditMovie.cshtml. This web page will ultimately contain a form populated with the details of the selected movie, and when you change these details, the changes will be submitted back to the database.
Replace the default content in EditMovie.cshtml with a form like this. The form is very similar to the one created in the previous section.
<h1 id="Edit-nbsp-a-nbsp-Movie">Edit a Movie</h1>
<form action="" method="post">
    <p>Name:<input type="text" name="formName" /></p>
    <p>Genre:<input type="text" name="formGenre" /></p>
    <p>Year:<input type="text" name="formYear" /></p>
    <p><input type="submit" value="Edit Movie" /></p>
</form>Calling the edit web page from the movie list
We now understand the basics of editing forms. But how do you initialize the form with the database contents for the specific movie you selected? First, let's look at how to tell this page which movie you wish to edit, for which we have to return to the dataMovies.cshtml page.
You may remember that we wrote some list items in the following form:
<li><a href="#">@row.Name, @row.Genre, @row.ReleaseYear</a></li>
The hyperlink doesn't go anywhere because the href is still just "#". We have the hyperlink go to the EditMovie.cshtml web page like this:
<li><a href="EditMovie.cshtml ">@row.Name, @row.Genre, @row.ReleaseYear</a></li>
This is nice, but no matter which movie you select, it will always call EditMovie.cshtml, and this web page doesn't Know which movie you are editing. However, the ataMovies.cshtml web page already knows about the movie you edited because you selected it, so you can pass the ID of your selected movie to EditMovie.cshtml like this:
EditMovie.cshtml? id=
And since we already know what the id of the current row is (@row.id), we can use Razor to write out that ID when writing out the list, changing <li><a href="EditMovie.cshtml?id=@row.id">@row.Name, @row.Genre, @row.ReleaseYear</a></li>
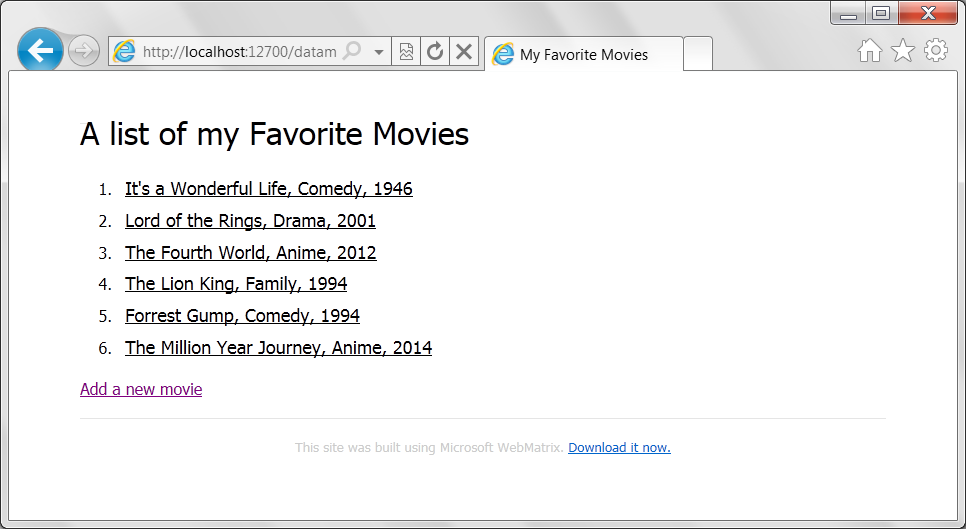
 <!DOCTYPE html>
<html lang="en">
  <head>
    <meta charset="utf-8" />
    <title>My Favorite Movies</title>
    <link rel="stylesheet" type="text/css" href="movies-html5.css" />
  </head>

<body>
  <header>
    <h1 id="A-nbsp-list-nbsp-of-nbsp-my-nbsp-Favorite-nbsp-Movies">A list of my Favorite Movies</h1>
  </header>

  <div id="movieslist">
  <ol>
    <li><a href="EditMovie.cshtml?id=1">Its a wonderful life, Comedy, 1946</a></li>
    <li><a href="EditMovie.cshtml?id=2">Lord of the Rings, Drama, 2001</a></li>
    <li><a href="EditMovie.cshtml?id=3">The Fourth World, Anime, 2012</a></li>
    <li><a href="EditMovie.cshtml?id=4">The Lion King, Family, 1994</a></li>
    <li><a href="EditMovie.cshtml?id=5">Forrest Gump, Comedy, 1994</a></li>
    <li><a href="EditMovie.cshtml?id=6">The Million Year Journey, Anime, 2014</a></li>
  </ol>

  <a href="AddMovie.cshtml">Add a new movie</a>
</div>

  <footer>

    This site was built using Microsoft WebMatrix.

    <a href="Download>http://web.ms/webmatrix">Download it now.</a>

  </footer>

</html>This code requires the creation of a local variable (named "id") , and initialize it with the value of the parameter (also "id"). WebMatrix is smart enough to realize that two IDs are different based on the context in which they are used.
var id=Request["id"];
var SQLSELECT = "SELECT * FROM Favorites where ID=@0";
var db = Database.Open("Movies");
var Movie = db.QuerySingle(SQLSELECT,id);
var MovieName=Movie.Name;
var MovieGenre=Movie.Genre;
var MovieYear=Movie.ReleaseYear;非常简单,对吧?我们说“从Favorites选择*,其中ID字段等于我们传入的ID”,然后对数据库执行该语句。因为我们只想要一条记录,所以我们要求db.QuerySingle获取一条记录。
然后执行查询,将Name、Genre和ReleaseYear值加载到局部变量中。
这样做很好,但问题在于值位于变量中而不是窗体中,用户如何编辑它们呢?答案很简单,请记住此代码是在网页加载之前执行的,所以我们在写出HTML之前已拥有变量。而且正因为此,我们可以使用这些值初始化窗体。窗体使用字段为我们提供文本框,这些字段支持“value”属性。我们现在可以直接在变量中使用此属性,以便初始化它们。
以下是页面的代码:
@{
  var id=Request["id"];
  var SQLSELECT = "SELECT * FROM Favorites where ID=@0";
  var db = Database.Open("Movies");
  var Movie = db.QuerySingle(SQLSELECT,id);
  var MovieName=Movie.Name;
  var MovieGenre=Movie.Genre;
  var MovieYear=Movie.ReleaseYear;
}

<h1 id="Edit-nbsp-a-nbsp-Movie">Edit a Movie</h1>
<form action="" method="post">
  <p>Name:<input type="text" name="formName" value="@MovieName" /></p>
  <p>Genre:<input type="text" name="formGenre" value="@MovieGenre" /></p>
  <p>Year:<input type="text" name="formYear" value="@MovieYear" /></p>
  <p><input type="submit" value="Edit Movie" /></p>
</form>我们运行 dataMovies.cshtml页面
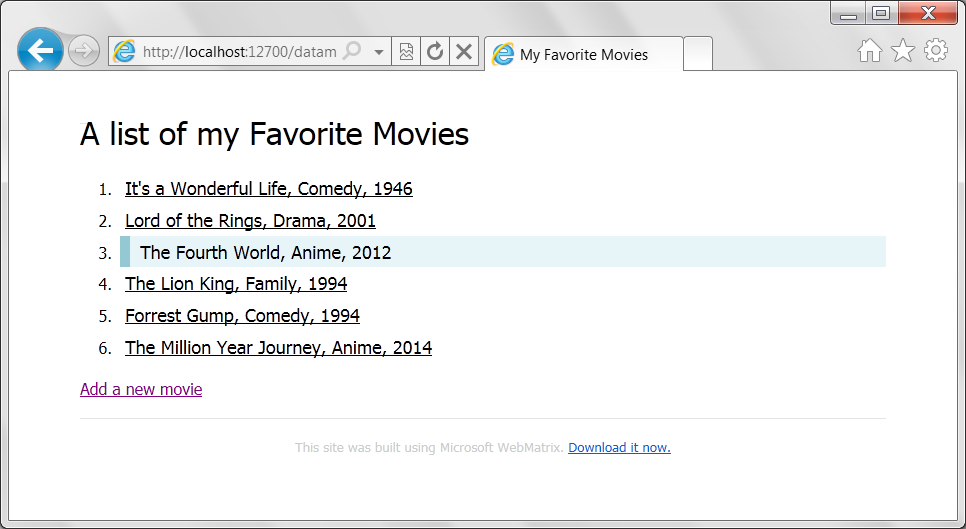
然后我们点选第三行 'The Fourth World'这部电影,将掉转到EditMovie.cshtml页面:
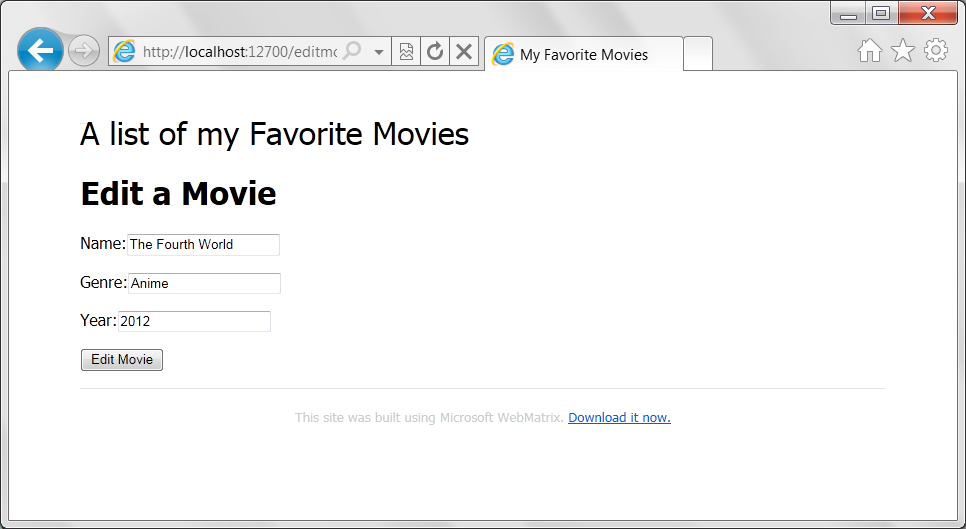
然后我们可以编辑内容,点击"Edit Moiie",依然使用if(IsPost)代码块,来获取POST Request
if(IsPost){
  MovieName=Request["formName"];
   MovieGenre=Request["formGenre"];
   MovieYear=Request["formYear"];
}现在我们需要更新数据,更新数据库SQL语法如下:
UPDATE table SET column=value, column=value, column=value... WHERE key=value
在本例中,我们需要更新三个字段的数据,执行的代码如下:
var SQLUPDATE = "UPDATE Favorites Set Name=@0, Genre=@1, ReleaseYear=@2 WHERE id=@3";
db.Execute(SQLUPDATE, MovieName, MovieGenre, MovieYear,id);
更新以后,还是从新定向到dataMovies.cshtml页面
完整代码如下:
@{
    var id=Request["id"];
    var SQLSELECT = "SELECT * FROM Favorites where ID=@0";
    var db = Database.Open("Movies");
    var Movie = db.QuerySingle(SQLSELECT,id);
    var MovieName=Movie.Name;
    var MovieGenre=Movie.Genre;
    var MovieYear=Movie.ReleaseYear;

    if(IsPost){
      MovieName=Request["formName"];
      MovieGenre=Request["formGenre"];
      MovieYear=Request["formYear"];
      var SQLUPDATE = "UPDATE Favorites Set Name=@0, Genre=@1, ReleaseYear=@2 WHERE id=@3";
      db.Execute(SQLUPDATE, MovieName, MovieGenre, MovieYear,id);
      Response.Redirect("dataMovies.cshtml");
    }
}

<h1 id="Edit-nbsp-a-nbsp-Movie">Edit a Movie</h1>
  <form action="" method="post">
    <p>Name:<input type="text" name="formName" value="@MovieName" /></p>
    <p>Genre:<input type="text" name="formGenre" value="@MovieGenre" /></p>
    <p>Year:<input type="text" name="formYear" value="@MovieYear" /></p>
    <p><input type="submit" value="Edit Movie" /></p>
</form>看一下运行效果
以上就是WebMatrix进阶教程(7):创建一个编辑数据网页的内容,更多相关内容请关注PHP中文网(www.php.cn)!

Hot AI Tools

Undresser.AI Undress
AI-powered app for creating realistic nude photos

AI Clothes Remover
Online AI tool for removing clothes from photos.

Undress AI Tool
Undress images for free

Clothoff.io
AI clothes remover

AI Hentai Generator
Generate AI Hentai for free.

Hot Article

Hot Tools

Notepad++7.3.1
Easy-to-use and free code editor

SublimeText3 Chinese version
Chinese version, very easy to use

Zend Studio 13.0.1
Powerful PHP integrated development environment

Dreamweaver CS6
Visual web development tools

SublimeText3 Mac version
God-level code editing software (SublimeText3)

Hot Topics
 1385
1385
 52
52
 Working With GraphQL Caching
Mar 19, 2025 am 09:36 AM
If you’ve recently started working with GraphQL, or reviewed its pros and cons, you’ve no doubt heard things like “GraphQL doesn’t support caching” or
 Building an Ethereum app using Redwood.js and Fauna
Mar 28, 2025 am 09:18 AM
With the recent climb of Bitcoin’s price over 20k $USD, and to it recently breaking 30k, I thought it’s worth taking a deep dive back into creating Ethereum
 Vue 3
Apr 02, 2025 pm 06:32 PM
It's out! Congrats to the Vue team for getting it done, I know it was a massive effort and a long time coming. All new docs, as well.
 Can you get valid CSS property values from the browser?
Apr 02, 2025 pm 06:17 PM
I had someone write in with this very legit question. Lea just blogged about how you can get valid CSS properties themselves from the browser. That's like this.
 A bit on ci/cd
Apr 02, 2025 pm 06:21 PM
I'd say "website" fits better than "mobile app" but I like this framing from Max Lynch:
 Comparing Browsers for Responsive Design
Apr 02, 2025 pm 06:25 PM
There are a number of these desktop apps where the goal is showing your site at different dimensions all at the same time. So you can, for example, be writing
 Using Markdown and Localization in the WordPress Block Editor
Apr 02, 2025 am 04:27 AM
If we need to show documentation to the user directly in the WordPress editor, what is the best way to do it?
 Stacked Cards with Sticky Positioning and a Dash of Sass
Apr 03, 2025 am 10:30 AM
The other day, I spotted this particularly lovely bit from Corey Ginnivan’s website where a collection of cards stack on top of one another as you scroll.


