
Navigation Highlighting
Navigation highlighting is a very common problem, including the navigation of the current page being highlighted in the menu and highlighted when hovering. You can control it with js, but with a little CSS tricks you can achieve this without using JS.


In the normal state, the default style of each navigation is:
nav li{
    opacity: 0.5;
}The navigation transparency of the current page is 1. In order to achieve this purpose:
First add different classes to different pages through the body to mark different pages
<!-- home.html -->
<body class="home"></body>
<!-- buy.html -->
<body class="buy"></body>
All li are also marked with class, in order There is a one-to-one correspondence:
<li class="home">home</li>
<li class="buy">buy</li>
Then you can set the style of the current page and overwrite the default style:
body.home nav li.home,
body.buy nav li.
buy{    opacity: 1;
}In this way, if the current page is home, then body.home na li.home This rule takes effect, and the navigation of home will be highlighted
If you use js control, the current page will not be highlighted before the script is loaded, and suddenly after the script is loaded, Highlighted. So using js is thankless.
To highlight when hovering, you can use the CSS :hover selector:
nav li:hover{    opaciy: 1;
}Adding the :hover selector will have a higher priority than the original one. When the mouse hovers, it will Overrides the default style, which is highlight.
You can also use the mouse event. Add a class during mouseover and remove the class during mouseleave. This becomes more complicated. Using CSS can even be compatible with browsers that do not support JS. Users may The browser's js is disabled. I have a static page that is purely for display. Why should I write js?
Note that this hover selector is particularly easy to use and is suitable for almost all scenarios that need to be displayed when hovering with the mouse.
2 Display when the mouse is hovering
Mouse hovering scenarios are very common, such as the navigation menu:

Display of the marker details box:

Generally, hidden things such as menus must be used as child elements or adjacent elements of the hover target, so that they can be easily controlled with css. For example, the menu above is treated as menu. An adjacent element of navigation:
<li class="user">用户</li><li class="menu">
   <ul>
      <li>账户设置</li>
      <li>登出</li>
</ul></li>menu is hidden in normal state:
.menu{    display: none;
}and displayed when navigation hover:
.user:hover + .menu{    display: list-item;
}Note that a phase is used here Neighbor selector, this is why it is written as adjacent elements as mentioned above. The location of the menu can be positioned using absolute.
At the same time, the menu itself must also be displayed when it hovers, otherwise the menu will disappear as soon as the mouse leaves the navigation:
.menu:hover{    display: list-item;
}There will be a small problem here, that is, the menu and navigation need to be next to each other. together, otherwise if there is a gap in the middle, the menu hover added above will not work. However, in actual situations, from an aesthetic point of view, there is a certain distance between the two. This is actually easy to solve. Just draw a transparent area on the menu, such as the following blue square:
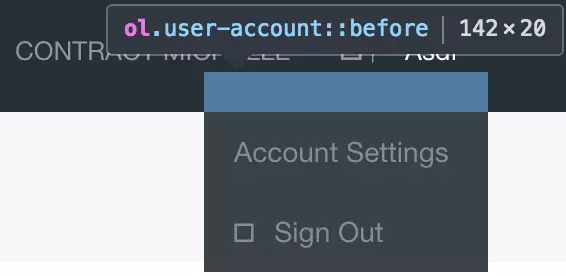
You can use before/after pseudo-classes and absoute Positioning implementation:
ul.menu:before{ content: ""; position: absolute; left: 0; top: -20px; width: 100%; height: 20px; /*background-color: rgba(0,0,0,0.2);*/}If I both write the CSS hover and listen to the mouse event, and use mouse to control the display and hiding, what will happen to the double effect? If I follow the normal routine, hover in the mouse event At that time, a display: block style was added, which would override the CSS settings. In other words, as long as you hover once, the css code will not work, because the priority of the inline style will be higher than that of the external link. However, in actual situations, accidents may occur, that is, on the mobile iPhone, touch will trigger the CSS hover, and this trigger will most likely occur before the touchstart event. In this event, it will be judged whether it is currently displayed or hidden. Status, due to the CSS hover function, it is judged to be displayed, and then hidden. In other words, if you click once and it doesn’t come out, click twice. So it’s best not to write both at the same time.
The second scenario, using child elements, is simpler. Treat the hover target and the hidden object as child elements of the same parent container, and then write hover on the parent container. You don't need to write a hover on the hidden element as above:
.marker-container .detail-info{    display: none
}.marker-container:hover .detail-info{    display: block
}3 Customize the style of radio/checkbox
我们知道,使用原生的radio/checkbox是不可以改变它的样式的,得自己用div/span去画,然后再去监听点击事件。但是这样需要自己去写逻辑控制,例如radio只能选一个的功能,另一个是没有办法使用change事件。就是没有用原生的方便。
但是实际上可以用一点CSS3的技巧实现自定义的目的,如下,就是用原生实现的radio:
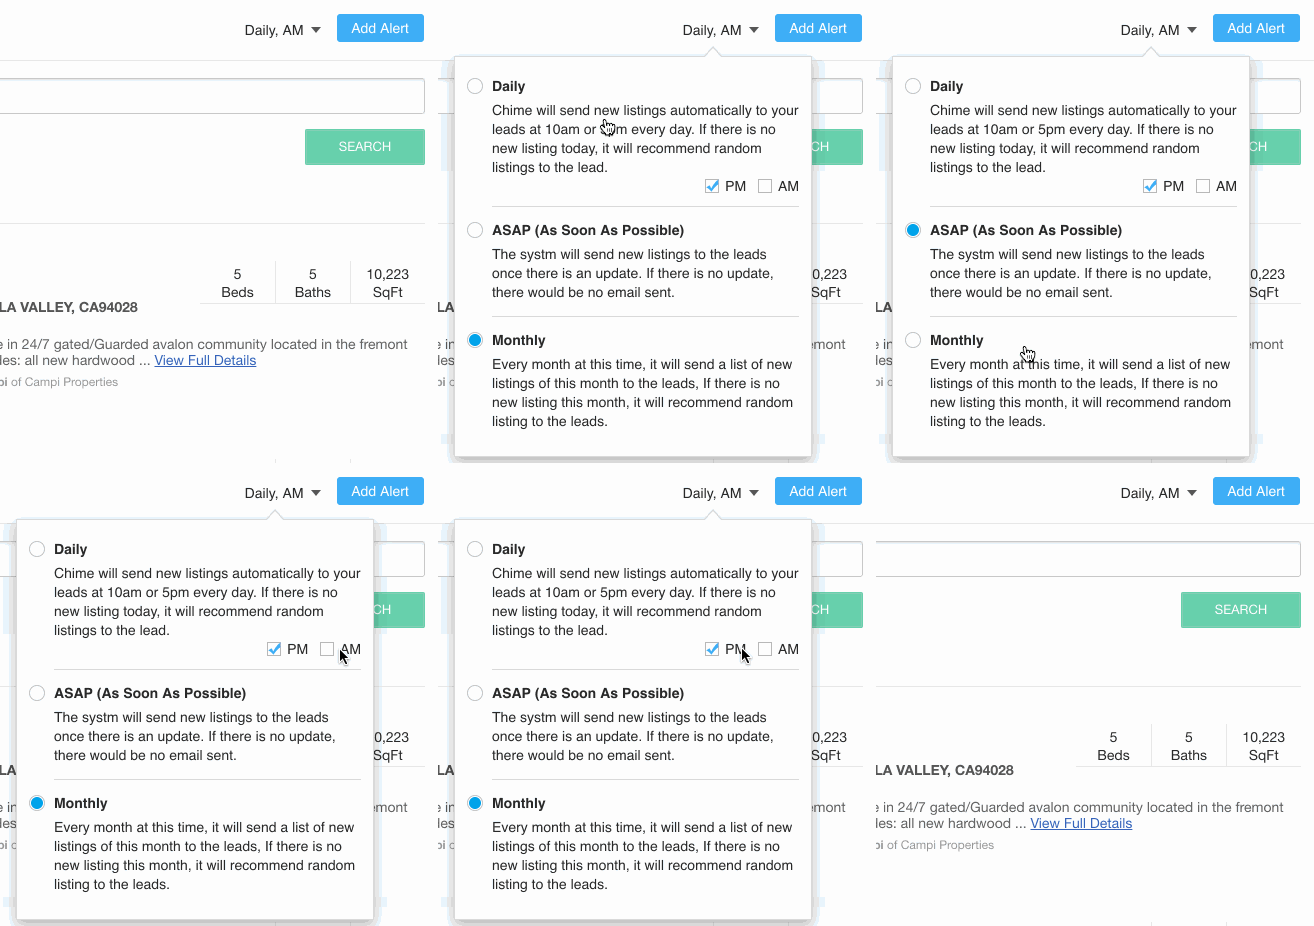
这个主要是借助了CSS3提供的一个伪类 :checkd,只要radio/checkbox是选中状态,这个伪类就会生效,因此可以利用选中和非选中的这两种状态,去切换不同的样式。如下把一个checkbox和一个用来自定义样式的span写在一个label里面,checkbox始终隐藏:
<style>input[type=checkbox]{    display: none;
}/*未选中的checkbox的样式*/.checkbox{

}</style><label>
   <input type="checkbox">
<span class="checkbox"></span></label>写在label里面是为了能够点击span的时候改变checkbox的状态,然后再改一下选中态的样式即可:
input[type=checkbox]:checked + .checkbox{

}关键在于这一步,添加一个打勾的背景图也好,使用图标字体也好。
:checked 兼容性还是比较好的,只要你不用兼容IE8就可以使用,或者说只要你可以用nth-of-type,就可以用:checked
4多列等高
多列等高的问题是这样的,排成一行的几列由于内容长短不一致,导致容器的高度不一致:
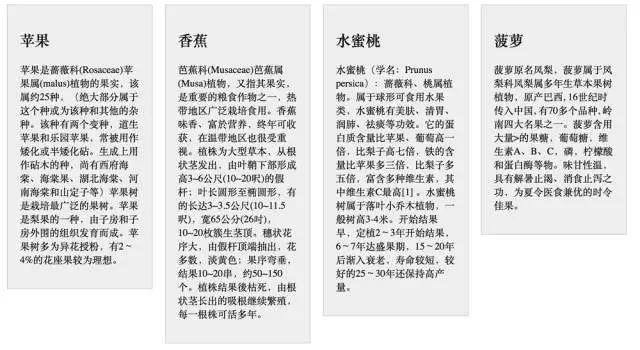
你可以用js算一下,以最高的一列的高度去设置所有列的高度,然而这个会造成页面闪动,刚开始打开页面的时候高度不一致,然后发现突然又对齐了。这个解决办法主要有两种:
第一种是每列来一个很大的padding,再来一个很大的负的margin值矫正回去,就对齐了,如下:
<style>
   .wrapper > div{        float: left;        padding-bottom: 900px;        margin-bottom: -880px;        background-color: #ececec;        border: 1px solid #ccc;
   }</style><div class="wrapper">
   <div>column 1</div>
   <div>column 2</div>
   <div>column 3</div>
<div>column 4</div></div>效果如下:

你会发现,这个对齐是对齐了,但是底部的border没有了,设置的圆角也不起作用了,究其原因,是因为设置了一个很大的padding值,导致它的高度变得很大,如上图所示。所以如果你想在底部absolute定位放一个链接”更多>>”也是实现不了了。
第二种办法是借助table的自适应特性 ,每个div都是一个td,td肯定是等高的,html结构不变,CSS改一下:
.wrapper{    display: table;    border-spacing: 20px;  /* td间的间距*/}.wrapper > div {    display: table-cell;    width: 1000px;         /*设置很大的宽度,table自动平分宽度 */
border-radius: 5px; /*这里设置圆角就正常了*/}对齐效果如下:
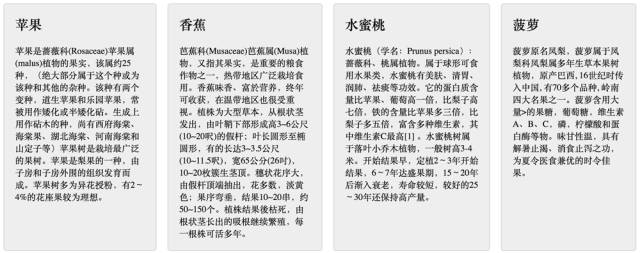
这样还有一个好处,就是在响应式开发的时候,可以借助媒体查询动态地改变display的属性,从而改它排列的方式。例如在小于500px时,每一列占满一行,那么只要把display: table-cell覆盖掉就好了:
@media (max-width: 500px){    .wrapper{        display: block;
   }    .wrapper > div{        display: block;        width: 100%;
   }
}效果如下所示:
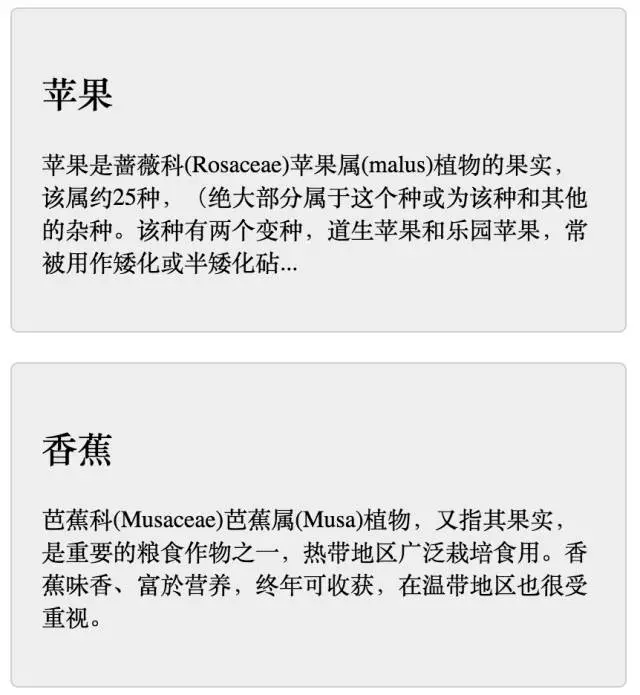
如果在pad 1024px的设备上,希望一行显示2个,那应该怎么办呢?由于上面用的td,必定会排在同一行。其实可以在第二个和第三个中间加一个tr,让它换行:
<div class="wrapper">
   <div>column 1</div>
   <div>column 2</div>
   <span class="tr"></span>
   <div>column 3</div>
   <div>column 4</div></div>
在大屏和小屏时,tr是不显示的,而在中屏时,tr显示:
.tr{    display: none;
}

@media (max-width: 1024px) and (min-width: 501px){    .tr{        display: table-row;
   }
}就能够实现在小屏时一行排两列了,只是这个有个小问题,就是在中屏拉到大屏的时候tr的dipslay: none已经没有什么作用,因为table的布局已经计算好。但是一般应该不用考虑这种拉伸范围很大的情况,正常刷新页面是可以的,如果真要解决那得借助下js
5需要根据个数显示不同样式
例如说可能有1~3个item显示在同一行,而item的个数不一定,如果1个,那这个item占宽100%,2个时每一个50%,3个时每一个33%,这个你也可以用js计算一下,但是用CSS3就可以解决这个问题:
<style>
   li{
       width: 100%;
   }
   li:first-child:nth-last-child(2),    li:first-child:nth-last-child(2) ~ li{
       width: 50%;
   }

   li:first-child:nth-last-child(3),    li:first-child:nth-last-child(3) ~ li{
       width: 33%;
   }
</style><ul>
   <li>1</li>
   <li>2</li>
<li>3</li></ul>第5行的意思就是选择li的第一个元素,并且它是倒数第二个元素,第6行的意思是选择前面有是第一个且是倒数第二个li的所有li,第一行是选择了第一个,第二行选择除第一个外的其它所有元素。有三个元素的类似。
6使用表单提交
提交请求有两种方式,一种是ajax,另外一种是表单提交。很多人都知道ajax,但往往忽略了还有个form提交。
假设在首页有一个搜索的表单,点击search的时候就跳到列表页

你可以一个个去获取所有的input的值,然后把它拼到网址参数重定向一下,但是其实可以不用这样,用一个表单提交就好了:
<form id="search-form" action="/search">
   <input type="search" name="keyword">
   <input type="number" name="price"></form>
将所有字段的名字写在input的name里面,然后form的action为搜索页的链接。这样子不用一行js代码就能够搜索跳转。
如果你需要做表单验证,那就监听submit事件,然后做验证,验证通过则调一下原生的submit就可以提交了,也是不需要手动去获取form的值
7自动监听回车事件
这个的场景是希望按回车的时候能够触发请求,像第6点,按回车实现跳转,或者是像下面的,按下回车就送一条聊天消息:
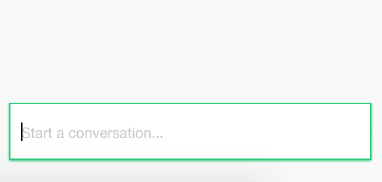
通常的做法是监听下keypress事件,然后检查一下keycode是不是回车,如果是则发请求。
但是其实有个特别简单的办法,也是不需要一行JS,那就是把表单写在一个form里面,按回车会自动触发submit事件。读者可以自己试试。这个就启示我们要用语义的html组织,而不是全部都用div。如果用相应的html标签,浏览器会自动做一些优化,特别是表单提交的input。
JS是万能的,几乎可以做任何事情,但是有时候会显得十分笨拙,在js/html/css三者间灵活地切换,往往会极大地简化开发,没有谁是最好的语言,只有适不适合。只要用得好,不管黑猫白猫,都是好猫。
更多If the problem can be solved with html/css, dont use JS相关文章请关注PHP中文网!


