 Web Front-end
 PS Tutorial
 PS photo retouching丨This is how the magazine cover model was retouched
PS photo retouching丨This is how the magazine cover model was retouched
The author has unique insights into character editing. He processes light and shadow based on the structural diagram of the face. In this way, the processed portrait has natural light and shadow, and the effect is very ideal.
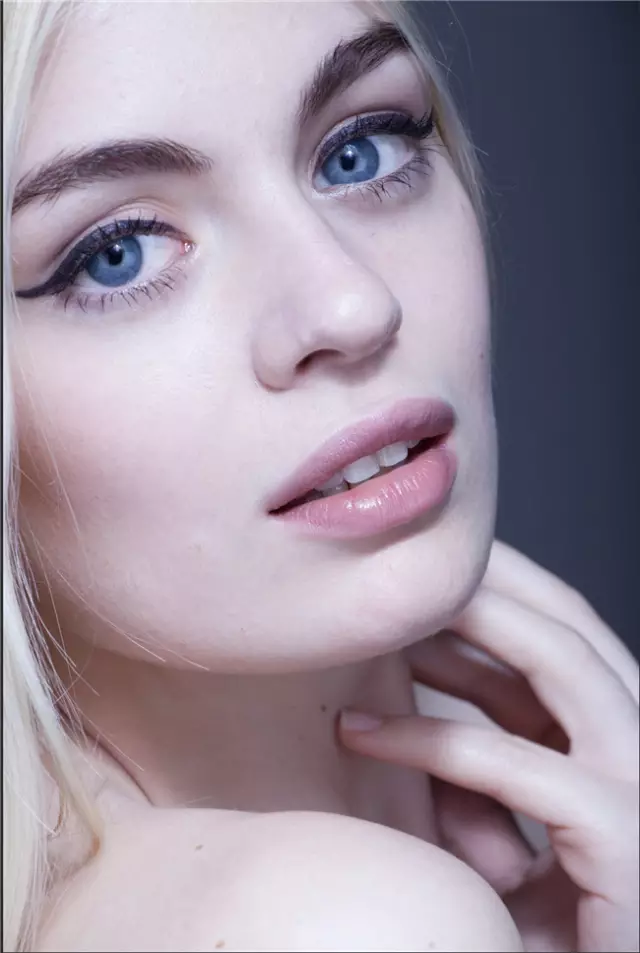
Original image
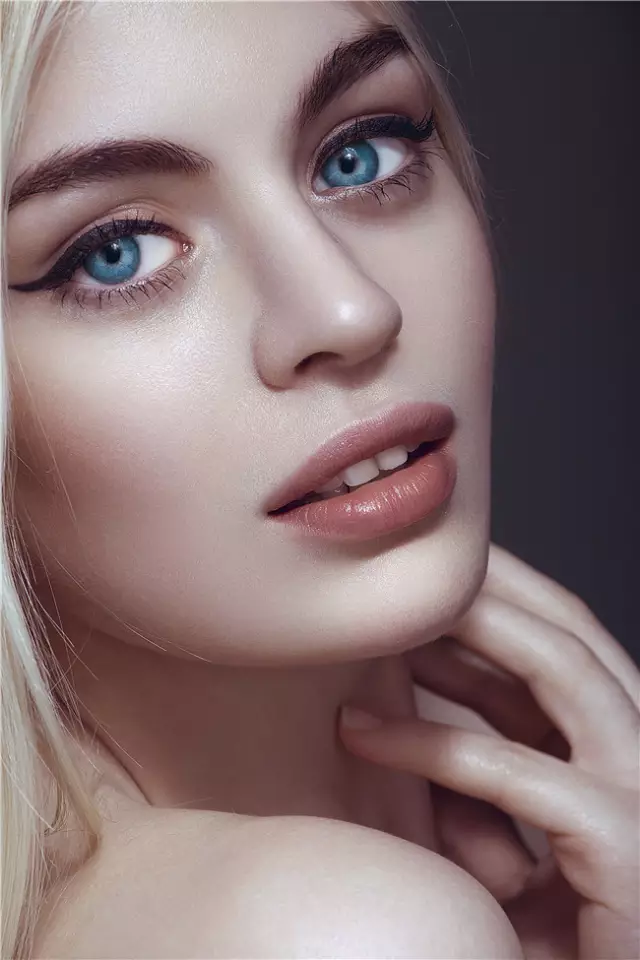
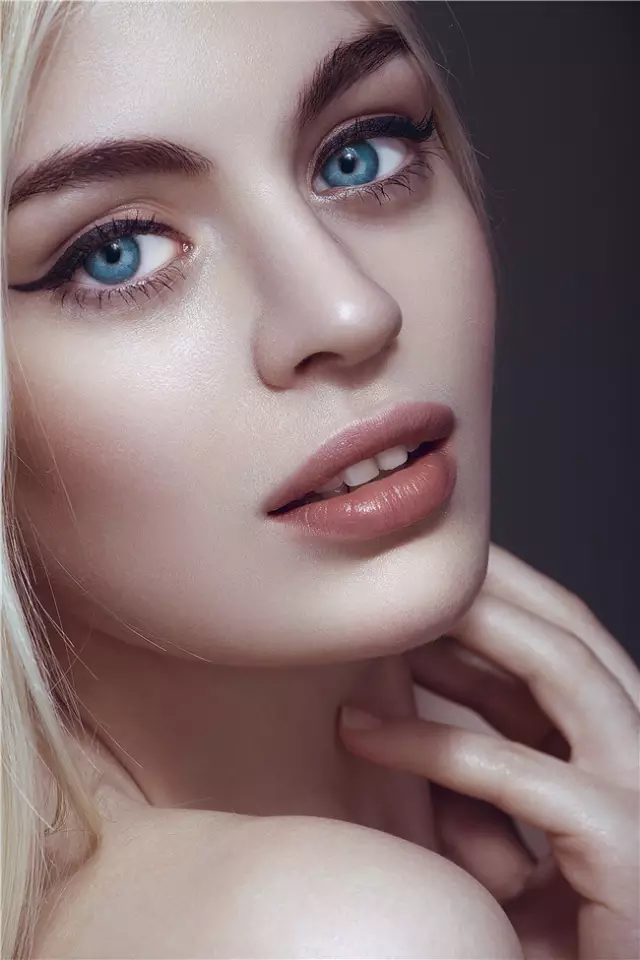
Final effect
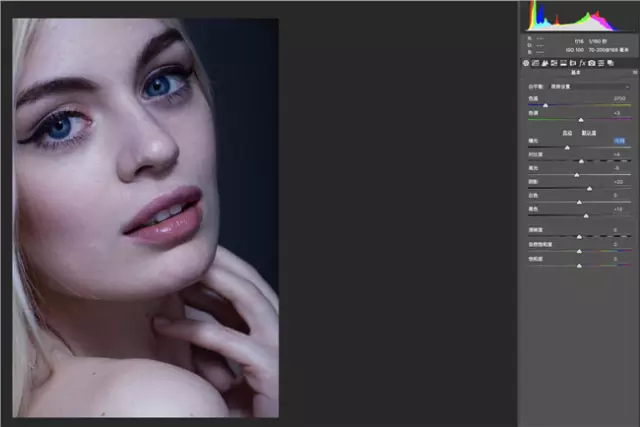
1 , when we transfer the film, we lower the exposure and increase the contrast. Let’s first bring back some of the texture of the image.
#2. Next, we create an observation layer and turn the film into black and white to observe the light and shadow.
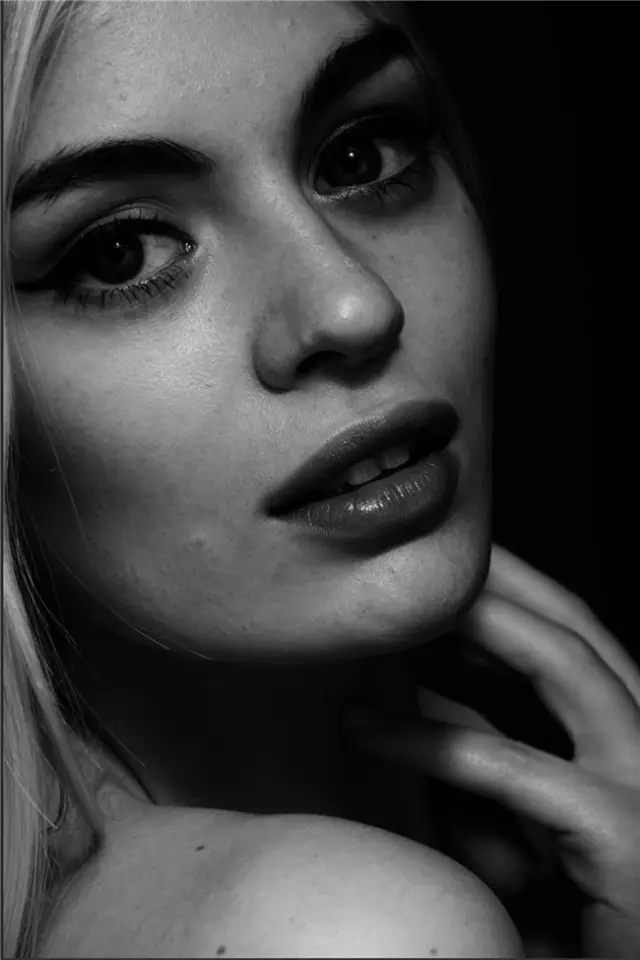
3. We can find that the light and shadow in these areas are very messy. These are the main reasons why our films are dirty, messy, and flowery. How do we deal with this mess? The light and shadow make our film look three-dimensional and clean.
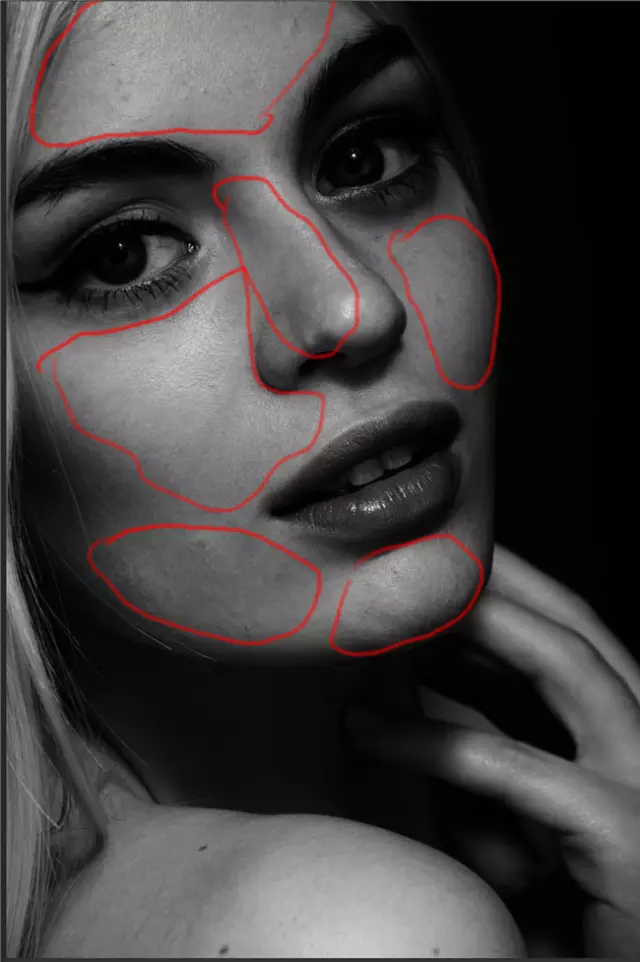
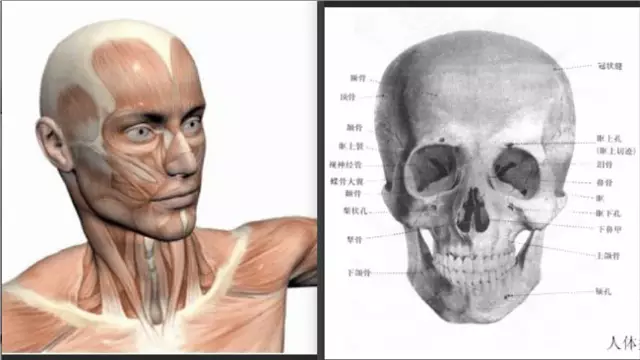
#4. First, we need to understand that a human face is composed of bones, muscles, and skin, and the three are related to each other.
The bones support the highlight points, the muscles connect and fill the main bones, and the skin is the most superficial material (what we call texture). If you only modify the surface of the skin and don't pay attention to the bone points and muscle directions, your picture will be a mess.
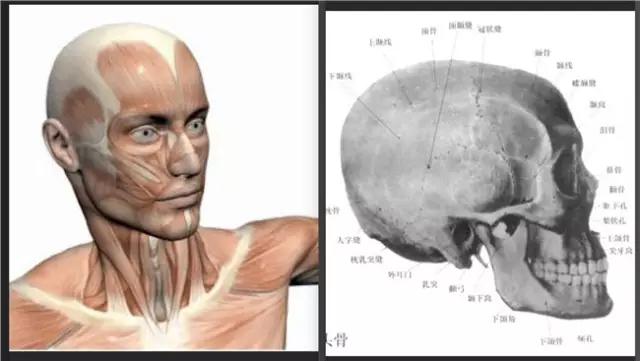
We first need to analyze the character's bones to find the locations of several important structures. We will observe them with the example of the character's skull, so that it is clear at a glance! Find the forehead, cheekbones, mouth, chin, and mandible.
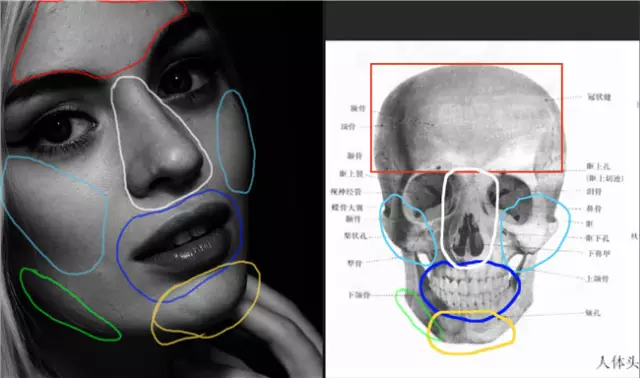
6. We have said that muscles play an important role in connecting bones, so let’s observe the direction of muscles [ps: If you use stamps to follow the direction of muscles, I don’t know how to retouch pictures, except for novices]. When you retouch the picture, you can simulate the movements of the muscles hidden deep under the skin in your mind. You will no longer scribble on them. You will know which places are concave and which are convex. Below we will still explain it with pictures.
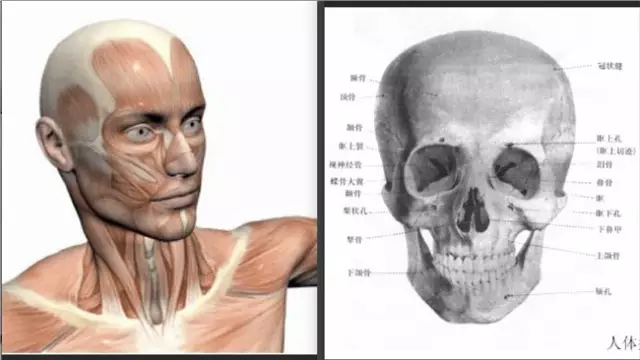
#7. First remove the big flaws on the picture.
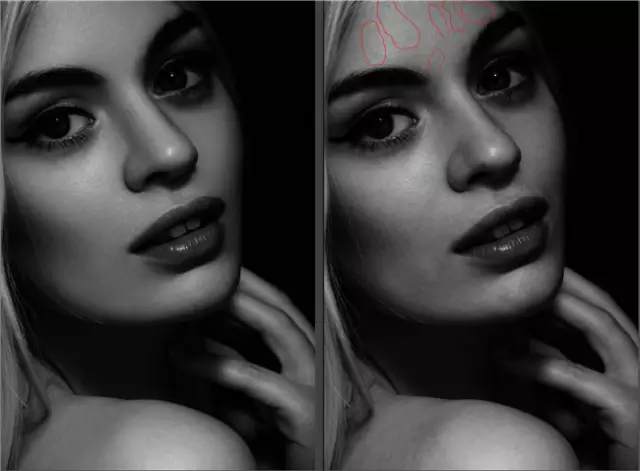
Starting from the forehead, the shape of the forehead has a curvature, we need to resolve the elements that affect the retouching [I use neutral gray here, the method is not limited] The so-called fullness of the heaven refers to the convex middle and the two sides slowly sliding down. According to each person's forehead, we can just make a transition from left to right. There is no need to change the flat forehead into an oval.
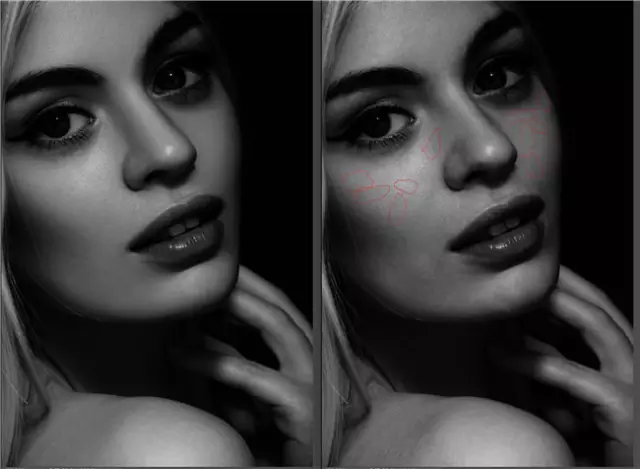
#9. Next, let’s look at the problem between the cheekbones and the nose. We can see that there are some obvious black and white areas on the side of the nose and in front of the cheekbones. We use the darken and dodge method to slowly transition these uneven areas, so that the transition between the two important structures becomes gentle.
10. Next is the transition from the cheekbones to the mouth. The transition from the cheekbones to the mouth is concave at first, and then slowly raised. You can touch your face to feel it. We can also see that the nasolabial folds and the area above the mouth are very disharmonious and look very dirty. We use the same method to transition them.
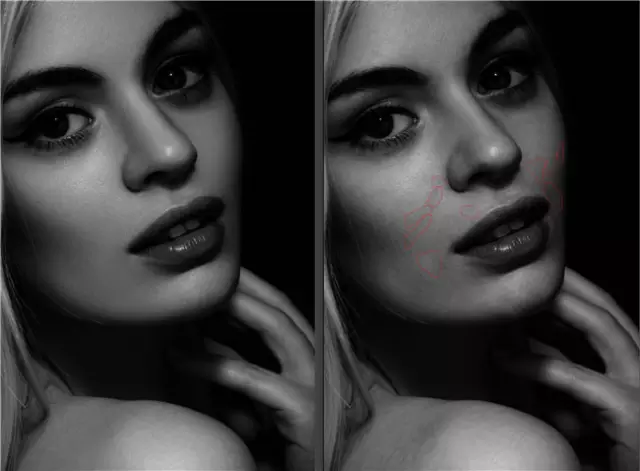
11. The next step is from the cheekbone to the lower jaw. This is also an arc. It is concave first and then protrudes. This transition is very important. You must remember this arc. , you need to find this arc in the original image, and then according to the shape of the original image, appropriately strengthen it without obvious, make an obvious transition, and solve the small patches on this curve one by one.
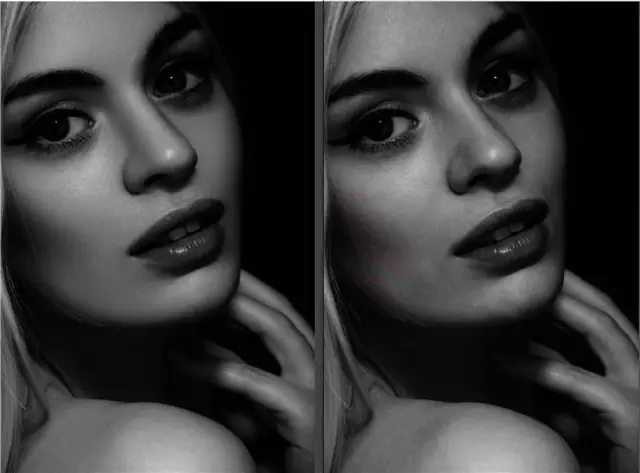
12. Finally, there is the chin, which extends from the middle to both sides and slowly connects with the lower jaw. We must pay attention to the connection here and make the grayscale look harmonious. The transition should not be too bright or dark, otherwise it will affect the realism of the picture.
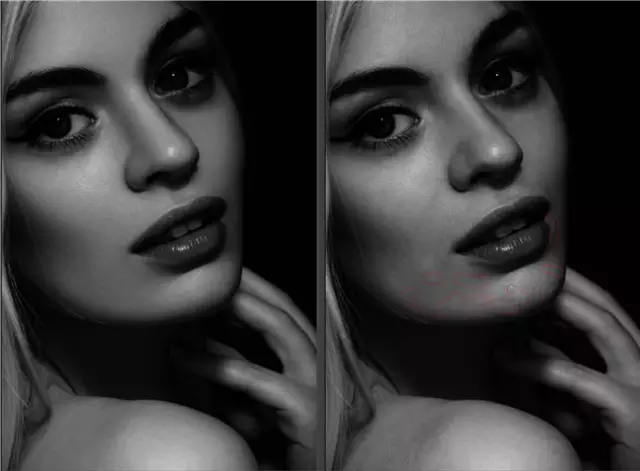
13. Also, we should pay attention when connecting these shapes with the mouth. The mouth is a convex cylinder, so we must move slowly to the position of the mouth. Carry out the embossing slowly, and don't let one grayscale go directly to the mouth. Otherwise, no matter how detailed you are in shaping it, your mouth will look like it is attached to the picture instead of growing on your body.
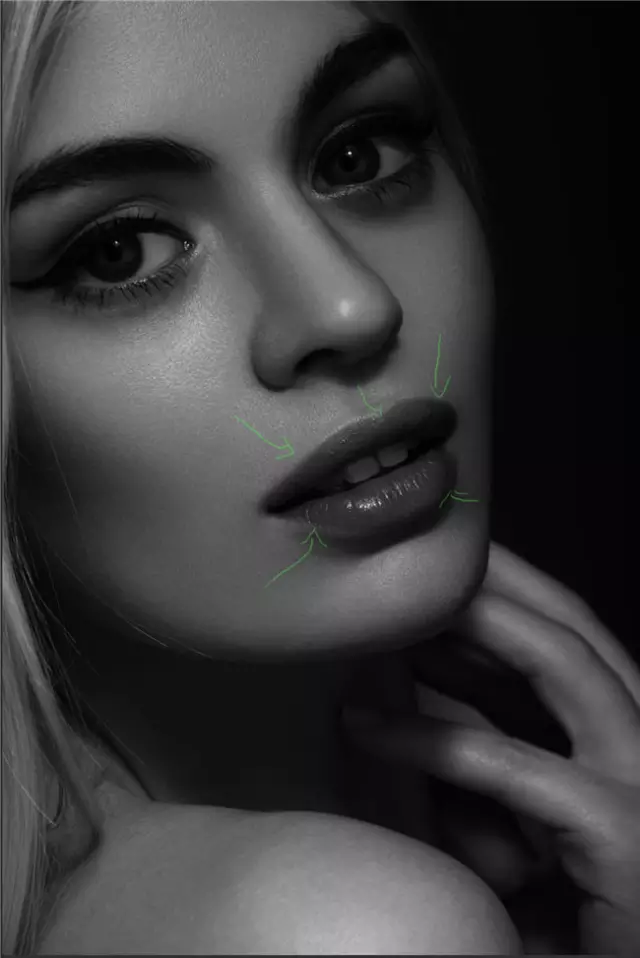
14. Next, we turn off the observation group and enhance the highlights of the picture to make the picture shine through.
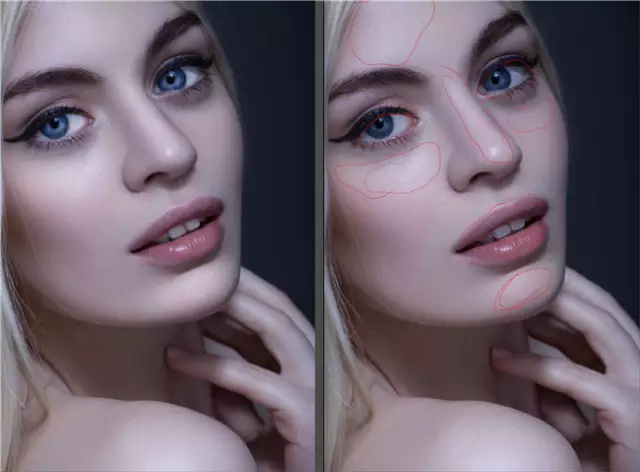
#15. Darken the shadow part. Here I use curves and mask wiping to make the character more three-dimensional, but you should pay attention to the degree. If it is too much, it will be dirty.
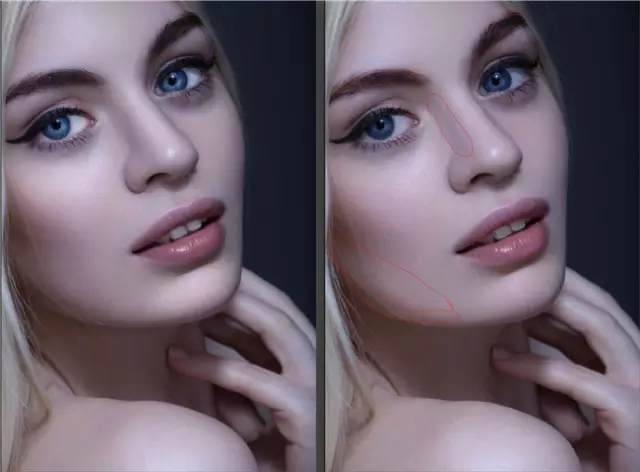
#16. Finally, we add some sharpening to make the texture level on the picture better. In this way, our retouching is complete.
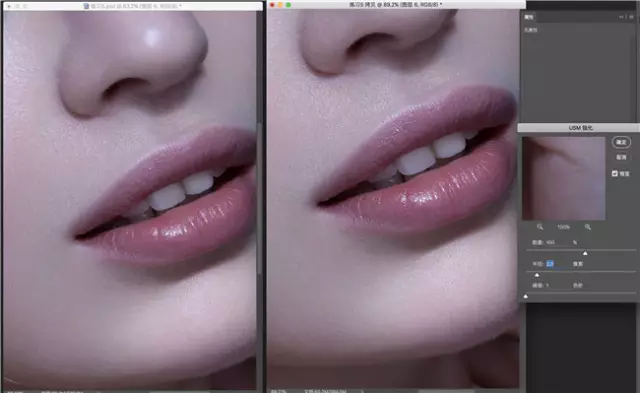
The rest is some color grading and detail adjustments.
Final effect:
Thanks for supporting the PHP Chinese website!

Hot AI Tools

Undresser.AI Undress
AI-powered app for creating realistic nude photos

AI Clothes Remover
Online AI tool for removing clothes from photos.

Undress AI Tool
Undress images for free

Clothoff.io
AI clothes remover

Video Face Swap
Swap faces in any video effortlessly with our completely free AI face swap tool!

Hot Article

Hot Tools

Notepad++7.3.1
Easy-to-use and free code editor

SublimeText3 Chinese version
Chinese version, very easy to use

Zend Studio 13.0.1
Powerful PHP integrated development environment

Dreamweaver CS6
Visual web development tools

SublimeText3 Mac version
God-level code editing software (SublimeText3)

Hot Topics
 1387
1387
 52
52
 What is the reason why PS keeps showing loading?
Apr 06, 2025 pm 06:39 PM
PS "Loading" problems are caused by resource access or processing problems: hard disk reading speed is slow or bad: Use CrystalDiskInfo to check the hard disk health and replace the problematic hard disk. Insufficient memory: Upgrade memory to meet PS's needs for high-resolution images and complex layer processing. Graphics card drivers are outdated or corrupted: Update the drivers to optimize communication between the PS and the graphics card. File paths are too long or file names have special characters: use short paths and avoid special characters. PS's own problem: Reinstall or repair the PS installer.
 What are the common questions about exporting PDF on PS
Apr 06, 2025 pm 04:51 PM
Frequently Asked Questions and Solutions when Exporting PS as PDF: Font Embedding Problems: Check the "Font" option, select "Embed" or convert the font into a curve (path). Color deviation problem: convert the file into CMYK mode and adjust the color; directly exporting it with RGB requires psychological preparation for preview and color deviation. Resolution and file size issues: Choose resolution according to actual conditions, or use the compression option to optimize file size. Special effects issue: Merge (flatten) layers before exporting, or weigh the pros and cons.
 How to solve the problem of loading when PS is always showing that it is loading?
Apr 06, 2025 pm 06:30 PM
PS card is "Loading"? Solutions include: checking the computer configuration (memory, hard disk, processor), cleaning hard disk fragmentation, updating the graphics card driver, adjusting PS settings, reinstalling PS, and developing good programming habits.
 How to speed up the loading speed of PS?
Apr 06, 2025 pm 06:27 PM
Solving the problem of slow Photoshop startup requires a multi-pronged approach, including: upgrading hardware (memory, solid-state drive, CPU); uninstalling outdated or incompatible plug-ins; cleaning up system garbage and excessive background programs regularly; closing irrelevant programs with caution; avoiding opening a large number of files during startup.
 How to set password protection for export PDF on PS
Apr 06, 2025 pm 04:45 PM
Export password-protected PDF in Photoshop: Open the image file. Click "File"> "Export"> "Export as PDF". Set the "Security" option and enter the same password twice. Click "Export" to generate a PDF file.
 How to use PS Pen Tool
Apr 06, 2025 pm 10:15 PM
The Pen Tool is a tool that creates precise paths and shapes, and is used by: Select the Pen Tool (P). Sets Path, Fill, Stroke, and Shape options. Click Create anchor point, drag the curve to release the Create anchor point. Press Ctrl/Cmd Alt/Opt to delete the anchor point, drag and move the anchor point, and click Adjust curve. Click the first anchor to close the path to create a shape, and double-click the last anchor to create an open path.
 How to solve the problem of loading when the PS opens the file?
Apr 06, 2025 pm 06:33 PM
"Loading" stuttering occurs when opening a file on PS. The reasons may include: too large or corrupted file, insufficient memory, slow hard disk speed, graphics card driver problems, PS version or plug-in conflicts. The solutions are: check file size and integrity, increase memory, upgrade hard disk, update graphics card driver, uninstall or disable suspicious plug-ins, and reinstall PS. This problem can be effectively solved by gradually checking and making good use of PS performance settings and developing good file management habits.
 How to draw vector PS
Apr 06, 2025 pm 10:00 PM
Vector diagrams are images created using mathematical curves with the advantages of scalability, clarity, and small file size. Drawing vector graphics requires using vector editing software to create images by creating shapes, combining shapes, adding colors, adding text, grouping and layers.


