 Web Front-end
 PS Tutorial
 PS web design tutorial XII - Create professional web2.0 web page layout in PS
PS web design tutorial XII - Create professional web2.0 web page layout in PS
As a coder, my art foundation is weak. We can refer to some mature web PS tutorials to improve our design capabilities. To paraphrase a sentence, "If you are familiar with three hundred Tang poems, you can recite them even if you don't know how to compose them."
The tutorials in this series come from online PS tutorials, all from abroad, and all in English. I try to translate these excellent tutorials. Due to limited translation capabilities, the details of the translation still need to be worked out. I hope that netizens will give you some advice.
Convention:
1. The software used in this article is Photoshop CS5 version
2. The screenshots of the original tutorial are in English. I took them again based on the re-production. Chinese version of Figure
3. Some operations in the original text do not give parameters. I measured some parameters through repeated testing, which are shown in red text. For some wrong parameters, the correct parameters are displayed directly in red text
For example: (90, 22, 231, 77) , indicating that the coordinates of the upper left corner of the rectangle are (90, 22) , width 231, height 77
For example: (90,22), indicating that the coordinates of the upper left corner of the rectangle are (90,22), the other two parameters of the rectangle have been specified in the tutorial
4. My own experience will be attached at the end of the tutorial. Some are optimizations of some steps in the tutorial, etc.
In this Photoshop tutorial we're going to learn how to create a web 2.0 layout, As we go through the tutorial we'll deal with so many Photoshop techniques. Seems kind of long ? that's because it's very detailed. I assure you'll find easy to follow and to get done, just give it a try!
In this PS tutorial, we will learn how to create web 2.0 Layout, we'll learn a lot of Photoshop tricks as we go through this tutorial. Seems too long? This is because it is very detailed. I promise you'll find it easy if you follow these steps, give it a try!
#Step 1
To keep everything aligned we're going to use 960s Grid System (Get it from here) once downloaded open up the file “960_grid_24_col.psd”.
We'll start by creating layer from background, right-click on the layer “Background”, then choose Layer From Background. and call it “bg”.
Step 1
In order to align the elements, we are going to use the 960s Grid System (obtained from here). After downloading, open the 960_grid_24_col.psd file
Start by creating the layer from the background, Right-click on Background, select the background layer, and name it bg
Since this translation does not use the 960s Grid System, this step is changed to create a new document, size: 1020px*1800px
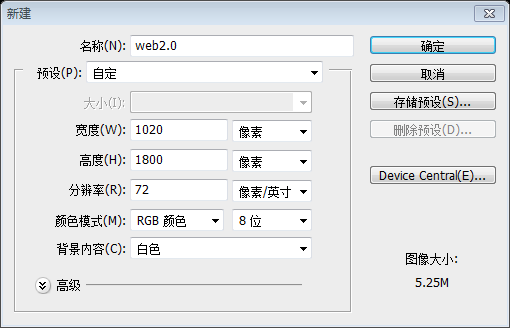
Step 2
As we'll use guides so much, we need to view our Rulers. In order to do that go to View > Rulers.
Step 2
We need guides, we need to show our rulers. To do this, click: View > Ruler
Step 3
We need to set lower borders for the header area, therefore we'll drag a new horizontal guide after 100px. go to View > New Guide, Position: 100.
Step 3
We need to set the border of the head area. To do this drag a horizontal guide at 100px. Click: View> New Guide, Position: 100
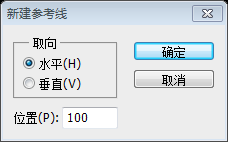
Step 4
Let's create our header. we'll start by creating a selection of 1020x100px. then click Shift+Backspace to fill it (with any color just for now).
Step 4
Now create the head area. We first create a 1020px*100px selection. Then press Shift+Backspace to fill (fill with the current foreground color)
Suggestion: A less common approach, generally use the rectangle tool to create a rectangle (0, 0, 1020, 100), the difference is The rectangle tool will create a new layer
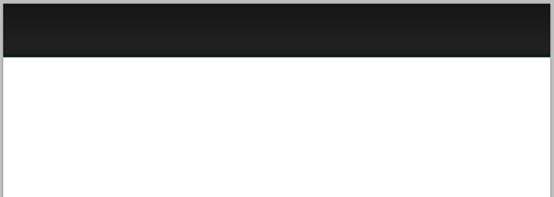
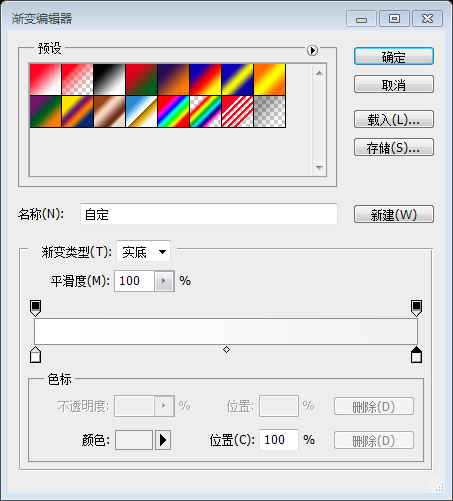
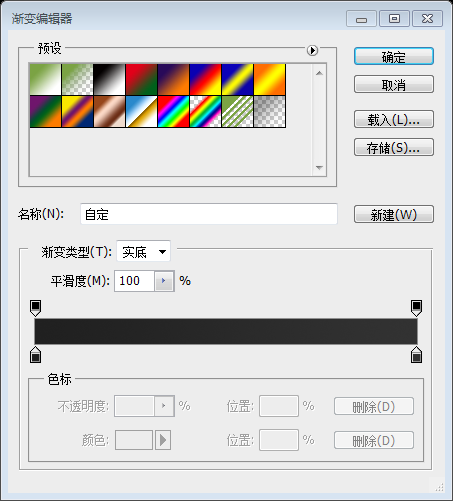
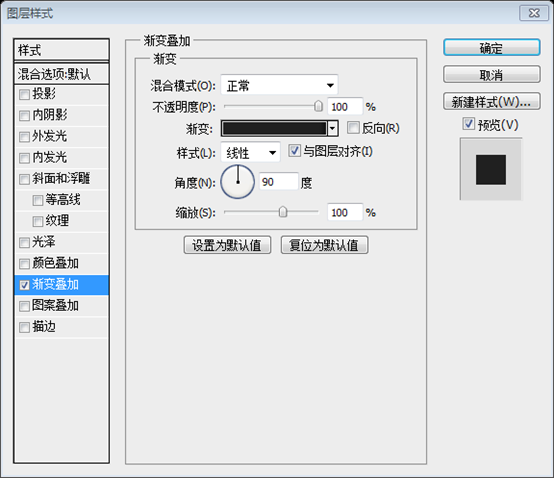
Give it a Gradient Overlay according to the following image:
Set the rectangle according to the image below Gradient Overlay Layer Style
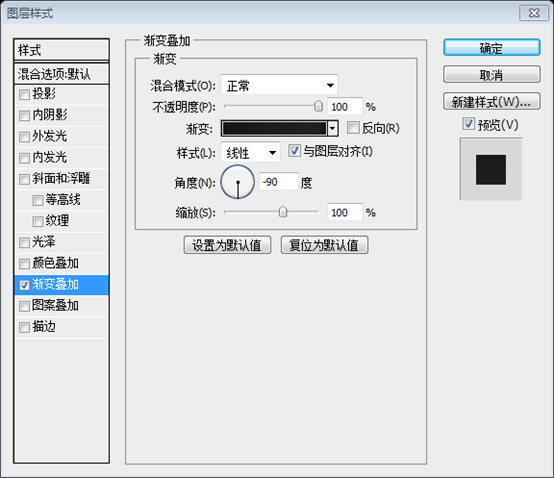
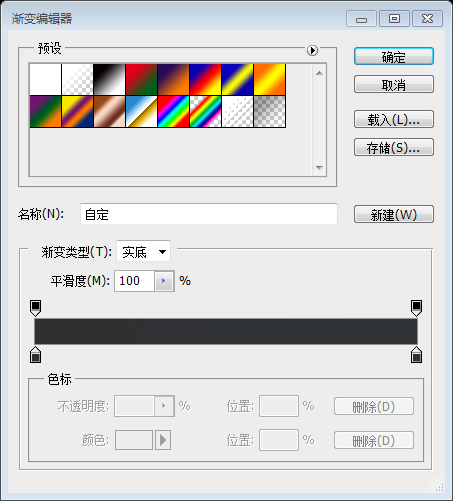
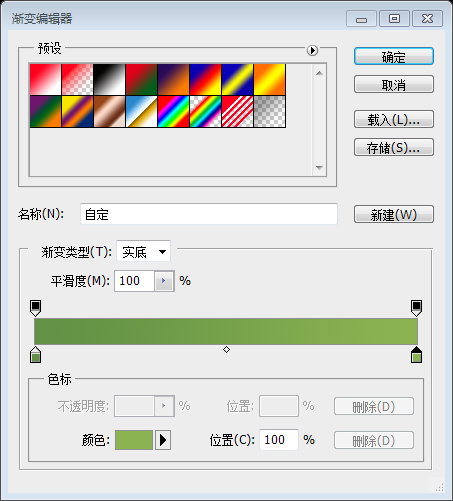
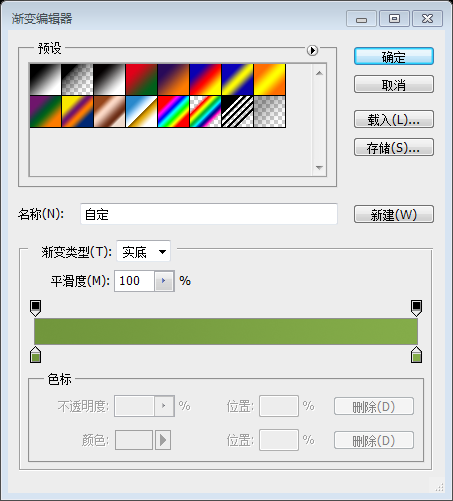
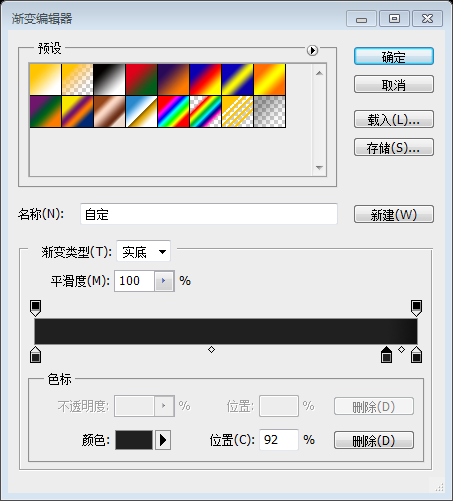
Gradient Editor Colors: #161616, #202020, #131313
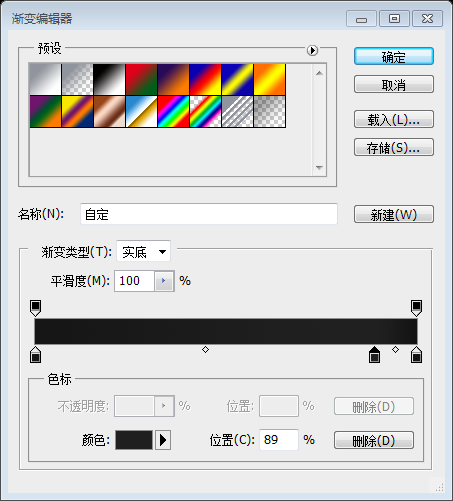
Now call this layer: “header_bg”.
Name this layer header_bg
Step 5
Write your Web site title with these settings:
Font Family : Rockwell (get it from here)
Font size: 30px
Font weight : Regular
Anti-aliasing setting: Smooth
##Color: Won 't matter, cause we're gonna give it a Gradient Overlay
Step 5
Follow the settings below , use the text tool to add the title of the websiteFont: Rockwell
Font size: 30px
Font style: Regular
Anti-aliasing method: Smooth
Color: No setting is required because we are going to add a gradient overlay


Click: Layer> Alignment> Vertical Center )

Step 6
Write your navigation text with these settings:Font Family: Arial
Font size: 20px
-
Font weight: Regular
- ##Anti-aliasing setting
: Smooth
- Color
: #ffffff
Add navigation text according to the settings below:
- Font:
Arial
- Font Size:
20px
- Font style:
Regular
- Anti-aliased style:
Smooth
- Color :
#ffffff
 Create a rounded rectangle which will represent a hovered link. it should be about 65x35px size – 5px radius, (fill it with any color for now).
Add a rounded rectangle
(551,33)to the hovered link. Size: 65px*35px, radius 5px, (fill with any color)
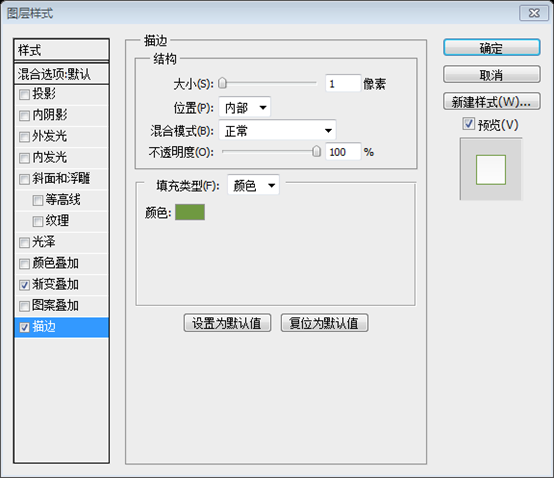
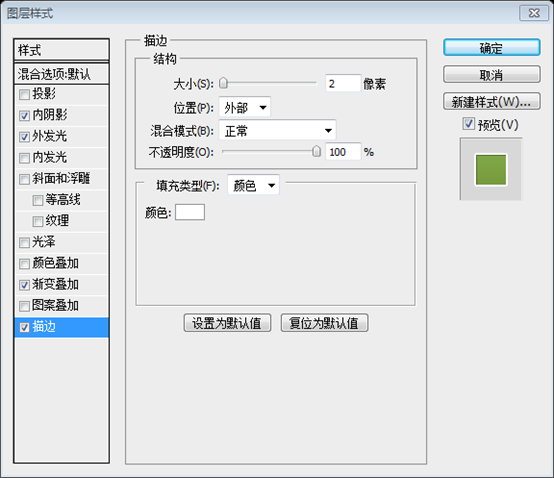
Give it a Stroke and Gradient Overlay according to the following image:
Adjust the circle according to the image below Set the layer style of stroke and gradient overlay for the corner rectangle:
Stroke color: #9dca5d

Gradient editor colors: #528037, #84ac49

Before we move to the next step, just make sure to keep your layers well-organized, Here's how mine looks!
Before taking the next step, just make sure to keep your layers well-organized (Merge these layers into the header group), here is what I did!

Step 7
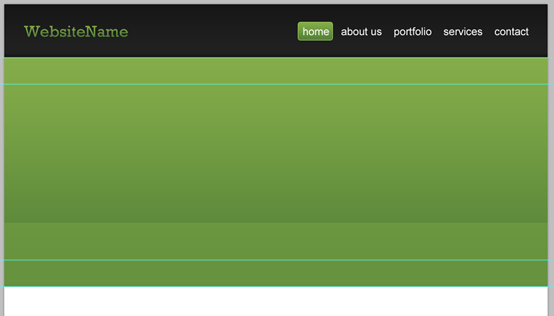
It's time to create the featured designs area. we'll start by setting our lower borders by adding a new horizontal guide after 430px.
Step 7
It’s time to create a featured area. To set the border, add a horizontal guide 430px below the previous horizontal guide.
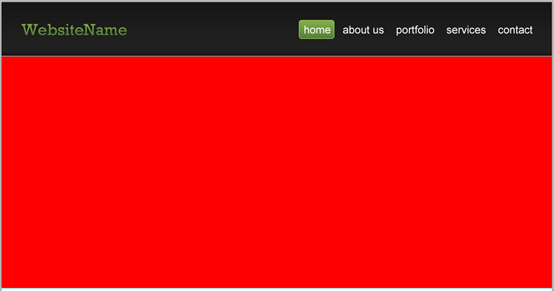
Create a selection of 1020x430px as a background for the featured designs area. and fill it with any color.
Add a background to the featured area and create a 1020px*430px of the constituency. Fill it with any color.
Suggestion: Use the rectangle tool to create a new rectangle (0, 100, 1020, 430)

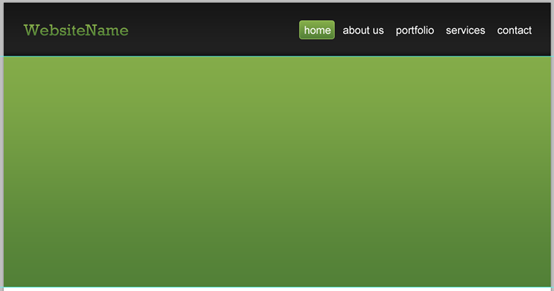
##Now let's create the glaze effect! create a selection of 1020x120px, fill it with any color.
Create a bright glaze effect now! Create a selection of 1020px*120px and fill it with any color.
Suggestion: Use the rectangle tool to create a new rectangle (0, 410, 1020, 120)
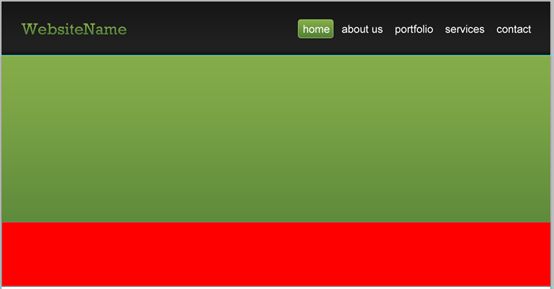
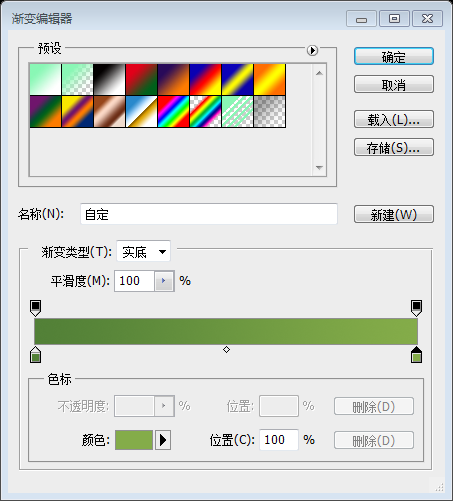
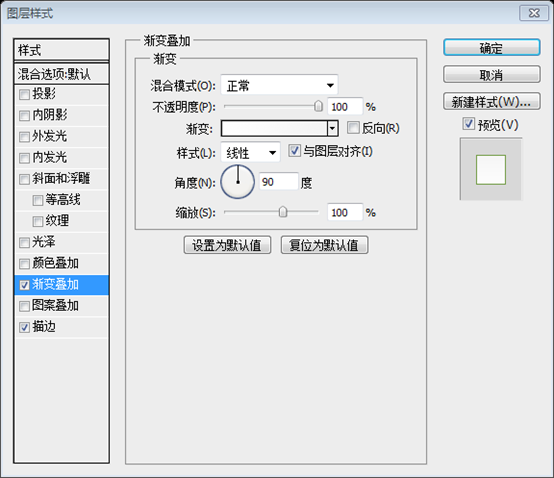
And then add a Gradient Overlay. use the image below for reference.
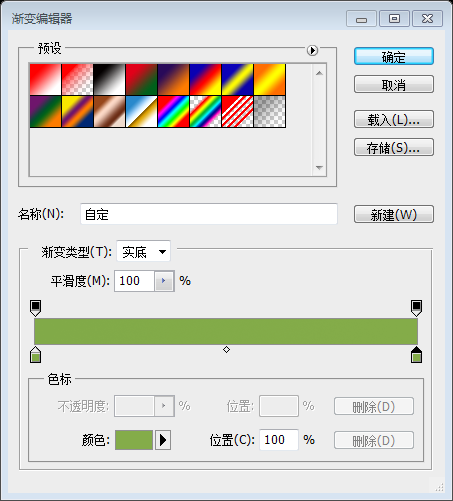
Then set the color of the gradient overlay
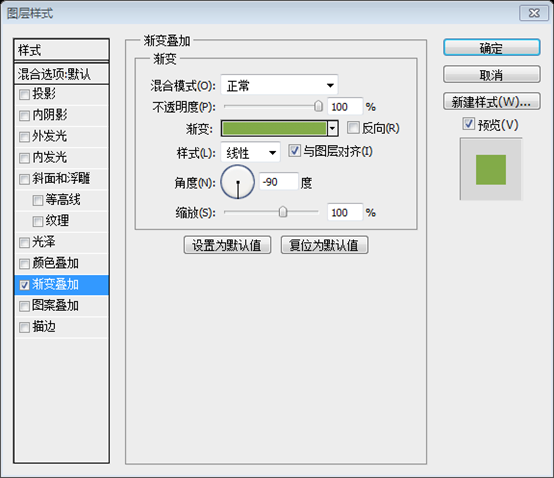 gradient editor as shown below: #81aa48, #84ac49
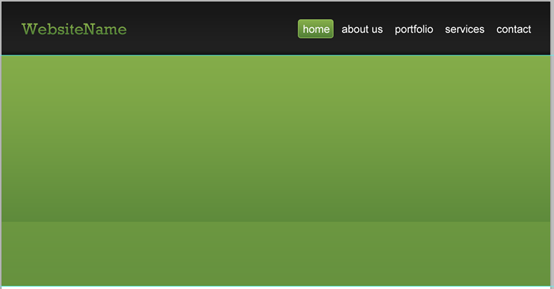
Now reduce this layer opacity to 40%
Adjust the opacity of this layer to 40%
Step 8
Let's add some touches! with the Single Row Marquee Tool create a 1px selection and align it like the following:
Now add some polish! Use the single line selection tool to create a 1px selection and align it as follows
Set your foreground color to #acd86e then click on Shift+Backspace to fill it; make sure to use foreground color as a filling option.
Set your foreground color to #acd86e, then press Shift+Backspace to fill the selection; make sure the fill mode is the foreground color.
Suggestion: Use the straight line tool to create a straight line (0, 100, 1020, 1), color: #acd86e.

I guarantee you'll have perfect pixel details
I guarantee you'll have perfect single-pixel components
We're done creating the background elements. so make sure to give them ideal names, organize them, and group them together.
We're done creating the background elements. Be sure to give them ideal names, organize them, and group them together.
Step 9
Let us be more accurate! drag two new guides according to the following image
Step 9
For more precise positioning! Drag two guide lines as shown below (50px inside of the previous two guide lines)
Write some welcoming words with these settings :
Font Family: Rockwell
##Font size: 40px
Font weight: Regular
Anti-aliasing setting: Sharp
Color: #f4f4f4
Font: Rockwell
Font Size: 40px
Font Style: Regular
Anti-aliased style: Sharp
Color: #f4f4f4
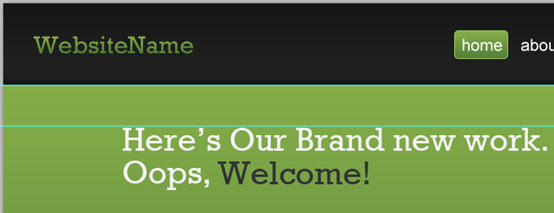
In order to solve this step perfectly, use the text tool to write Here's our brand new work. and Oops and Welcome!, and then add a gradient overlay layer style to Welcome!

##Now drag two new horizontal guides according to the following image
Now drag two new horizontal guides according to the image below (one aligned with the bottom of the text, the other 50px below the previous reference line),
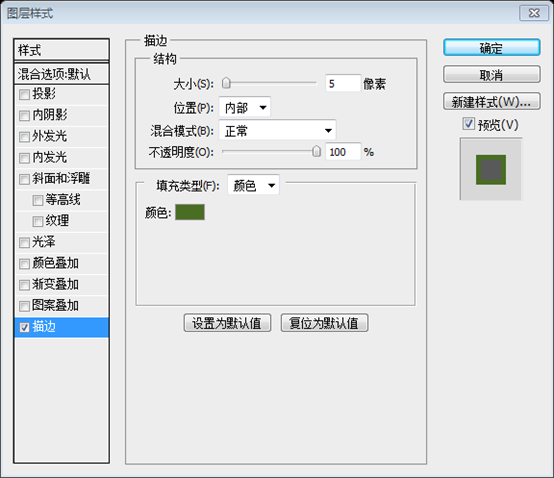
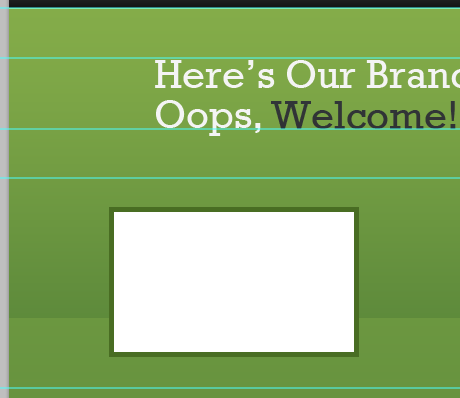
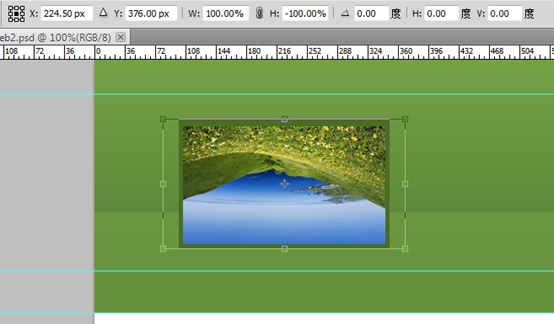
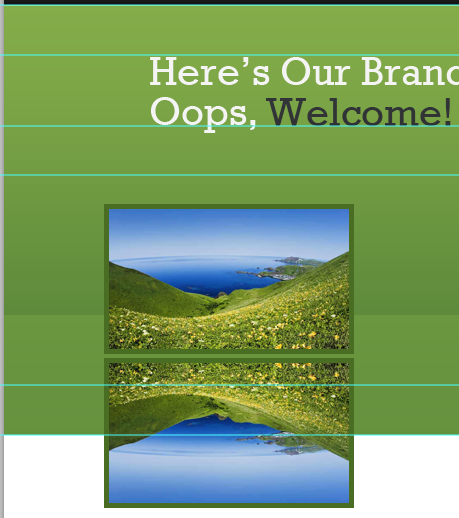
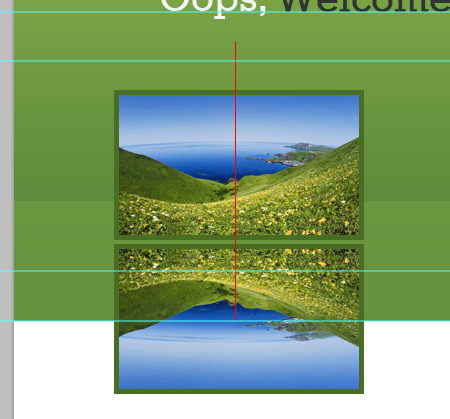
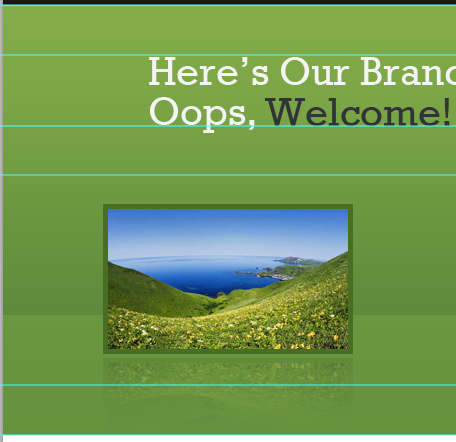
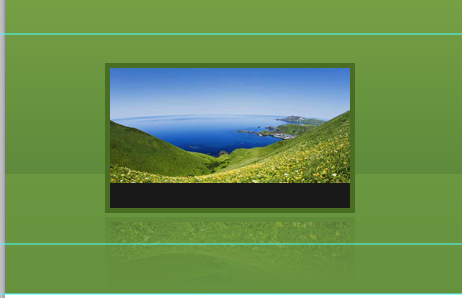
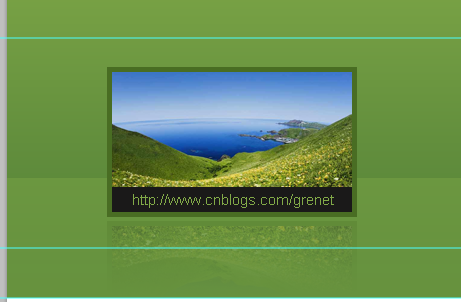
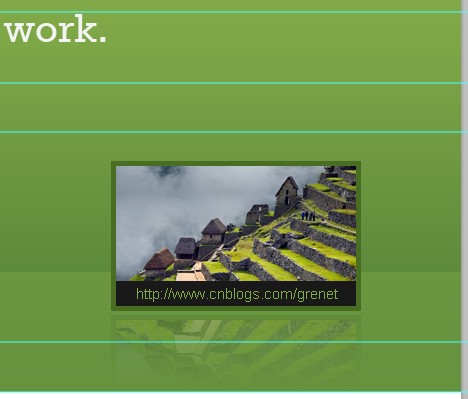
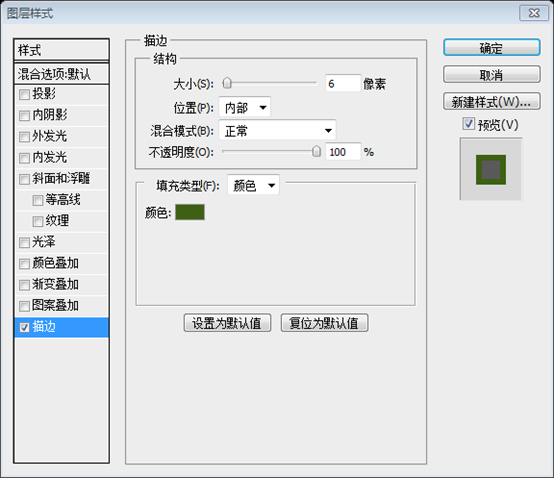
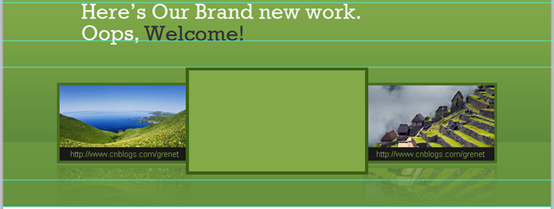
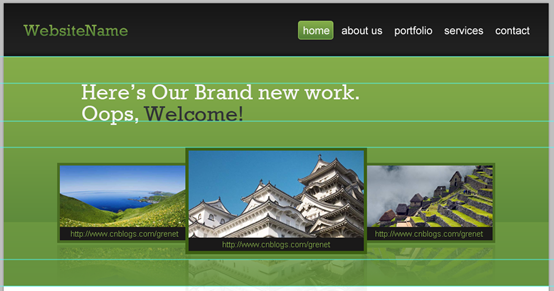
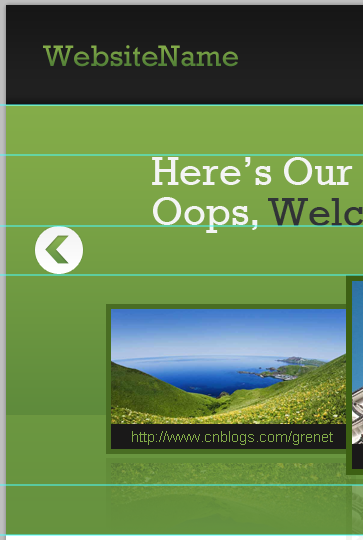
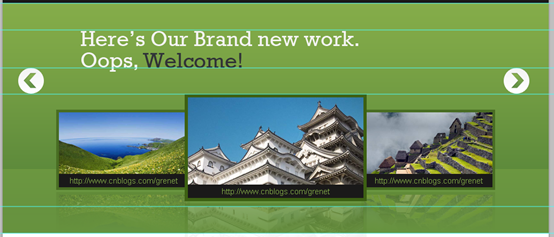
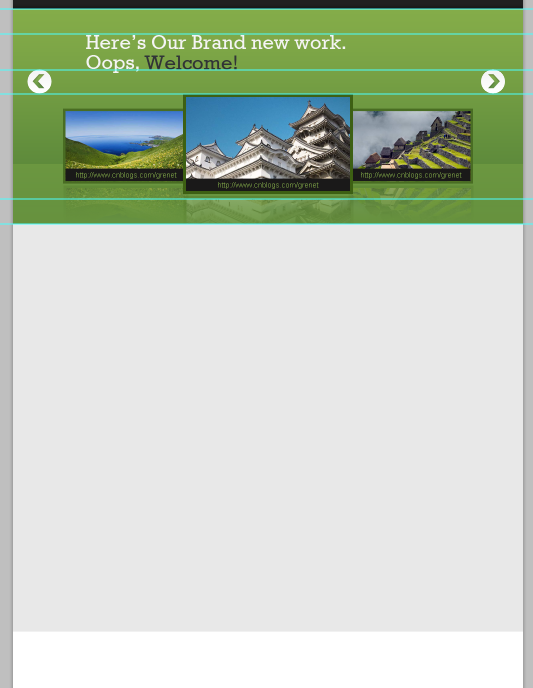
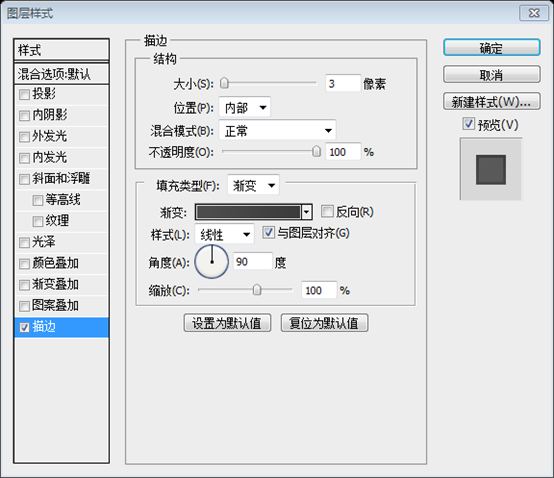
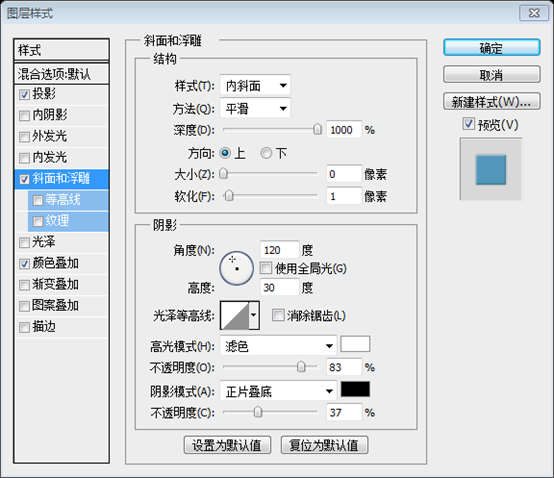
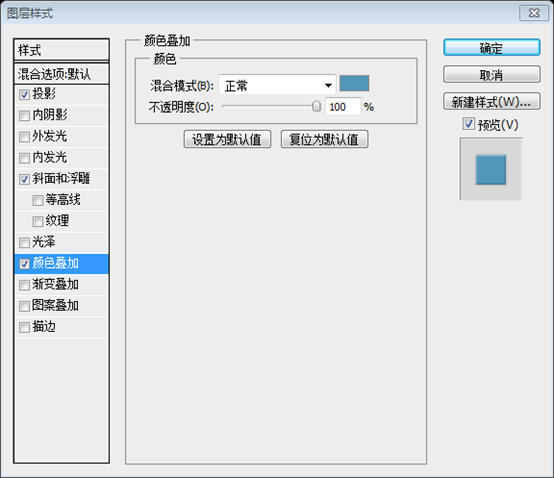
By calculating the positions of the two reference lines, they are roughly 220px and 270px Before we say goodbye to this step, just make sure to organize your text layers. Before we say goodbye to this step, organize Your text layers (merged into a group) Step 10 Start by creating a selection of 250x150px (fill it with any color ), this will be our image holder. Call this layer “pic_holder” and try aligning it like the image above.And give it a Stroke Step 10 Create a selection, size: 250px*150px (fill with any color), this will be our picture block Name this layer pic_holder, move it to the appropriate position as shown below, and Add a stroke as shown below Suggestion: Use the Rectangle Tool to create a new rectangle (100, 299), and add a stroke layer style as shown below Stroke color: #496d23 Step 11 Step 11 ##While we're still selecting the two duplicated layers right-click on them and choose Convert to Smart Object; call this layer “shadow”. and make sure to place it at the bottom. Right-click on the duplicated layers and choose Convert to Smart Object; Object, named shadow. Then move the layer below the original image Select “shadow” layer then click on Add layer mask (at the bottom of the layers panel) Select the shadow layer and click Add Layer Mask (at the bottom of the layers panel) Choose the Gradient Tool (G) and with a black, white linear gradient drag from down to top. Select the gradient tool, select the black-white linear gradient, and drag from bottom to top (shown as the red line in the picture below, drag from bottom to top) You should have something like this! The effect is as follows: Step 12 We need to add a description to our image. so we'll create a selection of 240x25px, and fill it with this color value: #1a1919, This will work as the description background. Step 12 You need to add a description text to the image. So we are going to create a selection with size: 240px*25px and fill it with color: #1a1919, which will serve as the background of the caption. Use the rectangle tool to create a new rectangle (105, 419) instead of this step. Color: #1a1919 Write some description with these character settings: Font Family: Arial Font size: 15px Font weight: Regular Anti-aliasing setting: None Color: #82aa48 Add caption according to the settings below: Font: Arial Font Size: 15px Font style: Regular Anti-aliased style: None Color: #82aa48 Step 13 Step 13 Use the rectangle tool to create a rectangle (340, 270) with any color. And add the stroke style as shown below, replacing the stroke color of in this step: #3d6013 Add images and shadows to the image blocks ##Make sure to organize your layers and to group them. I personally have created three separate groups. Here's how they look Organize your layers and merge them into groups where appropriate. I merged the layers of the three pictures into three groups Let's create our sliding button! we'll start by creating an Ellipse of 50x50px using the Elliptical Marquee Tool (M), and filling it with any color. Now give it some layer styles according to the following image Step 14 To create a sliding button! Use the Ellipse Selection Tool to create an elliptical selection, size: 50px*50px, fill it with any color Use the Ellipse Tool directly to create an ellipse (28, 220), size: 50px*50px, any color. Add a layer style to this layer as shown below Stroke color: #6f9941 Gradient editor colors: #ffffff, #f3f3f3 ##Make another copy of the arrow and align it to the right Copy an arrow on the right ##Step 15 Let's work on the content area. start by creating a selection of 1020x815px Step 15 The next step is to create the content area. First create a selection, size: 1020*815 After calculation in the following steps, this should be 1020*810 Suggestion: Use the rectangle tool directly to create a rectangle (0, 530, 1020, 810), color: #e8e8e8
Suggestion: Use the straight line tool to draw a horizontal straight line (0, 530, 1020, 1) which is relatively simple. Color: #ffffff
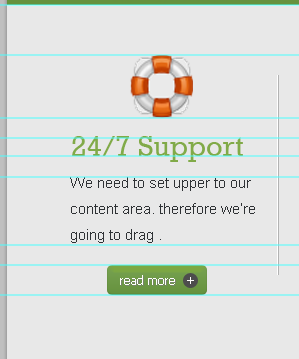
We need to set upper borders to our content area. therefore we're going to drag a new horizontal guide after 50px. Step 16 We need to set the boundaries of the content area. We need to drag a new horizontal guide 50px below the previous horizontal guide Download the icon: Basic Set – Pixel Mixer and place it as shown below Drag a new horizontal guide at the bottom of the icon, leave 20px then drag a new one. Drag a horizontal guide at the bottom of the icon, to Drag another horizontal guide line 20px below Now Write some heading with these settings: Font Family: Rockwell Font size: 29px Font weight: Regular Anti-aliasing setting: Sharp Color: #81aa48 Add header text according to the following settings: Font: Rockwell Font size: 29px ##Font style: Regular Anti-aliased style: Sharp Color: #81aa48 ##Write some text with these settings: : Arial : 15px
##Color Font Size: Font Style: Anti-aliased style: ##Color: Drag more three guides according to the following image Step 17
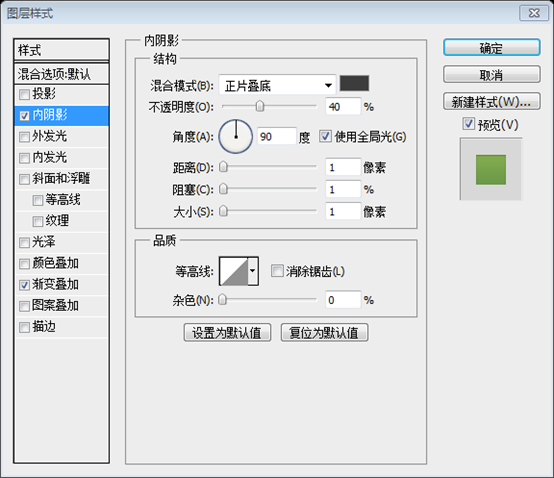
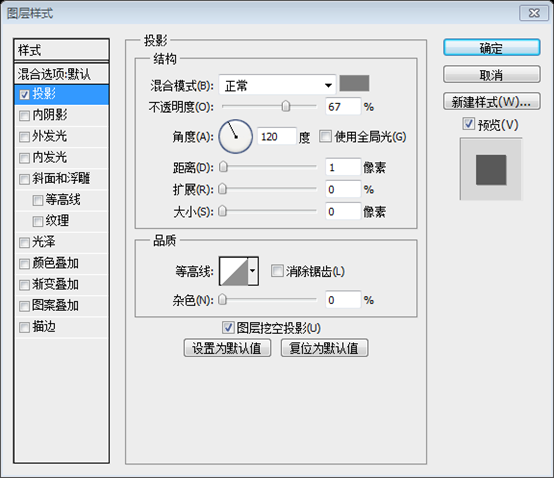
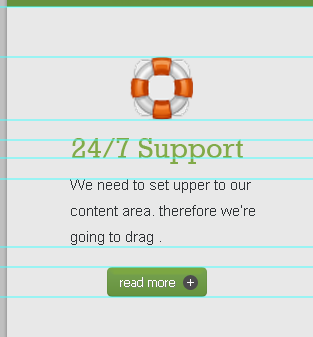
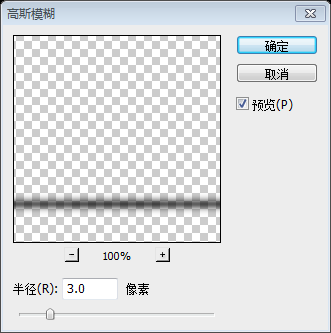
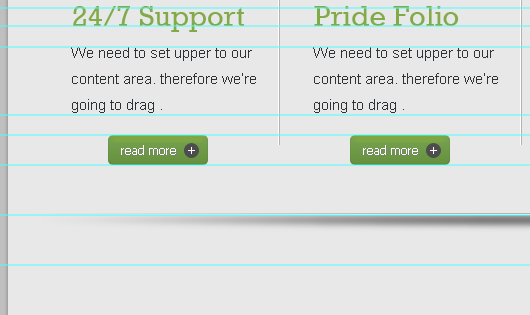
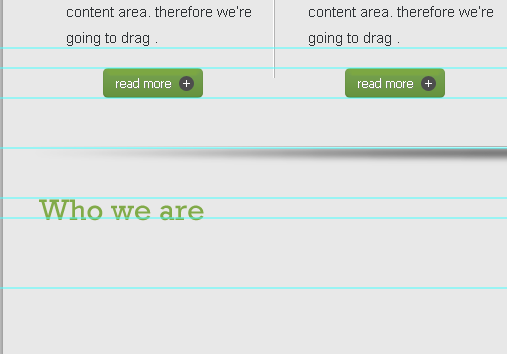
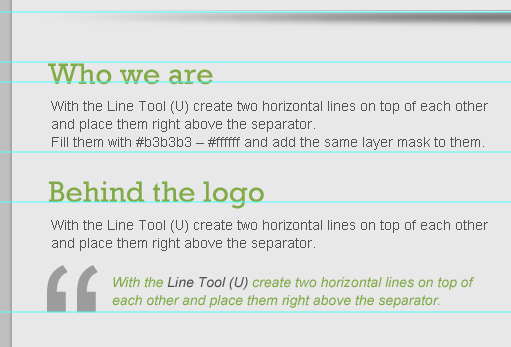
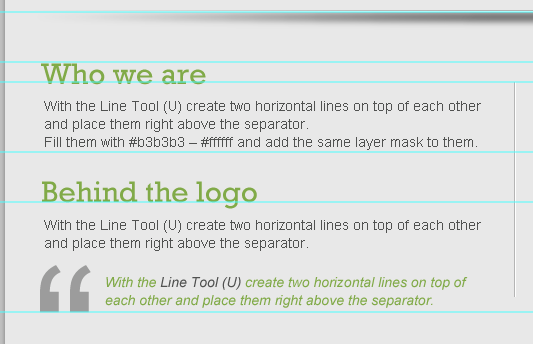
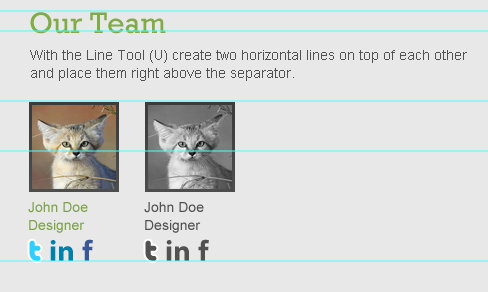
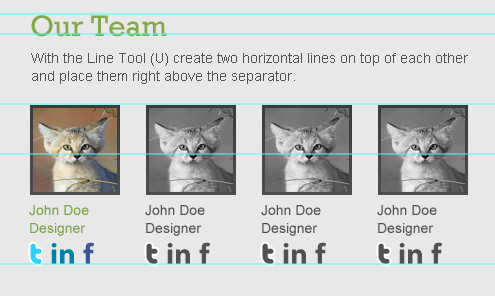
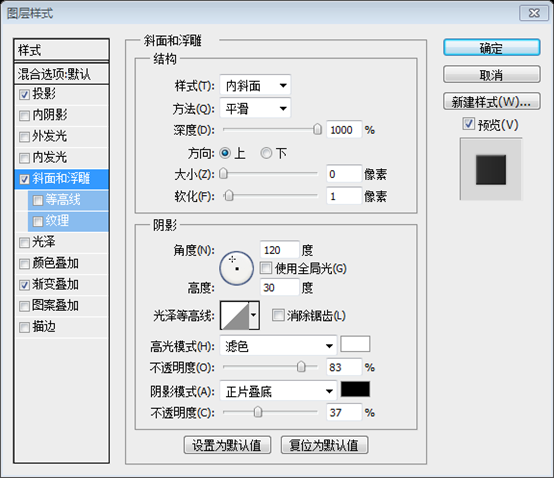
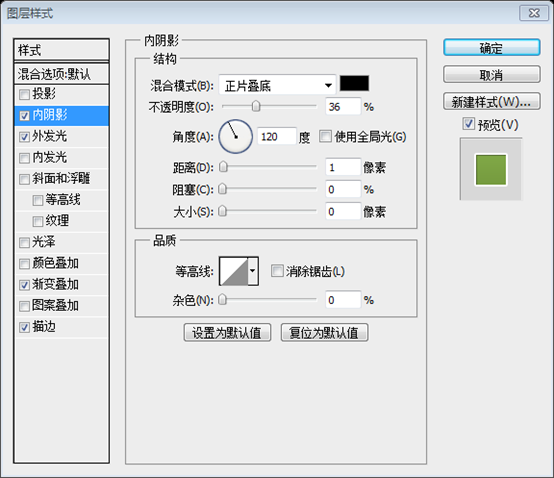
Give this rectangle some layer styles. use the image below for reference. Add layer styles to this rounded rectangle as shown below Color for highlight mode in Bevel and Emboss: #7da841 To align it correctly select its layer and the rectangle's layer then click Align vertical centers while having both layers selected. For precise alignment, select this layer and the rounded rectangle layer, then click Vertical Center Align ( ) Type “+”, fill it with white (#ffffff) and place it like this Enter +, fill it with white color, and place it as shown below Write the word “read more” with the following character settings: : Tahoma : 12px : Regular : None : #ffffff Add text according to the settings below read more: Tahoma 12px Regular None # ffffff Give it a drop shadow. use the image below for reference Add a drop shadow to the text. Set the projection and projection color as shown below: #7c7c7c To create a vertical separating line, With the Line Tool (U) create two vertical lines next to each. and fill them with these values: #ffffff – #b3b3b3. Step 18 Create a vertical dividing line, use the straight line tool to create two vertical straight lines ((270, 600, 1, 200) and (271,600,1,200)). The colors are: #ffffff and #b3b3b3 Align your line like the following image Align your line like the following image Don't forget to organize your layers. take a look at mine! Don't forget to organize your layers. Just like me. Step 19 Make three copies of what we've created in the previous two steps. and have something like this! Step 19 Copy the above two steps 3 times. Complete the following picture Step 20 #Let's create our separator. Step 20 Create a horizontal separator Create a new horizontal guide 50px below the previous horizontal guide With the Elliptical Marquee Tool (M) create a selection like the one below. Set your foreground color to black (#000000) then click Shift+Backspace to fill your selection. call this layer “separator_bg”. As shown below, use the Elliptical Selection Tool to create an elliptical selection Set your foreground color to black (#000000 ), then press Shift+Backspace to fill your selection. Name this layer separator_bg Suggestion: Use the Ellipse Tool to create an ellipse (30, 870, 960, 10), color: #000000 Press Ctrl+D to cancel the selection Click on Add layer mask icon. and set your gradient editor to black, white, black. Click the Add Layer Mask icon. And set your gradient editor to: black-white-black With the Gradient Tool (G) drag with a linear gradient according to the following image. Use the gradient tool to drag a linear gradient as shown below (drag horizontally from right to left, press Shift while dragging) Reduce the layer Opacity to 50% Adjust the opacity of the layer to 50% With the Line Tool (U) create two horizontal lines on top of each other and place them right above the separator. Use the straight line tool to create two horizontal straight lines((30,868,960,1) and (30,869,960,1)), just now Just above the separator fill their colors with #b3b3b3 and #ffffff respectively, and add the same layer mask as the separator Step 21 We'll start working on our lower content area, by dragging a new guide after 50px. Step 21 Now to create the lower content area, drag a new horizontal guide 50px below the previous guide Add a title with these character settings: Font Family: Rockwell Font size: 30px ##Font weight: Regular : Smooth : #81aa48
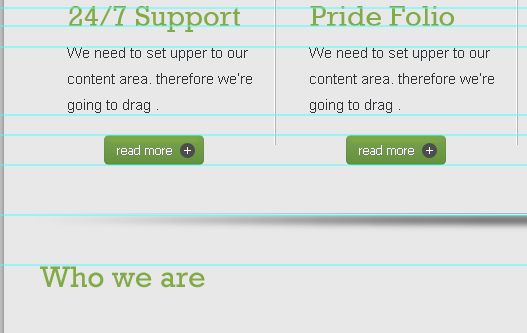
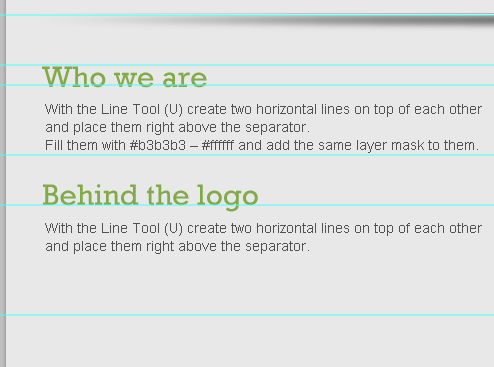
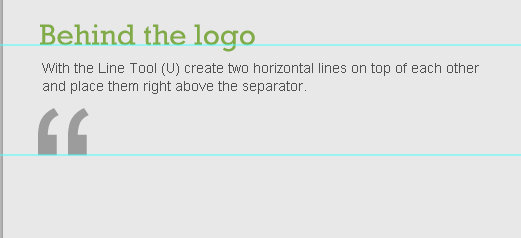
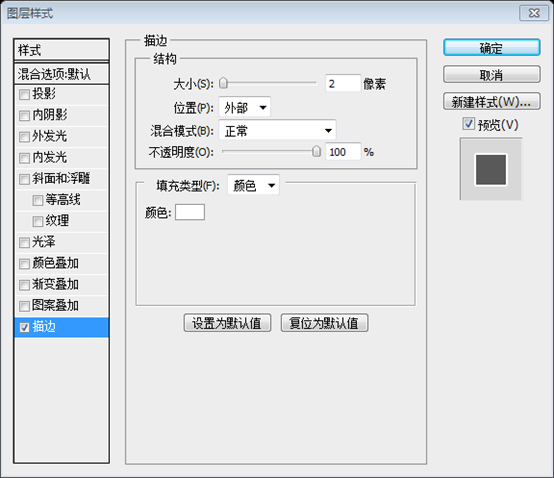
##Color: ##Drag two new horizontal guides according to the following image. Write some text with these character settings: Font Family Font size Font weight ##Anti-aliasing setting: None Color: #505150 Add text according to the following settings: Arial Font Size: 14px Font style: Regular Anti-aliased style: None Color: #505150 Step 22 Write another title and text using the same character settings we've used in the previous step. Step 22 Add another title and text using the same evil settings as in the previous step. (As shown below, first create a new horizontal reference line 50px below the penultimate horizontal reference line) Type a quotation mark on your keyboard, with these character settings: Font Family: Arial Font size: 200px Font weight: Regular ##Anti-aliasing setting: Smooth Color: #505150 Press the quotation mark on the keyboard to enter a double quotation mark and follow the settings below: Arial 200px Regular Smooth #505150 Write a word of wise or quote of yours with these character settings: : Arial : 14px : Italic : Smooth Enter some thoughts or quotes, follow the settings below: ##Font Style: Color: In order to create a vertical separating line, create two vertical lines next to each other, and fill them with these values: #ffffff – #b3b3b3. Create a vertical separator and create two vertical straight lines( (509, 940, 1, 215) and (510, 940, 1, 215)) , the colors are #ffffff and #b3b3b3 Make sure to keep your layer organized, Here's how I organized them. Layer grouping Write yet another title like the ones on the left (Try writing something that represents the team, for example I've written “Our Team”). Write the same title and text on the right side as on the left ( Try writing something to represent the team, for example, Our Team here) (546, 1011) This will be a picture block for team member photos. Now add the stroke layer style to it as shown below Colors from Gradient Editor: #4d4d4d, #3b3b3b Place a photo of a member and call its layer “photo1″. Make sure that the layer “photo1″ is right above “ photo1_holder” layer. then right-click on “photo1″ layer and choose Create clipping mask. You should come up with something like below! Insert a photo of the member and name this layer photo1. Make sure the photo1 layer is directly above the photo1_holder layer. Right-click on the photo1 layer and select Create Clipping Mask. Your work should look like this Step 25 Step 25 Write some text about the member, using these character settings: Font Family: Arial Font size: 14px ##Font weight: Regular Anti-aliasing setting: Smooth Color: #7ba344 Arial 14px Regular Smooth #7ba344
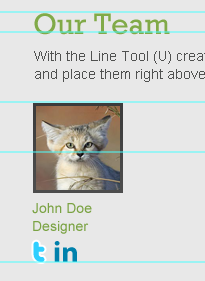
##Color Then Give it a Stroke according to the following image. Font size: Font style: Eliminate Zigzag style: Color: Then add a stroke to it as shown below Font size Font weight Anti-aliasing setting Color We create LinkedIn! Enter the in letters as follows: Font: Myriad Pro (get it from here) Font size: 30px Font style: Bold ##Anti-aliased style: smooth Color: #0081ac : Klavika (get it from here) : 30px : Bold : Smooth : #395796
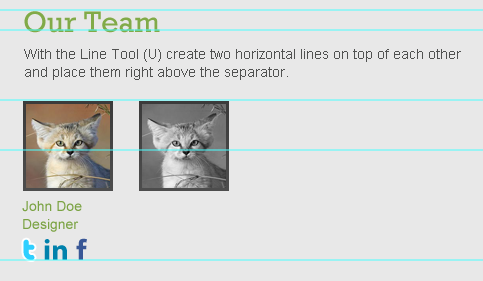
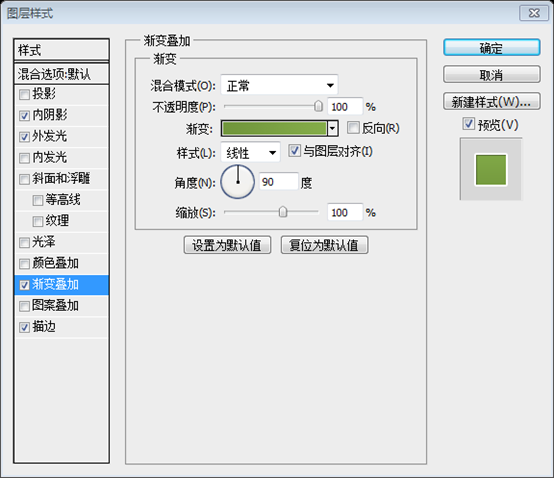
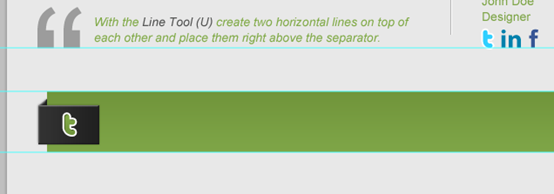
## Anti-aliasing style: Color: Make sure to check “ Use Previous Layer to Create Clipping Mask” Make sure Use previous layer to create clipping mask is checked Type the same text, social media letters we've written before using the same character settings, but give them all this color value: #505150. So obviously the member will look gray when it's not hovered! To make sure they're well-aligned, make four separate groups each one of them contains a member's content, and click on Distribute left edges in the control bar while having the four groups selected. Step 27 Step 27 Create a new horizontal guide line at the bottom of the content area Create a selection of about 940x70px and align it like the image below. Fill it with any color, and then give it a Gradient Overlay. use the image below for reference. Create a rectangular selection as shown below, size: 940px*70px Fill it with any color, and add a gradient overlay as shown below Recommendation: Use the rectangle tool to create a rectangle ( 46, 1220, 940, 70), add gradient overlay as shown below Color of Gradient Editor: #71953b, #7ea547 (36,1236), size: 70px*45px. Place it as shown below and add layer styles as shown below. Name this layer tw_bg
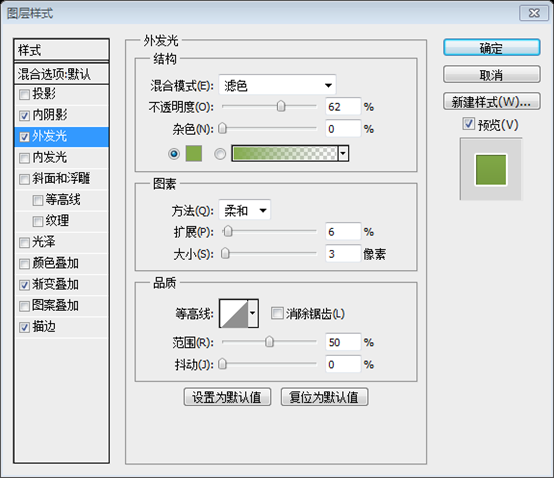
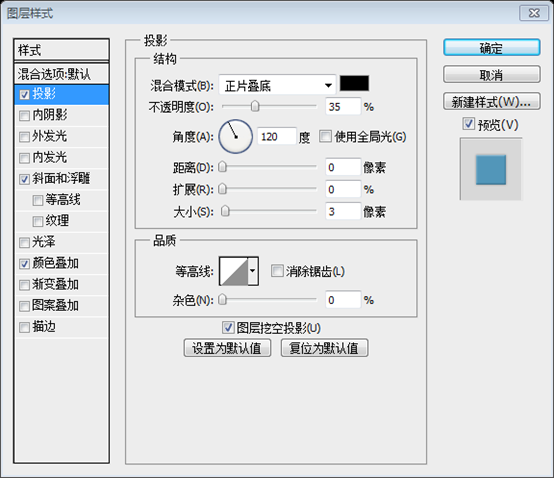
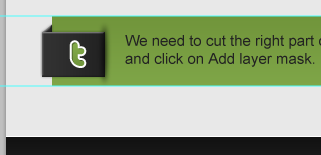
Also give it some layer styles according to the following image. Enter the letter t as follows: Font: Pico-Black (obtained from here) Font size: 35px Font style: Regular Anti-aliased Style: Smooth Color: Don’t worry because we are going to add a gradient overlay Then follow the below Figure sets layer styles. Outer glow color: #83ab48 Repeat step 20 to create another separator or even copy it. then place it this way: Repeat step 20 to create another separator or even make a copy. Then move to the position below:
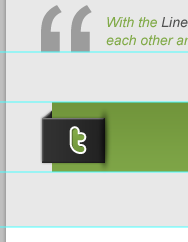
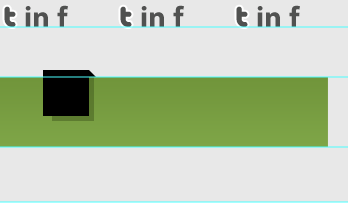
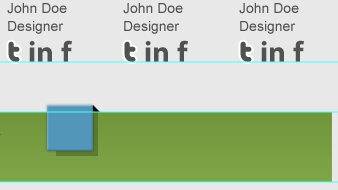
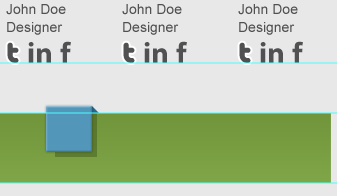
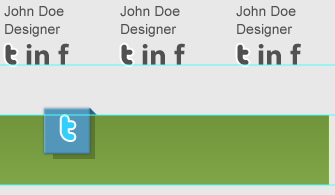
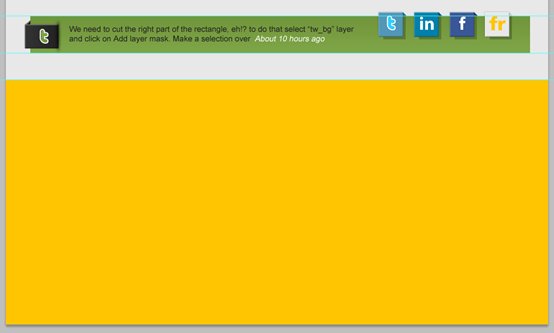
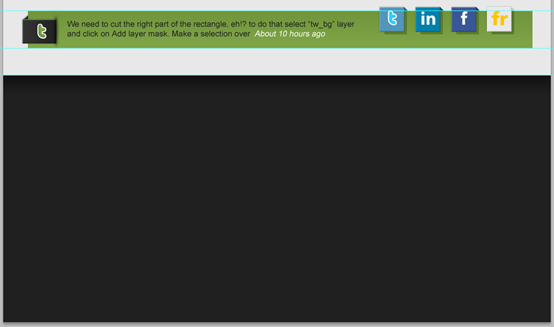
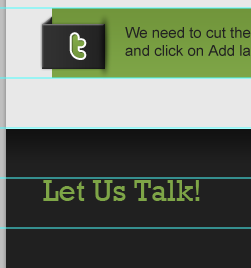
We need to cut the right part of the rectangle, eh!? to do that select “tw_bg” layer and click on Add layer mask. Create a selection on the right side of the rectangle (the part we want to cut away), set your foreground color to black (#000000) and press Shift +Backspace to fill it Step 29 Write some text – which is actually should be a Tweet – with these character settings: : Arial ##Font weight Anti-aliasing setting ##Color Enter some text using the settings below - it will look like a Tweet: Arial Font size: 15px ##Font style: Regular Anti-aliased style: Smooth Color: #222222 Click: Layer> Alignment> Vertical Center) Step 30 Step 30 First use the rectangle tool to create a new rectangle (701, 1213, 46, 46), and then create a triangle shadow on the right (There are many methods, not listed here), create a new rectangle (710, 1220, 42, 44), color: #334814, change the opacity to 40%, adjust the layer order reasonably, the effect is as follows ##Now fill the skewed rectangle with a darker color of this value: #2a6788 Give the skewed rectangle A dark color: #2a6788 Write “t” letter with these character settings: : Pico-Black : 35px : Regular
And give it a Stroke. use the image below for reference.
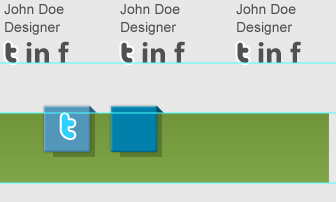
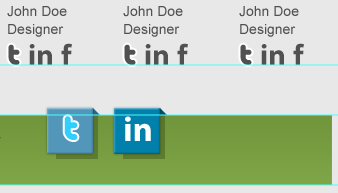
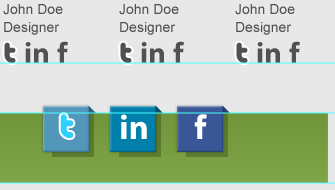
## Color: Then add a stroke to it as shown below Step 31 Make another copy of the Twitter icon, change the Color Overlay (for the big rectangle) to: #0080ab, and fill the skewed rectangle with this color value: #00526d. Step 31 Create another copy of the Twitter icon, change the color of the overlay The color (large rectangle) is: #0080ab, the color of the filled beveled rectangle (triangle shadow) is: #00526d Write the word “in” with these character settings: Font Family: Myriad Pro Font size: 35px ##Font weight: Bold : Smooth Enter the letters in according to the following settings:
(triangle shadow)
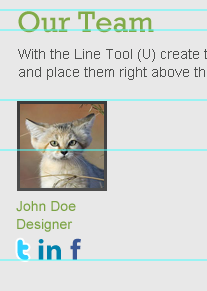
Enter the letter f according to the following settings:
##Font style: Anti-aliased style: ##Color:
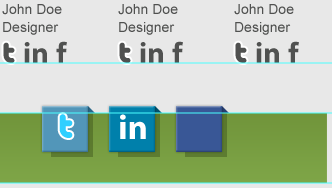
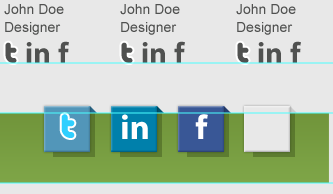
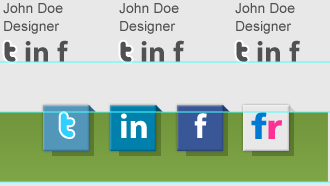
Make a last copy, change the Color Overlay (for the big rectangle) to: #e8e8e8, and fill the skewed rectangle with this color value : #cdcdcd. (triangle shadow) Write the word “fr” with these character settings: Font Family Font size Font weight Anti-aliasing setting ##Color: f: #0079d2 – r: # ff3093 Enter fr letters according to the following settings: Frutiger Black Font size: 35px Font style: Bold Anti-aliased style: Smooth Color: Color of f: #0079d2 and color of r: #ff3093 Step 32 Step 32 Suggestion: Use the rectangle tool to create a rectangle (0, 1340, 1020, 460) and fill it with any color Suggestion: Use the straight line tool to create a white horizontal line (0, 1340, 1020, 1) #Step 33 Step 33 Font Family: Rockwell : 30px : Regular : Sharp : #7ea547 Add a title using the settings below: Rockwell 30px Regular Sharp #7ea547 Write a sub-title with these character settings: Font size: 15px ##Font weight: Regular Anti-aliasing setting: None Color: #d3d3d3 Font: Arial Font size: 15px Font style: Regular Anti-aliasing style: 无 Color: #d3d3d3 Step 34 Step 34 (respectively (37, 1460) and (37, 1496)), size: 210px*25px, radius 5px, color: #141313, and add the inner shadow style as shown below : Arial : 15px : Regular : None
##Font style: Anti-aliased style: ## Color: Make a copy of the button we've created in step 17. and align it like the following image (37,1533)
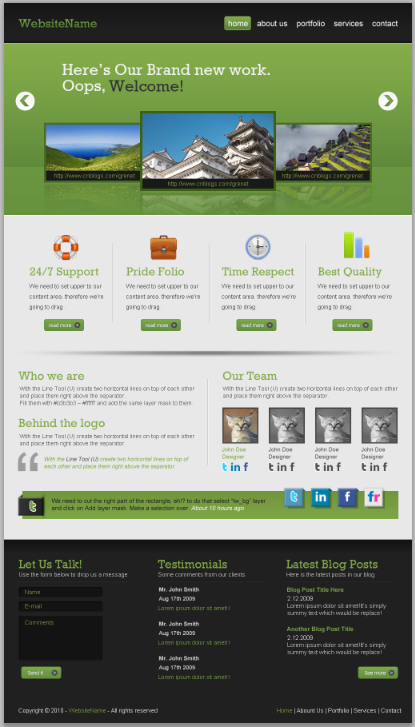
Step 35 Write another title like the one on the left. Step 35 Add another title like the one on the left Write some text . use the image below for reference. Add some text as shown below Step 36 Fill the right part with a third title and some text. Step 36 Fill the right part with a third title and some text. Step 37 We're almost there! drag a new horizontal guide after 50px. Step 37 We are still there! Drag a new horizontal guide 50px down Create two horizontal lines on top of each other, and fill them with these color values : #181818 – #2f2f2f. Create two horizontal lines next to each other and use these color values: #181818 (top) – #2f2f2f (bottom). Write some copyright text with these character settings: Font Family : Arial Font size: 15px Font weight: Regular Anti-aliasing setting: None Color: (#ffffff) – #82aa48 Add copyright information text according to the following settings: Font: Arial Font size: 15px Font style: Regular Anti-aliased style: None Color: (#ffffff) – #82aa48 Conclusion There we have it! we've created a professional-looking web 2.0 layout. As you can see the techniques used here are simple. but they get nice results. Conclusion We have it! We create professional looking web 2.0 layouts. You can see that simple techniques are used here. But they get good results. Postscript: This is the most detailed tutorial I have ever translated, down to every small step. The tutorial is very suitable for beginners to copy and learn. The highlights of this tutorial are two 1. The production of the picture slider in the featured area, which has a fresh and thorough feeling 2. The production of social media icons, Purely handmade, there is no process of importing images For more PS web design tutorials XII - Creating professional web2.0 web page layouts in PS, please pay attention to the PHP Chinese website for related articles! 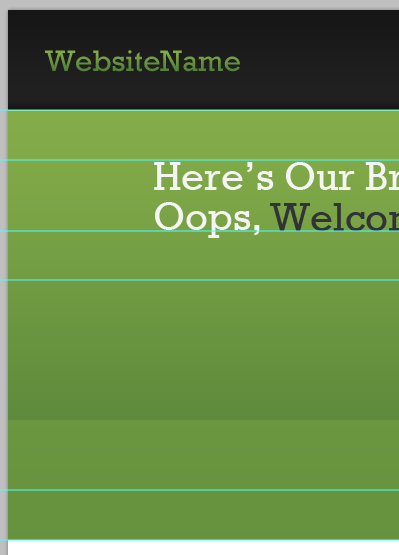



Download this Icon set: Basic Set – Pixel Mixer and place of them like the following.
Font: Arial
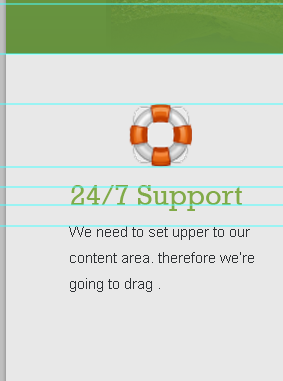
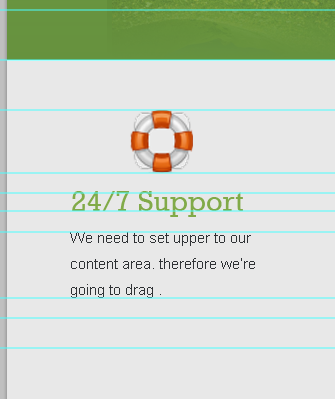 Step 17
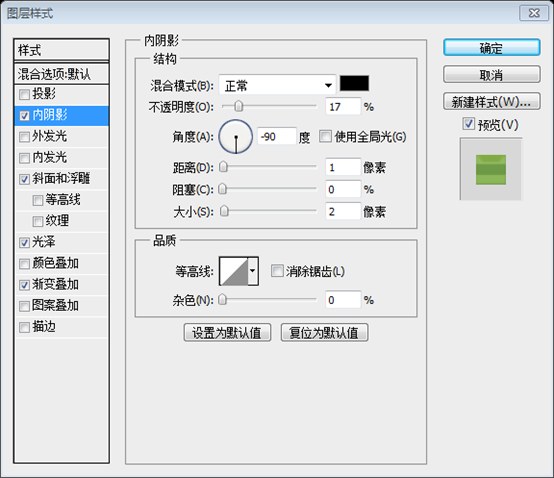
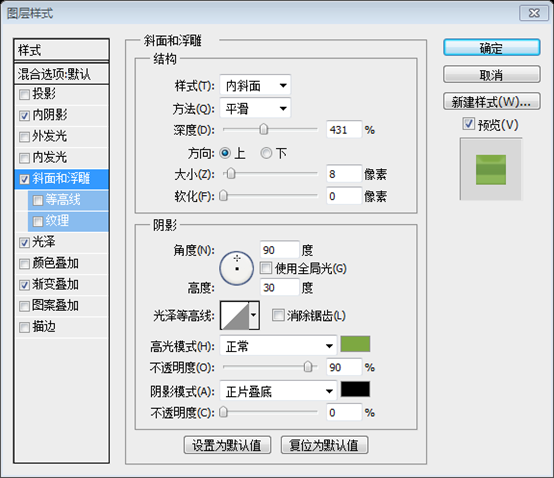
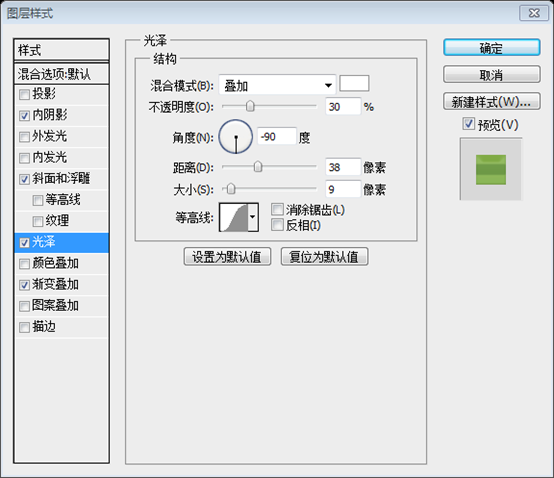
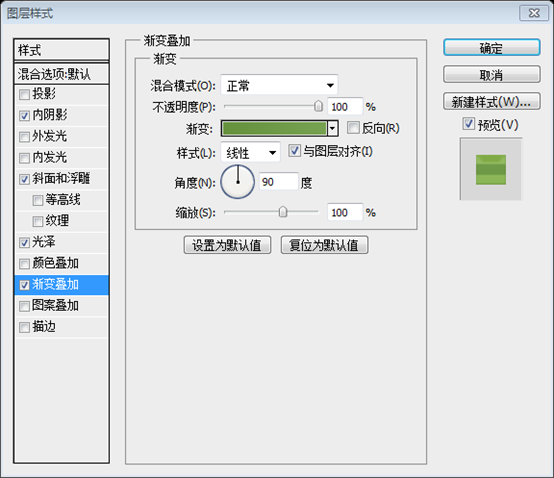
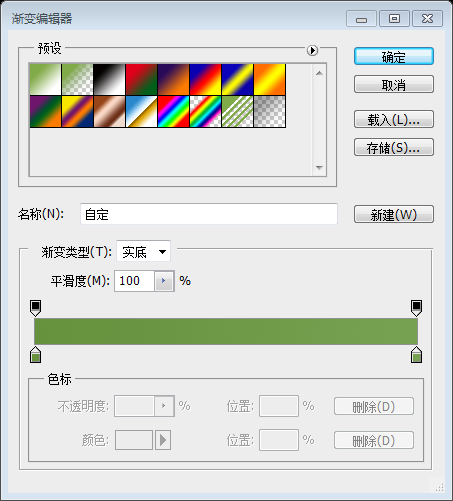
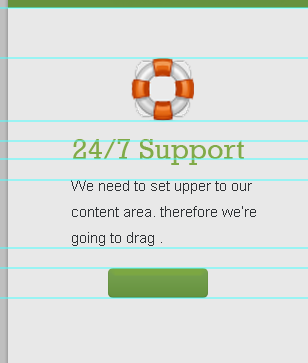
##Create with the ellipse tool An ellipse, size: 15px*15px, color: #4d4d4d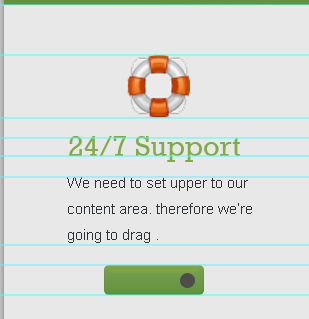
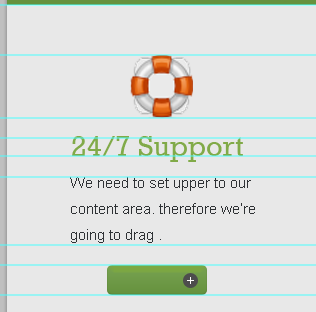

Drag a new horizontal guide after 50px



Fill them with #b3b3b3 – #ffffff and add the same layer mask to them.
##Add a title according to the settings below:
Font:
Font:
Drag a new guide after 160px as a lower border for the content area.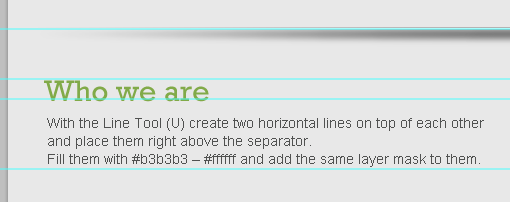 Create a new horizontal guide line 160px below the previous one as the bottom edge of the content area
Font:
 Make sure to keep your layer organized, Here's how I organized them.
 Using the Rectangle Tool (U) create a 90x90px rectangle, and fill it with any color. call this layer “photo1_holder”
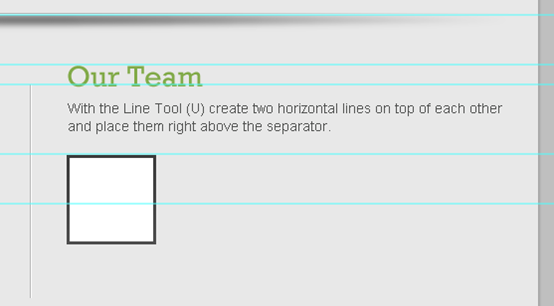
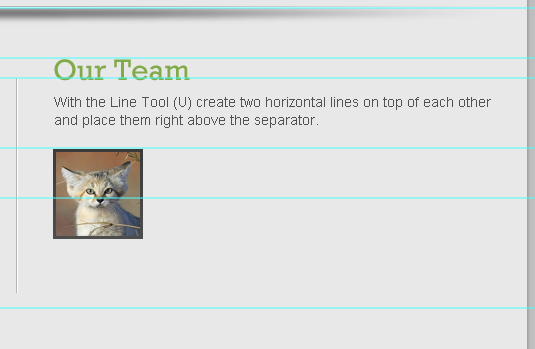
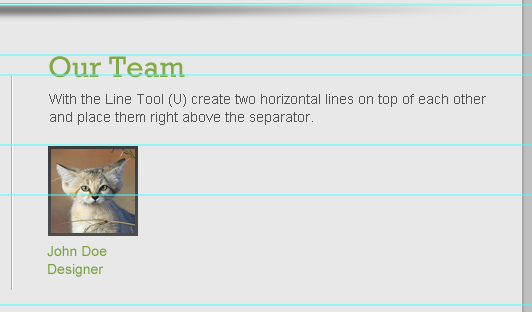
Input Member information text, follow the following settings:
Font Family
Font: Pico-Black (get it here)
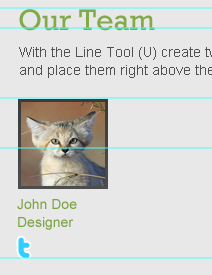 Let's create the LinkedIn one! Type “in” word with these character settings:
: Myriad Pro (get it from here)
Font:
 ##Step 26

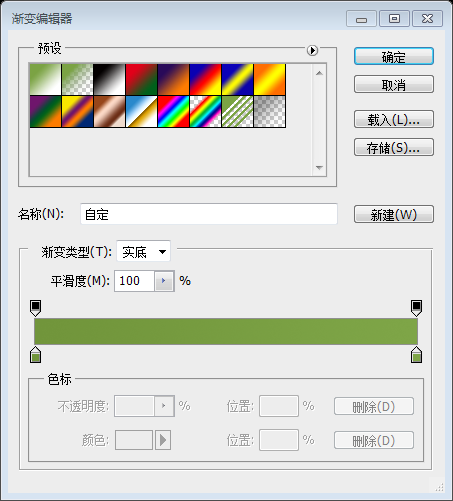


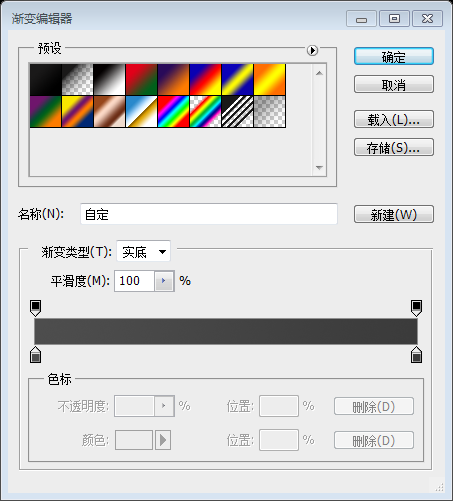
 #Gradient Editor Color: #202020, #323232

Hide the tw_bg layer to work more freelyCreate another rectangle, size: 10x43px, and click: Edit > Transform Path > Bevel. Adjust the parameters on the toolbar according to the following numbers:
X: 40px
Copy layer style from “tw_bg” layer and paste it into the layer “effect”.Copy the layer style of layer tw_bg to layer effect

Font Family
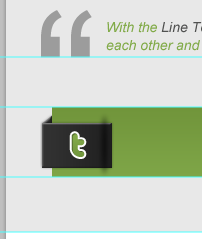
We need to cut off the right half of the rectangle ,Um! ? For this select the tw_bg layer and click Add Layer Mask 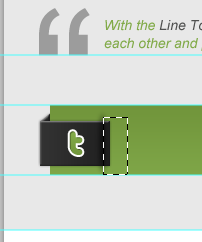
##Font:

Enter the letter t as follows:
Font:
Font:
Font Family
font :
Font:

##Font Family
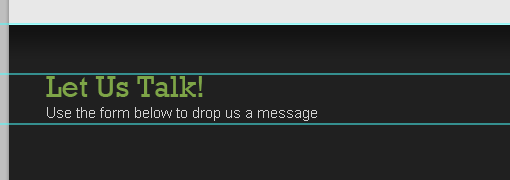
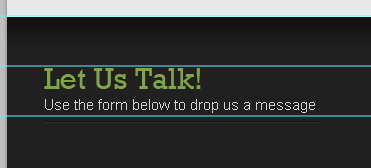
Add subtitle text according to the following settings:
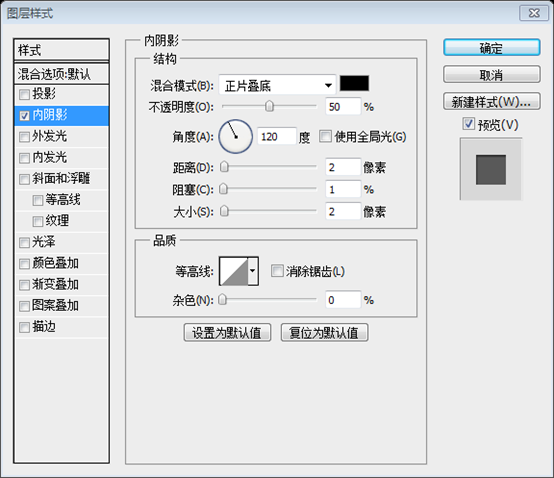
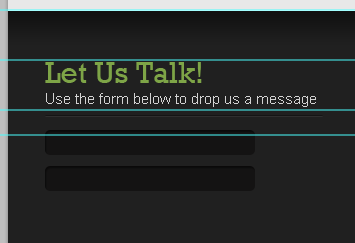
Follow The following settings add text inside two rounded rectangles:
Font:
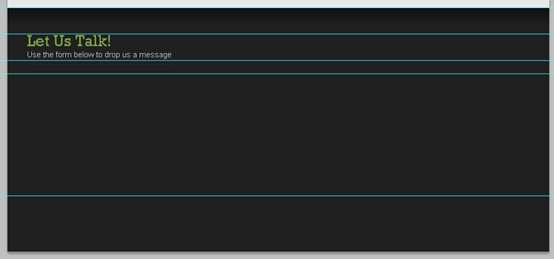
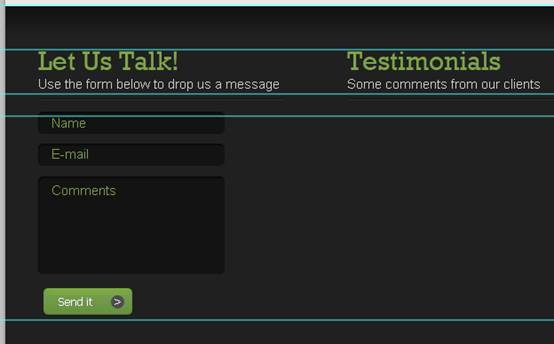
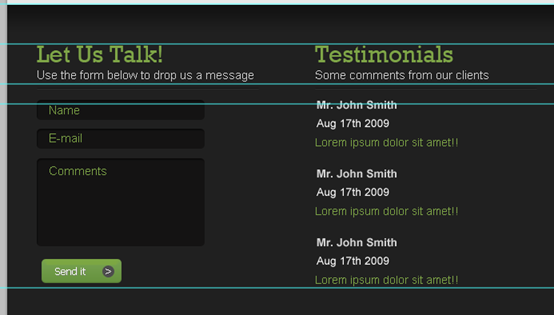
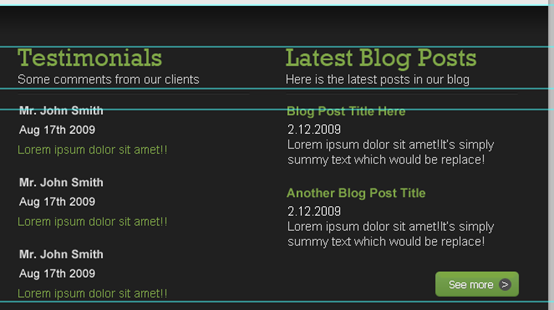
## Create another rectangle like the ones above, but this time its height will be: 110px. Also write some text inside it with the same character settings above. 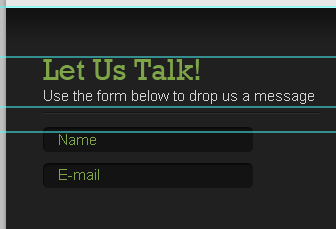
inside with the same text settings. Copy the button created in step 17. Place it in the appropriate position as shown below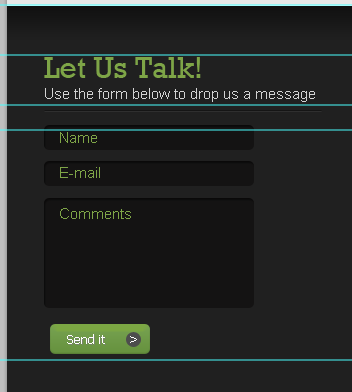



Hot AI Tools

Undresser.AI Undress
AI-powered app for creating realistic nude photos

AI Clothes Remover
Online AI tool for removing clothes from photos.

Undress AI Tool
Undress images for free

Clothoff.io
AI clothes remover

AI Hentai Generator
Generate AI Hentai for free.

Hot Article

Hot Tools

Notepad++7.3.1
Easy-to-use and free code editor

SublimeText3 Chinese version
Chinese version, very easy to use

Zend Studio 13.0.1
Powerful PHP integrated development environment

Dreamweaver CS6
Visual web development tools

SublimeText3 Mac version
God-level code editing software (SublimeText3)

Hot Topics
 1376
1376
 52
52
 How do I use Photoshop for creating social media graphics?
Mar 18, 2025 pm 01:41 PM
The article details using Photoshop for social media graphics, covering setup, design tools, and optimization techniques. It emphasizes efficiency and quality in graphic creation.
 How do I use Photoshop's Content-Aware Fill and Content-Aware Move tools effectively?
Mar 13, 2025 pm 07:35 PM
Article discusses using Photoshop's Content-Aware Fill and Move tools effectively, offering tips on selecting source areas, avoiding mistakes, and adjusting settings for optimal results.
 How do I prepare images for web use in Photoshop (file size, resolution, color space)?
Mar 13, 2025 pm 07:28 PM
Article discusses preparing images for web use in Photoshop, focusing on optimizing file size, resolution, and color space. Main issue is balancing image quality with quick loading times.
 How do I calibrate my monitor for accurate color in Photoshop?
Mar 13, 2025 pm 07:31 PM
Article discusses calibrating monitors for accurate color in Photoshop, tools for calibration, effects of improper calibration, and recalibration frequency. Main issue is ensuring color accuracy.
 How do I prepare images for web using Photoshop (optimize file size, resolution)?
Mar 18, 2025 pm 01:35 PM
Article discusses optimizing images for web using Photoshop, focusing on file size and resolution. Main issue is balancing quality and load times.
 How do I prepare images for print using Photoshop (resolution, color profiles)?
Mar 18, 2025 pm 01:36 PM
The article guides on preparing images for print in Photoshop, focusing on resolution, color profiles, and sharpness. It argues that 300 PPI and CMYK profiles are essential for quality prints.
 How do I create animated GIFs in Photoshop?
Mar 18, 2025 pm 01:38 PM
Article discusses creating and optimizing animated GIFs in Photoshop, including adding frames to existing GIFs. Main focus is on balancing quality and file size.
 How do I use Photoshop's video editing capabilities?
Mar 18, 2025 pm 01:37 PM
The article explains how to use Photoshop for video editing, detailing steps to import, edit, and export videos, and highlighting key features like the Timeline panel, video layers, and effects.


