
 Backend Development
PHP Tutorial
Yii Framework Official Tutorial Supplement 3 - Getting Started: Creating the First Yii Application
Backend Development
PHP Tutorial
Yii Framework Official Tutorial Supplement 3 - Getting Started: Creating the First Yii Application
Yii Framework Official Tutorial Supplement 3 - Getting Started: Creating the First Yii Application

<br>
<br>
In order to have a preliminary understanding of Yii, we will describe in this section how to build the first Yii application. We will create a new Yii application using yiic (command line tool). Gii (a powerful web-based code generator) completes automatic code generation for specific tasks. Assume that YiiRoot is the installation directory of Yii and WebRoot is the document root directory of the server. Run yiic on the command line as follows:
% YiiRoot/framework/yiic webapp WebRoot/testdrive
Note: When running yiic on MacOS, Linux or Unix systems, you may need to modify the permissions of the yiic file so that it Able to run. And you must be able to directly execute the php command in the terminal command line (you can use php -v in the terminal to test). If not, you need to place the executable php path in the system path. In addition, you can also run this tool like this:
% cd WebRoot
% php YiiRoot/framework/yiic.php webapp testdrive
This will create a basic Yii application in the WebRoot/testdrive directory. This application has the directory structure required by most Yii applications. Without writing a line of code, we can access the following URL in the browser to take a look at our first Yii application:
http://www.php.cn/
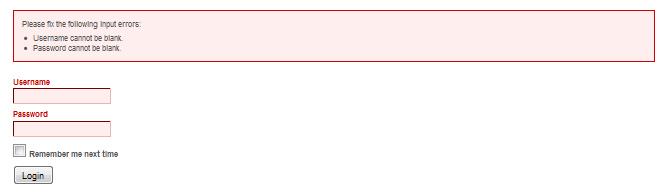
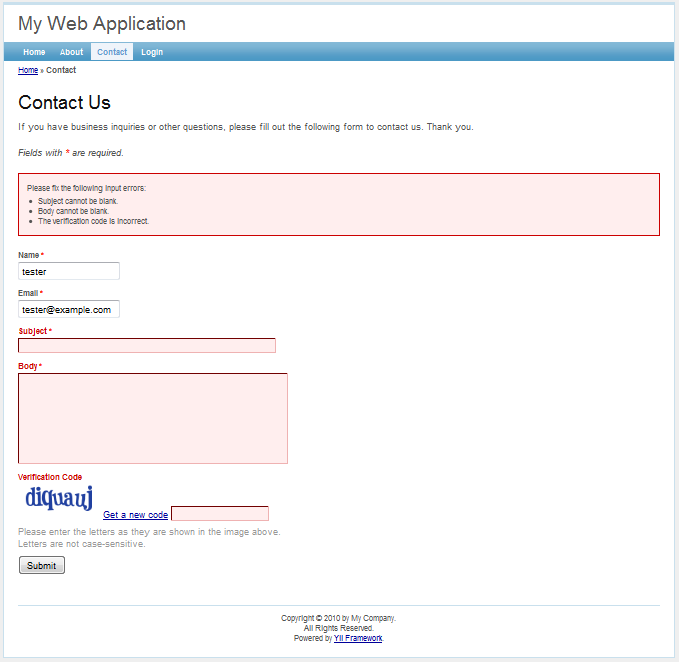
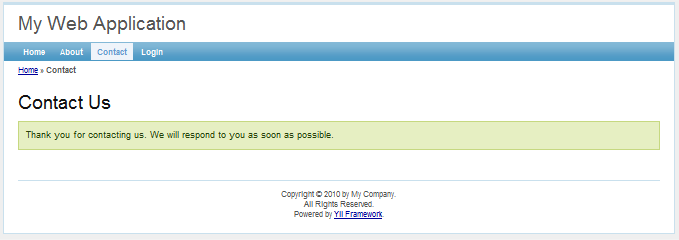
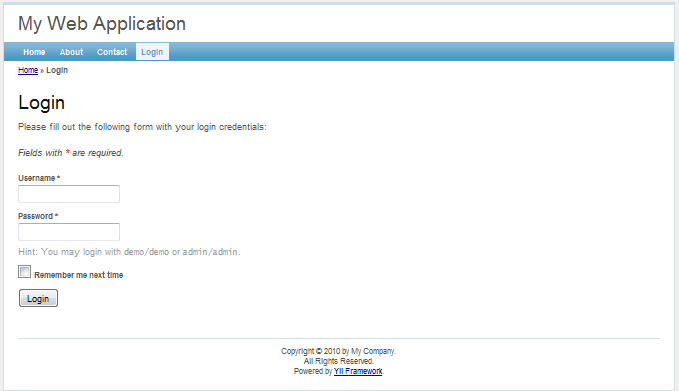
As we can see, this application contains three pages: home page, contact page, and login Page. The home page displays some information about the application and the user's login status, the contact page displays a contact form for users to fill out and submit their inquiries, and the login page allows users to first authenticate and then access authorized content. Check out the following screenshots to learn more:

The tree diagram below describes the directory structure of our application:
testdrive/
   index.php                 Web 应用入口脚本文件
   index-test.php            功能测试使用的入口脚本文件
   assets/                   包含公开的资源文件
   css/                      包含 CSS 文件
   images/                   包含图片文件
   themes/                   包含应用主题
   protected/                包含受保护的应用文件
      yiic                   yiic 命令行脚本
      yiic.bat               Windows 下的 yiic 命令行脚本
      yiic.php               yiic 命令行 PHP 脚本
      commands/              包含自定义的 'yiic' 命令
         shell/              包含自定义的 'yiic shell' 命令
      components/            包含可重用的用户组件
         Controller.php      所有控制器类的基础类
         Identity.php        用来认证的 'Identity' 类
      config/                包含配置文件 console.php         控制台应用配置
         main.php            Web 应用配置
         test.php            功能测试使用的配置
      controllers/           包含控制器的类文件
         SiteController.php  默认控制器的类文件
      data/                  包含示例数据库 schema.mysql.sql    示例 MySQL 数据库
         schema.sqlite.sql   示例 SQLite 数据库
         testdrive.db        示例 SQLite 数据库文件
      extensions/            包含第三方扩展
      messages/              包含翻译过的消息
      models/                包含模型的类文件
         LoginForm.php       'login' 动作的表单模型
         ContactForm.php     'contact' 动作的表单模型
      runtime/               包含临时生成的文件
      tests/                 包含测试脚本
      views/                 包含控制器的视图和布局文件
         layouts/            包含布局视图文件
            main.php         所有视图的默认布局
            column1.php      使用单列页面使用的布局
            column2.php      使用双列的页面使用的布局
         site/               包含 'site' 控制器的视图文件
            pages/           包含 "静态" 页面
               about.php     "about" 页面的视图
            contact.php      'contact' 动作的视图
            error.php        'error' 动作的视图(显示外部错误)
            index.php        'index' 动作的视图
            login.php        'login' 动作的视图
         system/             包含系统视图文件
1. Connect to the database
Most web applications are driven by databases, and our test application is no exception. To use the database, we first need to tell the application how to connect to it. Just modify the application's configuration file WebRoot/testdrive/protected/config/main.php as follows:
<br>
return array(
    ......
    'components'=>array(
        ......
        'db'=>array(
            'connectionString'=>'sqlite:protected/data/source.db',
        ),
    ),
    ......
);
The above code tells the Yii application to connect to the SQLite database WebRoot/testdrive/protected/data/testdrive.db when needed. Note that this SQLite database is already included in the application framework we created. The database only contains one table named tbl_user:
<br>
CREATE TABLE tbl_user (
    id INTEGER NOT NULL PRIMARY KEY AUTOINCREMENT,
    username VARCHAR(128) NOT NULL,
    password VARCHAR(128) NOT NULL,
    email VARCHAR(128) NOT NULL
);
If you want to change to a MySQL database, you need Import the file WebRoot/testdrive/protected/data/schema.mysql.sql to create the database.
Note: To use Yii’s database function, we need to enable PHP’s PDO extension and the corresponding driver extension. For the test application, we need to enable the php_pdo and php_pdo_sqlite extensions.
2. Implement CRUD operations
The exciting moment is here. We want to implement CRUD (create, read, update and delete) operations for the tbl_user table we just created, which are also the most common operations in practical applications. Without going to the trouble of writing actual code, here we'll use Gii - a powerful web-based code generator.
Configuring Gii
In order to use Gii, you first need to edit the file WebRoot/testdrive/protected/main.php, which is known as the application configuration file:
return array(
    ......
    'import'=>array(
        'application.models.*',
        'application.components.*',
    ),

    'modules'=>array(
        'gii'=>array(
            'class'=>'system.gii.GiiModule',
            'password'=>'pick up a password here',
        ),
    ),
);
Then, visit http://www.php.cn/. Here we need to enter the password, which we specified in the configuration above.
Generate User model
After logging in, click the link Model Generator. It will display the following model generation page: 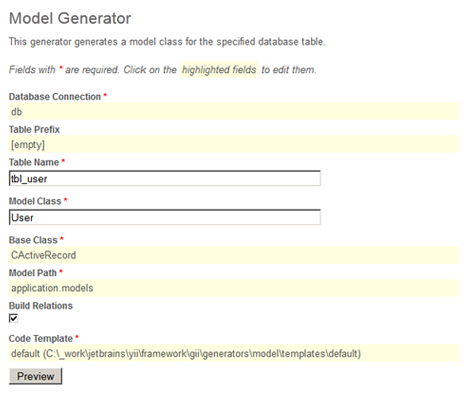
In the Table Name input box, enter tbl_user. In the Model Class input box, enter User. Then click the Preview button. This will show the new file that will be generated. Now click on the Generate button. A file named User.php will be generated into the protected/models directory. As we describe later, the User model class allows us to access the data table tbl_user in an object-oriented way.
Generate CRUD code
After creating the model class, we will generate the code to perform CRUD operations. We choose the Crud Generator in Gii, as shown below: 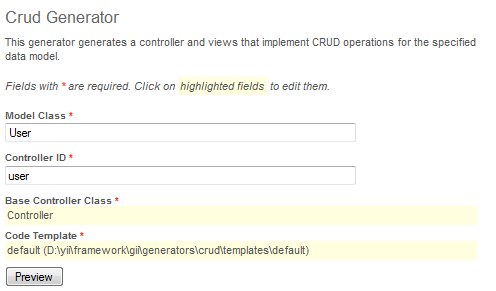
在Model Class输入框中,输入User。在Controller ID输入框中,输入user(小写格式)。现在点击Generate按钮后的 Preview按钮。CRUD 代码生成完成了。
访问 CRUD 页面
让我们看看成果,访问如下 URL:
http://www.php.cn/
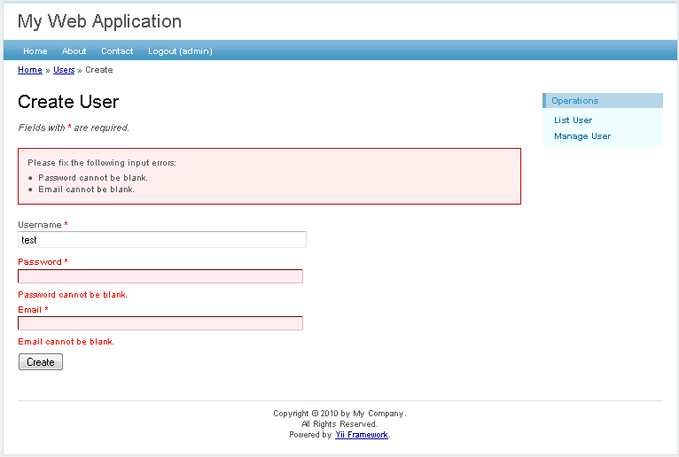
这会显示一个tbl_user表中记录的列表。 点击页面上的Create User 链接,如果没有登录的话我们将被带到Yii Framework Official Tutorial Supplement 3 - Getting Started: Creating the First Yii Application。登录后,我们看到一个可供我们添加新用户的表单。完成表单并点击Create按钮,如果有任何输入错误的话,一个友好的错误提示将会显示并阻止我们保存。回到用户列表页,我们应该能看到刚才添加的用户显示在列表中。 重复上述步骤以添加更多用户。注意,如果一页显示的用户条目太多,列表页会自动分页。 如果我们使用admin/admin作为管理员登录,我们可以在如下 URL 查看用户管理页:
http://www.php.cn/
这会显示一个包含用户条目的漂亮表格。我们可以点击表头的单元格来对相应的列进行排序,而且它和列表页一样会自动分页。 实现所有这些功能不要我们编写一行代码!
<br>
以上就是Yii框架官方教程增补篇3——开始:创建第一个Yii应用的内容,更多相关内容请关注PHP中文网(www.php.cn)!
<br>

Hot AI Tools

Undresser.AI Undress
AI-powered app for creating realistic nude photos

AI Clothes Remover
Online AI tool for removing clothes from photos.

Undress AI Tool
Undress images for free

Clothoff.io
AI clothes remover

Video Face Swap
Swap faces in any video effortlessly with our completely free AI face swap tool!

Hot Article
Hot Tools

Notepad++7.3.1
Easy-to-use and free code editor

SublimeText3 Chinese version
Chinese version, very easy to use

Zend Studio 13.0.1
Powerful PHP integrated development environment

Dreamweaver CS6
Visual web development tools

SublimeText3 Mac version
God-level code editing software (SublimeText3)
Hot Topics
 1387
1387
 52
52

 RESTful API development in Yii framework
Jun 21, 2023 pm 12:34 PM
RESTful API development in Yii framework
Jun 21, 2023 pm 12:34 PM
Yii is a high-performance MVC framework based on PHP. It provides a very rich set of tools and functions to support the rapid and efficient development of web applications. Among them, the RESTful API function of the Yii framework has attracted more and more attention and love from developers, because using the Yii framework can easily build high-performance and easily scalable RESTful interfaces, providing strong support for the development of web applications. . Introduction to RESTfulAPI RESTfulAPI is a
 Yii framework middleware: providing multiple data storage support for applications
Jul 28, 2023 pm 12:43 PM
Yii framework middleware: providing multiple data storage support for applications
Jul 28, 2023 pm 12:43 PM
Yii framework middleware: providing multiple data storage support for applications Introduction Middleware (middleware) is an important concept in the Yii framework, which provides multiple data storage support for applications. Middleware acts like a filter, inserting custom code between an application's requests and responses. Through middleware, we can process, verify, filter requests, and then pass the processed results to the next middleware or final handler. Middleware in the Yii framework is very easy to use
 How to use Yii framework in PHP
Jun 27, 2023 pm 07:00 PM
How to use Yii framework in PHP
Jun 27, 2023 pm 07:00 PM
With the rapid development of web applications, modern web development has become an important skill. Many frameworks and tools are available for developing efficient web applications, among which the Yii framework is a very popular framework. Yii is a high-performance, component-based PHP framework that uses the latest design patterns and technologies, provides powerful tools and components, and is ideal for building complex web applications. In this article, we will discuss how to use Yii framework to build web applications. Install Yii framework first,
 Steps to implement web page caching and page chunking using Yii framework
Jul 30, 2023 am 09:22 AM
Steps to implement web page caching and page chunking using Yii framework
Jul 30, 2023 am 09:22 AM
Steps to implement web page caching and page chunking using the Yii framework Introduction: During the web development process, in order to improve the performance and user experience of the website, it is often necessary to cache and chunk the page. The Yii framework provides powerful caching and layout functions, which can help developers quickly implement web page caching and page chunking. This article will introduce how to use the Yii framework to implement web page caching and page chunking. 1. Turn on web page caching. In the Yii framework, web page caching can be turned on through the configuration file. Open the main configuration file co
 Create a game guide website using Yii framework
Jun 21, 2023 pm 01:45 PM
Create a game guide website using Yii framework
Jun 21, 2023 pm 01:45 PM
In recent years, with the rapid development of the game industry, more and more players have begun to look for game strategies to help them pass the game. Therefore, creating a game guide website can make it easier for players to obtain game guides, and at the same time, it can also provide players with a better gaming experience. When creating such a website, we can use the Yii framework for development. The Yii framework is a web application development framework based on the PHP programming language. It has the characteristics of high efficiency, security, and strong scalability, and can help us create a game guide more quickly and efficiently.
 Yii Framework Middleware: Add logging and debugging capabilities to your application
Jul 28, 2023 pm 08:49 PM
Yii Framework Middleware: Add logging and debugging capabilities to your application
Jul 28, 2023 pm 08:49 PM
Yii framework middleware: Add logging and debugging capabilities to applications [Introduction] When developing web applications, we usually need to add some additional features to improve the performance and stability of the application. The Yii framework provides the concept of middleware that enables us to perform some additional tasks before and after the application handles the request. This article will introduce how to use the middleware function of the Yii framework to implement logging and debugging functions. [What is middleware] Middleware refers to the processing of requests and responses before and after the application processes the request.
 How to use controllers to handle Ajax requests in the Yii framework
Jul 28, 2023 pm 07:37 PM
How to use controllers to handle Ajax requests in the Yii framework
Jul 28, 2023 pm 07:37 PM
In the Yii framework, controllers play an important role in processing requests. In addition to handling regular page requests, controllers can also be used to handle Ajax requests. This article will introduce how to handle Ajax requests in the Yii framework and provide code examples. In the Yii framework, processing Ajax requests can be carried out through the following steps: The first step is to create a controller (Controller) class. You can inherit the basic controller class yiiwebCo provided by the Yii framework
 Encrypt and decrypt sensitive data using Yii framework middleware
Jul 28, 2023 pm 07:12 PM
Encrypt and decrypt sensitive data using Yii framework middleware
Jul 28, 2023 pm 07:12 PM
Encrypting and decrypting sensitive data using Yii framework middleware Introduction: In modern Internet applications, privacy and data security are very important issues. To ensure that users' sensitive data is not accessible to unauthorized visitors, we need to encrypt this data. The Yii framework provides us with a simple and effective way to implement the functions of encrypting and decrypting sensitive data. In this article, we’ll cover how to achieve this using the Yii framework’s middleware. Introduction to Yii framework Yii framework is a high-performance PHP framework.
