 Web Front-end
 PS Tutorial
 PS web design tutorial XX - Create a colorful candy store website layout in Photoshop
PS web design tutorial XX - Create a colorful candy store website layout in Photoshop
As a coder, my art foundation is weak. We can refer to some mature web PS tutorials to improve our design capabilities. To paraphrase a sentence, "If you are familiar with three hundred Tang poems, you can recite them even if you don't know how to compose them."
The tutorials in this series come from online PS tutorials, all from abroad, and all in English. I try to translate these excellent tutorials. Due to limited translation capabilities, the details of the translation still need to be worked out. I hope that netizens will give you some advice.
Convention:
1. The software used in this article is Photoshop CS5 version
2. The screenshots of the original tutorial are in English. I took them again based on the re-production. Chinese version of Figure
3. Some operations in the original text do not give parameters. I measured some parameters through repeated testing, which are shown in red text. For some wrong parameters, the correct parameters are displayed directly in red text
For example: (90, 22, 231, 77) , indicating that the coordinates of the upper left corner of the rectangle are (90, 22) , width 231, height 77
For example: (90,22), indicating that the coordinates of the upper left corner of the rectangle are (90,22), the other two parameters of the rectangle have been specified in the tutorial
4. My own experience will be attached at the end of the tutorial. Some are optimizations of some steps in the tutorial, etc.
1. Open up Photoshop and create a new document with the dimensions of 1200×1000.
1. Open up Photoshop and create a new document with the dimensions of 1200px* 1000px.

2. The first area we will start with is our background. Using your Paint Bucket Tool (G), fill your background layer with #FD6E8A .
2. First, we will start making the background. Using the Paint Bucket Tool (G), fill the background layer with the color: #FD6E8A.
3. We want to create a polka dot pattern we can add to our background. To do this we need to create a new document with the dimensions of 45×53.
3. We are going to create a polka dot pattern that can be added to our background. To do this we need to create a new document with dimensions: 45px*53px.
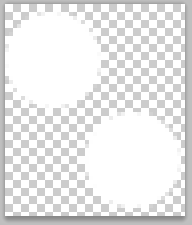
4. Create a new transparent layer and delete your background layer. Next add two circles in the following manner with your favorite Ellipse Tool. I used the Elliptical Marquee (M).
4. Create a new transparent layer and delete your background layer. Next, add two circles ((0, 2, 24, 24) (20, 27, 24, 24)) using your favorite Ellipse Tool. I use the Elliptical Marquee Tool (M).
 5. Go to “Edit>Define Pattern” and then insert the name Polka Dot for your pattern name. You can then close out of this document and return to your template where we will be using our newly created pattern.
5. Click:
Edit> Define pattern, and then enter the dot pattern name. You can then close this file and return to your layout, where we will use our newly created pattern.
6. In your layers palette create a new blank layer and name it dots. Using your Pattern Stamp (S), find your Polka Dot brush in the drop down menu. Then proceed to brush with a large soft brush until you have results that look similar to the following:
6. In the Layers panel, create a new blank layer and name it dots. Use the Pattern Stamp Tool (S) and find your dot brush in the drop-down menu. Use a large soft brush to paint the entire page, similar to the following result:
I set the size to 800px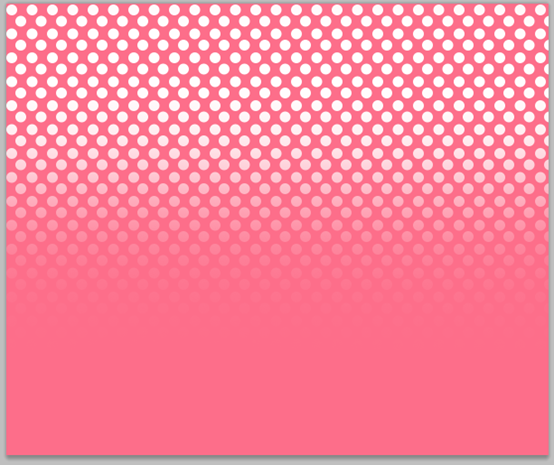
7. Then lower the opacity of your dots layer to about 2%. This will keep it very subtle in our background.
7. Then lower the opacity of your dots layer to about 2%. %about. This will make it appear subtle against our background.
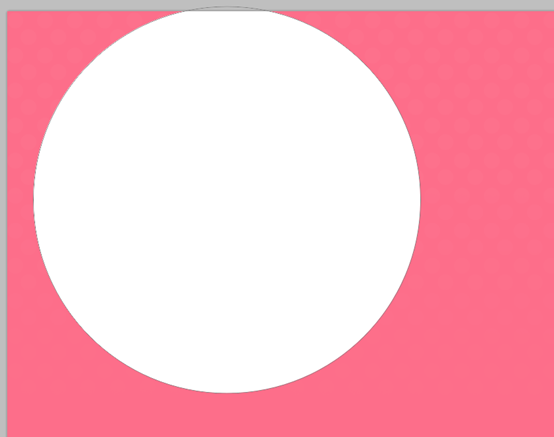
8. Now using your Ellipse Tool, create a circle that looks like the following:
8. Now using your Ellipse Tool, create a circle (39, -7.5 , 585, 585) , looks like this:
9. Then we want to use our Pen Tool (P) to create a shape on top of our circle that looks like the following: :
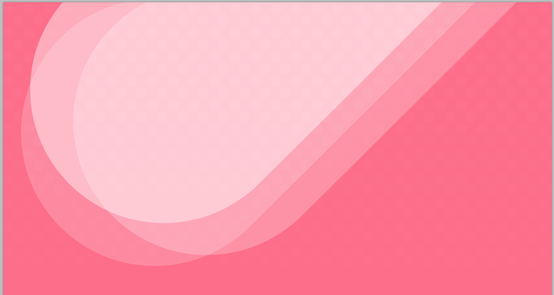
10. Once you are happen with your results, select both layers and then right click and choose Merge Layers to put them onto one layer. Lower the opacity of your layer to around 19%. We then want to duplicate this layer twice by hitting Command+J. Move your shapes in the following manner. Make your second copy 24% opacity, and then make your third 42%.
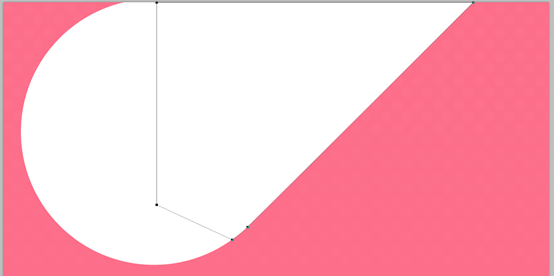 10. When you complete the above steps, select both layers, then right-click and select
to put them into one layer. Lower your layer's opacity to around 19%. Then we press ctrl+J, duplicate this layer twice and move your shape as shown below. Your second copy will have an opacity of 24%, and the third will have an opacity of 42%.
The positions of the three shapes (based on the lower left corner) are (39,578), (153,554), (59,484)
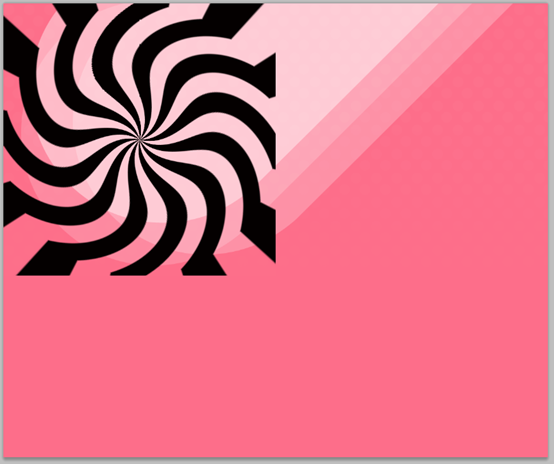
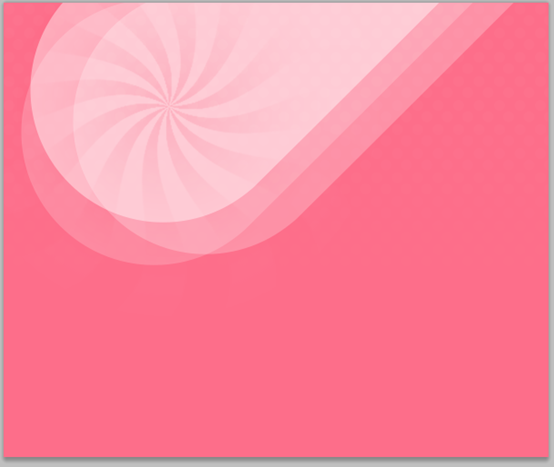
11. The last touch we will add to our background is by adding a Starburst Effect. We will use one of the brushes from this brush pack. With a foreground of # FD6E8A, place it in the following manner. I lowered the opacity to around 22%.
 11. As a final step, we will increase our background and add a radiant effect. We're going to use this brush. Foreground color: #FD6E8A, place it as shown below, lower the opacity to about 22%.
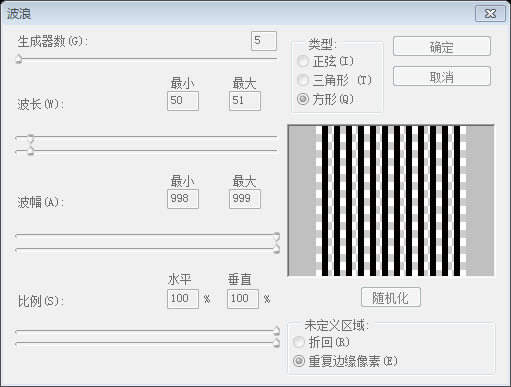
##Click: Filter > Distort > Wave
. Set the parameters as shown below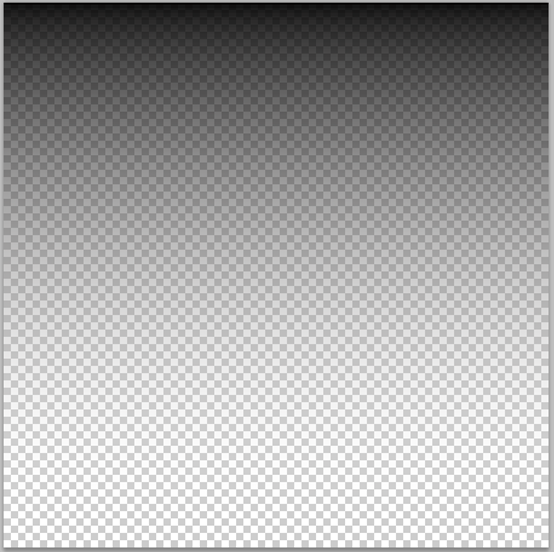
Filter> Twist> Shear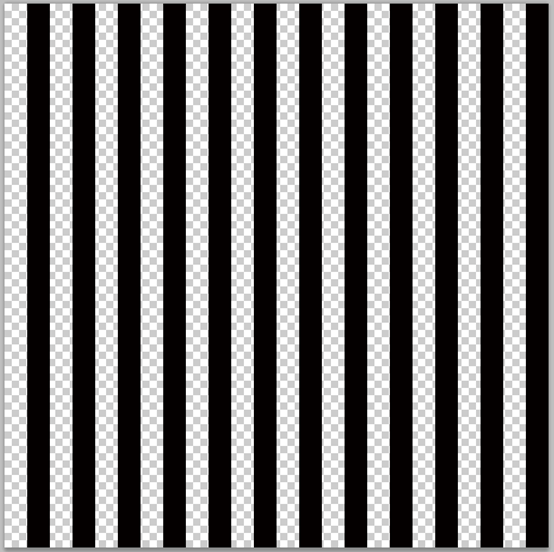 . Set parameters as shown below
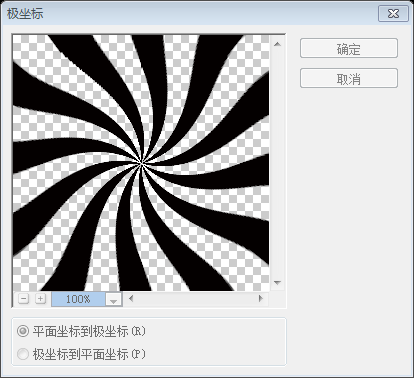
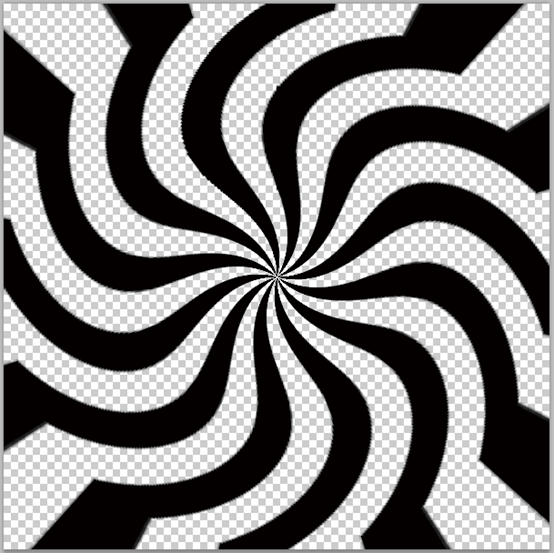
Click: Filter> Distortion> Polar Coordinates, set the parameters as shown below
##Right-click on the layer and select Copy layer, copy it to our main document
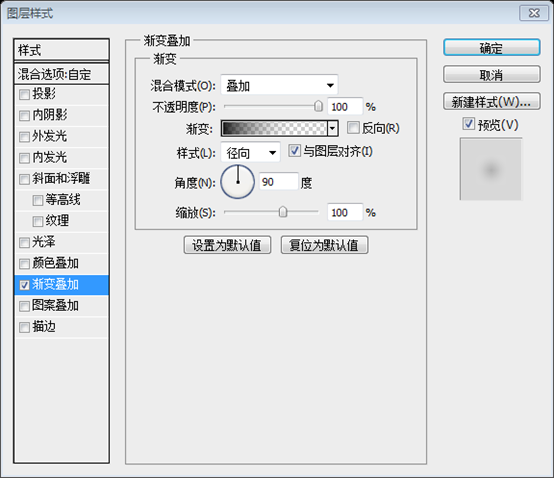
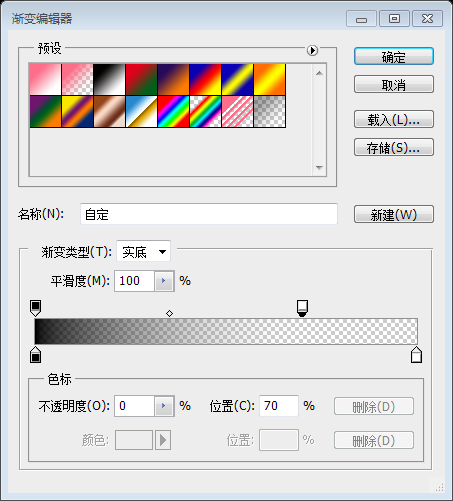
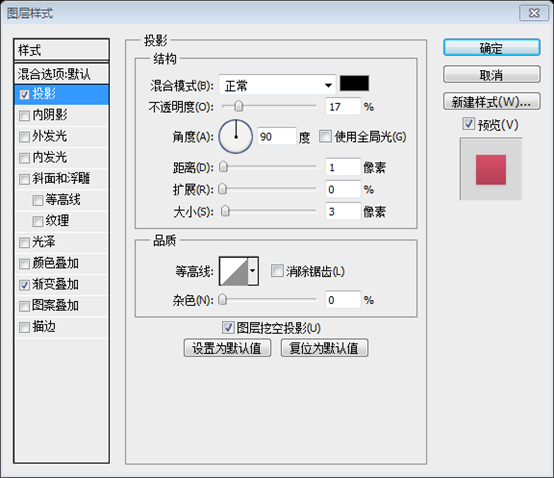
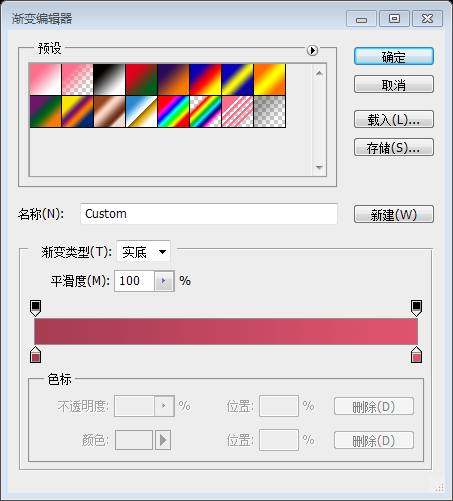
Gradient Editor Colors: #AE1B3F and #F9255A
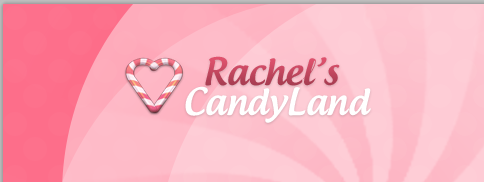
14. CANDYLAND's text layer uses the same projection as Rachel's text layer. Your artwork will look like this:
15. Now we will move onto our user account bar that will float to the right. Using your Rounded Rectangle Tool (U) with a radius of 10px, and a foreground of #BC3D56, make a rectangle that is similar to the following:
15. Now, we will move to the user's navigation bar that we float to the right. Use the Rounded Rectangle Tool (U), set the radius to 10px, and set the foreground color to: #BC3D56, draw a rounded rectangle (570, 75, 437, 36) , it Similar to the following:
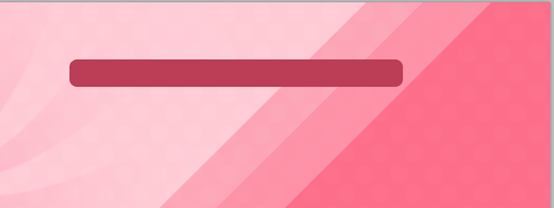
16. We want to add a highlight around our Rounded Rectangle next. To do so we want to Command+Click our thumbnail of our Rounded Rectangle in our Layers Palette to make it an active selection. Then go to “Select>Modify>Contract” and input 1 in the dialog box. Fill your selection with #FFFFFF on a new layer , and then contract it by 1 again and go to “Edit>Clear”. You will be left with a white line that looks like this:
16. We are going to add a circle of highlight around our rounded rectangle. . To do this, we're going to Ctrl+Click on the thumbnail of the rounded rectangle in our Layers panel to get a selection. Then click: Select > Modify > Shrink , and enter 1 in the dialog box. Create a new layer, fill the selection with #FFFFFF, then shrink it by 1 again, click: Edit > Clear. You will be left with a white line that looks like this:
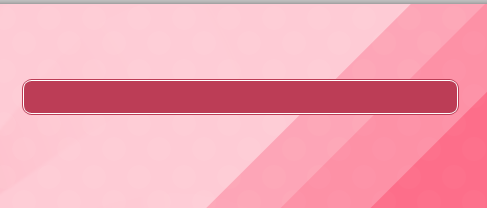
17. Change the blend mode to Soft Light on this layer, and then lower the opacity to around 38%. Now add the following blending options to your highlight layer:
17. On this layer, change the blending mode to Soft Light, then lower the opacity to about 38%. Now add the following blending options to your highlight layer:
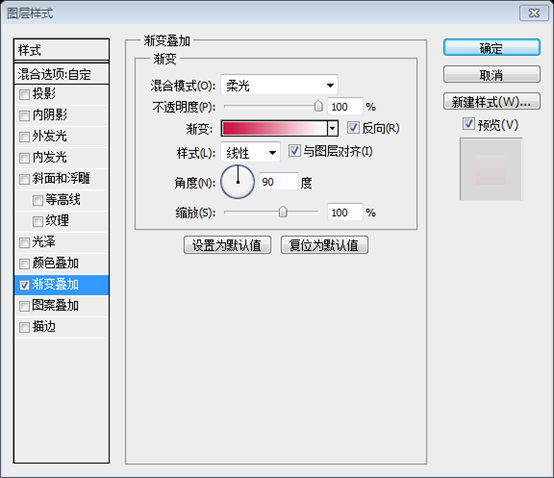
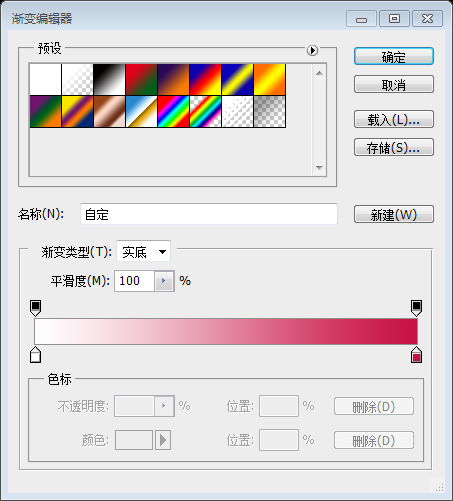
Colors from the Gradient Editor: #FFFFFF and #C81243
18. Add some text to symbolize links with the color #FDDCE3, and you'll have something that looks like this:
18. Add some text to symbolize links with the color #FDDCE3, and you'll have something that looks like this:
18. , your work will look like this: 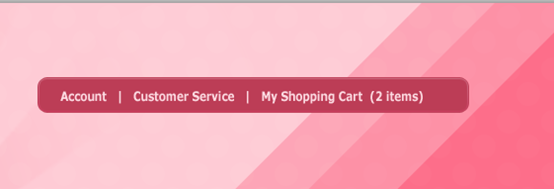
19. Now we need to create a search field. Using your Pen Tool, create a shape that looks like the following with a foreground of #72A0E5.19. Now we need to create a search area. Using the
Pen Tool, create a shape as shown below, color: #72A0E5.
20. Use Command+J to duplicate your shape and then go to Edit>Transform>Flip Horizontal and align it in the following way. Once you have it like you want it, select both layers and right click. Choose Merge Layers from the drop down menu:20. Duplicate your shape using Ctrl + J, then click:Edit> Transform> Flip Horizontal, Align as follows. Select both layers and right-click. Select
Merge layersin the pop-up menu:
Since I am not good at using the pen tool, I used the following method to create a similar effect######Use Rounded Rectangle Tool, set the radius to 50px, create a new rounded rectangle (730, 0, 224, 75), color: #72A0E5

Use Direct Selection ToolSelect the two points in the lower left corner (press the Shift key when selecting points), press Ctrl+T Transform, select the point in the lower left corner as the control point, right-click and select Horizontal Flip

Do the same operation to the lower right corner, so that the result is as follows:

Press Ctrl+T to perform free transformation, adjust the shape to the appropriate height, and right-click to select Perspective to adjust to the appropriate height. The shape of

21. Now add the following blending options to your search box:
21. Now, add the Add the following blending options to your search box:
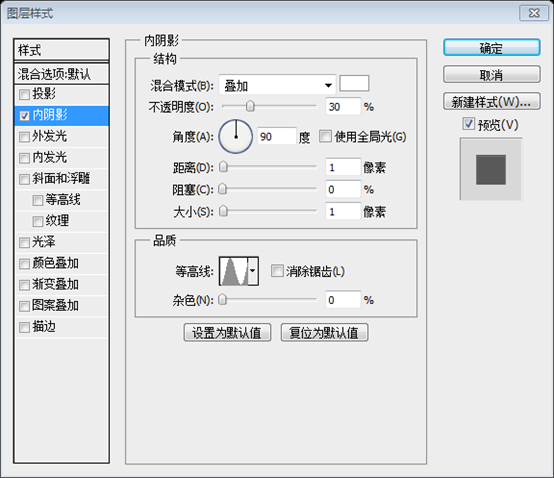

22. All that is left for the search box is to add an input field with your Rounded Rectangle Tool with a 5px radius. I then used a magnifying glass icon from the NIXUS icon pack.
22. Search box, the rest Just use the Rounded Rectangle Tool, with a radius of 5px, and add an input box (753, 45, 178, 25) . Then, add the magnifying glass icon from the NIXUS icon pack. and enter the text, the color of the text: #acacac

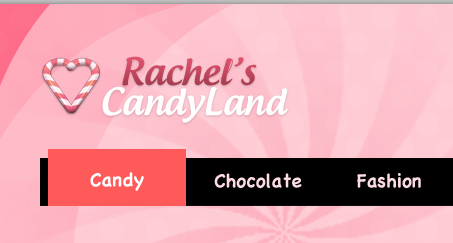
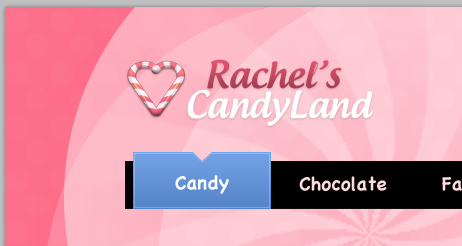
23. The last area of our header is our main site navigation . Using your favorite Rectangle Tool, make a black rectangle that looks like the following for the back of your navigational menu. Our first link “Candy” is going to be #FFFFFF, while our non-active links will be #FDDCE3. The font used for the links is called “Chalkboard”.
23. The last one in our header area is the main navigation of our website. Using your favorite Rectangle Tool, create a black rectangle similar to the one below for the back of the navigation menu (120, 154, 960, 48). The color of our first active link Candy: #FFFFFF, and the color of our inactive link: #FDDCE3. The font used for links is called Chalkboard. is actually Chalkboard Bold font, which is very different from Chalkboard font .
 24. For our active tab, we want to make a Rectangle in a similar shape as the following. The color doesn't matter as we will be adding a gradient to it later:
For our active tab, add a rectangle (128, 145, 138, 57) . The color is not important, we will add a gradient in a later step
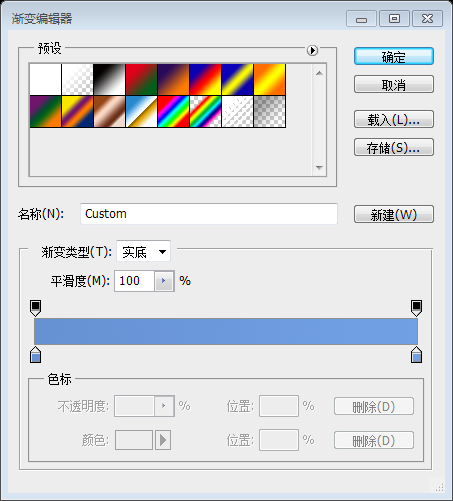
25. Now on your tab layer, add the following blending options to give it a nice gradient.
25. Now add the following blending options on your tab layer to give it a nice gradient.
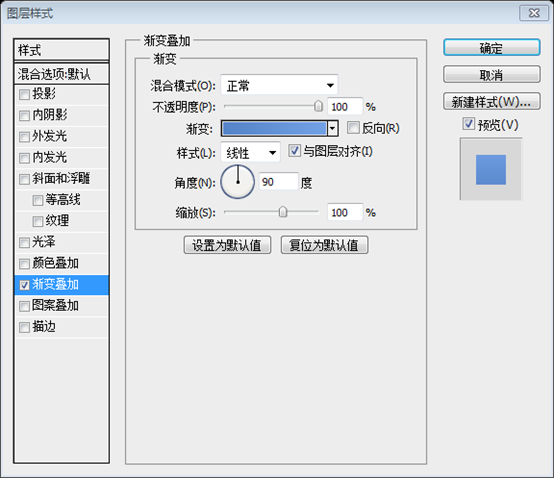
Gradient editor colors: #336FC1 and #4E8DE3
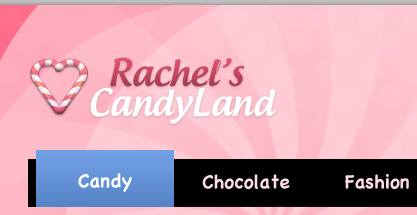
Polygonal Lasso Tool (L), draw a selection similar to the one below, then click: Select > Invert. Then select your tab layer and click the Add Layer Mask icon in the layers panel.
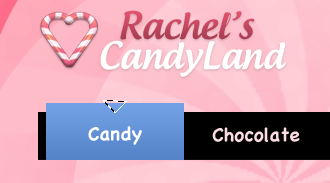
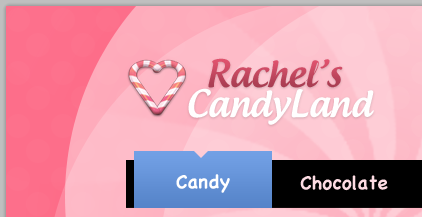
Addition, copy the layer first, then Rasterize layer, convert to smart layer,Rasterize layer. Then use the method in step 16
Rectangle Tool to create the rectangle (120, 202, 960, 9) again, like this:


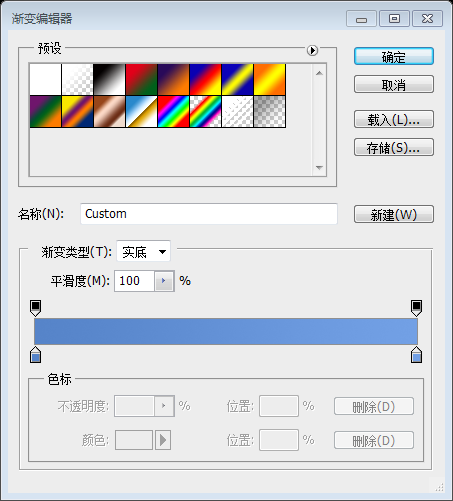
Gradient editor colors: #6692d4 and #72a0e5
Edit> Define pattern and name it stripes. Close your Stripe file and return to your document. Command + Click your rectangle to form the selection, then use your Pattern Stamp Tool to refresh on the layer to form the background:
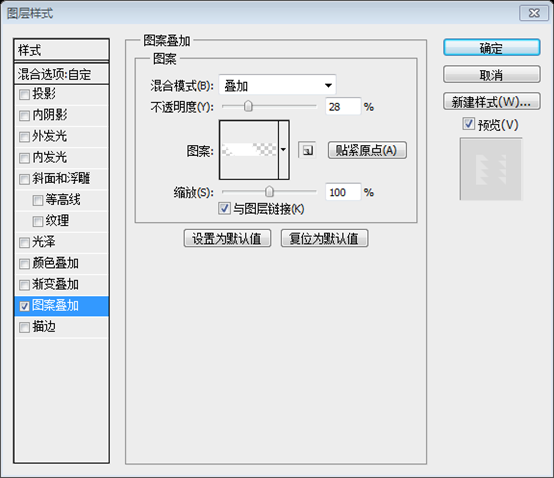
32. Change the blend mode to Overlay , and the lower the opacity to 28% and your completed header will look like the following:Change the blending mode to Overlay and the opacity to 28% and your completed header will look like the following:
The original tutorial for this step said it simply. I tried it for a long time, but it was not easy to succeed, so I tried another method.
Create a new document, size: 40px*9px, set the background to transparent. Use
Rectangle ToolCreate a rectangle (0, 0, 20, 9)
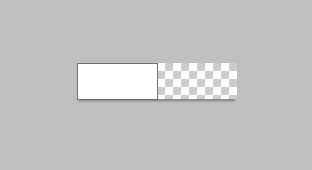 Press Ctrl+T to freely transform, right-click Select
and adjust the rectangle as shown below:
##Click:  Edit> Define Pattern
Go back to the main document, press Ctrl+click the previous long rectangle, create a new layer, fill it with any color, and change the fill to 0%. And add the following pattern overlay layer style to this layer
 33. The content area will rely mostly on placement of images and text, and keep things simple. We will have a white background, and use the color #28140D for our body text, #AF3F55 for headings, and #5987CB for our links.
33. The content area will mainly contain images and text. We will have a white background, body text color: #28140D, title text color: #AF3F55, link color: #5987CB
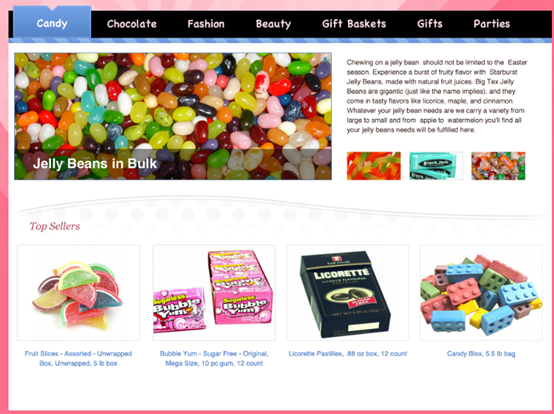
34. The last step is adding a footer. Using your Rounded Rectangle Tool with a radius of 15px, make a shape that looks like the following under your content layers:
34. The last step is to add a footer. Using the Rounded Rectangle Tool with a 15 px radius, create a rounded rectangle (120, 817, 960, 66) so that the shape below your content layer looks like this:

35. Now add the following blending options to your newly created Rounded Rectangle layer:
35. Now add the following blending options to your newly created Rounded Rectangle layer: Add the following blending options to the rectangle layer:
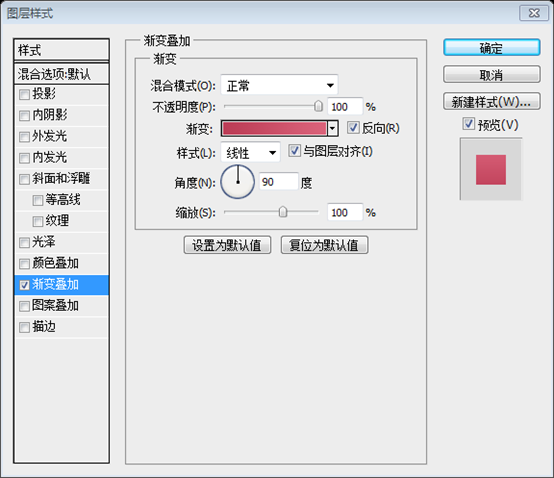
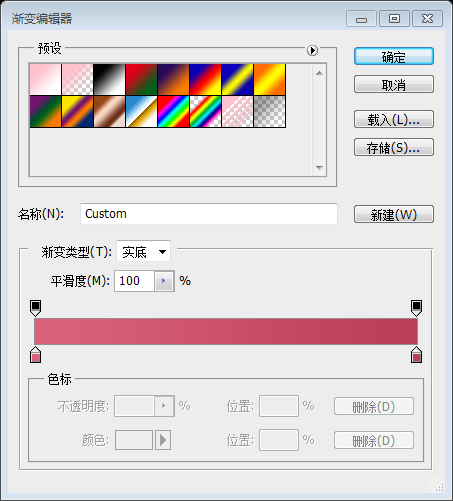
Color in the Gradient Editor: #EE3C66, #C81243
36. I then proceeded to use the same candy cane effect we used in the navigation to add stripes to our footer. I changed the blend mode to Soft Light, and lowered the opacity to 15% this time.
36. Next, add the stripes to our footer using the same candy cane effect we used in the navigation. Change the Blending Mode to Soft Light, and this time drop the Opacity to 15%.

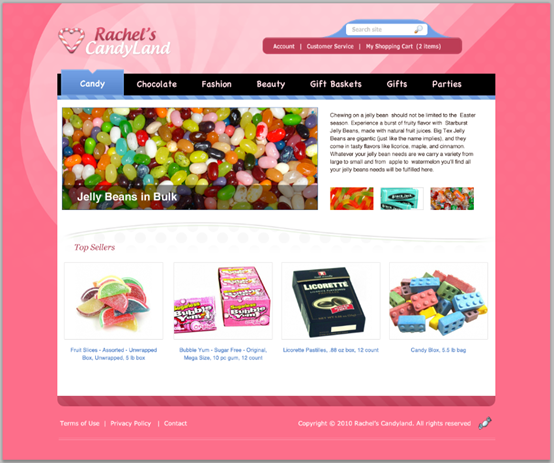
37. All that is left now is to add some text and any icons in your footer and your final result will look something like the following:
37. All that’s left now is to add some text and a footer and any icons for your final result to look like this:

Final work:
Postscript:
This is a tutorial with a very different style. These aspects of this tutorial are unique: the first is the wind wheel effect. In the original tutorial, a brush downloaded from the Internet was used, but I changed it to make it myself; the second is the unique pattern overlay effect; the third is the interesting sugar masking effect
More PS web design tutorial XX - Create a colorful candy store website layout in Photoshop. For related articles, please pay attention to the PHP Chinese website!

Hot AI Tools

Undresser.AI Undress
AI-powered app for creating realistic nude photos

AI Clothes Remover
Online AI tool for removing clothes from photos.

Undress AI Tool
Undress images for free

Clothoff.io
AI clothes remover

Video Face Swap
Swap faces in any video effortlessly with our completely free AI face swap tool!

Hot Article

Hot Tools

Notepad++7.3.1
Easy-to-use and free code editor

SublimeText3 Chinese version
Chinese version, very easy to use

Zend Studio 13.0.1
Powerful PHP integrated development environment

Dreamweaver CS6
Visual web development tools

SublimeText3 Mac version
God-level code editing software (SublimeText3)

Hot Topics
 1386
1386
 52
52
 What is the reason why PS keeps showing loading?
Apr 06, 2025 pm 06:39 PM
PS "Loading" problems are caused by resource access or processing problems: hard disk reading speed is slow or bad: Use CrystalDiskInfo to check the hard disk health and replace the problematic hard disk. Insufficient memory: Upgrade memory to meet PS's needs for high-resolution images and complex layer processing. Graphics card drivers are outdated or corrupted: Update the drivers to optimize communication between the PS and the graphics card. File paths are too long or file names have special characters: use short paths and avoid special characters. PS's own problem: Reinstall or repair the PS installer.
 How to solve the problem of loading when PS is always showing that it is loading?
Apr 06, 2025 pm 06:30 PM
PS card is "Loading"? Solutions include: checking the computer configuration (memory, hard disk, processor), cleaning hard disk fragmentation, updating the graphics card driver, adjusting PS settings, reinstalling PS, and developing good programming habits.
 What are the common questions about exporting PDF on PS
Apr 06, 2025 pm 04:51 PM
Frequently Asked Questions and Solutions when Exporting PS as PDF: Font Embedding Problems: Check the "Font" option, select "Embed" or convert the font into a curve (path). Color deviation problem: convert the file into CMYK mode and adjust the color; directly exporting it with RGB requires psychological preparation for preview and color deviation. Resolution and file size issues: Choose resolution according to actual conditions, or use the compression option to optimize file size. Special effects issue: Merge (flatten) layers before exporting, or weigh the pros and cons.
 How to speed up the loading speed of PS?
Apr 06, 2025 pm 06:27 PM
Solving the problem of slow Photoshop startup requires a multi-pronged approach, including: upgrading hardware (memory, solid-state drive, CPU); uninstalling outdated or incompatible plug-ins; cleaning up system garbage and excessive background programs regularly; closing irrelevant programs with caution; avoiding opening a large number of files during startup.
 How to set password protection for export PDF on PS
Apr 06, 2025 pm 04:45 PM
Export password-protected PDF in Photoshop: Open the image file. Click "File"> "Export"> "Export as PDF". Set the "Security" option and enter the same password twice. Click "Export" to generate a PDF file.
 How to use PS Pen Tool
Apr 06, 2025 pm 10:15 PM
The Pen Tool is a tool that creates precise paths and shapes, and is used by: Select the Pen Tool (P). Sets Path, Fill, Stroke, and Shape options. Click Create anchor point, drag the curve to release the Create anchor point. Press Ctrl/Cmd Alt/Opt to delete the anchor point, drag and move the anchor point, and click Adjust curve. Click the first anchor to close the path to create a shape, and double-click the last anchor to create an open path.
 How to solve the problem of loading when the PS opens the file?
Apr 06, 2025 pm 06:33 PM
"Loading" stuttering occurs when opening a file on PS. The reasons may include: too large or corrupted file, insufficient memory, slow hard disk speed, graphics card driver problems, PS version or plug-in conflicts. The solutions are: check file size and integrity, increase memory, upgrade hard disk, update graphics card driver, uninstall or disable suspicious plug-ins, and reinstall PS. This problem can be effectively solved by gradually checking and making good use of PS performance settings and developing good file management habits.
 How does PS feathering control the softness of the transition?
Apr 06, 2025 pm 07:33 PM
The key to feather control is to understand its gradual nature. PS itself does not provide the option to directly control the gradient curve, but you can flexibly adjust the radius and gradient softness by multiple feathering, matching masks, and fine selections to achieve a natural transition effect.


