ps+div+css creates blue background--login page design
ps+p+css creates a blue background
Be compatible with mainstream browsers
How to design a page?
How to achieve better slicing?
How to consider compatibility?
How to use p+css to make the percentage layout of the background?
Login page design
First design in photoshop
1, open ps, create a new 1200px*768px; Open the layers panel, unlock, double-click the background layer, unlock, and name it: Background layer
2, create a new folder: name it color system, create a new layer in it, and confirm the page The color to be used. As shown in the picture:

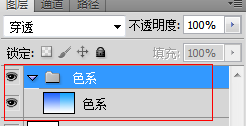

Left: Gradient: Click foreground color: #2366fe Background color: # ffffff, select the gradient tool from top to bottom
Right: Same as above, foreground color: #009cff Background color: #ffffff
ps: I chose the color system on the right.
3, create website background.
3-1: First pull the page baseline: because the website is generally 960*768, and when it is newly created, it is: 1200*768, so there will be: (1200-960)/2=120px on the left and right sides blank.
Specific method: ctrl+R, the ruler will appear, from the ruler position on the left, click and hold the left mouse button and drag right without releasing it.

Pull out two lines, respectively at: 120px and 1080px
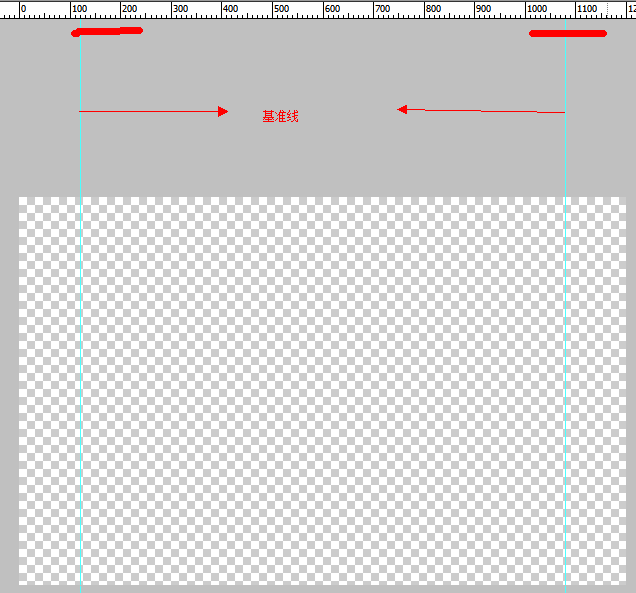

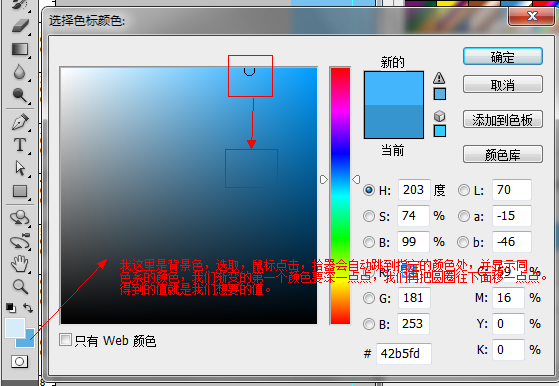

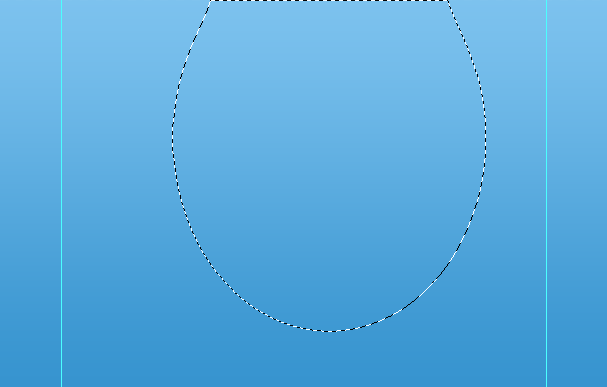


The final picture:


 ##4-4: Check: Projection, parameters as shown in the picture
 4-5: Check: Stroke, the parameters are as shown
 Confirm
4-6: Select "Text Tool"-->"Enter text_MT"-->Adjust color: "#cbe5f7"-->Adjust size_80px-->Adjust position-->Set font.
4-7: Open "Layer Style"-->Inner Shadow, the parameters are as shown in the figure:
 The final figure is as follows:
 5: System title
5-1: Select "Text Tool"->"Enter text_XXX Management System"-->Adjust color: "# e7f5fd"-->Adjust size_50px-->Adjust position-->Set font.
5-2: Set style:

##5-3-1: Add reflection-->First In the "XXX Management System" layer --> Press: ctrl+J, copy one layer; --> Get "XXX Management System Copy" --> Right-click "XXX Management System Copy" --> Select "Rasterize text"-->Get the layer "XXX Management System Copy"-->Create a new layer 3 and place it under "XXX Management System Copy"-->Select the layer "XXX Management System Copy" -->ctrl+E Merge layers downward to get "Layer 3"
Before rasterization:
After rasterization:

Before merging with layer 3:

After merging with layer 3:

ps: Pay attention to the red part, otherwise the merge will not achieve the effect
5-3-2: Select layer 3: ctrl+T, move the position to the "XXX Management System" position Directly below, invert and tilt, the result is as shown in the figure, OK


 ##6-2-1: Get the shape "Layer 2" --> Double-click --> Open "Layer Style" --> Check "Gradient Overlay", parameters: #09649e, #449cd5.
6-2-2: Check "Projection", the parameters are as shown in the figure:
 6-2-3: Check "Stroke", The parameters are as shown in the figure:
 6-2-4: Check the "Inner Glow" parameter as shown in the figure:
 6-3: Adjust the position as needed.
6-4: Follow step 5-3 to make a background for "Shape 2". After it is done, the final effect is as follows:
 6- 5-1: There are two icons used here. The processing method is as follows:
ctrl+T-->Adjust size-->Add "Layer Style"-->Check "Gradient Fill", parameters "#80aed1, #c9e0f3"-- >Check the "Shadow" parameters: distance: 1px, size: 2px, opacity: 30%, the effect is as follows:

6-5-2: To create a text box, select the "Distance Tool" parameters as follows


 ##The effect is as follows:
 Make another text box with focus:
ctrl+JCopy one layer, double-click to modify" Layer Style", the parameters are as follows:

 The focus effect is as follows:
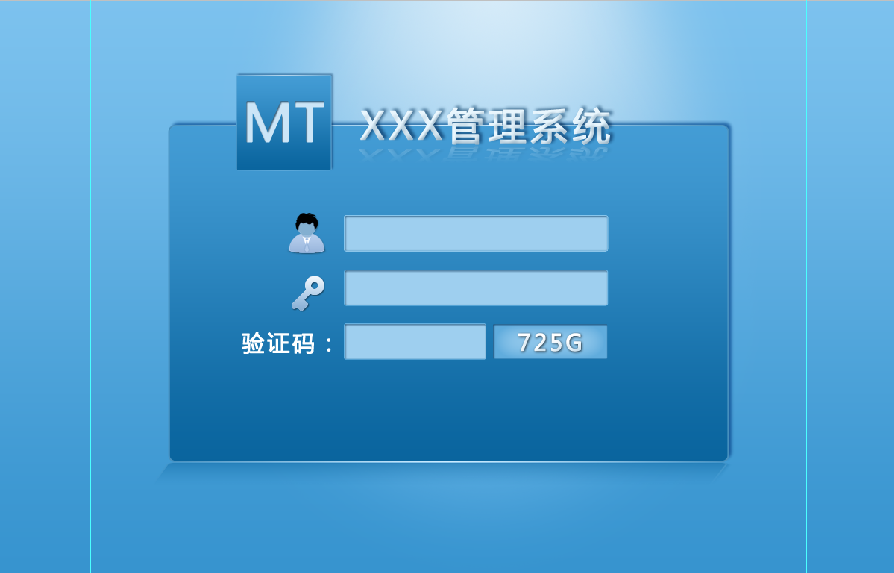
 6-4: Password box, verification code input box, copy one and adjust the position:
 The effect is as follows:
 7: Login button creation.
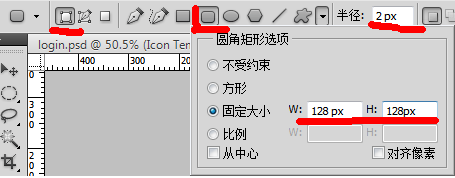
7-1: Follow steps: 6-5-2 to draw a rounded corner shape, the size is customized, the rounded corner radius is recommended: 4px; adjust the position,
7-2: Open "Layer Style", the parameters are as follows:


# #Effect: 
7-3: Make a button that gets focus, modify the style as shown: 

Effect:

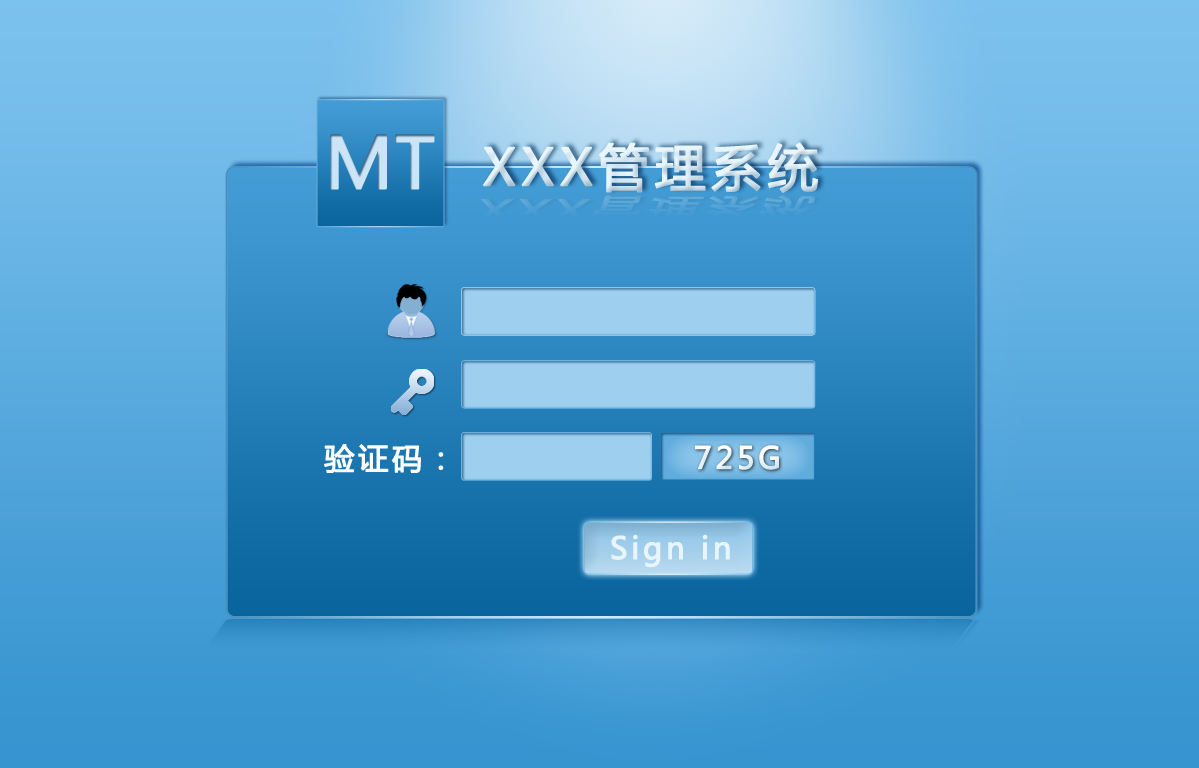
The design is now complete.
Look at the final file structure:

The final rendering:
Please indicate the source for reprinting: http:/ /www.php.cn/
For more ps+div+css to create a blue background--login page design related articles, please pay attention to the PHP Chinese website!

Hot AI Tools

Undresser.AI Undress
AI-powered app for creating realistic nude photos

AI Clothes Remover
Online AI tool for removing clothes from photos.

Undress AI Tool
Undress images for free

Clothoff.io
AI clothes remover

AI Hentai Generator
Generate AI Hentai for free.

Hot Article

Hot Tools

Notepad++7.3.1
Easy-to-use and free code editor

SublimeText3 Chinese version
Chinese version, very easy to use

Zend Studio 13.0.1
Powerful PHP integrated development environment

Dreamweaver CS6
Visual web development tools

SublimeText3 Mac version
God-level code editing software (SublimeText3)

Hot Topics
 1371
1371
 52
52
 How do I use Photoshop for creating social media graphics?
Mar 18, 2025 pm 01:41 PM
The article details using Photoshop for social media graphics, covering setup, design tools, and optimization techniques. It emphasizes efficiency and quality in graphic creation.
 How do I use Photoshop's Content-Aware Fill and Content-Aware Move tools effectively?
Mar 13, 2025 pm 07:35 PM
Article discusses using Photoshop's Content-Aware Fill and Move tools effectively, offering tips on selecting source areas, avoiding mistakes, and adjusting settings for optimal results.
 How do I prepare images for web use in Photoshop (file size, resolution, color space)?
Mar 13, 2025 pm 07:28 PM
Article discusses preparing images for web use in Photoshop, focusing on optimizing file size, resolution, and color space. Main issue is balancing image quality with quick loading times.
 How do I calibrate my monitor for accurate color in Photoshop?
Mar 13, 2025 pm 07:31 PM
Article discusses calibrating monitors for accurate color in Photoshop, tools for calibration, effects of improper calibration, and recalibration frequency. Main issue is ensuring color accuracy.
 How do I prepare images for print using Photoshop (resolution, color profiles)?
Mar 18, 2025 pm 01:36 PM
The article guides on preparing images for print in Photoshop, focusing on resolution, color profiles, and sharpness. It argues that 300 PPI and CMYK profiles are essential for quality prints.
 How do I use Photoshop's video editing capabilities?
Mar 18, 2025 pm 01:37 PM
The article explains how to use Photoshop for video editing, detailing steps to import, edit, and export videos, and highlighting key features like the Timeline panel, video layers, and effects.
 How do I create animated GIFs in Photoshop?
Mar 18, 2025 pm 01:38 PM
Article discusses creating and optimizing animated GIFs in Photoshop, including adding frames to existing GIFs. Main focus is on balancing quality and file size.
 How do I prepare images for web using Photoshop (optimize file size, resolution)?
Mar 18, 2025 pm 01:35 PM
Article discusses optimizing images for web using Photoshop, focusing on file size and resolution. Main issue is balancing quality and load times.


