A brief introduction to the testing framework Mocha under NodeJs
Feb 23, 2017 pm 05:20 PMIntroduction and code download
Mocha was released in 2011 and is currently one of the most popular javascript frameworks. In this article we focus on its use on NodeJs.
If you need to download the example code, you can find it by going to the official website. https://mochajs.org/
After downloading the code, install the dependencies:
$ cd DemoOfMocha
$ npm install
The code directory structure is as shown in the figure:
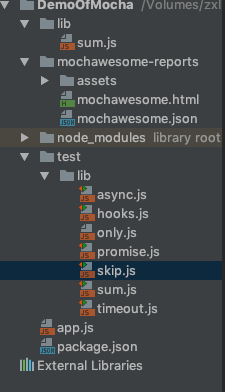
You can create a new lib folder and test folder in the root directory according to the code directory structure, then create a new lib folder in the test folder, and then use the npm init command to Generate package.json, you can also download the code and run it first
First test
Now create a new sum.js file in the lib directory
exports.sum =function (a,b) {
 return a+b
} Next, test this script and create a new test script in the lib folder under the test directory: sum.js
//test/lib/sum.js

var sum = require('../../lib/sum')
var assert = require('assert')

describe('和函数的测试',function () {
 it('1加1应该等于2',function () {
 var expect=10;
 assert.equal(sum(1,1),expect);
 })
})The above code is a test script. The test script can be executed independently. The test script should contain one or more describe blocks, and each describe block should also contain one or more it blocks
## The #describe block is a "test suite", which represents a group of related tests, which is a function, and the second one is the function that can actually be executed It block is a "test case" which represents a single test, the test The smallest unit is also a function. The first parameter is the name or description of the test case, and the second parameter is the actual executable function assert is the assertion package (there are many types of assertion packages, here I use NodeJs to With the assertion package), it is judged whether the execution result of the test code is consistent with the expected result. If it is inconsistent, an error will be thrown. In our test script, sum(1,1), the result should be equal to 2 Here we introduce some functions of Assert's assertion moduleassert.fail(actual, expected, message, operator)
assert.ok(value, [message])
assert.equal(actual, expected, [message])
assert.notEqual(actual, expected, [message])
assert.deepEqual(actual, expected, [message])
assert.notDeepEqual(actual, expected, [message])
assert.strictEqual(actual, expected, [message])
assert.notStrictEqual(actual, expected, [message])
assert.throws(block, [error], [message])
{
 "name": "DemoOfMocha",
 "version": "1.0.0",
 "description": "demo of mocha",
 "main": "index.js",
 "directories": {
 "test": "test"
 },
 "dependencies": {},
 "devDependencies": {},
 "scripts": {
 "test": "NODE_ENV=test mocha test/**/*.js"
 },
 "keywords": [
 "deom",
 "mocha"
 ],
 "author": "wjszxli",
 "license": "ISC"
}
$ npm install mocha --save-dev
$ npm test
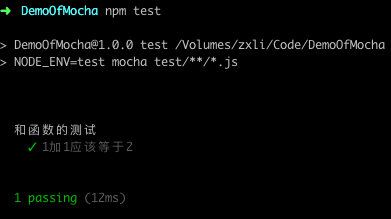
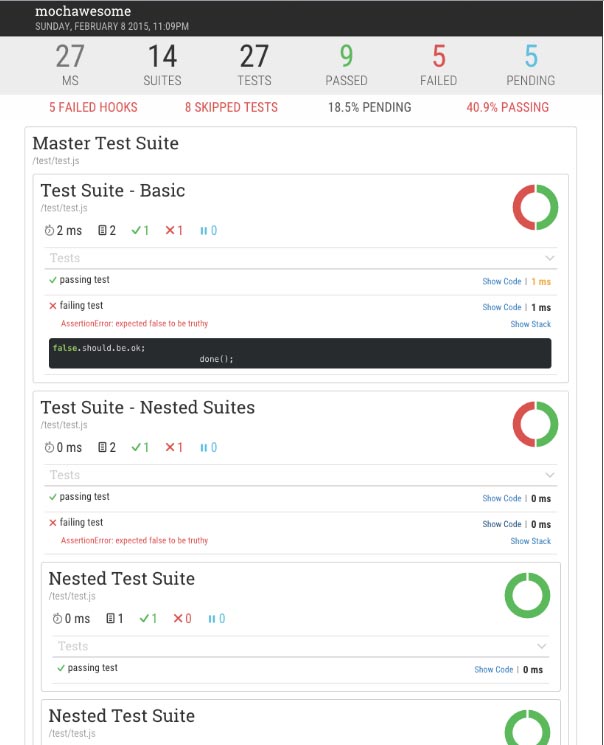
$ npm install --save-dev mochawesome
 "name": "DemoOfMocha",
 "version": "1.0.0",
 "description": "demo of mocha",
 "main": "index.js",
 "directories": {
 "test": "test"
 },
 "dependencies": {},
 "devDependencies": {
 "mocha": "^3.2.0",
 "mochawesome": "^2.0.4"
 },
 "scripts": {
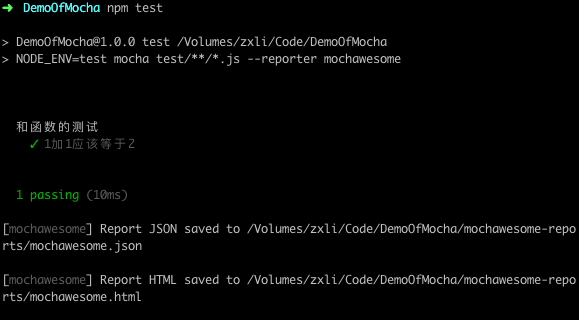
 "test": "NODE_ENV=test mocha test/**/*.js --reporter mochawesome"
 },
 "keywords": [
 "deom",
 "mocha"
 ],
 "author": "wjszxli",
 "license": "ISC”
}

异步测试
Mocha默认每个测试用例最多执行2000毫秒,2000毫秒之后没有得到结果,就会报错,如果涉及到异步操作的测试用例,2000毫秒是不够的,这个时候我们需要用 -t 或 —timeout 参数指定超时门槛
我们可以修改在package.json中的scripts字段(我们这里改成3000毫秒)
"scripts": {
 "test": "NODE_ENV=test mocha -t 3000 timeout test/**/*.js --reporter mochawesome”
},写一个异步测试脚本
//test/lib/timeout.js


var assert = require('assert')

describe('测试应该3000毫秒后结束',function () {
 it('测试应该3000毫秒后结束',function (over) {
 var a=false;
 var b = function () {
  a=true;
  assert.ok(a);
  over();
 };
 setTimeout(b,2500);
 })
})这个测试用例在执行 it 块的时候传入了一个参数 over,在测试结束的时候 必须显式的调用这个函数,告诉Mocha测试结束了,否则Mocha就会等到超时结束的时候报错。
输入命令运行测试用例
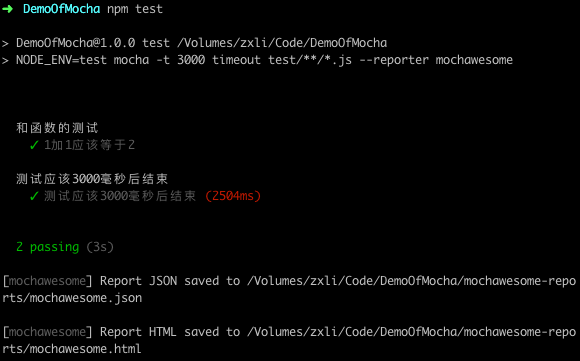
我们也可以测试异步请求内部地址或者外部的接口,这里我们请求内部地址为例子:
在根目录新建:app.js
var express = require('express')
var app = express();

app.get('/api/test',function (req,res) {
 res.send({})
})

var port = process.env.PORT || 3000

if (process.env.NODE_ENV !== 'test') {
 app.listen(port);
 console.log('start from http://www.php.cn/:' + port)
} else {
 module.exports = app;
}在test目录下的lib文件夹中新建 async.js
//test/lib/async.js

var http = require('http')
var assert = require('assert')
var request = require('superagent');

describe("测试异步请求",function () {
 it("测试异步请求返回一个对象",function (next) {
 request
  .get('http://localhost:3000/api/test')
  .end(function(err, res){
  //expect(res).to.be.an('object');
  console.log(res.body);
  assert.deepEqual(res.body,Object)
  next();
  });
 })
})测试结果
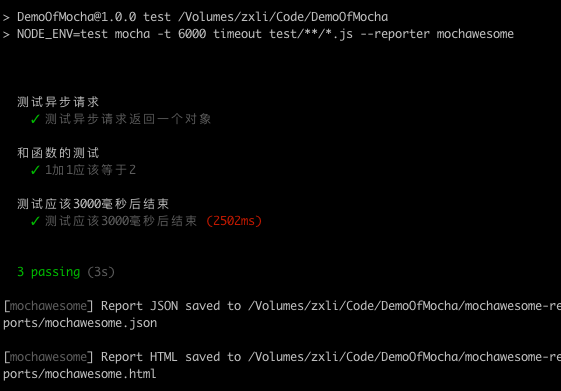
Mocha支持对Promist的测试,允许直接返回Promise,等到他的状态发生变化之后,再执行断言
//test/lib/promise.js

var fetch = require('node-fetch');
var http = require('http')
var assert = require('assert')

describe('Promise 异步测试',function () {
 it('异步Promise返回一个对象',function () {
 return fetch('http://localhost:3000/api/test')
  .then(function(res) {
  return res.json();
  }).then(function(json) {
  console.log(json)
  assert.deepEqual(json,{});
  });
 })
})执行测试
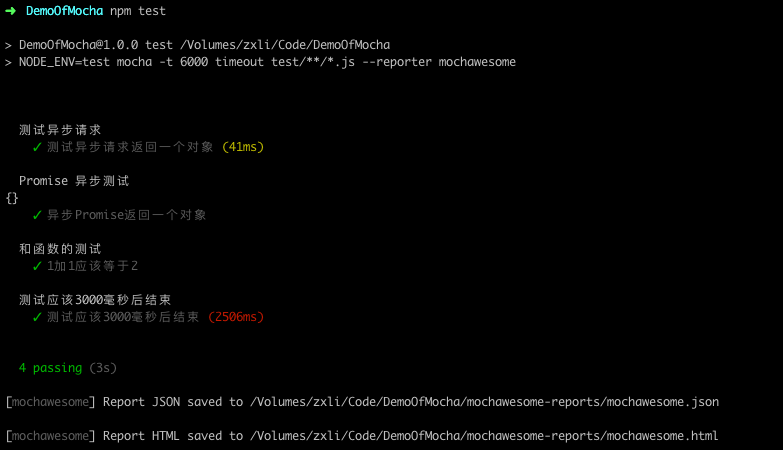
测试的钩子
在 describe 块之中,有四个测试用例的钩子:before()、after()、beforeEach()和afterEach()。它们会在指定时间执行。
describe('hooks', function() {
 before(function() {
 // 在当前区块的所有测试用例之前执行
 });
 after(function() {
 // 在当前区块的所有测试用例之后执行
 });
 beforeEach(function() {
 // 在当前区块的每个测试用例之前执行
 });
 afterEach(function() {
 // 在当前区块的每个测试用例之后执行
 });
 //测试用例
});在test目录下的lib文件夹中新建 hooks.js
//test/lib/hooks.js
var assert = require('assert')

describe('hook示例', function() {
 var foo = false;

 beforeEach(function() {
 foo = true;
 });

 it('修改foo要成功', function() {
 assert.ok(foo)
 });
});测试结果
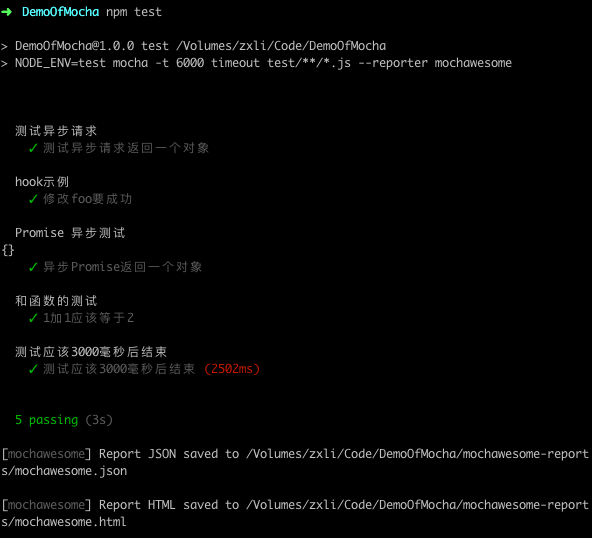
测试用例管理
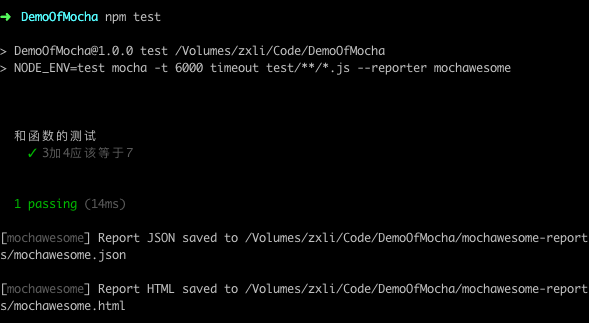
如果项目有很多测试用例,但有的时候只希望运行其中几个,这个时候可以用 only 方法,describe 块和 it 块都允许 only 方法,表示只允许运行带有 only 的测试用例
在test目录下的lib文件夹中新建 only.js
//test/lib/only.js

var sum = require('../../lib/sum')
var assert = require('assert')

describe('和函数的测试',function () {
 it('1加2应该等于3',function () {
 var expect=3;
 assert.equal(sum(1,2),expect);
 })

 it.only('3加4应该等于7',function () {
 var expect=7;
 assert.equal(sum(3,4),expect);
 })
})测试结果:
还有 skip 方法,表示跳过指定的测试用例
在test目录下的lib文件夹中新建 skip.js
//test/lib/only.js

var sum = require('../../lib/sum')
var assert = require('assert')

describe('和函数的测试',function () {
 it('5加6应该等于11',function () {
 var expect=11;
 assert.equal(sum(5,6),expect);
 })

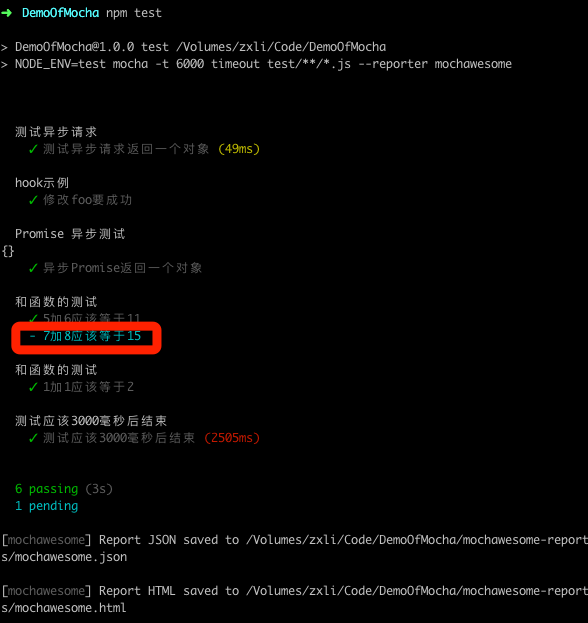
 it.skip('7加8应该等于15',function () {
 var expect=15;
 assert.equal(sum(7,8),expect);
 })
})测试结果如下,跳过的用 - 号表示
以上就是本文的全部内容,希望对大家的学习有所帮助,也希望大家多多支持PHP中文网。
更多A brief introduction to the testing framework Mocha under NodeJs相关文章请关注PHP中文网!

Hot Article

Hot tools Tags

Hot Article

Hot Article Tags

Notepad++7.3.1
Easy-to-use and free code editor

SublimeText3 Chinese version
Chinese version, very easy to use

Zend Studio 13.0.1
Powerful PHP integrated development environment

Dreamweaver CS6
Visual web development tools

SublimeText3 Mac version
God-level code editing software (SublimeText3)

Hot Topics
 Replace String Characters in JavaScript
Mar 11, 2025 am 12:07 AM
Replace String Characters in JavaScript
 10 Ajax/jQuery Autocomplete Tutorials/Plugins
Feb 28, 2025 am 01:03 AM
10 Ajax/jQuery Autocomplete Tutorials/Plugins


