
1, Multi-element horizontal centering
##Achieve the following effect:

When ordinary people see the question, they initially feel that it is not difficult to achieve the effect in the picture. Just set the width and height margins of the small black box and center the font horizontally and vertically. In fact, the question should actually examine the horizontal centering of multiple elements, that is, no matter what the cardinality of the elements (small black boxes) is, they can be horizontally centered as a whole.
In website layout, many times, inline elements such as span or block element li tags are used in child elements, and the number of tags is variable, and we want this block to have no matter the number. No matter how many (the overall width of the child elements is variable), they can always be displayed in the center. This requires setting the child element display:inline-block. At the same time, according to the attribute of display:inline-block, the child element itself has the characteristics of inline, so the parent element needs to set text-align: center to achieve the horizontal centering of the child element as a whole in the parent element.
main{
  text-align:center;
}p{
  display:inline-block;
  *display:inline;/*hack IE*/
*zoom:1;/*hack IE*/}Use the display:inline-block attribute to make inline elements or block elementsYou can define its own width and height without adding float attributes, and at the same time, the element can be displayed in the center of the parent element.
Define the display:inline-block attribute on the inline element and find that the display effect in IE6 and IE7 is consistent with other browsers, but the fact is that IE7 and lower versions of IE browse The server does not support the display:inline-block attribute.
Under IE, display: inline-block only triggers the layout of the element. For example, setting display: inline-block to p can only ensure that p has the characteristics of a block element (width, height, etc. can be set), but line breaks will still occur. Next, set display: inline so that it does not cause line breaks. Write display:inline-block;*display:inline; on the same style. The inline-block attribute will not trigger the layout of the element, so we have to add *zoom:1 to trigger the layout.
In addition to the effective methods mentioned above, there is also another method:
Use first The display:inline-block attribute triggers the block element, and then defines display:inline to render the block element as an inline object (two displays must be placed in two CSS style declarations to have an effect. This is a classic bug of IE , if display:inline-block is defined first, and then the display is set back to inline or block, the layout will not disappear).
p {display:inline-block;...}p {*display:inline;}
But it should be noted that, display: There will be extra white space between inline-block elements (not covered in this question). Solution: The parent element defines font-size:0 to remove the horizontal white space of the inline block element; the child element defines the vertical-align attribute to remove the vertical white space of the inline block element.
http://codepen.io/floralam/pen/XJwWZJ?editors=110Implementing multiple elements Center horizontally and vertically
Use flexbox
http://codepen.io/floralam/pen/MwKmGP
2, Fence layout
Implement the following layout:
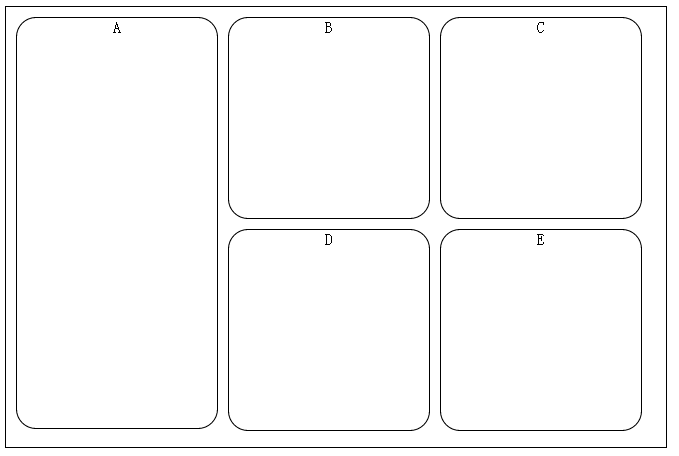
.parent{
    display: flex;
    flex-direction: column;//上面两行等同于flex-flow:colomn
    flex-wrap: wrap;// 显示 wrap一行显示不完的时候换行
    height: 440px;
    width: 660px;
}一个Flexbox布局是由一个伸缩容器(flex containers)和在这个容器里的伸缩项目(flex items)组成。 伸缩方向与换行(flex-flow) 伸缩容器有一个CSS属性“flex-flow”用来决定伸缩项目的布局方式。 如果伸缩容器设置了“flex-flow”值为“row”,伸缩项目排列由左向右排列。 如果“flex-flow”值设置为“column”,伸缩项目排列由上至下排列。 制作一个20%、60%、20%网格布局 3, 未知高度多行文本垂直居中 方法一,使用display:inline-block+伪元素:http://codepen.io/floralam/pen/WbBrwV?editors=110 box 容器通过 after或者before 生成一个高度 100% 的「备胎」,他的高度和容器的高度是一致的,相对于「备胎」垂直居中,在视觉上表现出来也就是相对于容器垂直居中了 方法二(感谢超级课程表胡晋哥哥的提示),使用display:table-cell: http://codepen.io/floralam/pen/yNeMPg 通过display转化成为表格的形式,再采用垂直居中的方法得到需要的结果。 display:table 此元素会作为块级表格来显示(类似 display:table-cell 此元素会作为一个表格单元格显示(类似 方法三(感谢超级课程表胡晋哥哥的提示),flexbox布局: http://codepen.io/floralam/pen/yNeMvM flexbox属性: 伸缩容器:一个设有“display:flex”或“display:inline-flex”的元素 另外,对于单行文本,设置line-height=height代码更加简洁: http://codepen.io/floralam/pen/eNJvyE 父元素设置宽度高度,然后设置属性 text-align:center; /* 水平居中 */ 4, 多栏自适应布局 对于移动设备浏览器:http://codepen.io/floralam/pen/NPVwgz?editors=110 实现左右两侧元素,右侧元素的文字不会溢出到左侧位置。 1)让左边的图片左浮动或者绝对定位, http://codepen.io/floralam/pen/wBbPPj .right{ margin-left: 150px; } 2)让左边的图片左浮动或者绝对定位, http://codepen.io/floralam/pen/gbJogQ .right{ overflow:hidden;/*让右侧文字和左侧图片自动分栏*/ } 3)左侧图片设置为左浮动, http://codepen.io/floralam/pen/bNyaaX?editors=110 .right{ display: table-cell;/*让右侧文字和左侧图片自动分栏*/ } 两栏或多栏自适应布局的通用类语句是(block水平标签,需配合浮动): http://codepen.io/floralam/pen/vEwpjV .cell{ padding-right:10px; display: table-cell; *display: inline-block; *width: auto; } 5, 强制不换行 自动换行 word-wrap是控制换行的。break-word是控制是否断词的。 强制英文单词断行 p{ word-break:break-all; } 6, li超过一定长度,以省略号显示 http://codepen.io/floralam/pen/zxQjrK 7, 左侧导航 http://codepen.io/floralam/pen/ogrbXW?editors=110 8, css3文字分栏 http://codepen.io/floralam/pen/ZYdOmN?editors=110 9, 修复侧边栏 在外容器的添加导航和主内容,当导航和主内容的宽度加上内外边距的数值大于外容器的宽度减去内边距的值,会导致导航和主内容(其中一个,html代码排后面的元素)被挤下。 http://codepen.io/floralam/pen/XJLRYq?editors=110 解决方案: 1) Section元素上使用box-sizing:border-box;模拟IE6中,使得内元素的宽度为width的值,而非width加上padding和margin的值。 2) width:-moz-calc(75% -1rem * 2);width:-webkit-calc(75% - 1rem * 2); width: calc(75% - 1rem * 2); width属性中减去padding值 3) http://codepen.io/floralam/pen/yydPOE 在元素内部增加一个额外的容器,并将padding放在这个新增的内部容器中,这是一种修复方法,而且得到众多浏览器支持。 10, css描绘三角形 http://codepen.io/floralam/pen/azgGmZ 很多关于使用css3来描绘特定图像,使用代码而非图片实现(多座小山包,返回顶部)的题目,都离不开描绘三角形。 11, 清除浮动的技巧 在非IE浏览器(如Firefox)下,当容器的高度为auto,且容器的内容中有浮动(float为left或right)的元素,在这种情况下,容器的高度不能自动伸长以适应内容的高度,使得内容溢出到容器外面而影响(甚至破坏)布局的现象。这个现象叫浮动溢出,为了防止这个现象的出现而进行的CSS处理,就叫CSS清除浮动。 1) 添加最后一个元素 2) The parent element sets overflow: hidden; 3) Using CSS:after pseudo-element Through CSS The pseudo-element adds an invisible space "020" or dot "." to the end of the inner element of the container, and assigns the clear attribute to clear the float. It should be noted that for IE6 and IE7 browsers, a zoom:1; must be added to the clearfix class to trigger haslayout. http://codepen.io/floralam/pen/xboPXK?editors=110 For more CSS layout issues, please pay attention to PHP Chinese for related articles net! 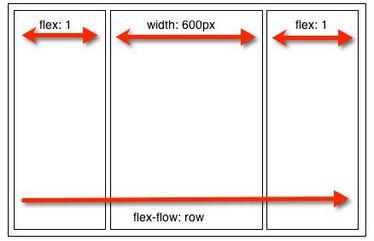
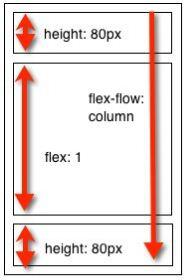
.main-content {
      width: 60%;
}.main-nav,.main-sidebar {
     -webkit-box-flex: 1;      /* OLD - iOS 6-, Safari 3.1-6 */
      -moz-box-flex: 1;         /* OLD - Firefox 19- */
      width: 20%;               /* For old syntax, otherwise collapses. */
      -webkit-flex: 1;          /* Chrome */
      -ms-flex: 1;              /* IE 10 */
      flex: 1;                  /* NEW, Spec - Opera 12.1, Firefox 20+ */}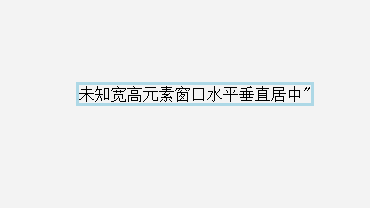
.container{
   position: fixed;
    left: 0;
    top:0;
    height: 100%;
    width: 100%;
    text-align: center;
}.mask:after{
    content: " ";
    display: inline-block;
    vertical-align: middle;
    height: 100%}.dialog{
    display: inline-block;
    border: 3px solid lightblue;
}),表格前后带有换行符。
和 )
伸缩项目:伸缩容器的子元素
主轴、主轴方向:用户代理沿着一个伸缩容器的主轴配置伸缩项目,主轴是主轴方向的延伸。
主轴起点、主轴终点:伸缩项目的配置从容器的主轴起点边开始,往主轴终点边结束。
主轴长度、主轴长度属性:伸缩项目的在主轴方向的宽度或高度就是项目的主轴长度,伸缩项目的主轴长度属性是width或height属性,由哪一个对着主轴方向决定。
侧轴、侧轴方向:与主轴垂直的轴称作侧轴,是侧轴方向的延伸。
侧轴起点、侧轴终点:填满项目的伸缩行的配置从容器的侧轴起点边开始,往侧轴终点边结束。
侧轴长度、侧轴长度属性:伸缩项目的在侧轴方向的宽度或高度就是项目的侧轴长度,伸缩项目的侧轴长度属性是「width」或「height」属性,由哪一个对着侧轴方向决定。
line-height: 300px; /* line-height = height */.container{
display:-webkit-box;
}.left{
-webkit-box-flex:1;
}.right{
-webkit-box-flex:1;
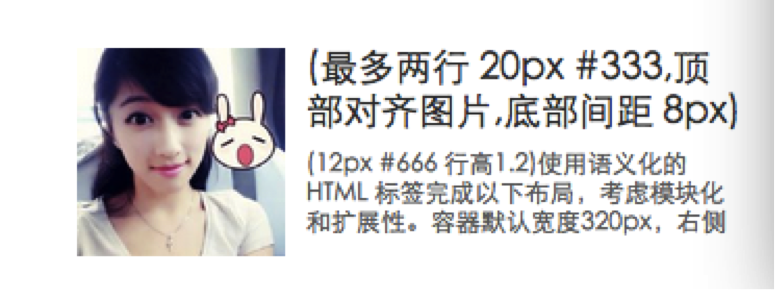
}
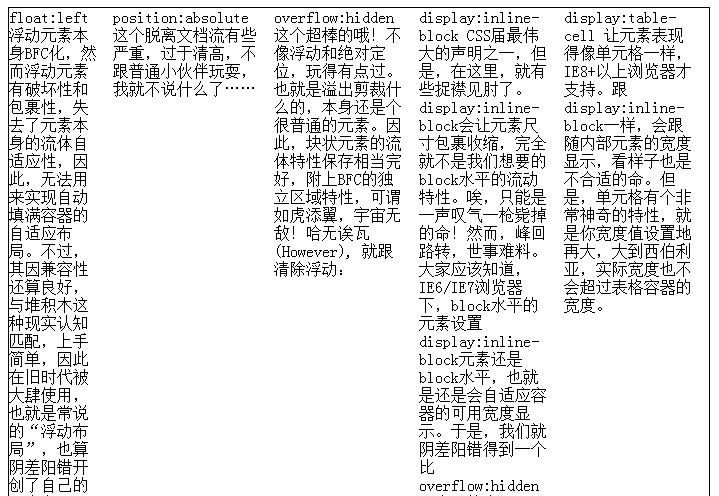
p{
    white-space:nowrap;
}p{ word-wrap: break-word; //性允许长单词或 URL 地址换行到下一行
word-break: normal; //让浏览器实现在任意位置的换行}.nowrap li{
white-space:nowrap;
width:100px;
overflow:hidden;
text-overflow: ellipsis;
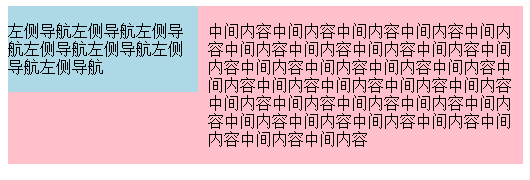
}
{
:;
:;:;
:;
:;
}{
:;
:;
:;
}{
:;
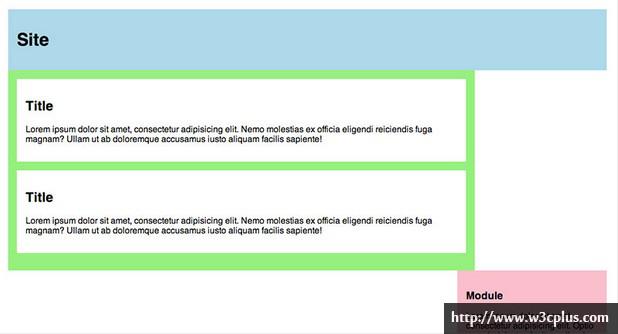
}
 What are the common management systems?
 mintui
 Which version of linux system is easy to use?
 What to do if an error occurs in the script of the current page
 What are the requirements for Douyin live broadcast?
 Why can't I open pinterest?
 Introduction to Document in JS
 What is the format of the account name of steam
 What are the enterprise erp systems?


