

Python generates icons and screenshots for iOS10

Introduction
After updating Xcode8 in the past two days, I found that Xcode’s requirements for icons have changed again, and a small application “IconKit” I used before has not caught up. The rhythm can no longer meet the requirements of Xcode8.
So I thought of using Python to make a script to generate icons.
In fact, this script was written a long time ago. Now in order to adapt to iOS10, it has been modified and improved and put on GitHub.
You can take a look at the renderings:
1.png
Code:
#encoding=utf-8
#by 不灭的小灯灯
#create date 2016/5/22
#update 2016/9/21
#support iOS 10
#site www.winterfeel.com
import os
import sys
from PIL import Image

iosSizes = ['20@1x','20@2x','20@3x','29@1x','29@2x','29@3x','40@1x','40@2x','40@3x','60@2x','60@3x','60@3x','76@1x','76@2x','167@1x']
androidSizes = [32,48,72,96,144,192]
androidNames = ['ldpi','mdpi','hdpi','xhdpi','xxhdpi','xxxhdpi']

sizesiOS = [(640,960),(640, 1136),(750, 1334),(1242, 2208),(1536, 2048),(2048, 2732)]
foldersiOS = ['iPhone4s','iPhone5','iPhone6','iPhone6plus','iPad','iPadLarge']

sizesAndroid = [(480,800),(720,1280),(1080,1920)]
foldersAndroid = ['480x800','720x1280','1080x1920']

def processIcon(filename,platform):
  icon = Image.open(filename).convert("RGBA")
  if icon.size[0] != icon.size[1]:
    print 'Icon file must be a rectangle!'
    return
  if platform == 'android':
    #安卓圆角
    mask = Image.open('mask.png')
    r,g,b,a = mask.split()
    icon.putalpha(a)
    if not os.path.isdir('androidIcon'):
      os.mkdir('androidIcon')
    index = 0
    for size in androidSizes:
      im = icon.resize((size,size),Image.BILINEAR)
      im.save('androidIcon/icon-'+ androidNames[index]+'.png')
      index = index + 1
  else:
    if not os.path.isdir('iosIcon'):
      os.mkdir('iosIcon')
    for size in iosSizes:
      originalSize = int(size.split('@')[0])#原始尺寸
      multiply = int(size.split('@')[1][0:1])#倍数
      im = icon.resize((originalSize*multiply,originalSize*multiply),Image.BILINEAR)
      im.save('iosIcon/icon'+size+'.png')
  print 'Congratulations!It\'s all done!'

def walk_dir(dir,platform):
  files = os.listdir(dir)
  for name in files:
    if name.split('.')[-1] == 'jpg' or name.split('.')[-1] == 'png':#处理jpg和png
      produceImage(name,platform)
  print 'Congratulations!It\'s all done!'

def produceImage(filename,platform):
  print 'Processing:' + filename
  img = Image.open(filename)
  index = 0
  sizes = sizesiOS
  folders = foldersiOS
  if platform == 'android':#默认ios,如果是安卓
    sizes = sizesAndroid
    folders = foldersAndroid
  for size in sizes:
    if not os.path.isdir(folders[index]):
      os.mkdir(folders[index])
    if img.size[0] > img.size[1]:#如果是横屏,交换坐标
      im = img.resize((size[1],size[0]),Image.BILINEAR)
      im.save(folders[index]+'/'+filename)
    else:
      im = img.resize(size,Image.BILINEAR)
      im.save(folders[index]+'/'+filename)
    index = index + 1

action = sys.argv[1]#action:icon or screenshot
if action == 'screenshot':
  platform = sys.argv[2]#platform
  if platform == 'ios':
    walk_dir('./','ios')
  elif platform == 'android':
    walk_dir('./','android')
  else:
    print 'Hey,Platform can only be "ios" or "android" !'
elif action == 'icon':
  filename = sys.argv[2]#image filename
  platform = sys.argv[3]#platform
  if not os.path.exists(filename):
    print 'Hey,File Not Found!'
  else:
    if platform == 'ios':
      processIcon(filename,'ios')
    elif platform == 'android':
      processIcon(filename,'android')
    else:
      print 'Hey,Platform can only be "ios" or "android" !'
else:
print 'Hey,action can only be "icon" or "screenshot" !'Script environment requirements
Python 2.7
PIL or Pillow
The author personally tested it, maybe I am too good at it, try it I tried various methods to install PIL but always got errors. Finally I used Pillow and the effect was the same.
How to use the script
In the Windows command line or Mac terminal, enter:
python tool.py [action] [ filename] [platform]
action: icon or screenshot
filename: icon file name, no file name is required for screenshots, automatic traversal
platform: ios or android
Give some examples:
Generate iOS icon: python tool.py icon icon.jpg ios
Generate Android icon: python tool.py icon icon.jpg android
Generate iOS screenshots: python tool.py screenshot ios
Generate Android screenshots: python tool.py screenshot android
Note:
To generate an Android rounded corner icon, you need a PNG to be cropped, with a size of 512x512 and a 70mm rounded corner. It is already included in GitHub.
When generating screenshots, it will automatically traverse all JPG and PNG files and automatically identify horizontal and vertical screens
Conclusion
If you find it useful, welcome Star it in GitHub. Improvements are also welcome. The code is simple and easy to understand with comments.
The above is the entire content of this article. I hope it will be helpful to everyone's learning. I also hope that everyone will support the PHP Chinese website.
For more articles related to Python generating icons and screenshots for iOS10, please pay attention to the PHP Chinese website!

Hot AI Tools

Undresser.AI Undress
AI-powered app for creating realistic nude photos

AI Clothes Remover
Online AI tool for removing clothes from photos.

Undress AI Tool
Undress images for free

Clothoff.io
AI clothes remover

AI Hentai Generator
Generate AI Hentai for free.

Hot Article
Hot Tools

Notepad++7.3.1
Easy-to-use and free code editor

SublimeText3 Chinese version
Chinese version, very easy to use

Zend Studio 13.0.1
Powerful PHP integrated development environment

Dreamweaver CS6
Visual web development tools

SublimeText3 Mac version
God-level code editing software (SublimeText3)
Hot Topics
 1384
1384
 52
52

 How to disable taskbar thumbnail preview in Win11? Turn off the taskbar icon display thumbnail technique by moving the mouse
Feb 29, 2024 pm 03:20 PM
How to disable taskbar thumbnail preview in Win11? Turn off the taskbar icon display thumbnail technique by moving the mouse
Feb 29, 2024 pm 03:20 PM
This article will introduce how to turn off the thumbnail function displayed when the mouse moves the taskbar icon in Win11 system. This feature is turned on by default and displays a thumbnail of the application's current window when the user hovers the mouse pointer over an application icon on the taskbar. However, some users may find this feature less useful or disruptive to their experience and want to turn it off. Taskbar thumbnails can be fun, but they can also be distracting or annoying. Considering how often you hover over this area, you may have inadvertently closed important windows a few times. Another drawback is that it uses more system resources, so if you've been looking for a way to be more resource efficient, we'll show you how to disable it. but
 How to remove icons in Ubuntu start menu?
Jan 13, 2024 am 10:45 AM
How to remove icons in Ubuntu start menu?
Jan 13, 2024 am 10:45 AM
There are many software icons listed in the Ubuntu system start menu. There are many uncommon icons. If you want to delete them, how should you delete them? Let’s take a look at the detailed tutorial below. 1. First enter the ubuntu desktop and click on the start menu under the left panel. 2. You can find a text editor icon inside, we need to delete it. 3. Now we return to the desktop and right-click the mouse to open the terminal. 4. Use the command to open the application list directory. sudonautilus/usr/share/applicationssudonautilus~/.local/share/applications5. Find the corresponding text editor icon inside. 6. Then go straight
 How do I get the system tray icon to appear on all my Windows 11 monitors?
Sep 22, 2023 pm 03:21 PM
How do I get the system tray icon to appear on all my Windows 11 monitors?
Sep 22, 2023 pm 03:21 PM
When using a multi-monitor setup, users want to display the tray icon on all monitors in order to keep up with the latest notifications or access certain applications. This can be very useful, and in today's guide we'll show you how to enable this feature correctly. How to show tray icon on all monitors in Windows 11? 1. Use the display fusion software to visit the DisplayFusion website and download the software. After downloading the software, run the setup file and install it. Start the software and configure it as needed. On the second screen, right-click the taskbar, select Multi-monitor Taskbar, and then select System Tray. Finally, check Show/Hide Icons. Once this is done, you should get your system on both monitors on Windows 11
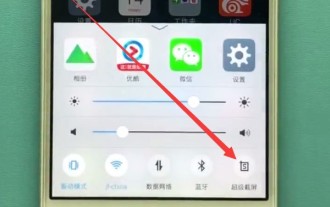 Introduction to how to take screenshots on vivo mobile phones
Mar 22, 2024 pm 05:36 PM
Introduction to how to take screenshots on vivo mobile phones
Mar 22, 2024 pm 05:36 PM
1. Swipe up from the bottom of the screen and click to open [Super Screenshot]. 2. Select [Long Screenshot] or [Rectangular Screenshot] as needed. Take the rectangular screenshot as an example and click on the rectangular screenshot. 3. Select the area you want to screenshot, and then click [Save].
 Download the phone settings icon to the desktop 'Know in seconds: Steps to change icons for apps on Android phones'
Feb 06, 2024 pm 04:27 PM
Download the phone settings icon to the desktop 'Know in seconds: Steps to change icons for apps on Android phones'
Feb 06, 2024 pm 04:27 PM
In order to beautify their desktop, many users like to change their desktop themes regularly to keep them fresh. However, changing the theme will not change the icon of the third-party APP, and the personalized beautification is not thorough enough. If you're tired of the same app icons, replace them. Theoretically, if you want to change the icon for a mobile app, you usually need a ROOT system and some tools to unpack and replace the icon. But since the vast majority of mobile phones no longer support the ROOT system, we need to find other methods to achieve it. For example, some specific applications may offer the option to customize the icon, or personalize the icon through a third-party launcher. In addition, some mobile phone brands have also launched special theme and icon stores for users to choose and change icons. In major app stores,
 What do the 5G UC and 5G UW icons on your T-mobile smartphone mean?
Feb 24, 2024 pm 06:10 PM
What do the 5G UC and 5G UW icons on your T-mobile smartphone mean?
Feb 24, 2024 pm 06:10 PM
T-Mobile users have started noticing that the network icon on their phone screens sometimes reads 5GUC, while other carriers read 5GUW. This is not a typo, but represents a different type of 5G network. In fact, operators are constantly expanding their 5G network coverage. In this topic, we will take a look at the meaning of the 5GUC and 5GUW icons displayed on T-Mobile smartphones. The two logos represent different 5G technologies, each with its own unique characteristics and advantages. By understanding what these signs mean, users can better understand the type of 5G network they are connected to so they can choose the network service that best suits their needs. 5GUCVS5GUW icon in T
 What should I do if Win10 takes a screenshot and crashes? How to solve the problem of Win10 flashing and then disappearing after taking a screenshot?
Jun 02, 2024 pm 12:48 PM
What should I do if Win10 takes a screenshot and crashes? How to solve the problem of Win10 flashing and then disappearing after taking a screenshot?
Jun 02, 2024 pm 12:48 PM
There are many reasons why the screenshot disappears after taking a screenshot in Win10. Users can first check the screenshot save location or adjust the screenshot settings, or check the animation effect to check it. If it really doesn't work, you can also choose to update the driver and operating system to perform the operation. Let this website carefully introduce to users the analysis of the problem of Win10 disappearing after taking a screenshot. Analysis of the problem after win10 takes a picture and it flashes and disappears 1. Check where the screenshot is saved: When you use the Win+PrtSc (PrintScreen) key combination to take a screenshot, the screenshot is usually saved in the C:\Users\YourUsername\Pictures\Screenshots folder. please
 How to insert excel icons into PPT slides
Mar 26, 2024 pm 05:40 PM
How to insert excel icons into PPT slides
Mar 26, 2024 pm 05:40 PM
1. Open the PPT and turn the page to the page where you need to insert the excel icon. Click the Insert tab. 2. Click [Object]. 3. The following dialog box will pop up. 4. Click [Create from file] and click [Browse]. 5. Select the excel table to be inserted. 6. Click OK and the following page will pop up. 7. Check [Show as icon]. 8. Click OK.
