JavaScript singleton pattern concepts and code examples
Preface
Like other programming languages, Javascript also has many design patterns, such as singleton mode, proxy mode, observer mode, etc. Proficient use of Javascript design patterns can make our code logic clearer and easier to maintain and refactor.
This article will introduce the more common and practical mode in Javascript mode - singleton mode, which is mainly divided into concept and example parts. While introducing examples, additional knowledge points in the code will also be explained.
Concept of singleton pattern
First of all, what is singleton pattern? It can be understood this way: the singleton pattern aims to ensure that a class has only one instance and provides a global access point.
Maybe some people still don’t understand the concept of singleton, so you can imagine some examples in life. For example, when registering an account, if the account we registered already exists, the system will prompt us "The account already exists. Do you want to use this account to log in?". We cannot create an identical account again unless we cancel the original account. This is a vivid embodiment of the singleton pattern.
A similar example is the login pop-up box on the web page. No matter how many times we click the login button, only one login pop-up box will always be displayed on the interface, and a second one cannot be created.
This article will take the login pop-up box as an example to introduce the use of singleton mode.
Single case mode example
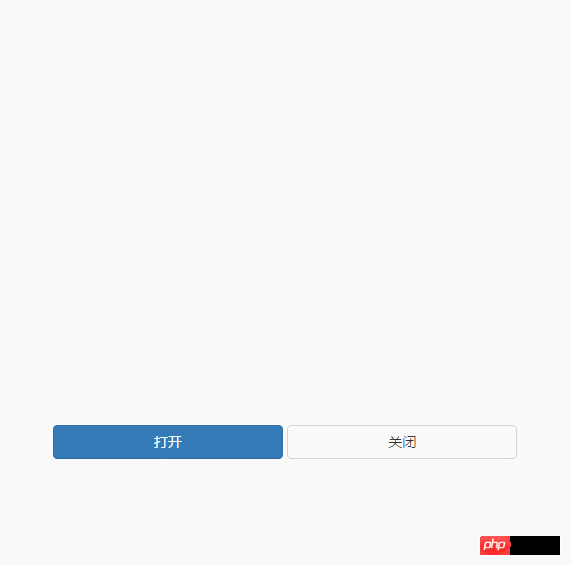
1.demo display

The demo address is: Pop-up box example
2. Code display
The code to build a singleton mode pop-up box instance may be written differently by everyone, but the purpose is the same: to build a globally unique and accessible pop-up box. Next we implement this example step by step.
(1) Obtain the DOM object
var $ = function(id) {
    return typeof id === 'string' ? document.getElementById(id) : id;
};First of all, in order to facilitate some subsequent operations on the DOM, we will use the principle of functional programming to obtain the element object of the target id. The method is encapsulated and can be obtained directly using $(id).
(2) Pop-up frame constructor
var Modal = function(id, html) {
    this.html = html;
    this.id = id;
    this.open = false;
};Here we declare a Modal as the constructor of the pop-up frame, and define the public attributes html and id inside it and open. HTML is used to define the content inside the pop-up box, id is used to define the id name for the pop-up box, and open is used to determine whether the pop-up box is open.
(3) open method
Modal.prototype.create = function() {
    if (!this.open) {
        var modal = document.createElement('p');

        modal.innerHTML = this.html;
        modal.id = this.id;
        document.body.appendChild(modal);

        setTimeout(function() {
            modal.classList.add('show');
        }, 0);

        this.open = true;
    }
};We defined the create method on the prototype chain of Modal. Inside the method, we create and insert the bullet box into the DOM, and at the same time give Add an animation effect with class "show" to the pop-up box. Here is a brief introduction to classList:
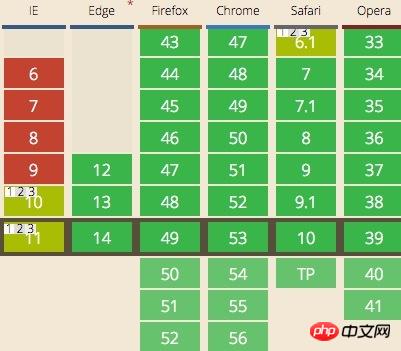
classList is a more convenient attribute to operate the element class than className, but it is not compatible with versions below IE10 in terms of compatibility:

The operation class methods it provides are similar to those of jQuery, mainly
add(class1, class2, ...) Add one or more class names to the element, similar to jQuery's addClass ()
remove(class1, class2, …) Removes one or more class names from the element, similar to jQuery’s removeClass()
contains(class) Determines whether the specified class name exists, similar to jQuery's hasClass()
Here we use the add method to add the show class to Modal.
(4) close method
Modal.prototype.delete = function() {
    if (this.open) {
        var modal = $(this.id);

        modal.classList.add('hide');
        setTimeout(function() {
            document.body.removeChild(modal);
        }, 200);

        this.open = false;
    }
};After defining the open method, we define here a method to close the pop-up box, and add a hide class animation effect to the pop-up box object inside it. , and finally remove the pop-up object from the page.
(5) Create an instance
var createIntance = (function() {
    var instance;
    return function() {
        return instance || (instance = new Modal('modal', '这是一个弹框'))
    }
})();This is an important part of implementing the singleton mode. Let’s analyze the knowledge points:
-
Use ClosureEncapsulates the instance private variable and returns a function
Use || syntax to determine if the instance does not exist, execute the latter's instantiation Modal If the method exists, it will directly return instance, ensuring that there is only one pop-up instance
The creation of this instance can also be understood as part of the proxy mode.
(6) Button operation
var operate = {
    setModal: null,
    open: function() {
        this.setModal = createIntance();
        this.setModal.create();
    },
    delete: function() {
        this.setModal ? this.setModal.delete() : '';
    }
};Here we put the button operation in the operate object, so that the opening and closing operations can obtain the instance setModal through this.
(7) Binding events
$('open').onclick = function() {
    operate.open();
};

$('delete').onclick = function() {
    operate.delete();
};Finally, we bind the open and delete methods to the two buttons. At this point, we use the singleton mode to implement the pop-up box The demo is implemented.
Please view the complete code: Complete code
Conclusion
The above is the content of the JavaScript singleton mode concept and code examples. For more related content, please pay attention to the PHP Chinese website (www .php.cn)!

Hot AI Tools

Undresser.AI Undress
AI-powered app for creating realistic nude photos

AI Clothes Remover
Online AI tool for removing clothes from photos.

Undress AI Tool
Undress images for free

Clothoff.io
AI clothes remover

Video Face Swap
Swap faces in any video effortlessly with our completely free AI face swap tool!

Hot Article

Hot Tools

Notepad++7.3.1
Easy-to-use and free code editor

SublimeText3 Chinese version
Chinese version, very easy to use

Zend Studio 13.0.1
Powerful PHP integrated development environment

Dreamweaver CS6
Visual web development tools

SublimeText3 Mac version
God-level code editing software (SublimeText3)

Hot Topics
 1386
1386
 52
52
 How to implement an online speech recognition system using WebSocket and JavaScript
Dec 17, 2023 pm 02:54 PM
How to use WebSocket and JavaScript to implement an online speech recognition system Introduction: With the continuous development of technology, speech recognition technology has become an important part of the field of artificial intelligence. The online speech recognition system based on WebSocket and JavaScript has the characteristics of low latency, real-time and cross-platform, and has become a widely used solution. This article will introduce how to use WebSocket and JavaScript to implement an online speech recognition system.
 WebSocket and JavaScript: key technologies for implementing real-time monitoring systems
Dec 17, 2023 pm 05:30 PM
WebSocket and JavaScript: Key technologies for realizing real-time monitoring systems Introduction: With the rapid development of Internet technology, real-time monitoring systems have been widely used in various fields. One of the key technologies to achieve real-time monitoring is the combination of WebSocket and JavaScript. This article will introduce the application of WebSocket and JavaScript in real-time monitoring systems, give code examples, and explain their implementation principles in detail. 1. WebSocket technology
 How to use JavaScript and WebSocket to implement a real-time online ordering system
Dec 17, 2023 pm 12:09 PM
Introduction to how to use JavaScript and WebSocket to implement a real-time online ordering system: With the popularity of the Internet and the advancement of technology, more and more restaurants have begun to provide online ordering services. In order to implement a real-time online ordering system, we can use JavaScript and WebSocket technology. WebSocket is a full-duplex communication protocol based on the TCP protocol, which can realize real-time two-way communication between the client and the server. In the real-time online ordering system, when the user selects dishes and places an order
 What does the metaverse concept mean? What is the metaverse concept?
Feb 22, 2024 pm 03:55 PM
The Metaverse is an illusory world that uses technology to map and interact with the real world. Analysis 1 Metaverse [Metaverse] is an illusory world that makes full use of technological methods to link and create, and maps and interacts with the real world. It is a data living space with the latest social development system. The 2-dimensional universe is essentially a virtual technology and digital process of the real world, which requires a lot of transformation of content production, economic system, customer experience and physical world content. 3 However, the development trend of the metaverse is gradual. It is finally formed by the continuous combination and evolution of many tools and platforms with the support of shared infrastructure, standards and protocols. Supplement: What is the metaverse composed of? 1 The metaverse is composed of Meta and Verse, Meta is transcendence, and V
 How to implement an online reservation system using WebSocket and JavaScript
Dec 17, 2023 am 09:39 AM
How to use WebSocket and JavaScript to implement an online reservation system. In today's digital era, more and more businesses and services need to provide online reservation functions. It is crucial to implement an efficient and real-time online reservation system. This article will introduce how to use WebSocket and JavaScript to implement an online reservation system, and provide specific code examples. 1. What is WebSocket? WebSocket is a full-duplex method on a single TCP connection.
 Master the key concepts of Spring MVC: Understand these important features
Dec 29, 2023 am 09:14 AM
Understand the key features of SpringMVC: To master these important concepts, specific code examples are required. SpringMVC is a Java-based web application development framework that helps developers build flexible and scalable structures through the Model-View-Controller (MVC) architectural pattern. web application. Understanding and mastering the key features of SpringMVC will enable us to develop and manage our web applications more efficiently. This article will introduce some important concepts of SpringMVC
 JavaScript and WebSocket: Building an efficient real-time weather forecasting system
Dec 17, 2023 pm 05:13 PM
JavaScript and WebSocket: Building an efficient real-time weather forecast system Introduction: Today, the accuracy of weather forecasts is of great significance to daily life and decision-making. As technology develops, we can provide more accurate and reliable weather forecasts by obtaining weather data in real time. In this article, we will learn how to use JavaScript and WebSocket technology to build an efficient real-time weather forecast system. This article will demonstrate the implementation process through specific code examples. We
 Learn more about Gunicorn's fundamentals and features
Jan 03, 2024 am 08:41 AM
Basic concepts and functions of Gunicorn Gunicorn is a tool for running WSGI servers in Python web applications. WSGI (Web Server Gateway Interface) is a specification defined by the Python language and is used to define the communication interface between web servers and web applications. Gunicorn enables Python web applications to be deployed and run in production environments by implementing the WSGI specification. The function of Gunicorn is to


