
 Web Front-end
H5 Tutorial
Detailed explanation of how to make various lists on H5 mobile terminal (3)
Web Front-end
H5 Tutorial
Detailed explanation of how to make various lists on H5 mobile terminal (3)
Detailed explanation of how to make various lists on H5 mobile terminal (3)

How to make various lists on H5 mobile terminal (3)
Review of previous situation
In the previous blog post "Mobile terminal In "Various List Making Methods (2)", we use two DEMOs to demonstrate the list making that is more demanding in mobile H5. However, it seems to be quite simple. This Chapter, then go deeper.
If you saw this article first, it is recommended that you go to the link above and read the corresponding content first, so that the context is coherent and it is easier to understand the content of this article.
List with small icons
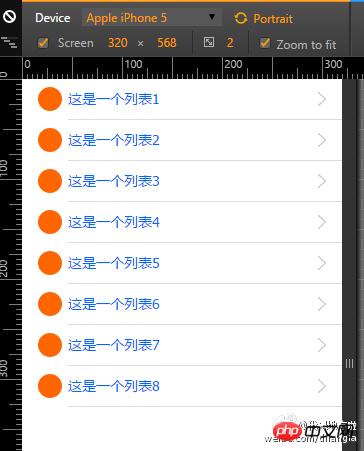
In the above two chapters, we made some ordinary lists. In mobile H5, we often make lists with one small icon per line. In this DEMO, we Let’s make this type of list. The example is as shown below.

I will not use the small icon here, but draw a circle instead.
html code
<!DOCTYPE html>
<html lang="en">
<head>
<meta charset="UTF-8">
<meta name="viewport" content="width=device-width, initial-scale=1.0, maximum-scale=1.0, user-scalable=0" />
<title>list 1</title>
<link rel="stylesheet" href="../style/style.css"></head><body>
<p class="list_1">
    <ul>
        <li><a href=""><i class="ico ico_1"></i>这是一个列表1</a></li>
        <li><a href=""><i class="ico ico_2"></i>这是一个列表2</a></li>
        <li><a href=""><i class="ico ico_3"></i>这是一个列表3</a></li>
        <li><a href=""><i class="ico ico_4"></i>这是一个列表4</a></li>
        <li><a href=""><i class="ico ico_5"></i>这是一个列表5</a></li>
        <li><a href=""><i class="ico ico_6"></i>这是一个列表6</a></li>
        <li><a href=""><i class="ico ico_7"></i>这是一个列表7</a></li>
        <li><a href=""><i class="ico ico_8"></i>这是一个列表8</a></li>
</ul></p></body></html>The html code here is different from the previous example. Here we add a i tag to make the icon. Give each i# The ## tag plus different class is to customize different icons.
.list_1 {    ul {padding-left: 1.6rem;}
    li {        border-bottom: 1px solid #ddd;padding-right: 1.6rem;
    a {
            display: block;height: 4rem;line-height: 4rem;overflow: hidden;font-size: 1.4rem;
            background:url("../image/icon_goto.png") right center no-repeat;
            background-size: auto 1.4rem;
            padding-left: 3rem;
            position: relative;
            }
        .ico {
        display: block;width: 2.4rem;height: 2.4rem;position: absolute;left: 0;top: .8rem;
        background: #f60;border-radius: 50%;
        }
    }
}
Copy after login
In this example, we use the positioning layout method. If you don’t know much about positioning layout, please read my blog post "Css Detailed Interpretation of Positioning Attributes and Parameters".In addition, since each icon must be different, I give each icon in the html .list_1 { ul {padding-left: 1.6rem;}
li { border-bottom: 1px solid #ddd;padding-right: 1.6rem;
a {
display: block;height: 4rem;line-height: 4rem;overflow: hidden;font-size: 1.4rem;
background:url("../image/icon_goto.png") right center no-repeat;
background-size: auto 1.4rem;
padding-left: 3rem;
position: relative;
}
.ico {
display: block;width: 2.4rem;height: 2.4rem;position: absolute;left: 0;top: .8rem;
background: #f60;border-radius: 50%;
}
}
}i tags are added with different classes to facilitate calling different icon images in CSS. In other words, we use background images to make icons.
background-size to process the icons, about background-size## The use of # is explained in the previous chapter of this article. I will not go into details here. SASS loop, it is recommended to check the implementation method on the official website of Getting Started with Sass - Sass Tutorial. I will not elaborate too much here.
A list with icons, but the dividing line must be aligned with the text.
First, let’s look at the rendering:
 This list and The above list looks no different at first glance. But if you look closely, you will find that the dividing line is aligned with the text, not the icon.
Don’t blame me for being awkward, that’s how the designer designed it. If it is not done, the designer will be very angry.
The html code is consistent with the DEMO above. I won’t repeat it here
Without further ado, adjust the css
The left padding of SASS code
.list_1 {
ul {padding-left: 4.6rem;}
    li {
    border-bottom: 1px solid #ddd;
    padding-right: 1.6rem;
    position: relative;
    a {
            display: block;height: 4rem;line-height: 4rem;overflow: hidden;font-size: 1.4rem;
            background:url("../image/icon_goto.png") right center no-repeat;
            background-size: auto 1.4rem;
            }
        .ico {
        display: block;width: 2.4rem;height: 2.4rem;position: absolute;left: -3rem;top: .8rem;
        background: #f60;border-radius: 50%;
        }
    }
}originally on
a is added to ul. In this way, li can be compressed to achieve The effect of reducing the edge. In the processing of the icon, the left
value uses a negative number and is moved above the ul filling. The design effect is achieved.Summary
This chapter does not focus on how to deal with SASS loops. These are technical issues. You can learn them quickly by referring to the SASS tutorial.
I am here Assume that the background image method is used to realize small icons. Of course, there are many ways to realize the production of small icons, such as CSS icons, such as font icons. Each of these implementation methods has its own advantages and disadvantages, which is not the issue I will consider today. .
This chapter focuses on the following points:
- Positioning layout. This is very important.
- Flexible use For various elements, use inner filling or outer filling to achieve the effect you want.
- Use different class names to achieve different small icons.
The above is the detailed content of Detailed explanation of how to make various lists on H5 mobile terminal (3). For more information, please follow other related articles on the PHP Chinese website!

Hot AI Tools

Undresser.AI Undress
AI-powered app for creating realistic nude photos

AI Clothes Remover
Online AI tool for removing clothes from photos.

Undress AI Tool
Undress images for free

Clothoff.io
AI clothes remover

Video Face Swap
Swap faces in any video effortlessly with our completely free AI face swap tool!

Hot Article
Hot Tools

Notepad++7.3.1
Easy-to-use and free code editor

SublimeText3 Chinese version
Chinese version, very easy to use

Zend Studio 13.0.1
Powerful PHP integrated development environment

Dreamweaver CS6
Visual web development tools

SublimeText3 Mac version
God-level code editing software (SublimeText3)
Hot Topics
 1386
1386
 52
52

 Table Border in HTML
Sep 04, 2024 pm 04:49 PM
Table Border in HTML
Sep 04, 2024 pm 04:49 PM
Guide to Table Border in HTML. Here we discuss multiple ways for defining table-border with examples of the Table Border in HTML.
 HTML margin-left
Sep 04, 2024 pm 04:48 PM
HTML margin-left
Sep 04, 2024 pm 04:48 PM
Guide to HTML margin-left. Here we discuss a brief overview on HTML margin-left and its Examples along with its Code Implementation.
 Nested Table in HTML
Sep 04, 2024 pm 04:49 PM
Nested Table in HTML
Sep 04, 2024 pm 04:49 PM
This is a guide to Nested Table in HTML. Here we discuss how to create a table within the table along with the respective examples.
 HTML Table Layout
Sep 04, 2024 pm 04:54 PM
HTML Table Layout
Sep 04, 2024 pm 04:54 PM
Guide to HTML Table Layout. Here we discuss the Values of HTML Table Layout along with the examples and outputs n detail.
 HTML Input Placeholder
Sep 04, 2024 pm 04:54 PM
HTML Input Placeholder
Sep 04, 2024 pm 04:54 PM
Guide to HTML Input Placeholder. Here we discuss the Examples of HTML Input Placeholder along with the codes and outputs.
 HTML Ordered List
Sep 04, 2024 pm 04:43 PM
HTML Ordered List
Sep 04, 2024 pm 04:43 PM
Guide to the HTML Ordered List. Here we also discuss introduction of HTML Ordered list and types along with their example respectively
 Moving Text in HTML
Sep 04, 2024 pm 04:45 PM
Moving Text in HTML
Sep 04, 2024 pm 04:45 PM
Guide to Moving Text in HTML. Here we discuss an introduction, how marquee tag work with syntax and examples to implement.
 HTML onclick Button
Sep 04, 2024 pm 04:49 PM
HTML onclick Button
Sep 04, 2024 pm 04:49 PM
Guide to HTML onclick Button. Here we discuss their introduction, working, examples and onclick Event in various events respectively.
