
Operating system: Windows Server 2008 R2
Integrated development environment (IDE): Microsoft Visual Studio 2010
Development language: c
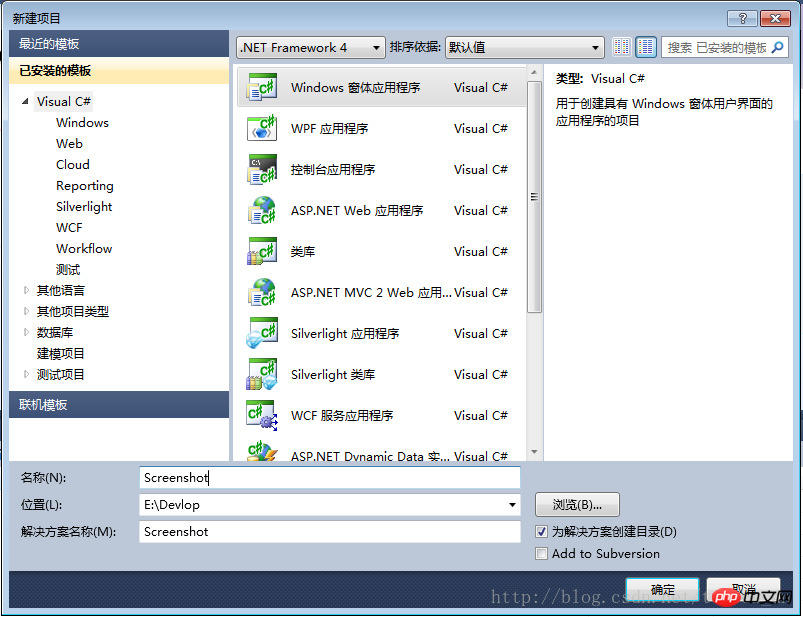
File》New》Project

.NET Framework can choose version 2.0 or version 4.0;
Project type selection: Windows Forms application
Enter the project name and confirm
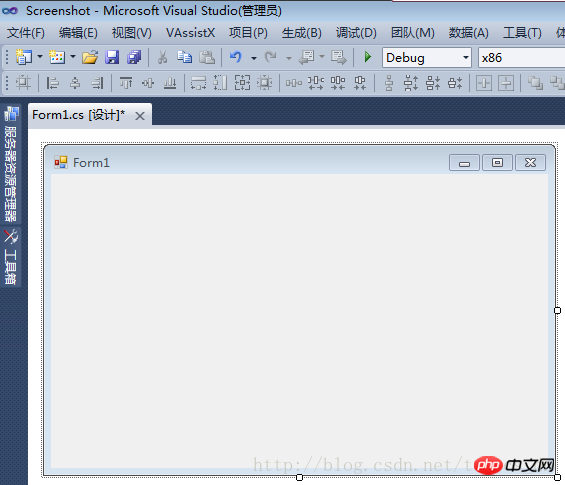
The project was created successfully, as shown below:
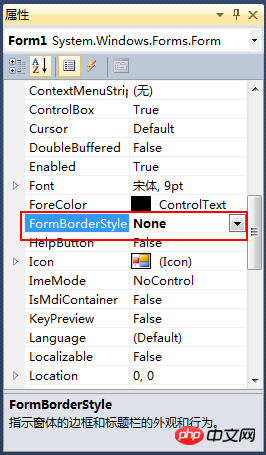
Modify the "FormBorderStyle" property of the form to "none" to implement a form without borders
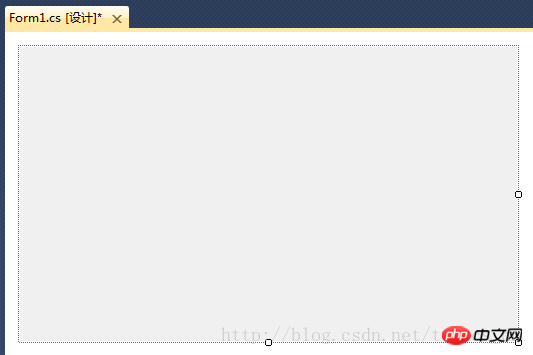
After modification, the display in the window designer is as follows:
#Modify other attributes as shown below, the attribute values are in bold It is a modified
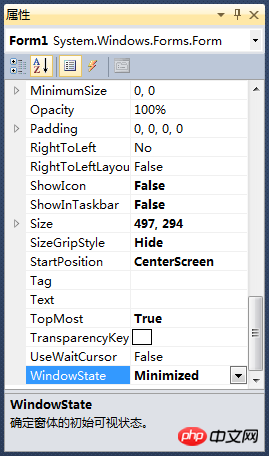
Property description:
ShowIcon=False, do not display the icon of the form;
ShowInTaskbar=False, so that the form does not appear in the Windows taskbar;
SizeGripStyle=Hide, disable the function of dragging the lower right corner of the form to change the size;
WindowsState=Minimized , minimize the window after startup;
After setting these properties, compile and run, the program is in running state, but the window of the program cannot be seen;
you need to use WindowsAPI
to register the hotkey: RegisterHotKey
##theFunctionDefine a system-wide hotkey. FunctionPrototype: BOOL RegisterHotKey(HWND hWnd, int id, UINT fsModifiers, UINT vk);
Cancel hotkey registration : UnregisterHotKeyGlobalAddAtom## Applies only to desktop applications.
Adds a
stringto the global atom table and returns the unique identifier (atomic ATOM) of this string. API and local
Variables /// <summary>
/// 向全局原子表添加一个字符串,并返回这个字符串的唯一标识符(原子ATOM)。
/// </summary>
/// <param name="lpString">自己设定的一个字符串</param>
/// <returns></returns>
[System.Runtime.InteropServices.DllImport("Kernel32.dll")]
public static extern Int32 GlobalAddAtom(string lpString);
/// <summary>
/// 注册热键
/// </summary>
/// <param name="hWnd"></param>
/// <param name="id"></param>
/// <param name="fsModifiers"></param>
/// <param name="vk"></param>
/// <returns></returns>
[System.Runtime.InteropServices.DllImport("user32.dll")]
public static extern bool RegisterHotKey(IntPtr hWnd, int id, uint fsModifiers, Keys vk);
/// <summary>
/// 取消热键注册
/// </summary>
/// <param name="hWnd"></param>
/// <param name="id"></param>
/// <returns></returns>
[System.Runtime.InteropServices.DllImport("user32.dll")]
public static extern bool UnregisterHotKey(IntPtr hWnd, int id);
/// <summary>
/// 热键ID
/// </summary>
public int hotKeyId = 100;
/// <summary>
/// 热键模式:0=Ctrl + Alt + A, 1=Ctrl + Shift + A
/// </summary>
public int HotKeyMode = 1;
/// <summary>
/// 控制键的类型
/// </summary>
public enum KeyModifiers : uint
{
None = 0,
Alt = 1,
Control = 2,
Shift = 4,
Windows = 8
}
/// <summary>
/// 用于保存截取的整个屏幕的图片
/// </summary>
protected Bitmap screenImage; private void Form1_Load(object sender, EventArgs e)
{
//隐藏窗口
this.Hide();
//注册快捷键
//注:HotKeyId的合法取之范围是0x0000到0xBFFF之间,GlobalAddAtom函数得到的值在0xC000到0xFFFF之间,所以减掉0xC000来满足调用要求。
this.hotKeyId = GlobalAddAtom("Screenshot") - 0xC000;
if (this.hotKeyId == 0)
{
//如果获取失败,设定一个默认值;
this.hotKeyId = 0xBFFE;
}
if (this.HotKeyMode == 0)
{
RegisterHotKey(Handle, hotKeyId, (uint)KeyModifiers.Control | (uint)KeyModifiers.Alt, Keys.A);
}
else
{
RegisterHotKey(Handle, hotKeyId, (uint)KeyModifiers.Control | (uint)KeyModifiers.Shift, Keys.A);
}
} /// <summary>
/// 处理快捷键事件
/// </summary>
/// <param name="m"></param>
protected override void WndProc(ref Message m)
{
//if (m.Msg == 0x0014)
//{
// return; // 禁掉清除背景消息
//}
const int WM_HOTKEY = 0x0312;
switch (m.Msg)
{
case WM_HOTKEY:
ShowForm();
break;
default:
break;
}
base.WndProc(ref m);
}When the hotkey is pressed, the program first obtains a picture of the entire screen and saves it to the "screenImage" variable; then adds a mask layer, sets it as the background image of the form, and sets the window size to The size of the main screen and the display window make it feel like adding a translucent mask layer to the desktop.
The code is as follows:
        /// <summary>
        /// 如果窗口为可见状态,则隐藏窗口;
        /// 否则则显示窗口
        /// </summary>
        protected void ShowForm()
        {
            if (this.Visible)
            {
                this.Hide();
            }
            else
            {
                Bitmap bkImage = new Bitmap(Screen.AllScreens[0].Bounds.Width, Screen.AllScreens[0].Bounds.Height);
                Graphics g = Graphics.FromImage(bkImage);
                g.CopyFromScreen(new Point(0, 0), new Point(0, 0), Screen.AllScreens[0].Bounds.Size, CopyPixelOperation.SourceCopy);
                screenImage = (Bitmap)bkImage.Clone();
                g.FillRectangle(new SolidBrush(Color.FromArgb(64, Color.Gray)), Screen.PrimaryScreen.Bounds);
                this.BackgroundImage = bkImage;

                this.ShowInTaskbar = false;
                this.FormBorderStyle = System.Windows.Forms.FormBorderStyle.None;
                this.Width = Screen.PrimaryScreen.Bounds.Width;
                this.Height = Screen.PrimaryScreen.Bounds.Height;
                this.Location = Screen.PrimaryScreen.Bounds.Location;

                this.WindowState = FormWindowState.Maximized;
                this.Show();
            }
}Cancel hotkey registration
        /// <summary>
        /// 当窗口正在关闭时进行验证
        /// </summary>
        /// <param name="sender"></param>
        /// <param name="e"></param>
        private void Form1_FormClosing(object sender, FormClosingEventArgs e)
        {
            if (e.CloseReason == CloseReason.ApplicationExitCall)
            {
                e.Cancel = false;
                UnregisterHotKey(this.Handle, hotKeyId);
            }
            else
            {
                this.Hide();
                e.Cancel = true;
            }
}Go here, hotkey Functions such as key registration and screenshot window display have been basically completed.
Note: When testing this code, it is best to add a button to the form to close or hide the screenshot window; because the screenshot window is full screen and cannot respond to the ESC key , so the process can only be ended through the task managerExit. When debugging it is best to add a Label control to the form to display the required variable information, because the screenshot window is a top-level full-screen window, and there is no way to operate it when the breakpoint is hit. VS.
The above is the detailed content of C# Development Example-Customized Screenshot Tool (2) Create Project, Register Hotkeys, and Display the Screenshot Main Window. For more information, please follow other related articles on the PHP Chinese website!


