 Backend Development
 C#.Net Tutorial
 C# Development Example-Customized Screenshot Tool (7) Code Example for Adding Magnifying Glass Function
C# Development Example-Customized Screenshot Tool (7) Code Example for Adding Magnifying Glass Function
Since you may need to accurately capture a certain part when taking a screenshot, you need the function of a magnifying glass, so that it is easier to locate the location of the screenshot when taking a screenshot.
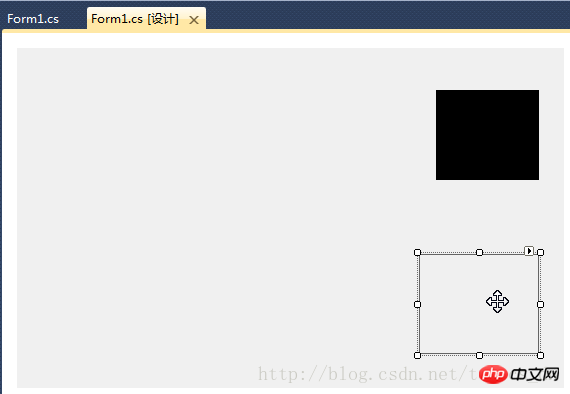
Add PictureBox, name attribute is set to "pictureBox_zoom";

in "For m1_Load”Event handlingAdd the following code in function:
//设置放大镜的大小
            this.pictureBox_zoom.Width = this.ZoomBoxWidth;
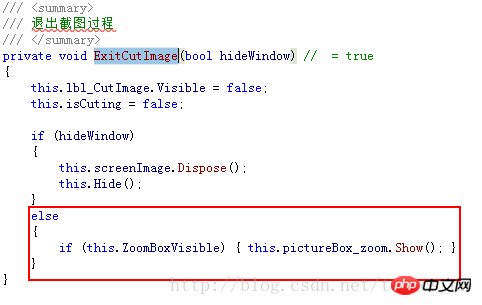
this.pictureBox_zoom.Height = this.ZoomBoxHeight;Add code in the “ExitCutImage” method:

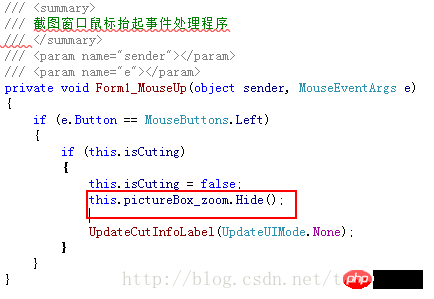
Add code in the "Form1_MouseUp" event handler function:

Add code at the end of the else condition of the "ShowForm" method:
if (this.ZoomBoxVisible)
                {
                    UpdateCutInfoLabel(UpdateUIMode.ShowZoomBox);
                    this.pictureBox_zoom.Show();
}Add the following code at the end of the "UpdateCutInfoLabel" function:
if (this.pictureBox_zoom.Visible || (updateUIMode & UpdateUIMode.ShowZoomBox) != UpdateUIMode.None)
            {
                Point zoomLocation = new Point(MousePosition.X + 15, MousePosition.Y + 22);
                if (zoomLocation.Y + this.pictureBox_zoom.Height > this.Height)
                {
                    if (zoomLocation.X + this.pictureBox_zoom.Width > this.Width)
                    {
                        zoomLocation = new Point(MousePosition.X - this.pictureBox_zoom.Width - 10, MousePosition.Y - this.pictureBox_zoom.Height - 10);
                    }
                    else
                    {
                        zoomLocation = new Point(MousePosition.X + 15, MousePosition.Y - this.pictureBox_zoom.Height - 15);
                    }
                }
                else
                {
                    if (zoomLocation.X + this.pictureBox_zoom.Width > this.Width)
                    {
                        zoomLocation = new Point(MousePosition.X - this.pictureBox_zoom.Width - 15, MousePosition.Y);
                    }
                }
                this.pictureBox_zoom.Location = zoomLocation;
                if (!this.pictureBox_zoom.Visible)
                {
                    this.pictureBox_zoom.Show();
                }
}Add the following code in the "Form1_KeyUp" event handling function:

Add the "Paint" event handler for "pictureBox_zoom", the code is as follows:
        /// <summary>
        /// 放大镜组件重绘事件处理程序
        /// 实时显示鼠标指针位置放大后的图像
        /// </summary>
        /// <param name="sender"></param>
        /// <param name="e"></param>
        private void pictureBox_zoom_Paint(object sender, PaintEventArgs e)
        {
            Bitmap bmp_lbl = new Bitmap(e.ClipRectangle.Width, e.ClipRectangle.Height);
            int srcWidth = (int)(this.ZoomBoxWidth / 10);
            int srcHeight = (int)(this.ZoomBoxHeight / 10);

            Bitmap bmp = new Bitmap(srcWidth, srcHeight);
            Rectangle srcRect = new Rectangle(MousePosition.X - 5, MousePosition.Y - 4, srcWidth, srcHeight);
            if (!isCuting)
            {
                srcRect = new Rectangle(MousePosition.X - 6, MousePosition.Y - 5, srcWidth, srcHeight);
            }
            Graphics g = Graphics.FromImage(bmp);
            g.DrawImage(screenImage, 0, 0, srcRect, GraphicsUnit.Pixel);
            g.Dispose();

            //Zoom
            int x, y;
            for (int row = 0; row < bmp.Height; row++)
            {
                for (int col = 0; col < bmp.Width; col++)
                {
                    Color pc = bmp.GetPixel(col, row);
                    for (int h = 0; h < 10; h++)
                    {
                        for (int w = 0; w < 10; w++)
                        {
                            x = col * 10 + w;
                            y = row * 10 + h;
                            if (x < bmp_lbl.Width && y < bmp_lbl.Height)
                            {
                                bmp_lbl.SetPixel(x, y, pc);
                            }
                        }
                    }
                }
            }

            e.Graphics.DrawImage(bmp_lbl, 0, 0);

            int blockX = e.ClipRectangle.Width / 2;
            int blockY = e.ClipRectangle.Height / 2;

            SolidBrush brush = new SolidBrush(Color.FromArgb(10, 124, 202));
            Pen pen = new Pen(brush, 2.0F);
            e.Graphics.DrawLine(pen, new Point(0, blockY), new Point(e.ClipRectangle.Width, blockY));
            e.Graphics.DrawLine(pen, new Point(blockX, 0), new Point(blockX, e.ClipRectangle.Height));

            g.Dispose();
            bmp_lbl.Dispose();
}Compile, run, take a screenshot to see the effect!
The above is the detailed content of C# Development Example-Customized Screenshot Tool (7) Code Example for Adding Magnifying Glass Function. For more information, please follow other related articles on the PHP Chinese website!

Hot AI Tools

Undresser.AI Undress
AI-powered app for creating realistic nude photos

AI Clothes Remover
Online AI tool for removing clothes from photos.

Undress AI Tool
Undress images for free

Clothoff.io
AI clothes remover

AI Hentai Generator
Generate AI Hentai for free.

Hot Article

Hot Tools

Notepad++7.3.1
Easy-to-use and free code editor

SublimeText3 Chinese version
Chinese version, very easy to use

Zend Studio 13.0.1
Powerful PHP integrated development environment

Dreamweaver CS6
Visual web development tools

SublimeText3 Mac version
God-level code editing software (SublimeText3)

Hot Topics
 1377
1377
 52
52
 Active Directory with C#
Sep 03, 2024 pm 03:33 PM
Guide to Active Directory with C#. Here we discuss the introduction and how Active Directory works in C# along with the syntax and example.
 Random Number Generator in C#
Sep 03, 2024 pm 03:34 PM
Guide to Random Number Generator in C#. Here we discuss how Random Number Generator work, concept of pseudo-random and secure numbers.
 C# Serialization
Sep 03, 2024 pm 03:30 PM
Guide to C# Serialization. Here we discuss the introduction, steps of C# serialization object, working, and example respectively.
 C# Data Grid View
Sep 03, 2024 pm 03:32 PM
Guide to C# Data Grid View. Here we discuss the examples of how a data grid view can be loaded and exported from the SQL database or an excel file.
 Patterns in C#
Sep 03, 2024 pm 03:33 PM
Guide to Patterns in C#. Here we discuss the introduction and top 3 types of Patterns in C# along with its examples and code implementation.
 Prime Numbers in C#
Sep 03, 2024 pm 03:35 PM
Guide to Prime Numbers in C#. Here we discuss the introduction and examples of prime numbers in c# along with code implementation.
 Factorial in C#
Sep 03, 2024 pm 03:34 PM
Guide to Factorial in C#. Here we discuss the introduction to factorial in c# along with different examples and code implementation.
 The difference between multithreading and asynchronous c#
Apr 03, 2025 pm 02:57 PM
The difference between multithreading and asynchronous is that multithreading executes multiple threads at the same time, while asynchronously performs operations without blocking the current thread. Multithreading is used for compute-intensive tasks, while asynchronously is used for user interaction. The advantage of multi-threading is to improve computing performance, while the advantage of asynchronous is to not block UI threads. Choosing multithreading or asynchronous depends on the nature of the task: Computation-intensive tasks use multithreading, tasks that interact with external resources and need to keep UI responsiveness use asynchronous.


