

When using the screenshot function of QQ, do you think its cursor is cool? Today I will talk about how to apply a custom cursor and use the QQ screenshot cursor in our screenshot tool.
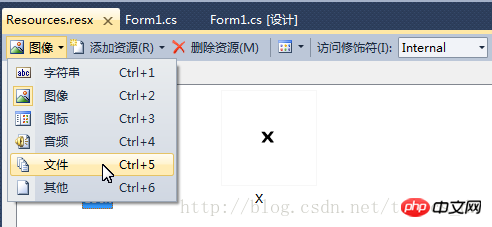
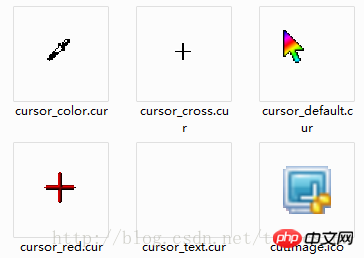
Required cursorFile download :C#Software development example. Customize the cursor file used in your own screenshot tool
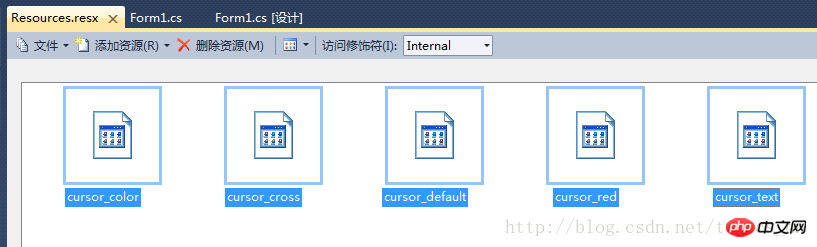
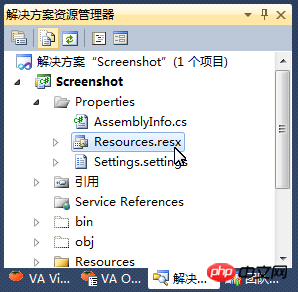
Resources The first letter of the word in the resource name is changed to uppercase.
        #region 自定义光标
        System.Windows.Forms.Cursor cursorCross = null;
        System.Windows.Forms.Cursor cursorDefault = null;
        System.Windows.Forms.Cursor cursorText = null;
        System.Windows.Forms.Cursor cursorColor = null;
#endregion [DllImport("user32.dll")]
private static extern IntPtr LoadCursorFromFile(string fileName); /// <summary>
/// 从已有资源中获得光标
/// </summary>
/// <param name="resource"></param>
/// <returns></returns>
public static Cursor getCursorFromResource(byte[] resource)
{
byte[] b = resource;
FileStream fileStream = new FileStream("cursorData.dat", FileMode.Create);
fileStream.Write(b, 0, b.Length);
fileStream.Close();
Cursor cur = new Cursor(LoadCursorFromFile("cursorData.dat"));
return cur;
} /// <summary>
/// 窗口初始化事件处理程序
/// </summary>
private void Form1_Init()
{
this.isCuting = false;
this.beginPoint = new Point(0, 0);
this.endPoint = new Point(0, 0);
cursorDefault = getCursorFromResource(Properties.Resources.Cursor_Default);
cursorCross = getCursorFromResource(Properties.Resources.Cursor_Cross);
cursorText = getCursorFromResource(Properties.Resources.Cursor_Text);
cursorColor = getCursorFromResource(Properties.Resources.Cursor_Color);
}Add in the else condition of the ShowForm method :
this.Cursor = cursorDefault;
Add code in the ExitCutImage method:
this.Cursor = cursorDefault;
Add the mouse to enter the Form1 form event handler:
        /// <summary>
        /// 鼠标进入Form1窗体事件处理程序
        /// </summary>
        /// <param name="sender"></param>
        /// <param name="e"></param>
        private void Form1_MouseEnter(object sender, EventArgs e)
        {
            this.Cursor = cursorDefault;
}Form1's constructor Add code:
Form1_Init();
Ok, compile, take a screenshot to see the effect!
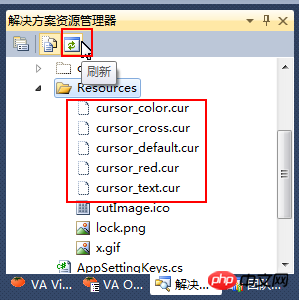
Multiple cursor files have been added here, but only one is used. Others will be used in functions added in the future.
The above is the detailed content of C# development example-customized screenshot tool (9) using custom cursor and cursor when taking QQ screenshots (picture). For more information, please follow other related articles on the PHP Chinese website!


![[Web front-end] Node.js quick start](https://img.php.cn/upload/course/000/000/067/662b5d34ba7c0227.png)


