This article is mainly for everyone to use the detailed introduction of C#WeChat development instructions. It is of great reference value and practicality. Interested friends can refer to it
If you don’t want to talk nonsense, just go directly wrote! Because it is left for you to write essays, so if you see it, please don’t complain...
1. You must have a WeChat public account
2. You can also apply for a test WeChat account, the link is given to youhttp://mp.weixin.qq.com/debug/cgi-bin/sandbox?t=sandbox/login
Then, to create mvc, you only need to click a few Download VS and it will be done for you. This is no nonsense
Next, you need to create a general handler, give it a name casually, passing the test is the key, hurry up...
/// <summary>
 /// 验证微信签名
 /// </summary>
 /// <returns></returns>
 /// * 将token、timestamp、nonce三个参数进行字典序排序
 /// * 将三个参数字符串拼接成一个字符串进行sha1加密
 /// * 开发者获得加密后的字符串可与signature对比,标识该请求来源于微信。
 private bool CheckSignature()
 {
 var token = "token";
 var signature = HttpContext.Current.Request.QueryString["signature"];
 var timestamp = HttpContext.Current.Request.QueryString["timestamp"];
 var nonce = HttpContext.Current.Request.QueryString["nonce"];
 var echostr = HttpContext.Current.Request.QueryString["echostr"];
 string[] ArrTmp = { token, timestamp, nonce };
 Array.Sort(ArrTmp); //字典排序
 var tmpStr = string.Join("", ArrTmp);
 tmpStr = FormsAuthentication.HashPasswordForStoringInConfigFile(tmpStr, "SHA1");//加密方式

 if (tmpStr.ToLower() == signature)
 {
 return true;
 }
 return false;
}This The code is equivalent to a one-to-one token communication handshake with the Token you wrote in [Development] - [Basic Configuration] of the WeChat official account. As long as they communicate with each other, then you are done!
Finishing it is a matter for later, there is still work to be done, let’s continue writing!
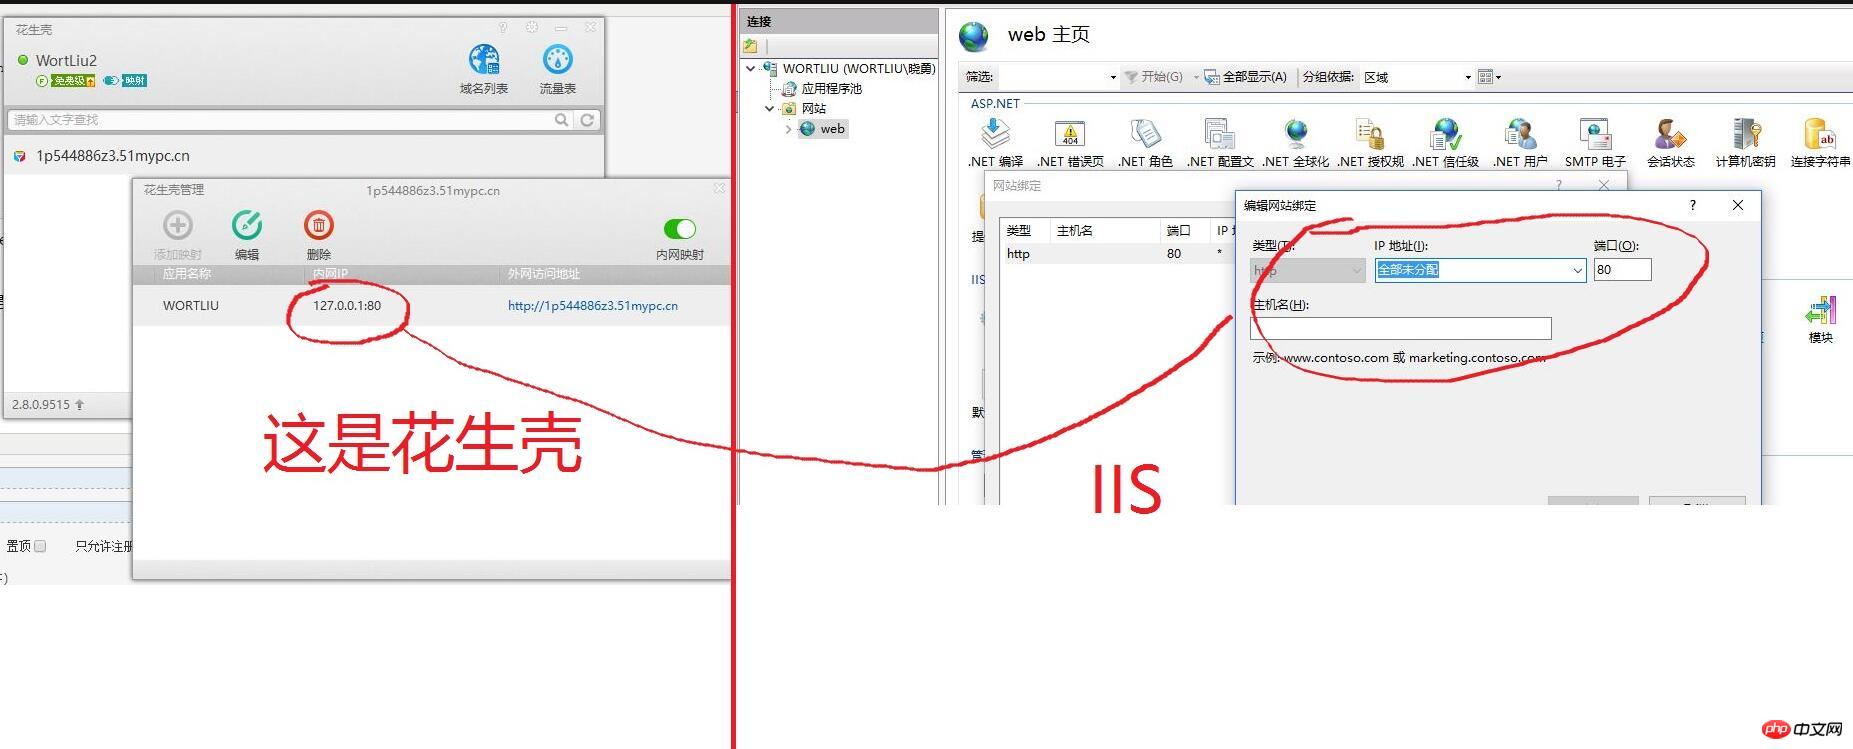
How to configure it? This is the problem. You can only use peanut shells to test it first. At least you need to know whether it works after playing for a long time!
Look at the picture below: Peanut shell configuration on the left-----iis website publishing binding on the right

See this picture, you also understand the next step How to play. The local iis is equipped with a domain name. This is so fucking awesome...
Below. We add code. Set up sending and automatic reply tests to see if you can play
 #region 接收消息
 /// <summary>
 /// 接收微信发送的XML消息并且解析
 /// </summary>
 private void ReceiveXml()
 {
 var requestStream = HttpContext.Current.Request.InputStream;
 var requestByte = new byte[requestStream.Length];
 requestStream.Read(requestByte, 0, (int)requestStream.Length);
 var requestStr = Encoding.UTF8.GetString(requestByte);

 if (!string.IsNullOrEmpty(requestStr))
 {
 //封装请求类
 var requestDocXml = new XmlDocument();
 requestDocXml.LoadXml(requestStr);
 var rootElement = requestDocXml.DocumentElement;
 if (rootElement == null) return;
 var wxXmlModel = new WxXmlModel
 {
  ToUserName = rootElement.SelectSingleNode("ToUserName").InnerText,
  FromUserName = rootElement.SelectSingleNode("FromUserName").InnerText,
  CreateTime = rootElement.SelectSingleNode("CreateTime").InnerText,
  MsgType = rootElement.SelectSingleNode("MsgType").InnerText
 };

 switch (wxXmlModel.MsgType)
 {
  case "text"://文本
  wxXmlModel.Content = rootElement.SelectSingleNode("Content").InnerText;
  break;
  case "image"://图片
  wxXmlModel.PicUrl = rootElement.SelectSingleNode("PicUrl").InnerText;
  break;
  case "event"://事件
  wxXmlModel.Event = rootElement.SelectSingleNode("Event").InnerText;
  if (wxXmlModel.Event != "TEMPLATESENDJOBFINISH")//关注类型
  {
  wxXmlModel.EventKey = rootElement.SelectSingleNode("EventKey").InnerText;
  }
  break;
  default:
  break;
 }

 ResponseXML(wxXmlModel);//回复消息
 }
 }
 #endregion

 #region 回复消息
 private void ResponseXML(WxXmlModel WxXmlModel)
 {
 var QrCodeApi = new QrCodeApi();
 var XML = "";
 switch (WxXmlModel.MsgType)
 {
 case "text"://文本回复
  XML = ResponseMessage.GetText(WxXmlModel.FromUserName, WxXmlModel.ToUserName, WxXmlModel.Content);
  break;
 case "event":
  switch (WxXmlModel.Event)
  {
  case "subscribe":
  if (string.IsNullOrEmpty(WxXmlModel.EventKey))
  {
  XML = ResponseMessage.GetText(WxXmlModel.FromUserName, WxXmlModel.ToUserName, "关注成功");
  }
  else
  {
  XML = ResponseMessage.SubScanQrcode(WxXmlModel.FromUserName, WxXmlModel.ToUserName, WxXmlModel.EventKey);//扫描带参数二维码先关注后推送事件
  }
  break;
  case "SCAN":
  XML = ResponseMessage.ScanQrcode(WxXmlModel.FromUserName, WxXmlModel.ToUserName, WxXmlModel.EventKey);//扫描带参数二维码已关注 直接推送事件
  break;
  }
  break;
 default://默认回复
  break;
 }
 HttpContext.Current.Response.Write(XML);
 HttpContext.Current.Response.End();
 }
#endregionThe above one is sent and the other is received, still in the WhApi.ashx handler file . I just want to make it clear, haha!
Because your handshake with the public platform was successful, you must send something to try, right~~
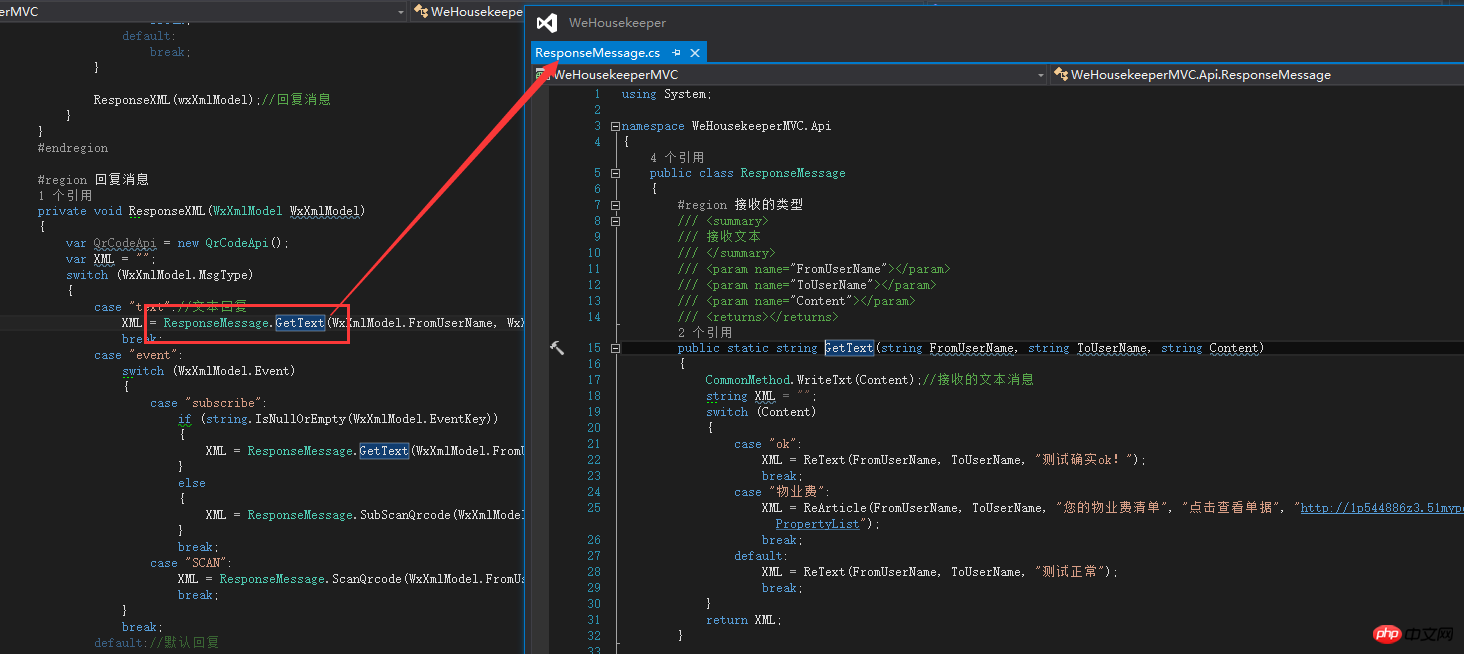
The picture below shows the association between a receiving method and an automatic matching reply file. Don’t worry, I will explain belowUploadThis file!

# There is still one missing configuration, that is, to set up [Debug]----[Attach to process] for vs, you only need to set the following If you check [Show all user processes], you can find w3wp.exe. If there are multiple such processes, you still have to confirm the [User Name] column, select the one with the same name as your program pool, and click OK. Attach, confirm the attachment!
Next. It’s fun……………………………………………………………………
Scan the test public account on WeChat and send a customized message to see what kind of reply there is, the above The configuration is cumbersome, and you can add breakpoints for debugging. Otherwise, there is no point in doing so much, right? Just make sure that the sending and receiving are consistent with your own settings, then it will be ok.
The above is the detailed content of Introduction to using C# WeChat development instructions. For more information, please follow other related articles on the PHP Chinese website!


