
Gulp is an automation tool that front-end developers can use to handle common tasks:
1. Build a web server
2. Automatically reload the browser when saving files
3. Use preprocessors such as Sass and LESS
4. Optimize resources, such as compressing CSS, JavaScript, and compressing images
Of course Gulp can go far More than these. If you're crazy enough, you can even use it to build a static page generator. Gulp is really powerful, but you have to learn to harness it.
This is the main purpose of this article. Help you understand the basic usage of Gulp and help you accomplish your great goal of unifying the world as soon as possible.
At the end of this article, you will have a simple workflow:
Compile Sass
In addition, you will also learn to use simple command chains to call multiple tasks.
You need to install Node.js before installing Gulp.
If you haven’t installed Node, you can download it here.
After installing Node.js, use Terminal (terminal, cmd under win) to install Gulp with the following command
$ sudo npm
Only mac users need the sudo command, and do not copy the $ symbol too , this is not your thing.
npm install is a command specified to install from the Node Package Manager (npm you are afraid of hair).
-g means global installation, so you can only use the gulp command anywhere on your computer.
Mac users need administrator rights to install globally, so sudo is required.
Next use Gulp to create the project.
First, we create a new project folder and execute the npm init command in this directory:
$ npm init
npm init command A package.json file will be created for you, which saves information related to this project. For example, the various dependencies you use (mainly plug-ins here) (the following content will automatically appear in the terminal, just fill it in casually here)
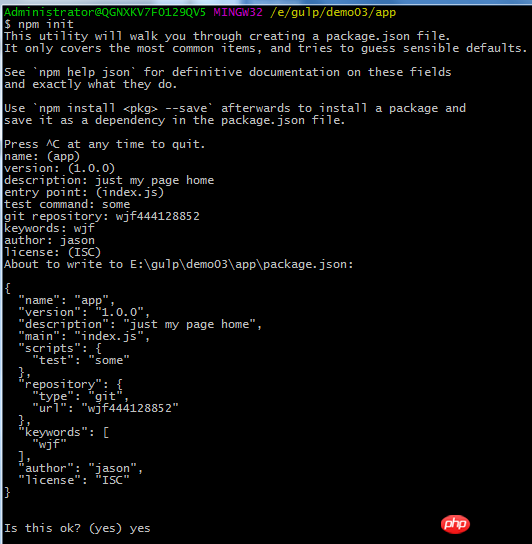
After creation, we execute the following The command:
$ npm
This time, we install Gulp locally. Using --save-dev will notify the computer to add gulp dependencies in package.json.
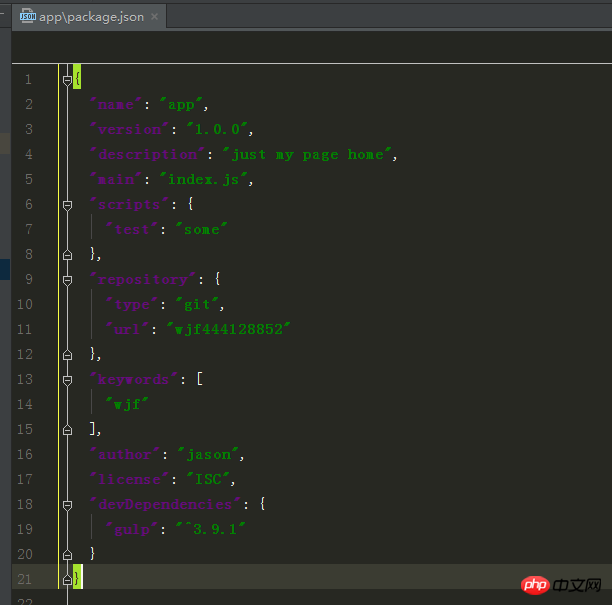
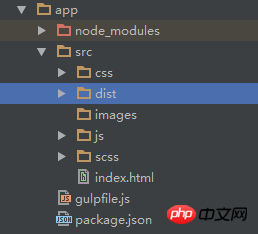
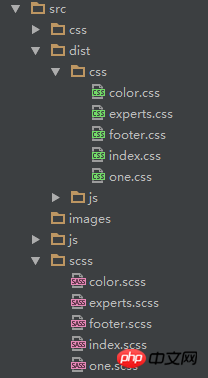
In this structure, we use the app folder as The development directory (all source files are placed under this), and the dist folder is used to store content in the production environment.
You can name these files however you want, but please be sure to remember your directory structure. Now let's create gulpfile.js and enter it as follows.

Let’s install the gulp-sass plug-in to compile the sass file.
1. Enter the command line under the app:
$ npm install gulp-sass --save-dev
<span class="hljs-keyword"><span class="hljs-comment">此时package.json文件会自动更新依赖包!</span></span><em><span class="hljs-keyword"><span class="hljs-comment"><br/></span></span></em><span class="hljs-keyword" style="font-size: 16px;"><span class="hljs-comment"><strong>2、在gulpfile.js内引入该插件</strong></span></span><em><span class="hljs-keyword"><span class="hljs-comment"><br/><img src="/static/imghw/default1.png" data-src="https://img.php.cn/upload/article/000/000/013/68d5342ec803364505a5e04feaca1b3f-4.png" class="lazy" alt="An introduction to the steps to compile sass using Gulp" style="max-width:90%" style="max-width:90%" title="An introduction to the steps to compile sass using Gulp"/></span></span></em>
3.告知gulp要执行的任务,gulpfile.js中的task任务
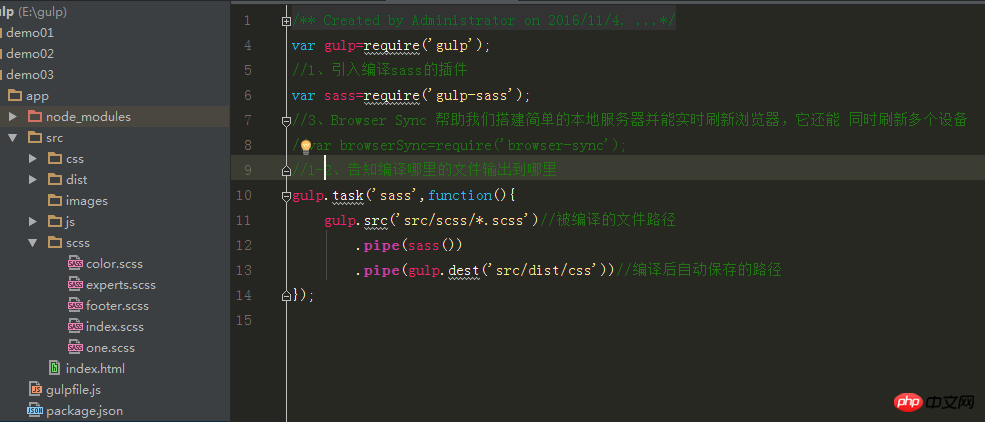
The command line is executed at this time
gulp sass

will automatically compile and generate all css in dist/css/
The above is the detailed content of An introduction to the steps to compile sass using Gulp. For more information, please follow other related articles on the PHP Chinese website!
 What software is zoom?
 MySQL index
 Why is there no signal on the monitor after turning on the computer?
 The role of base tag
 Introduction to hard disk interface types
 How to use googlevoice
 The difference between JD.com's self-operated flagship store and its official flagship store
 What does Matcha Exchange do?


