
 Java
javaTutorial
Code example sharing for accessing multiple different databases at the same time in Java Spring
Java
javaTutorial
Code example sharing for accessing multiple different databases at the same time in Java Spring
Code example sharing for accessing multiple different databases at the same time in Java Spring

When developing enterprise applications, we often encounter the problem of accessing multiple different databases at the same time. Sometimes the data must be archived in some kind of data warehouse, and sometimes data changes must be pushed to a third-party database. When using SpringFramework, it is very easy to use a single database, but if you want to access multiple databases at the same time, events become much more complicated.
This article takes developing a SpringMVC program under the Spring framework as an example to demonstrate a method of accessing multiple databases at the same time and simplifying configuration changes as much as possible.
Build database
It is recommended that you also set up two databases at the same time to follow our example. In this article we used PostgreSQL and MySQL.
The following script content is the command to create tables and insert data in two databases.
PostgreSQL
CREATE TABLE usermaster (
   id integer,
   name character varying,
   emailid character varying,
   phoneno character varying(10),
   location character varying
)

INSERT INTO usermaster(id, name, emailid, phoneno, location)
VALUES (1, 'name_postgres', 'email@email.com', '1234567890', 'IN');
MySQL
CREATE TABLE `usermaster` (
   `id` int(11) NOT NULL,
   `name` varchar(255) DEFAULT NULL,
   `emailid` varchar(20) DEFAULT NULL,
   `phoneno` varchar(20) DEFAULT NULL,
   `location` varchar(20) DEFAULT NULL,
   PRIMARY KEY (`id`)
)

INSERT INTO `kode12`.`usermaster`
  (`id`, `name`, `emailid`, `phoneno`, `location`)
VALUES
  ('1', 'name_mysql', 'test@tset.com', '9876543210', 'IN');
Build the project
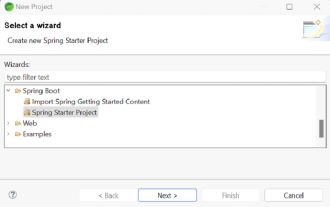
We use Spring Tool Suite (STS) To build this example:
Click File -> New -> Spring Starter Project.
Enter the project name, Maven coordinates, description and package information in the dialog box, and click Next.
Select Web in the boot dependency and click Next.
Click Finish. STS will automatically download the required content from the Spring warehouse according to project dependencies.
The created project is as shown below:
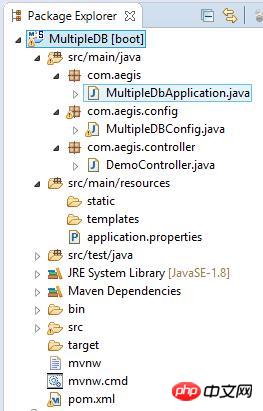
Next we will carefully study each related item in the project document content.
pom.xml
pom contains all required dependencies and plug-in mappings. Code:<?xml version="1.0" encoding="UTF-8"?>
<project xmlns="http://maven.apache.org/POM/4.0.0"
xmlns:xsi="http://www.w3.org/2001/XMLSchema-instance"
xsi:schemaLocation="http://maven.apache.org/POM/4.0.0
http://maven.apache.org/xsd/maven-4.0.0.xsd">
<modelVersion>4.0.0</modelVersion>
<groupId>com.aegis</groupId>
<artifactId>MultipleDBConnect</artifactId>
<version>0.0.1-SNAPSHOT</version>
<packaging>jar</packaging>
<name>MultipleDB</name>
<description>MultipleDB with Spring Boot</description>
<parent>
<groupId>org.springframework.boot</groupId>
<artifactId>spring-boot-starter-parent</artifactId>
<version>1.3.5.RELEASE</version>
<relativePath />
</parent>
<properties>
<project.build.sourceEncoding>UTF-8</project.build.sourceEncoding>
<java.version>1.8</java.version>
</properties>
<dependencies>
<dependency>
<groupId>org.springframework.boot</groupId>
<artifactId>spring-boot-starter-web</artifactId>
</dependency>
<dependency>
<groupId>org.springframework.boot</groupId>
<artifactId>spring-boot-starter-test</artifactId>
<scope>test</scope>
</dependency>
<dependency>
<groupId>org.springframework.boot</groupId>
<artifactId>spring-boot-starter-jdbc</artifactId>
</dependency>
<dependency>
<groupId>org.postgresql</groupId>
<artifactId>postgresql</artifactId>
</dependency>
<dependency>
<groupId>mysql</groupId>
<artifactId>mysql-connector-java</artifactId>
<version>5.1.38</version>
</dependency>
</dependencies>
<build>
<plugins>
<plugin>
<groupId>org.springframework.boot</groupId>
<artifactId>spring-boot-maven-plugin</artifactId>
</plugin>
</plugins>
</build>
</project>- spring-boot-starter -web: Provides support for web development and MVC.
- spring-boot-starter-test: Provides JUnit, Mockito and other test dependencies.
- spring-boot-starter-jdbc: Provides JDBC support.
- postgresql: JDBC driver for PostgreSQL database.
- mysql-connector-java: JDBC driver for
MySQL database.
application.properties
Contains all configuration information required by the program. In the old version of Spring, we had to provide this configuration information through multiple XML files.server.port=6060 spring.ds_post.url =jdbc:postgresql://localhost:5432/kode12 spring.ds_post.username =postgres spring.ds_post.password =root spring.ds_post.driverClassName=org.postgresql.Driver spring.ds_mysql.url = jdbc:mysql://localhost:3306/kode12 spring.ds_mysql.username = root spring.ds_mysql.password = root spring.ds_mysql.driverClassName=com.mysql.jdbc.Driver
Attributes:
- The ones prefixed with "spring.ds_*" are user-defined attributes.
- The properties prefixed with "spring.ds_post.*" are properties defined for the PostgreSQL database.
- The properties prefixed with "spring.ds_mysql.*" are properties defined for the MySQL database.
MultipleDbApplication.java
package com.aegis;

import org.springframework.boot.SpringApplication;
import org.springframework.boot.autoconfigure.SpringBootApplication;

@SpringBootApplication
public MultipleDbApplication {

    public static void main(String[] args) {
        SpringApplication.run(MultipleDbApplication.class, args);
    }
}function that starts our Boot program. The annotation "@SpringBootApplication" is a combination of all other Spring annotations and Java annotations, including:
@Configuration
@EnableAutoConfiguration
@ComponentScan
@Target(value={TYPE})
@Retention(value=RUNTIME)
@Documented
@Inherited@Configuration @EnableAutoConfiguration @ComponentScan
MultipleDBConfig.java
package com.aegis.config;
import javax.sql.DataSource;
import org.springframework.beans.factory.annotation.Qualifier;
import org.springframework.boot.autoconfigure.jdbc.DataSourceBuilder;
import org.springframework.boot.context.properties.ConfigurationProperties;
import org.springframework.context.annotation.Bean;
import org.springframework.context.annotation.Configuration;
import org.springframework.context.annotation.Primary;
import org.springframework.jdbc.core.JdbcTemplate;

@Configuration
public class MultipleDBConfig {
    @Bean(name = "mysqlDb")
    @ConfigurationProperties(prefix = "spring.ds_mysql")
    public DataSource mysqlDataSource() {
        return DataSourceBuilder.create().build();
    }

    @Bean(name = "mysqlJdbcTemplate")
    public JdbcTemplate jdbcTemplate(@Qualifier("mysqlDb") DataSource dsMySQL) {
        return new JdbcTemplate(dsMySQL);
    }

    @Bean(name = "postgresDb")
    @ConfigurationProperties(prefix = "spring.ds_post")
    public DataSource postgresDataSource() {
        return  DataSourceBuilder.create().build();
    }

    @Bean(name = "postgresJdbcTemplate")
    public JdbcTemplate postgresJdbcTemplate(@Qualifier("postgresDb")

    DataSource dsPostgres) {
        return new JdbcTemplate(dsPostgres);
    }
}@Bean(name = "mysqlDb")
@ConfigurationProperties(prefix = "spring.ds_mysql")
public DataSource mysqlDataSource() {
return DataSourceBuilder.create().build();
}The second line helps @Bean load all properties with the prefix spring.ds_mysql.
The fourth line creates and initializes the DataSource class and creates the mysqlDb DataSource object.
@Bean(name = "mysqlJdbcTemplate")
public JdbcTemplate jdbcTemplate(@Qualifier("mysqlDb") DataSource dsMySQL) {
     return new JdbcTemplate(dsMySQL);
}The second line passes the new parameter of the DataSource type created in the first line into the function, and uses mysqlDB as the qualifier.
The third line initializes the JdbcTemplate instance with the DataSource object.
@Bean(name = "postgresDb")
@ConfigurationProperties(prefix = "spring.ds_post")
public DataSource postgresDataSource() {
   return  DataSourceBuilder.create().build();
}The second line helps @Bean load all configurations prefixed with spring.ds_post.
The fourth line creates and initializes the DataSource instance postgresDb.
@Bean(name = "postgresJdbcTemplate")
public JdbcTemplate postgresJdbcTemplate(@Qualifier("postgresDb")
DataSource dsPostgres) {
  return new JdbcTemplate(dsPostgres);
}The second line accepts parameters of DataSource type and uses postgresDb as the qualifier.
The third line initializes the JdbcTemplate instance with the DataSource object.
DemoController.java
package com.aegis.controller;
import java.util.HashMap;
import java.util.Map;
import org.springframework.beans.factory.annotation.Autowired;
import org.springframework.beans.factory.annotation.Qualifier;
import org.springframework.jdbc.core.JdbcTemplate;
import org.springframework.web.bind.annotation.PathVariable;
import org.springframework.web.bind.annotation.RequestMapping;
import org.springframework.web.bind.annotation.RestController;

@RestController
public class DemoController {

    @Autowired
    @Qualifier("postgresJdbcTemplate")
    private JdbcTemplate postgresTemplate;

    @Autowired
    @Qualifier("mysqlJdbcTemplate")
    private JdbcTemplate mysqlTemplate;

    @RequestMapping(value = "/getPGUser")
    public String getPGUser() {
        Map<String, Object> map = new HashMap<String, Object>();
        String query = " select * from usermaster";
        try {
            map = postgresTemplate.queryForMap(query);
        } catch (Exception e) {
            e.printStackTrace();
        }
        return "PostgreSQL Data: " + map.toString();
    }

    @RequestMapping(value = "/getMYUser")
    public String getMYUser() {
        Map<String, Object> map = new HashMap<String, Object>();
        String query = " select * from usermaster";
        try {
            map = mysqlTemplate.queryForMap(query);
        } catch (Exception e) {
            e.printStackTrace();
        }
        return "MySQL Data: " + map.toString();
    }
}上面代码段创建了一个JdbcTemplate实例。@Qualifier用于生成一个对应类型的模板。代码中提供的是postgresJdbcTemplate作为Qualifier参数,所以它会加载MultipleDBConfig实例的jdbcTemplate(…)函数创建的Bean。
这样Spring就会根据你的要求来调用合适的JDBC模板。在调用URL “/getPGUser”时Spring会用PostgreSQL模板,调用URL “/getMYUser”时Spring会用MySQL模板。
@Autowired
@Qualifier("postgresJdbcTemplate")
private JdbcTemplate postgresTemplate;这里我们用queryForMap(String query)函数来使用JDBC模板从数据库中获取数据,queryForMap(…)返回一个map,以字段名为Key,Value为实际字段值。
演示
执行类MultipleDbApplication中的main (…)函数就可以看到演示效果。在你常用的浏览器中点击下面URL:
URL: http://localhost:6060/getMYUser

Url: http://localhost:6060/getPGUser
上面的URL会查询PostgreSQL数据库并以字符串形式返回数据。

The above is the detailed content of Code example sharing for accessing multiple different databases at the same time in Java Spring. For more information, please follow other related articles on the PHP Chinese website!

Hot AI Tools

Undresser.AI Undress
AI-powered app for creating realistic nude photos

AI Clothes Remover
Online AI tool for removing clothes from photos.

Undress AI Tool
Undress images for free

Clothoff.io
AI clothes remover

AI Hentai Generator
Generate AI Hentai for free.

Hot Article
Hot Tools

Notepad++7.3.1
Easy-to-use and free code editor

SublimeText3 Chinese version
Chinese version, very easy to use

Zend Studio 13.0.1
Powerful PHP integrated development environment

Dreamweaver CS6
Visual web development tools

SublimeText3 Mac version
God-level code editing software (SublimeText3)
Hot Topics
 1378
1378
 52
52

 Java Spring Interview Questions
Aug 30, 2024 pm 04:29 PM
Java Spring Interview Questions
Aug 30, 2024 pm 04:29 PM
In this article, we have kept the most asked Java Spring Interview Questions with their detailed answers. So that you can crack the interview.
 Break or return from Java 8 stream forEach?
Feb 07, 2025 pm 12:09 PM
Break or return from Java 8 stream forEach?
Feb 07, 2025 pm 12:09 PM
Java 8 introduces the Stream API, providing a powerful and expressive way to process data collections. However, a common question when using Stream is: How to break or return from a forEach operation? Traditional loops allow for early interruption or return, but Stream's forEach method does not directly support this method. This article will explain the reasons and explore alternative methods for implementing premature termination in Stream processing systems. Further reading: Java Stream API improvements Understand Stream forEach The forEach method is a terminal operation that performs one operation on each element in the Stream. Its design intention is
 TimeStamp to Date in Java
Aug 30, 2024 pm 04:28 PM
TimeStamp to Date in Java
Aug 30, 2024 pm 04:28 PM
Guide to TimeStamp to Date in Java. Here we also discuss the introduction and how to convert timestamp to date in java along with examples.
 Java Program to Find the Volume of Capsule
Feb 07, 2025 am 11:37 AM
Java Program to Find the Volume of Capsule
Feb 07, 2025 am 11:37 AM
Capsules are three-dimensional geometric figures, composed of a cylinder and a hemisphere at both ends. The volume of the capsule can be calculated by adding the volume of the cylinder and the volume of the hemisphere at both ends. This tutorial will discuss how to calculate the volume of a given capsule in Java using different methods. Capsule volume formula The formula for capsule volume is as follows: Capsule volume = Cylindrical volume Volume Two hemisphere volume in, r: The radius of the hemisphere. h: The height of the cylinder (excluding the hemisphere). Example 1 enter Radius = 5 units Height = 10 units Output Volume = 1570.8 cubic units explain Calculate volume using formula: Volume = π × r2 × h (4
 How to Run Your First Spring Boot Application in Spring Tool Suite?
Feb 07, 2025 pm 12:11 PM
How to Run Your First Spring Boot Application in Spring Tool Suite?
Feb 07, 2025 pm 12:11 PM
Spring Boot simplifies the creation of robust, scalable, and production-ready Java applications, revolutionizing Java development. Its "convention over configuration" approach, inherent to the Spring ecosystem, minimizes manual setup, allo
 Create the Future: Java Programming for Absolute Beginners
Oct 13, 2024 pm 01:32 PM
Create the Future: Java Programming for Absolute Beginners
Oct 13, 2024 pm 01:32 PM
Java is a popular programming language that can be learned by both beginners and experienced developers. This tutorial starts with basic concepts and progresses through advanced topics. After installing the Java Development Kit, you can practice programming by creating a simple "Hello, World!" program. After you understand the code, use the command prompt to compile and run the program, and "Hello, World!" will be output on the console. Learning Java starts your programming journey, and as your mastery deepens, you can create more complex applications.
 Java Made Simple: A Beginner's Guide to Programming Power
Oct 11, 2024 pm 06:30 PM
Java Made Simple: A Beginner's Guide to Programming Power
Oct 11, 2024 pm 06:30 PM
Java Made Simple: A Beginner's Guide to Programming Power Introduction Java is a powerful programming language used in everything from mobile applications to enterprise-level systems. For beginners, Java's syntax is simple and easy to understand, making it an ideal choice for learning programming. Basic Syntax Java uses a class-based object-oriented programming paradigm. Classes are templates that organize related data and behavior together. Here is a simple Java class example: publicclassPerson{privateStringname;privateintage;
 Java Program to insert an element at the Bottom of a Stack
Feb 07, 2025 am 11:59 AM
Java Program to insert an element at the Bottom of a Stack
Feb 07, 2025 am 11:59 AM
A stack is a data structure that follows the LIFO (Last In, First Out) principle. In other words, The last element we add to a stack is the first one to be removed. When we add (or push) elements to a stack, they are placed on top; i.e. above all the
