


Detailed graphic tutorial introducing the installation and configuration of MySQL5.6.31 winx64.zip
This article mainly introduces MySQL5.6.31 winx64.zip Installation Detailed configuration tutorial, very good, has reference value, friends in need You can refer to the following
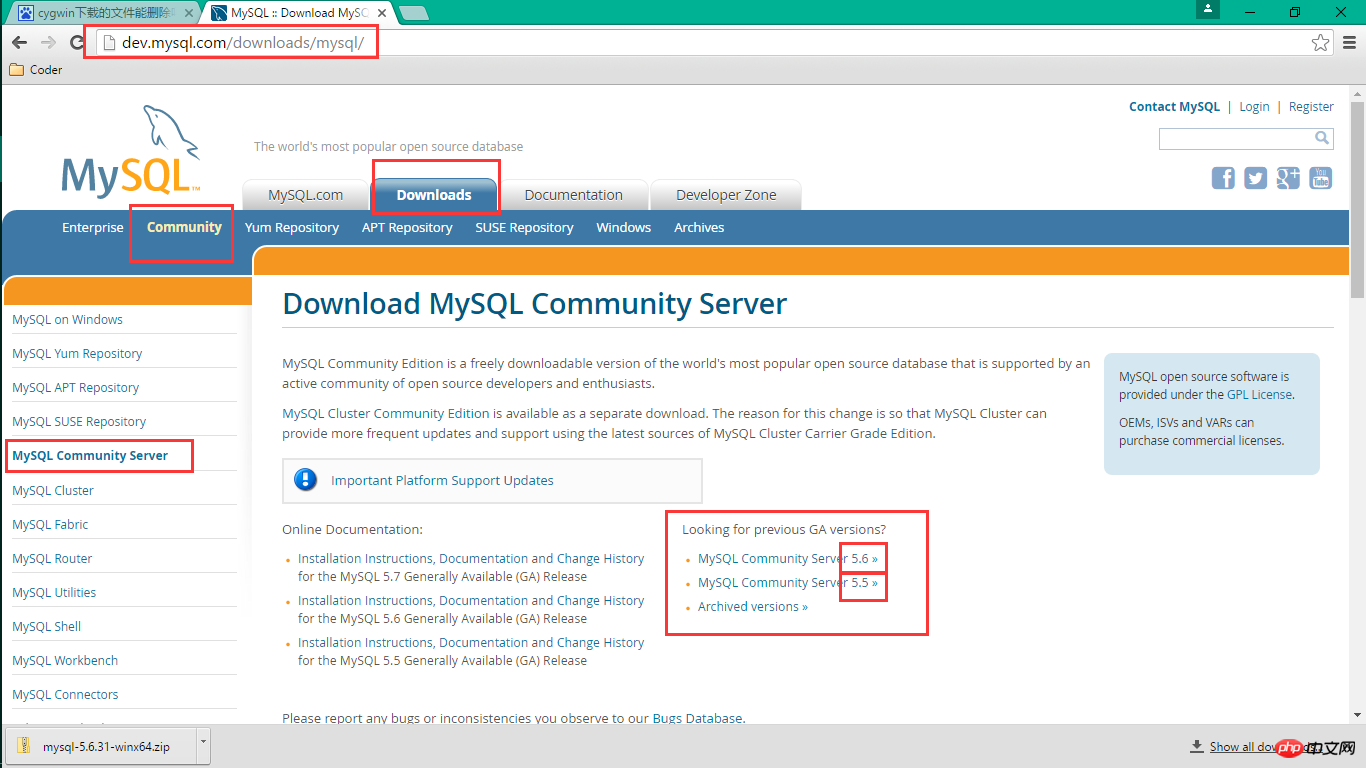
#1. Download
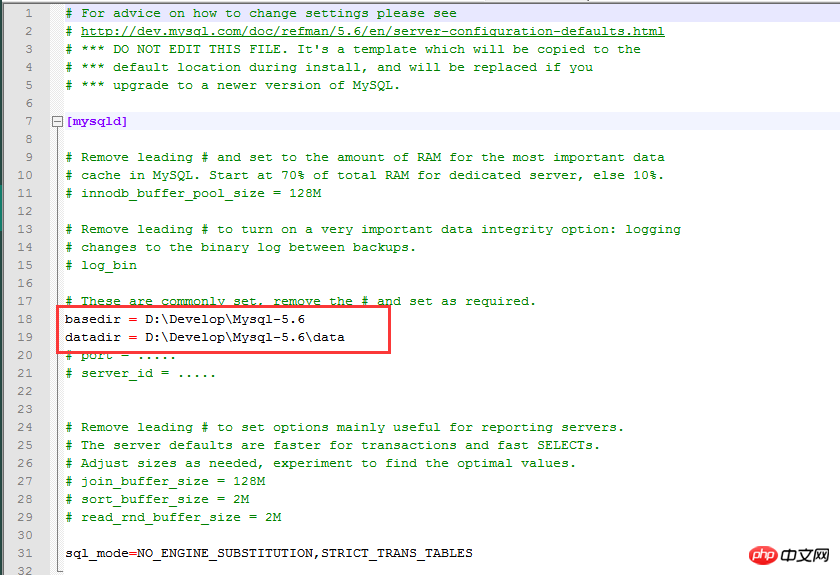
##2. Unzip it locally and modify the necessary configuration my*.ini
##3.mysql install
admin模式启动cmd cd mysql目录/bin
4.mysql encoding configuration
[mysqld] #设置字符集为utf8 loose-default-character-set = utf8 character-set-server = utf8 basedir = 你的mysql路径 datadir = 你的mysql路径/data [client] #设置客户端字符集 default-character-set = utf8
5. Modification Root password
## 1. Specify root
MySQL through mysql -u username-p. After entering, press Enter and you will be prompted to enter the password.
2. Modify the MySQL root user password, format: mysql> set password for username@localhost = password('new password');
Example:
mysql> set password for root@localhost = password('shapo lang ');
The above example changes the password of user root to shapolang;
Log in again and enter the new password shapolang and it will be ok;
The above is the detailed content of Detailed graphic tutorial introducing the installation and configuration of MySQL5.6.31 winx64.zip. For more information, please follow other related articles on the PHP Chinese website!

Hot AI Tools

Undresser.AI Undress
AI-powered app for creating realistic nude photos

AI Clothes Remover
Online AI tool for removing clothes from photos.

Undress AI Tool
Undress images for free

Clothoff.io
AI clothes remover

AI Hentai Generator
Generate AI Hentai for free.

Hot Article

Hot Tools

Notepad++7.3.1
Easy-to-use and free code editor

SublimeText3 Chinese version
Chinese version, very easy to use

Zend Studio 13.0.1
Powerful PHP integrated development environment

Dreamweaver CS6
Visual web development tools

SublimeText3 Mac version
God-level code editing software (SublimeText3)

Hot Topics


Learn Pygame from scratch: complete installation and configuration tutorial, specific code examples required Introduction: Pygame is an open source game development library developed using the Python programming language. It provides a wealth of functions and tools, allowing developers to easily create a variety of type of game. This article will help you learn Pygame from scratch, and provide a complete installation and configuration tutorial, as well as specific code examples to get you started quickly. Part One: Installing Python and Pygame First, make sure you have

PyCharm Community Edition is a very powerful and widely used Python integrated development environment (IDE). It provides a wealth of functions and tools to help developers improve efficiency. This article will provide you with a detailed installation tutorial for PyCharm Community Edition. Whether you have programming experience or not, you can easily install and configure PyCharm. 1. Download PyCharm Community Edition First, we need to download the installation package of PyCharm Community Edition. You can visit JetBrains official website (h

Flask installation and configuration guide: Easily master the cornerstone of Python Web development Introduction: With the rapid development of Python, more and more developers are paying attention to Python Web development. In Python Web development, Flask, as a lightweight Web framework, is loved by the majority of developers. This article will introduce you to the installation and configuration process of Flask, and provide specific code examples to help you easily master the cornerstone of Python Web development. 1. Environment

Get started easily: UbuntuVNC installation and configuration guide Introduction: Ubuntu is a powerful and popular operating system, and VNC is a remote desktop protocol that allows users to control remote computers over the network. This article will take you through the installation and configuration process of VNC in Ubuntu system in detail, including specific code examples. Step 1: Install VNCServer Open Terminal and enter the following command to install VNCServer: sudoapt-g

Starting from scratch: Detailed explanation of Java virtual machine installation and configuration [Introduction] Java is a cross-platform programming language, and its execution platform depends on the Java Virtual Machine (JavaVirtualMachine, JVM). By installing and configuring the Java virtual machine, you can run Java programs on different operating systems. This article will take you from scratch, detail how to install and configure a Java virtual machine, and provide some commonly used Java code examples. Let’s start learning! [Part 1: J

Teach you step by step how to install and configure golang on Ubuntu. Specific code examples are required. In the field of computer programming, Golang is a programming language that has attracted much attention in recent years. It is simple, efficient and has excellent concurrency performance, so it is favored by more and more developers. In this article, we will teach you step by step how to install and configure Golang on the Ubuntu operating system, and provide some practical code examples for you to practice. The first step is to install Golang. In order to install Golan on Ubuntu

Golang Beginner's Guide: Complete Guide to Installation and Configuration on Mac System Go language (also known as Golang) is an open source programming language developed by Google. It has the characteristics of fast compilation, efficient execution and lightweight, and is suitable for building high-performance s application. This article will provide a detailed installation and configuration guide for Golang novices on Mac systems to help them easily get started with this emerging programming language. 1. Install Golang Step 1: Download the Golang installation package. First, open the official website

Installation settings Download the tar package: wget-c http://download.redis.io/releases/redis-3.2.4.tar.gz Unzip and install tarzxvfredis-3.2.4.tar.gzmkdir/usr/local/redismakePREFIX=/usr/ local/redisinstall sets the environment variable vim/etc/profileexportREDIS_HOME=/usr/local/redisexportPATH=$PATH:$REDIS_HOME/bin:wqsource/e
